Most organizations want to create multiple users at once to save time. Therefore, you must…
How to set Employee ID for Microsoft 365 users
You can change the Employee ID for each user in the Microsoft Entra admin center. Some Microsoft 365 users don’t even have an Employee ID, so this field will be empty when you find it. Another faster way is to set the Employee ID for multiple Microsoft 365 users with Microsoft Graph PowerShell. In this article, you will learn how to set the Employee ID for Microsoft 365 users in the Microsoft Entra ID and with PowerShell.
Table of contents
Change Employee ID in Microsoft Entra admin center
Time needed: 10 minutes
How to change Employee ID for a user in Microsoft Entra ID.
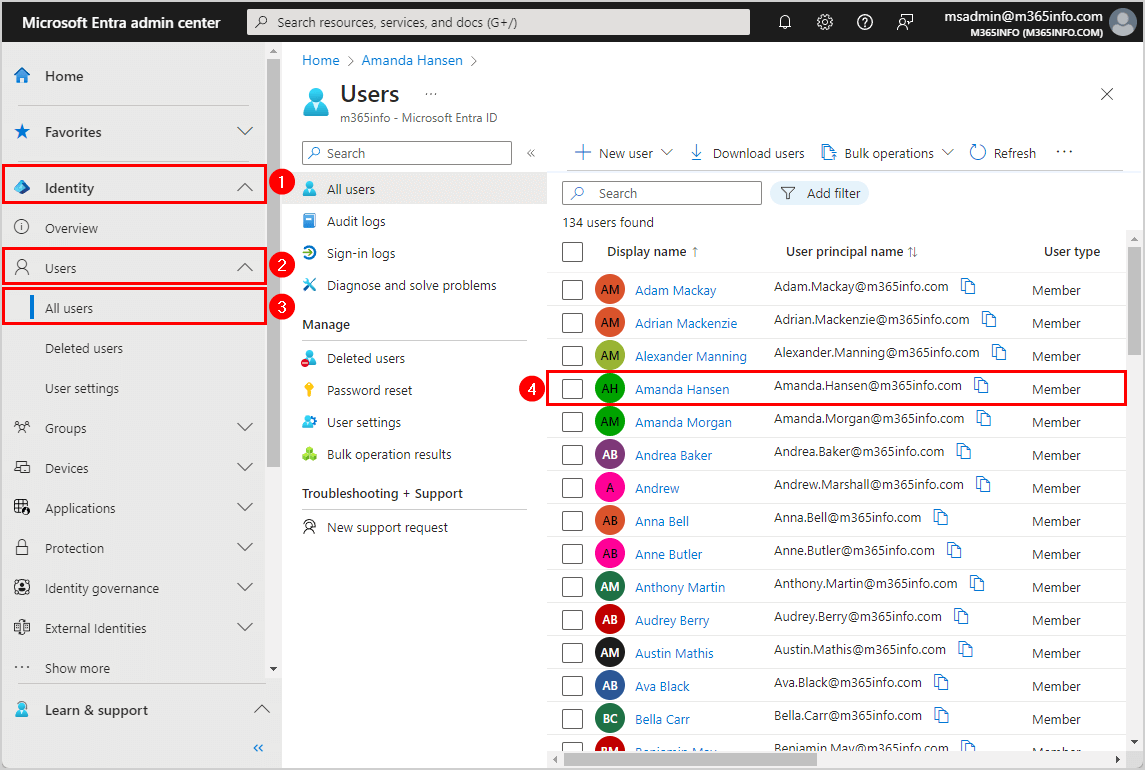
- Go to Microsoft Entra admin center.
Sign in to Microsoft Entra with your admin credentials.
- Search and select the Microsoft 365 user.
Expand Identity > Users > All users.
Click on the user from the list.
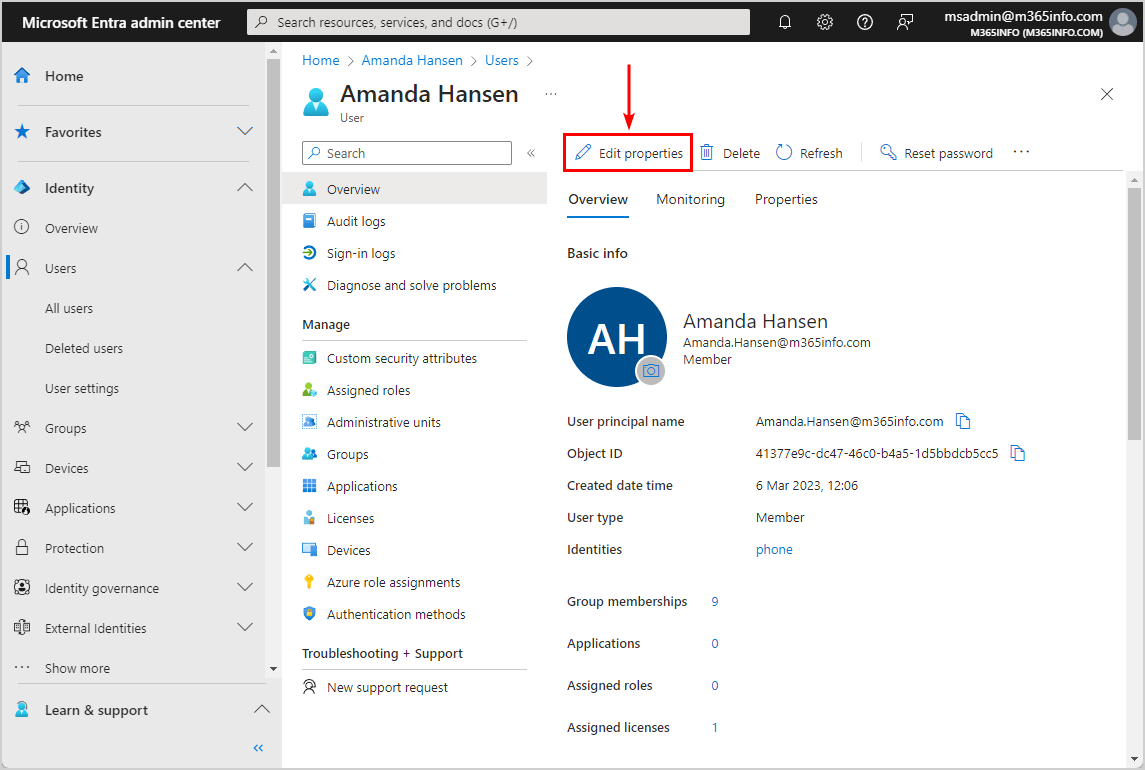
- The user overview page.
Click on Edit properties.
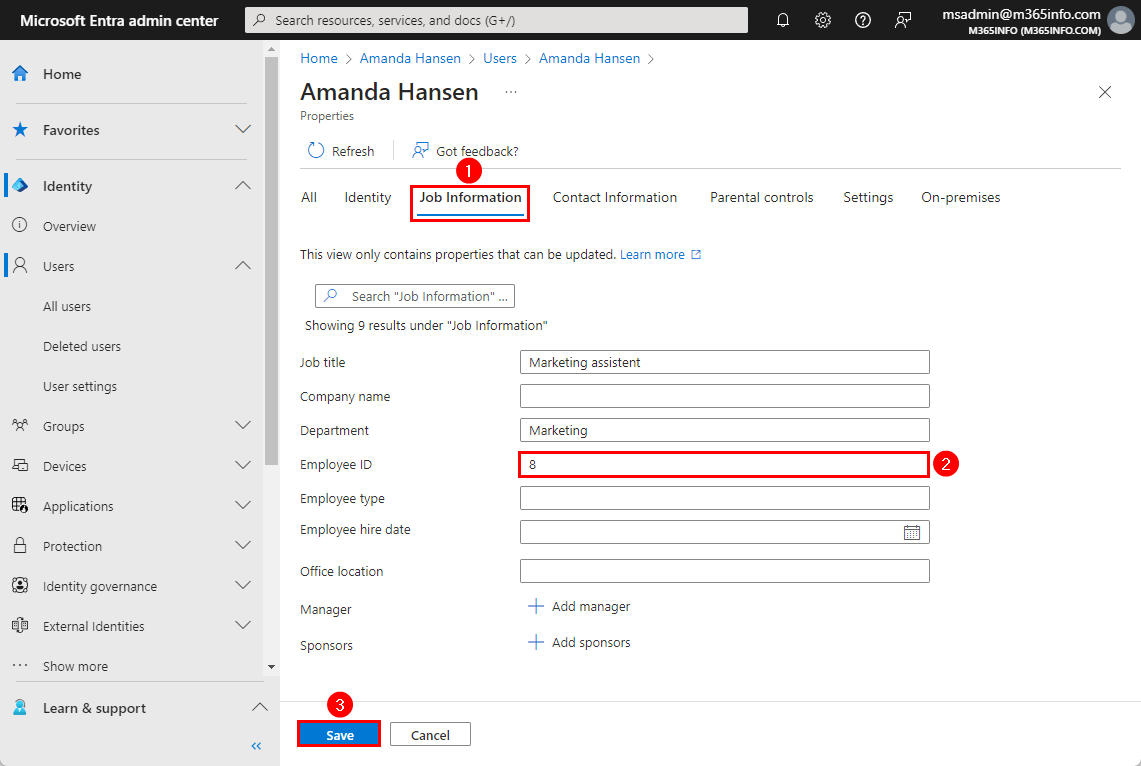
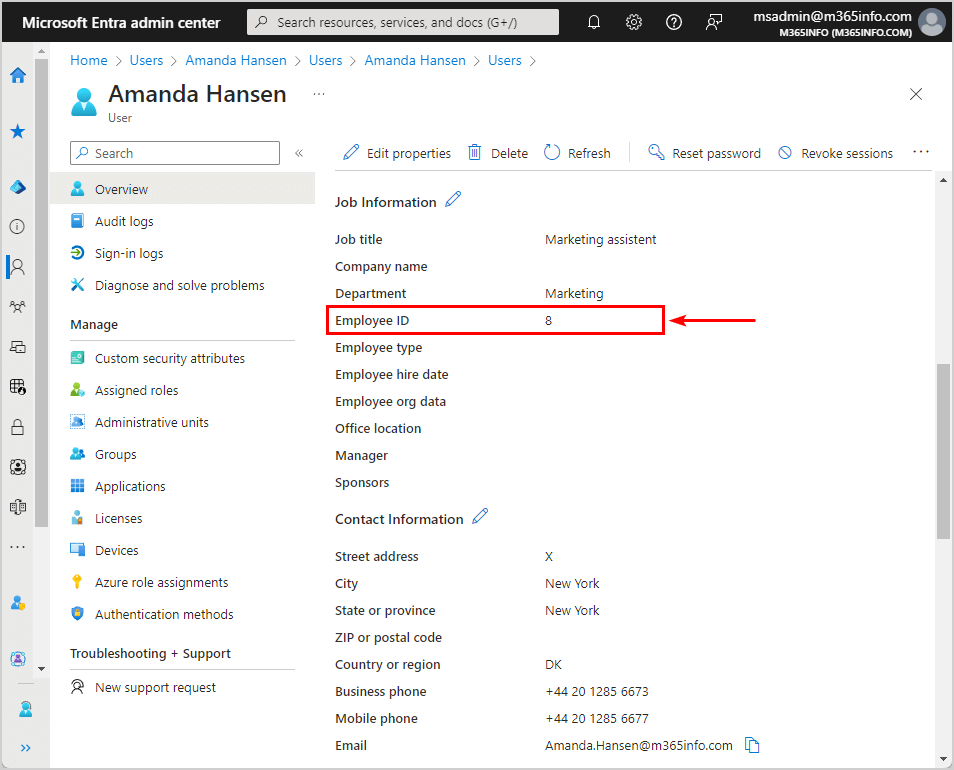
- Find the Employee ID under Job information.
Change or set a new Employee ID.
Click Save.
You will get a notification that you successfully updated the properties of the user (Amanda Hansen).
Verify updated user Employee ID in Microsoft Entra ID
To check the Employee ID of a user in Microsoft Entra ID, follow these steps:
- Expand Identity > Users > All users
- Click on a user from the list
- Click on Properties
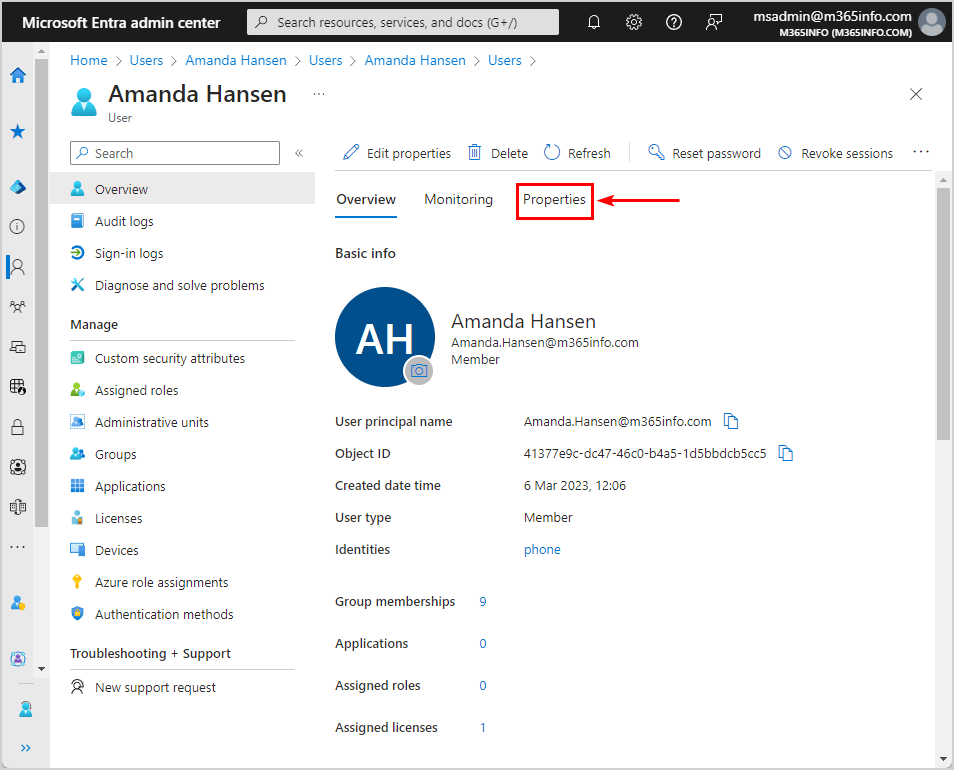
- Scroll down to find the new Employee ID shown in the picture below
You successfully set the Employee ID of any user in Microsoft Entra ID!
In the next step, you will learn to get and set the Employee ID for all Microsoft 365 users with PowerShell.
Set and get Employee ID with PowerShell
First, we will show you how to get and set an Employee ID of a single Microsoft 365 user with Microsoft Graph PowerShell. Then, you can export all Microsoft 365 users Employee ID to a CSV file. Also, we made a script to bulk set Microsoft 365 users Employee ID with PowerShell.
Connect to Microsoft Graph PowerShell
1. First, you must install the Microsoft Graph PowerShell module, including the Microsoft Graph Beta module. It is recommended to install PowerShell 7 version on Windows.
Install-Module Microsoft.Graph -Force
Install-Module Microsoft.Graph.Beta -AllowClobber -Force
Important: Always install the Microsoft Graph PowerShell and Microsoft Graph Beta PowerShell modules. That’s because some cmdlets are not yet available in the final version, and they will not work. Update both modules to the latest version before you run a cmdlet or script to prevent errors and incorrect results.
2. Open Windows PowerShell as administrator and run the below cmdlet.
Connect-MgGraph -Scopes User.ReadWrite.All3. The sign-in to your account window opens, where you choose your admin account and enter the password. Then click on Sign in.
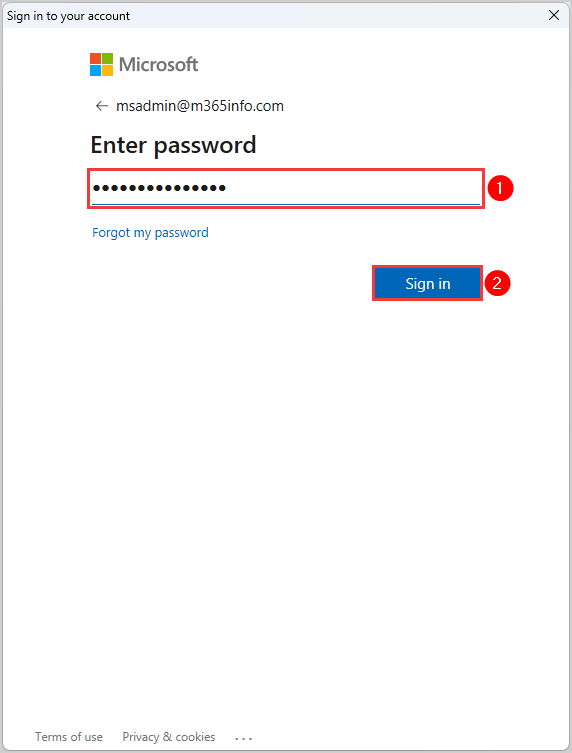
If you have enabled MFA, you will get a verification code sent as a text message or to your Authentication app on your phone. If your MFA is disabled, you will not do anything here.
Now, you must go back to the PowerShell windows where you will see this output.
Welcome To Microsoft Graph!Now, you are ready to get and set the EmployeeId of all Microsoft 365 users with PowerShell commands.
Get single Microsoft 365 user Employee ID
Get the EmployeeID information of a single user by running the below PowerShell command.
Get-MgBetaUser -UserId "Brenda.Smith@m365info.com" | fl employee*The PowerShell output shows the EmployeeId of a single user.
EmployeeHireDate      :
EmployeeId            : 2
EmployeeLeaveDateTime :
EmployeeOrgData       : Microsoft.Graph.PowerShell.Models.MicrosoftGraphEmployeeOrgData
EmployeeType          :
It shows that the user Brenda Smith has an EmployeeId 2.
Set single Microsoft 365 user Employee ID
Let’s say that we want to change the Employee ID of a single user. In our example, we want to change the EmployeeId of Brenda Smith to number 22.
Note: You can type numbers and letters when you set the EmployeeID of a Microsoft 365 user.
1. Use the below PowerShell syntax to type the UserId (UPN) of the single user and type the EmployeeId new number you want to set.
Update-MgBetaUser -UserId "UserPrincipalName" -EmployeeId "new number"2. Run the PowerShell command to change the EmployeeId of a single user. In our example, we want to change the EmployeeId of Brenda Smith to number 22.
Update-MgBetaUser -UserId "Brenda.Smith@m365info.com" -EmployeeId "22"3. Verify you updated the EmployeeId of this single user.
Get-MgBetaUser -UserId "Brenda.Smith@m365info.com" | fl EmployeeIdThe PowerShell output shows the updated EmployeeId of this single user. In our example, we set a new EmployeeId 22 for Brenda Smith.
EmployeeId : 22You correctly set a new Employee ID for a single user. Next, we will show you how to get all users EmployeeId.
Bulk get Microsoft 365 users Employee ID
To get bulk users Employee ID, run the below PowerShell command.
Get-MgBetaUser -All | ft UserPrincipalName, Displayname, EmployeeIdThe PowerShell output shows the below result.
UserPrincipalName           DisplayName     EmployeeId
-----------------           -----------     ----------
Amanda.Hansen@m365info.com	Amanda Hansen	8
Andrea.Baker@m365info.com	Andrea Baker	11
Brenda.Smith@m365info.com	Brenda Smith	22
Chris.Lucas@m365info.com	Chris Lucas
Diana.Baker@m365info.com	Diana Baker	    1
George.Wilson@m365info.com	George Wilson	2
Julia.Wood@m365info.com	    Julia Wood	    44
Ken.Walker@m365info.com	    Ken Walker	    55
Soren.Vest@m365info.com	    Søren Vest	    3
Stephen.Hunter@m365info.com	Stephen Hunter
Export bulk Microsoft 365 users Employee ID to CSV file
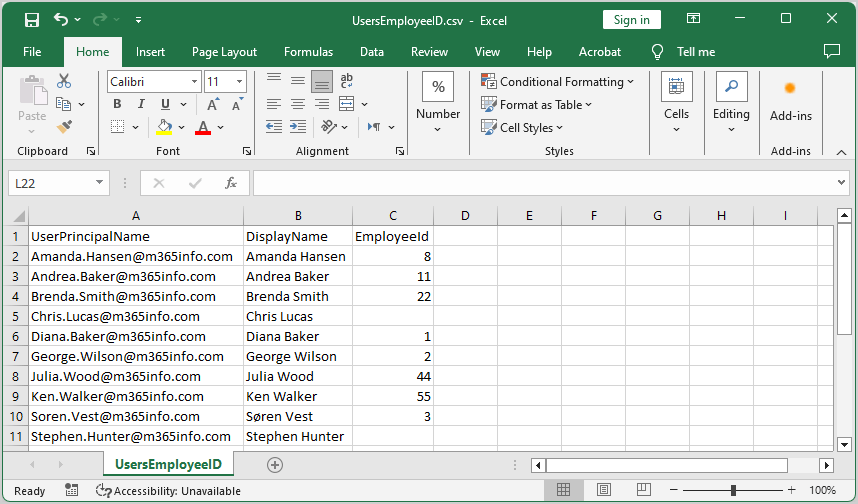
You can export all Microsoft 365 users’ Employee IDs to a single CSV file. This way, you can easily search which Employee ID number each user has.
Run the below PowerShell command to export bulk users’ EmployeeId to a CSV file.
Get-MgBetaUser -All | Select-Object UserPrincipalName, DisplayName, EmployeeId | Export-Csv -Path "C:\temp\UsersEmployeeID.csv" -NoTypeInformation -Encoding UTF8You will find the CSV file in the C:\temp folder. Open the CSV file with an application like Microsoft Excel to see the results.
Bulk set Microsoft 365 users Employee ID
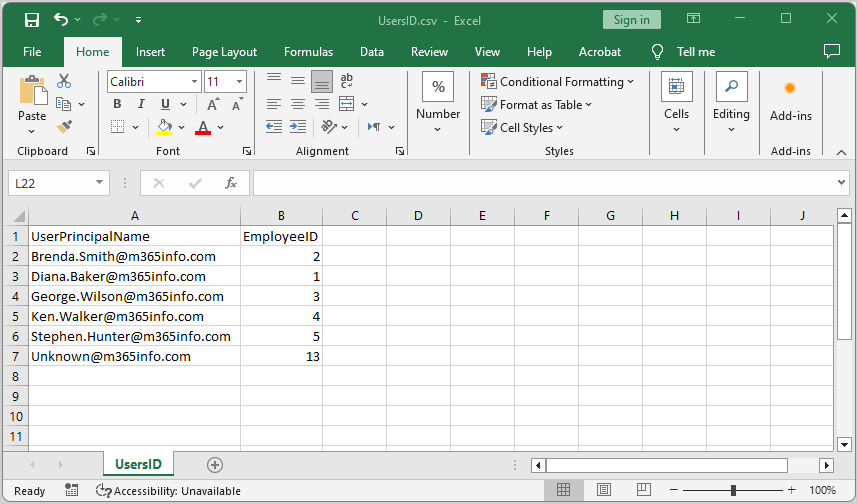
To set multiple Microsoft 365 users Employee ID with PowerShell, you need to create a single CSV file consisting of two columns.
Open Microsoft Excel and type the data below to change or set an Employee ID for multiple Microsoft 365 users.
- Type UserPrincipalName as the header of the first column
- List the Microsoft 365 users
- Type EmployeeID as the header of the second column
- Set the updated EmployeeID
The below picture is an example of how your CSV file should look like.
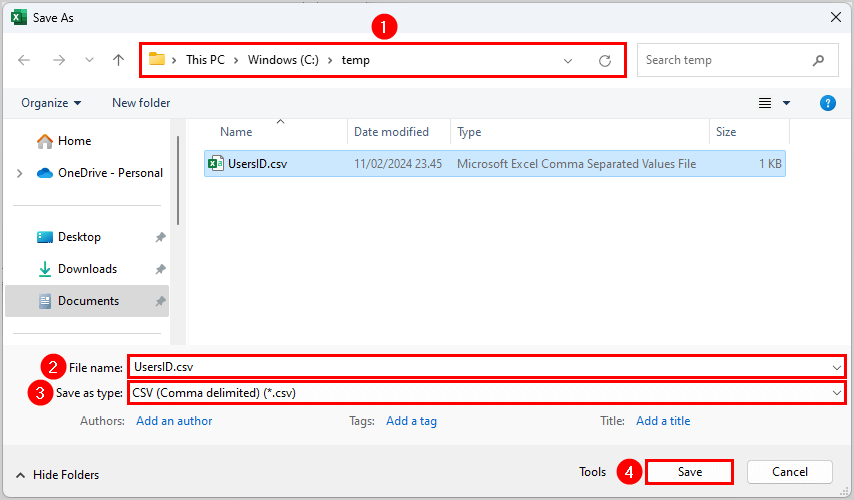
- Create the folder temp if you don’t have it already in the (C:) drive
- Name the file UsersID.csv
- Save as type CSV (Comma delimited (*.csv)
- Click Save
- The next step is to download the Set-EmployeeID.ps1 PowerShell script.
- Or copy and paste the script below in Notepad and save it as Set-EmployeeID.ps1 file.
<#
    .SYNOPSIS
    .\Set-EmployeeID.ps1

    .DESCRIPTION
    The script will set/update the employee ID for Microsoft 365 users.

    .LINK
    o365info.com/set-employee-id

    .NOTES
    Written By: o365info
    Website:    o365info.com

    .CHANGELOG
    V1.00, 06/01/2023 - Initial version
#>

# Connect to Microsoft Graph
Connect-MgGraph -Scopes User.ReadWrite.All

# Read the CSV file
$users = Import-Csv -Path "C:\temp\UsersID.csv"

# Go through each user in the CSV and update the EmployeeId property
foreach ($user in $users) {
    $userPrincipalName = $user.UserPrincipalName
    $employeeId = $user.EmployeeId

    # Check if the user exists
    $existingUser = Get-MgBetaUser -UserId $userPrincipalName -ErrorAction SilentlyContinue

    if ($existingUser) {
        # Check if the existing EmployeeId matches the new value
        if ($existingUser.EmployeeId -eq $employeeId) {
            # EmployeeId already set with the same value
            Write-Host "User '$userPrincipalName' already has Employee ID '$employeeId'." -ForegroundColor Cyan
        }
        else {
            # Update the EmployeeId
            Update-MgBetaUser -UserId $userPrincipalName -EmployeeId $employeeId
            Write-Host "User '$userPrincipalName' updated Employee ID '$employeeId'successfully." -ForegroundColor Green
        }
    }
    else {
        # User not found
        Write-Host "User '$userPrincipalName' not found and couldn't set Employee ID $employeeId." -ForegroundColor Red
    }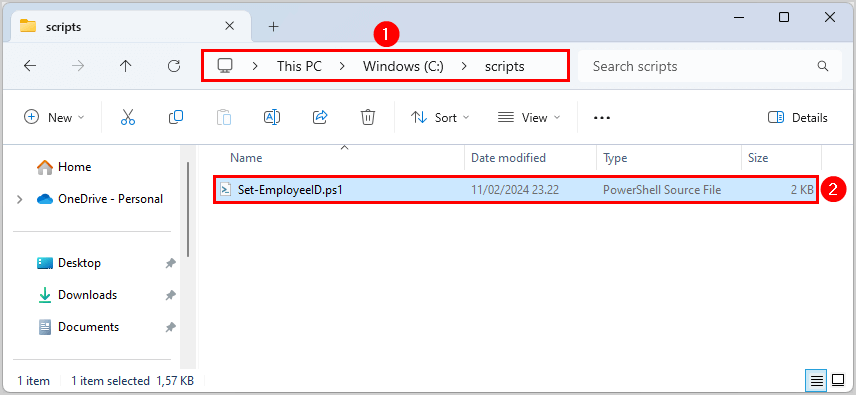
}- Create the folder scripts in the (C:) drive if you don’t have it already
- Save the Set-EmployeeID.ps1 PowerShell script in the C:\scripts folder
Open the file to check if it is unblocked to prevent errors when running the script.
Run the script in PowerShell, and the output will look like the below example result.
The Set-EmployeeID.ps1 script will show the following:
- If the user already has the same Employee ID
- If the user Employee ID is set successfully
- If the user is not found in Microsoft Entra
User 'Brenda.Smith@m365info.com' updated Employee ID '2'successfully.
User 'Diana.Baker@m365info.com' already has Employee ID '1'.
User 'George.Wilson@m365info.com' updated Employee ID '3'successfully.
User 'Ken.Walker@m365info.com' updated Employee ID '4'successfully.
User 'Stephen.Hunter@m365info.com' updated Employee ID '5'successfully.
User 'Unknown@m365info.com' not found and couldn't set Employee ID 13.
That’s it! You managed to bulk get and set Employee ID for all Microsoft 365 users with PowerShell.
Read more: Manage user mailbox with PowerShell »
Conclusion
You learned how to set Employee ID for Microsoft 365 users in the Microsoft Entra admin center and with PowerShell. It’s easy to find the Microsoft 365 user Employee ID and edit its properties in Microsoft Entra ID. Another way is to export the Employee ID of all Microsoft 365 users to a CSV file and set it with a PowerShell script.
Did you enjoy this article? You may also like Create unlimited Client Secret in Microsoft Entra ID. Don’t forget to follow us and share this article.
This Post Has 0 Comments