
WordPress often does not send your emails, and that's a big problem. That's because the…
Assign Microsoft 365 licenses with group-based licensing
There is no need to manually assign or remove licenses for each user in the Microsoft 365 admin center. Instead, an easier way to assign licenses for multiple users is with groups. In this article, you will learn how to assign Microsoft 365 licenses using group-based licensing in Microsoft Entra admin center.
Table of contents
Group-based licensing in Microsoft Entra ID
Once you create a group with users in Microsoft Entra ID, you can assign one or more product licenses. All the members of the group will have the same licenses assigned. Microsoft Entra ID applies the same licenses when you add new members to a group. And when a member leaves a group, their licenses are automatically removed.
This licensing method eliminates using PowerShell to manage licenses for individual users based on organizational or department structure changes. It makes the process of assigning and removing licenses for multiple users at once more efficient.
Note: If you want to assign Microsoft 365 licenses to users directly, read the article How to Assign Microsoft 365 licenses with PowerShell.
Group-based licensing requirements
To use group-based licensing, every user must have one of the following licensing:
- Paid or trial subscription for Microsoft Entra ID P1 and above.
- Paid or trial edition of Microsoft 365 Business Premium, Office 365 Enterprise E3 or Office 365 A3 or Office 365 GCC G3, Office 365 E3 for GCCH, or Office 365 E3 for DOD and above.
Create new group with members in Microsoft Entra ID
We will create a group to assign the default Microsoft 365 licenses to all users. Then, we will create another group to add paid Microsoft 365 licenses (e.g., Power BI or Visio) for certain users.
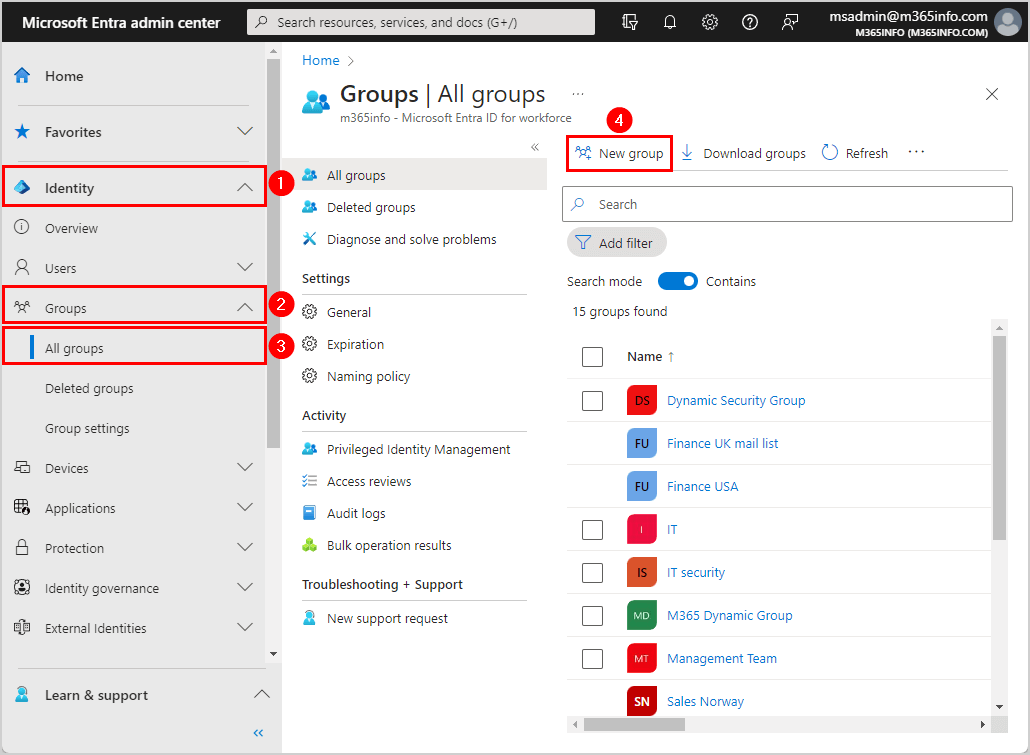
Follow the steps to create a new group, including members in Microsoft Entra admin center:
- Sign in to Microsoft Entra admin center
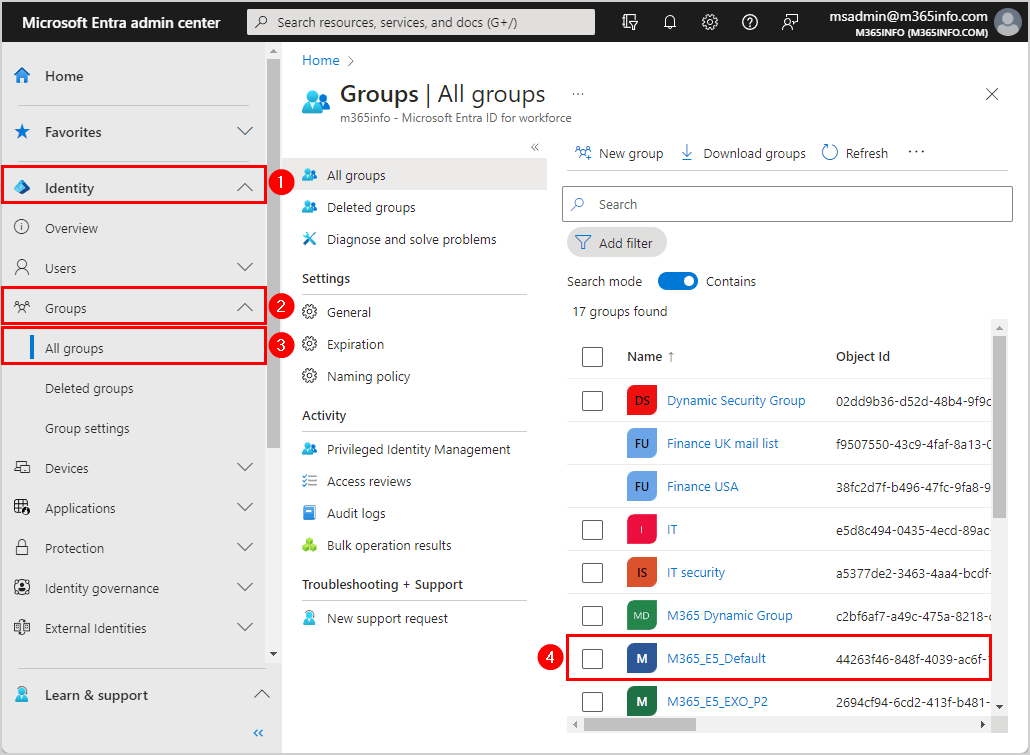
- Expand Identity > Groups > All groups
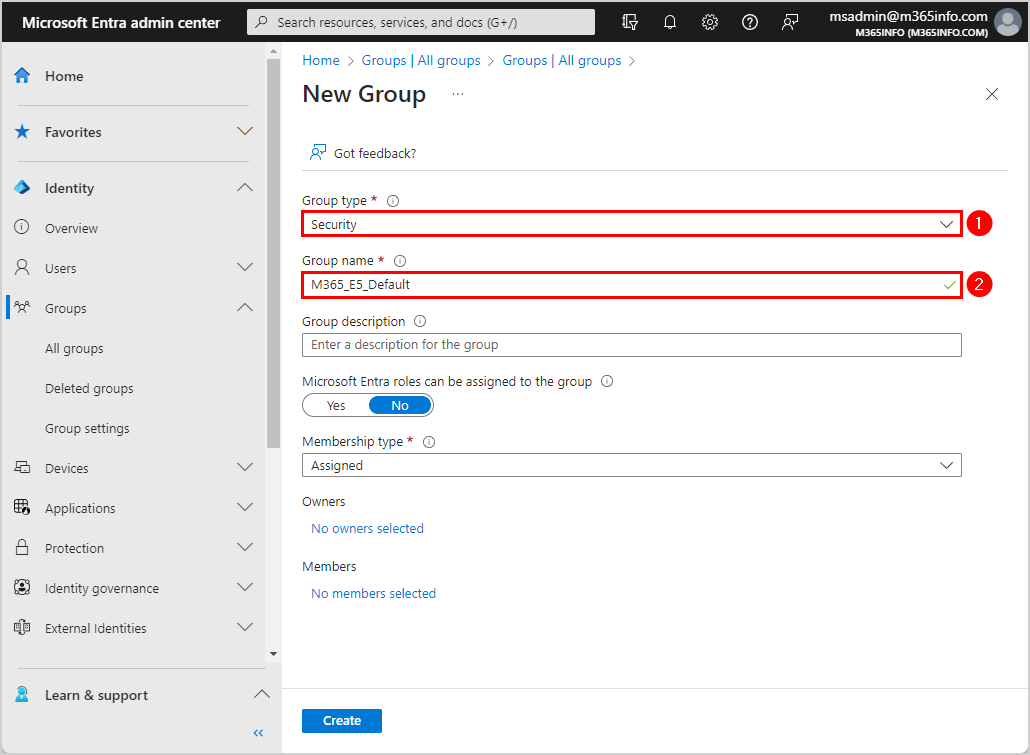
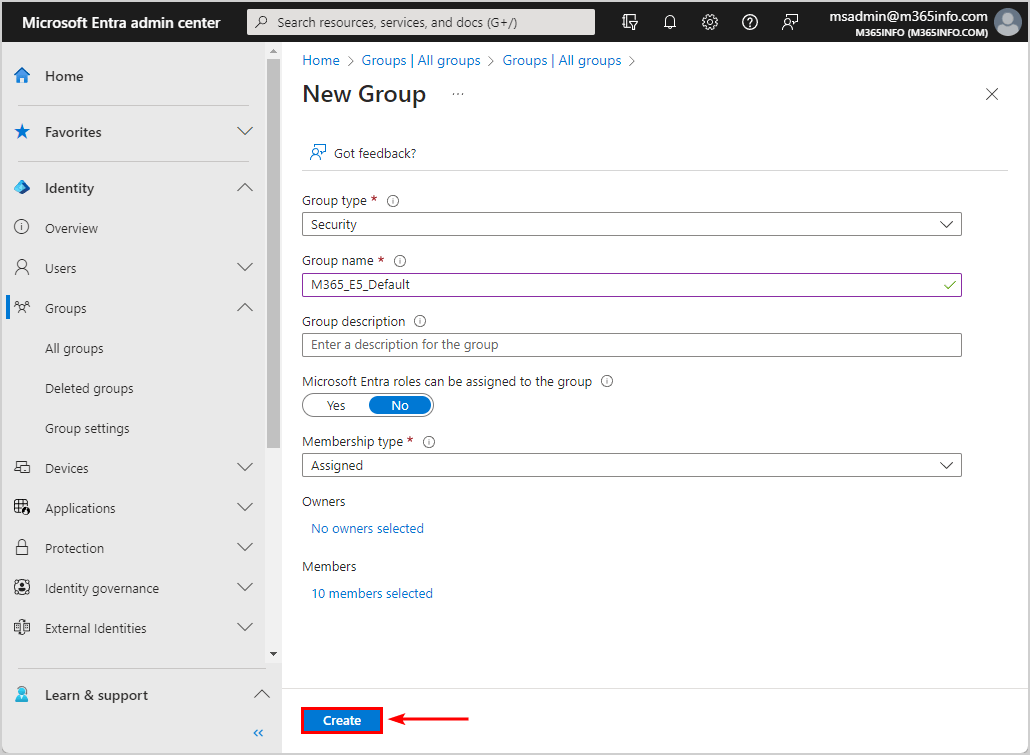
- Click New Group
- Select Security
- Enter the group name > M365_E5_Default
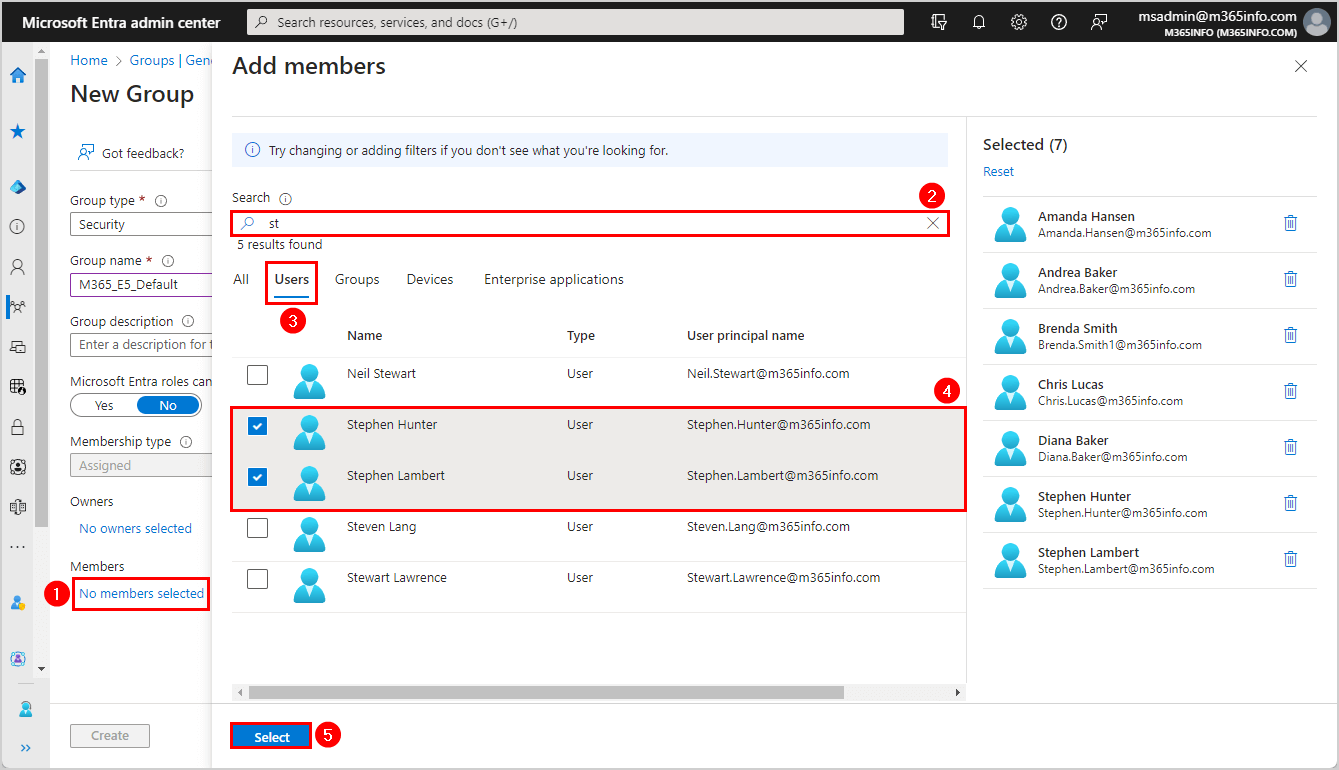
You can add members before and after you create the group. In our example, we will add members before creating the group.
- Click No members selected
- Search for the user
- Click the tab Users
- Select the user to add a member
- Click Select
- Click Create
Note: You need to refresh the page to see the new group you created in the list.
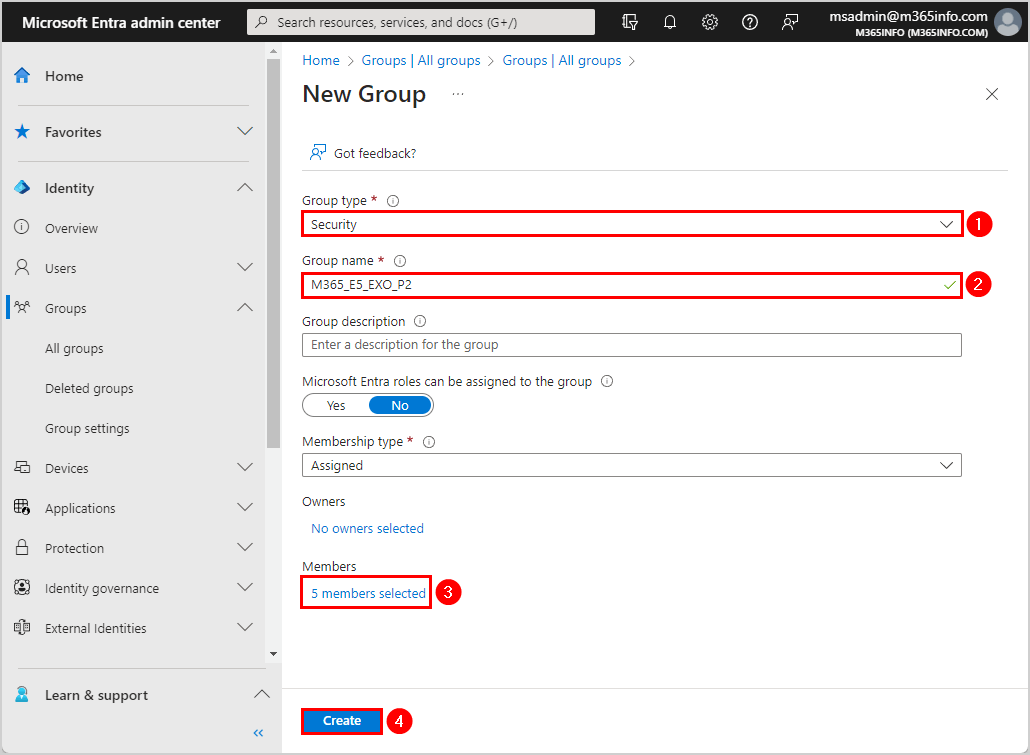
Now, we will create a new group to assign other (paid) licenses to a few members. Follow the same steps as shown above to create a new group.
In our example, we named the group M365_E5_EXO_P2 and selected 5 members.
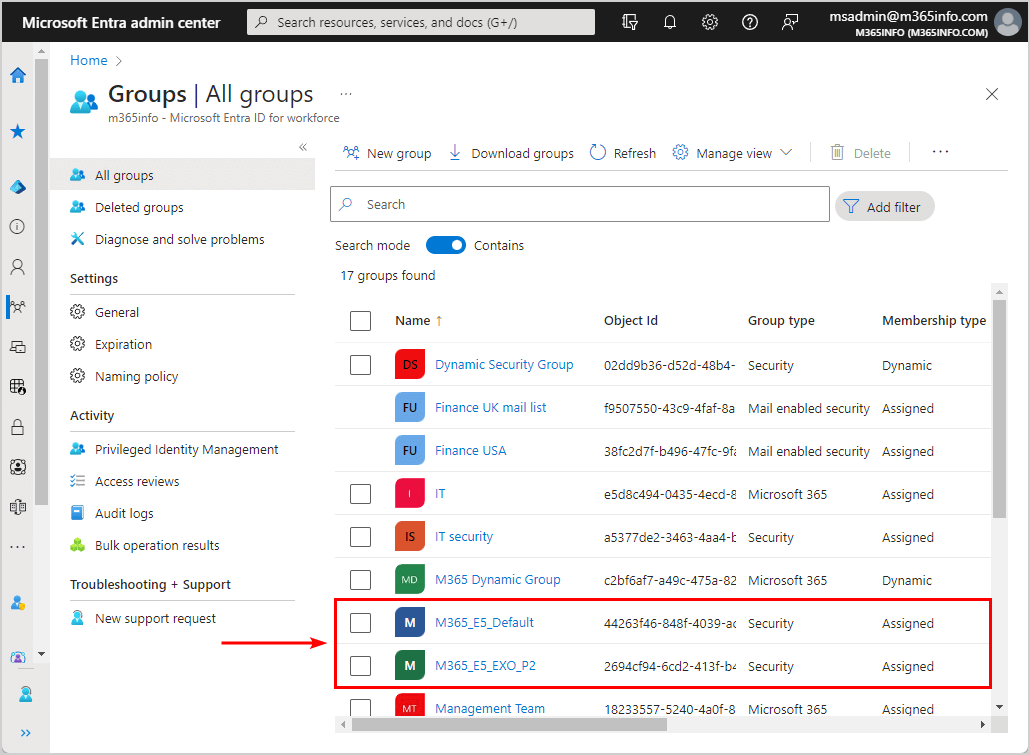
Go to Identity > Groups > All groups to find the two security groups you created. The next step is to assign licenses to each group in Microsoft Entra admin center.
Assign Microsoft 365 licenses to group in Microsoft Entra ID
Time needed: 10 minutes
We will show you how to assign Microsoft 365 licenses to a group in Microsoft Entra ID.
- Go to Microsoft Entra admin center.
Sign in to Microsoft Entra with your admin credentials.
- Open the newly created security group
Click on Identity > Groups > All groups.
Click the newly created group > M365_E5_Default.
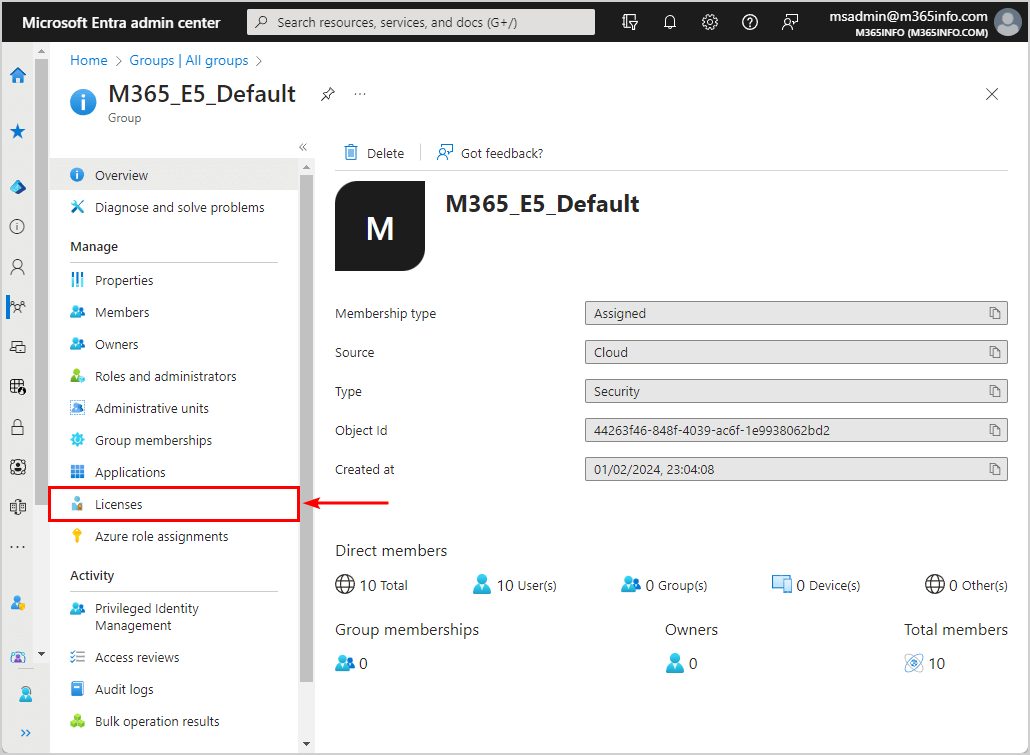
- Assign a new license to the group.
Click on Licenses.
- Select Assignments.
Click on Assignments.
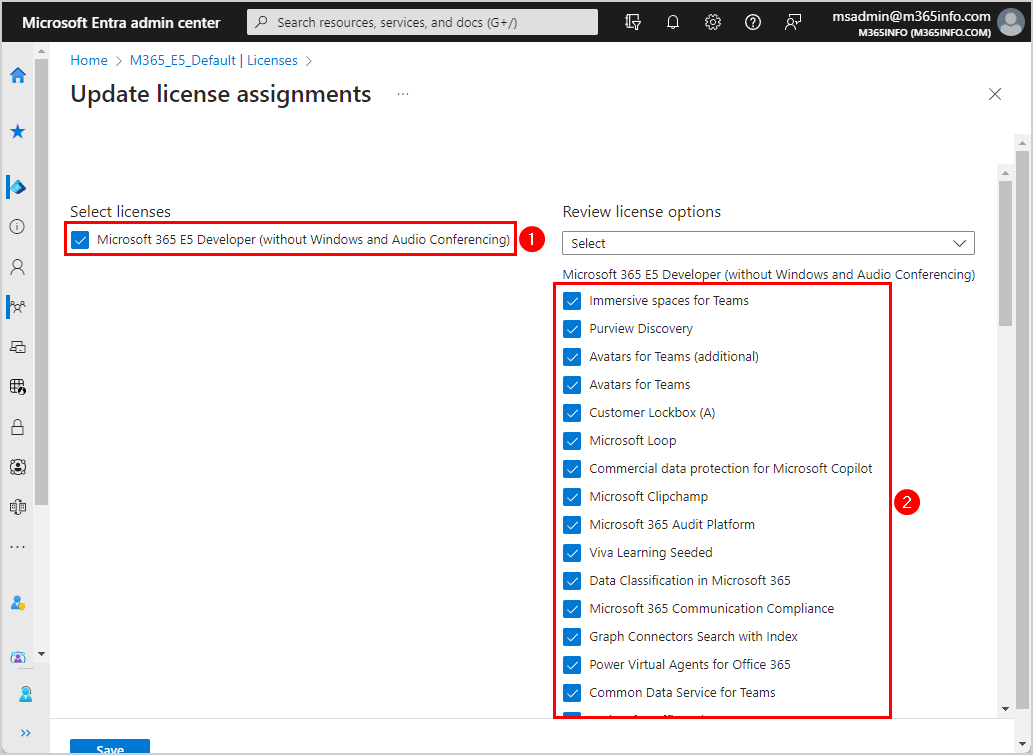
- Select licenses to assign to the group.
Select licenses Microsoft 365 E5 Developer.
Choose the license services for the group.
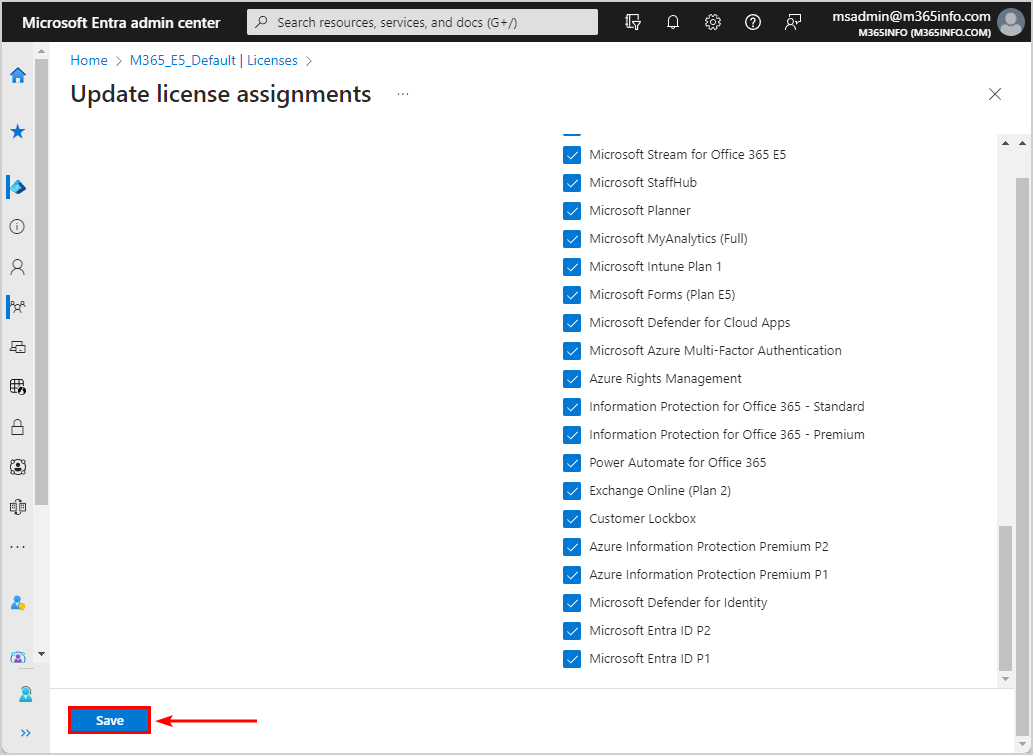
- Click Save.
Click Save and close the license screen.
- License assignments succeeded.
Wait a few minutes for the license changes to apply to all users.
There is another way to assign licenses to a group. You can follow the same steps we showed above or learn another way.
Follow the steps to assign licenses to the other group we created:
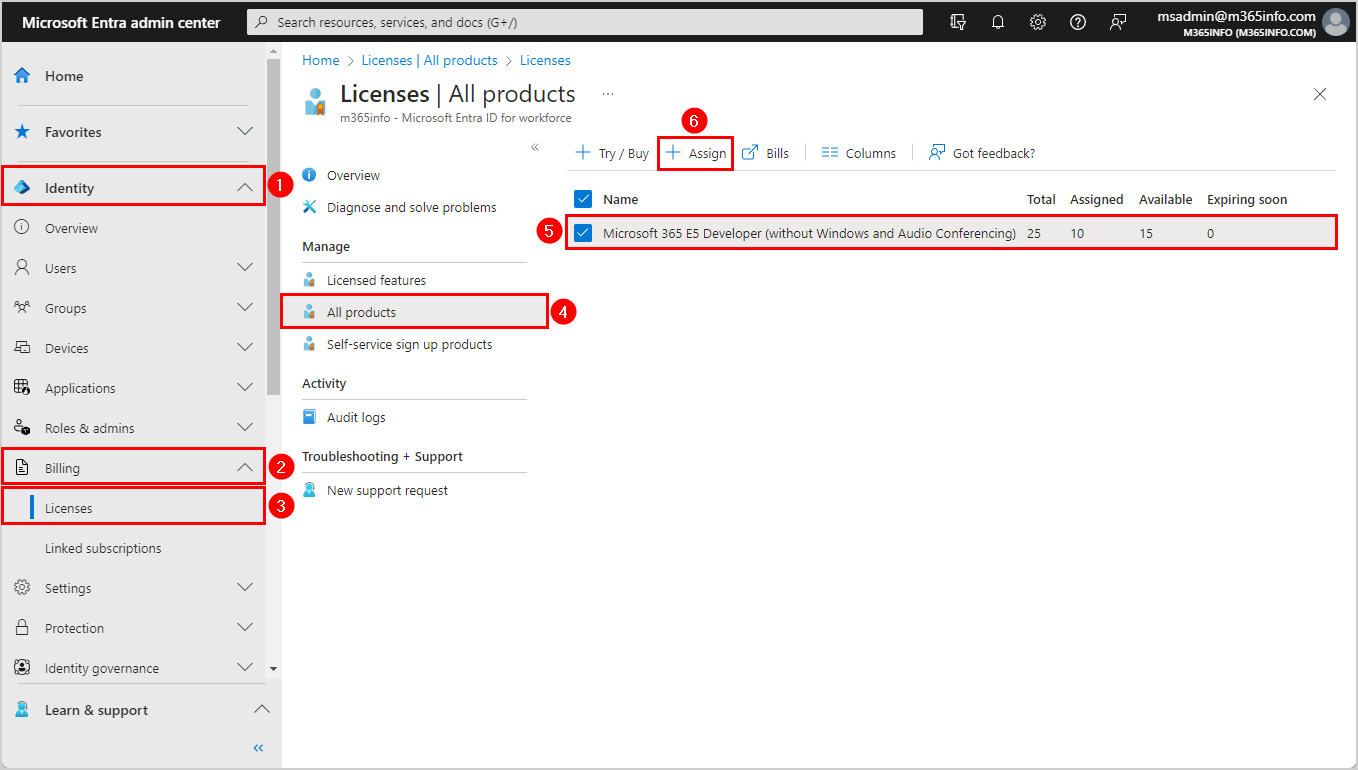
- Go to Microsoft Entra admin center
- Expand Identity > (Show more) > Billing > Licenses
- Click All products
- Select the checkbox Microsoft 365 E5 Developer
- Click Assign
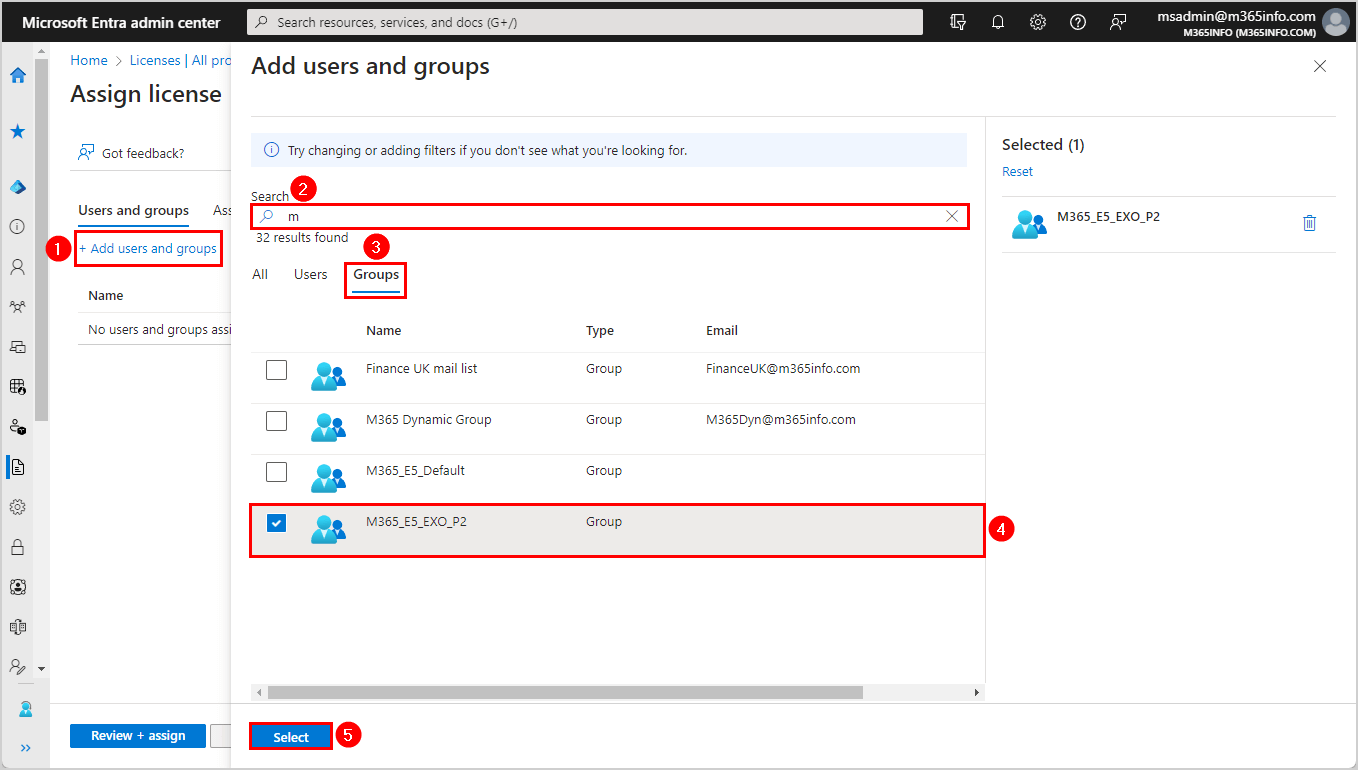
- Click Add users and groups
- Search for the group
- Click the tab Groups
- Select the group M365_E5_EXO_P2
- Click Select
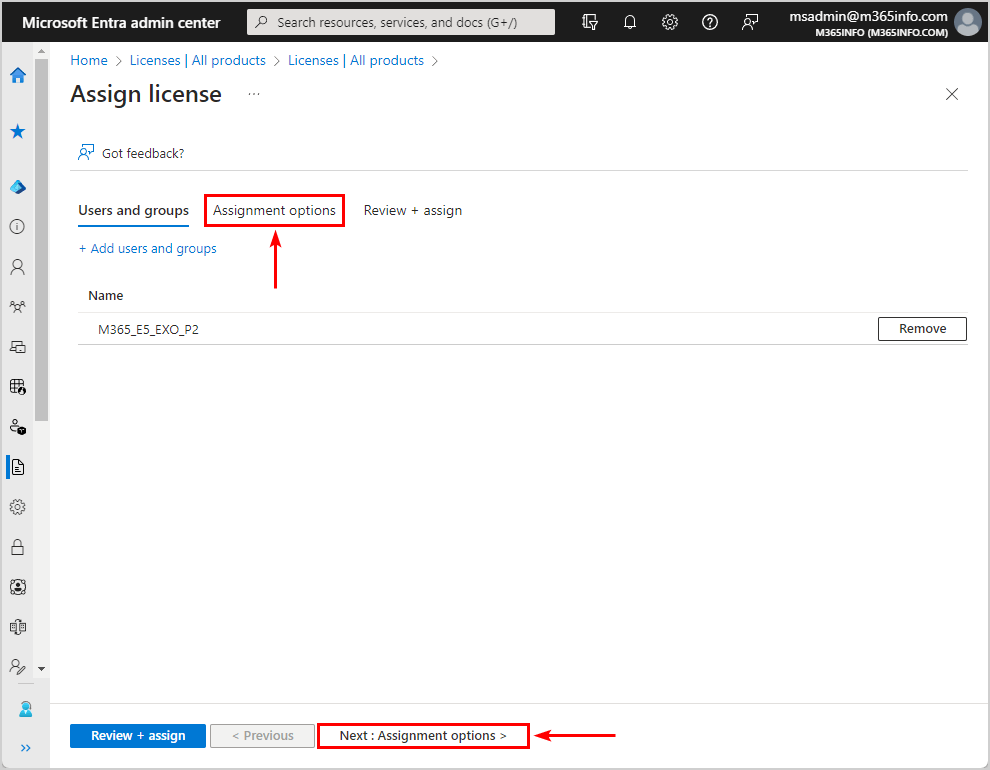
- Click on the tab Assignment options or below Next: Assignment options >
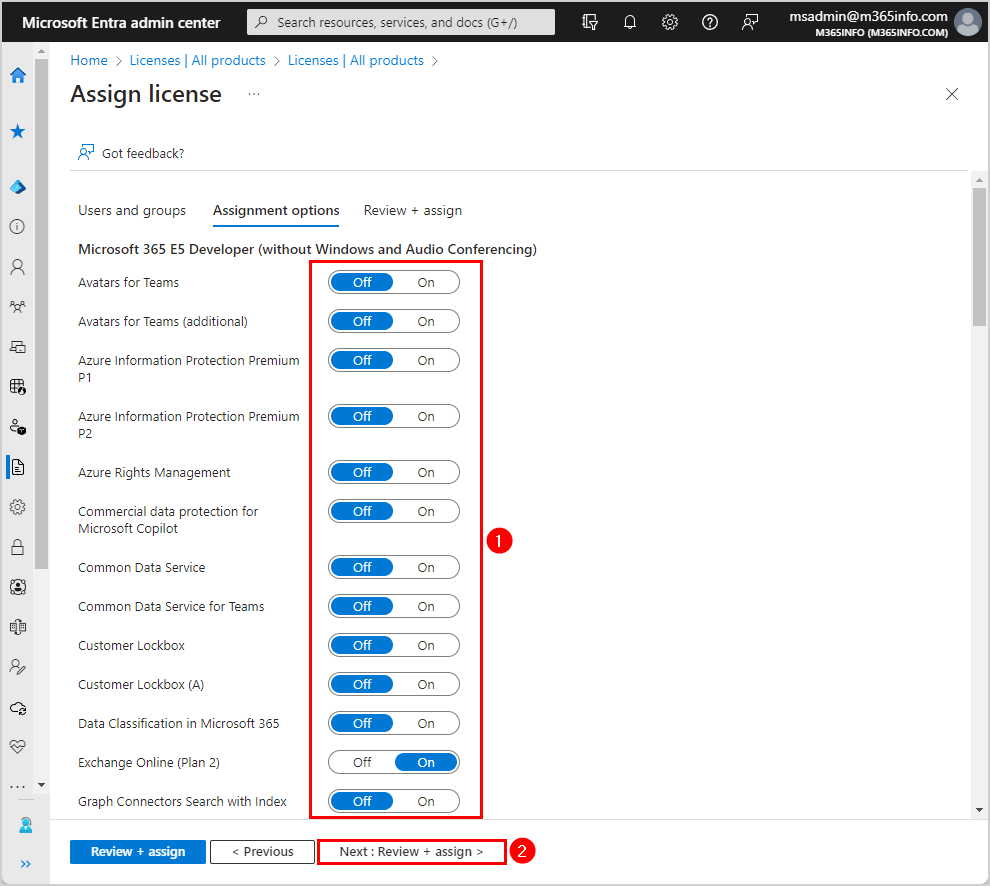
- Select the assignment options you want to include
- Click Next: Review + assign >
Note: For the other group, you can only include paid licenses such as Microsoft Power BI or Microsoft Visio.
- Click Assign

You will get a notification that the licenses are assigned to the group.
Verify group-based licensing in Microsoft Entra ID
Verify you created a security group type with licensed users in Microsoft Entra ID.
Follow the below steps to find the group-based licensing:
- Go to Microsoft Entra admin center
- Expand Identity > Billing > Licenses
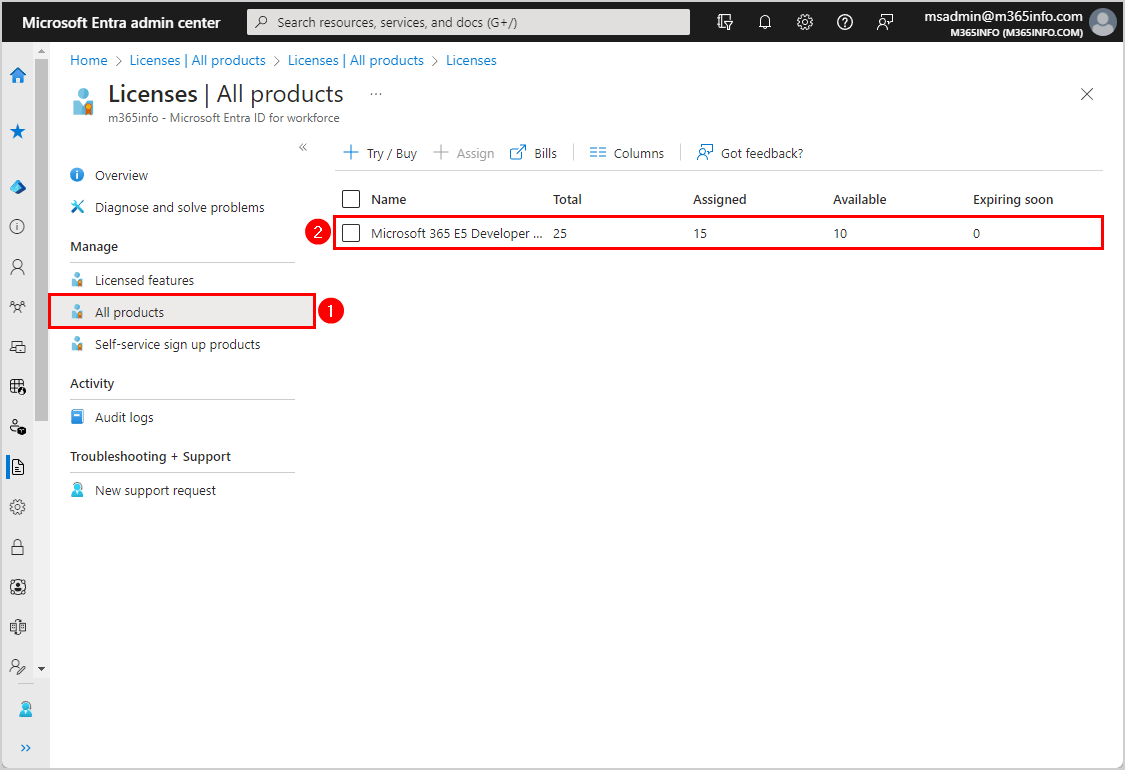
- Click All products
- Click on the license Microsoft 365 E5 Developer
You can see that 15 members with the license Microsoft 365 E5 Developer are assigned. In our example, 10 members of the group M365_E5_Default have all the license options, and 5 members from the group M365_E5_EXO_P2 have 1 license option (Exchange Online Plan 2) assigned.
- Click on Licensed users
You will find a list of all the users with the Microsoft 365 E5 Developer license. Some users can have multiple licenses assigned, as you can see in the below picture.
Note: Some users have assigned the Microsoft 365 E5 Developer license manually (Direct), and some through the group-based licensing (Inherited).
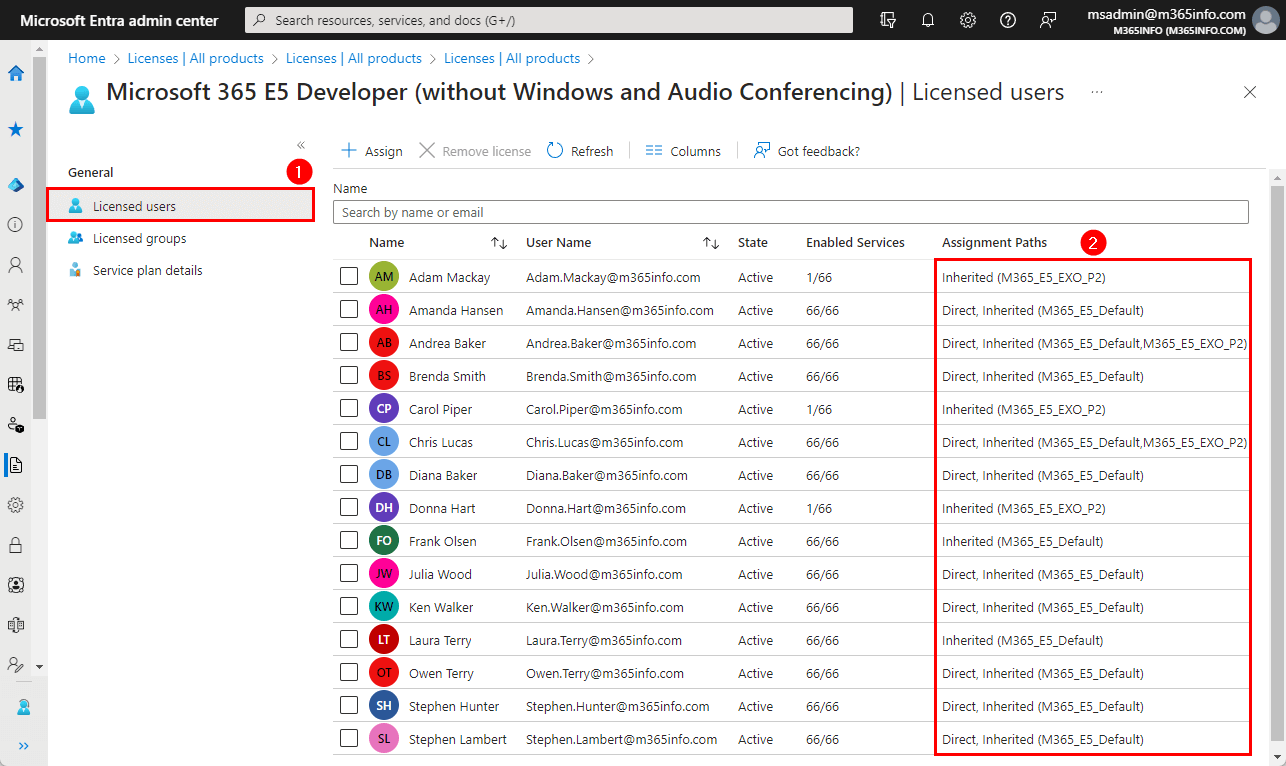
Note: You can remove the direct license assignment from each user. To remove the inherited license, you must remove the user from the group.
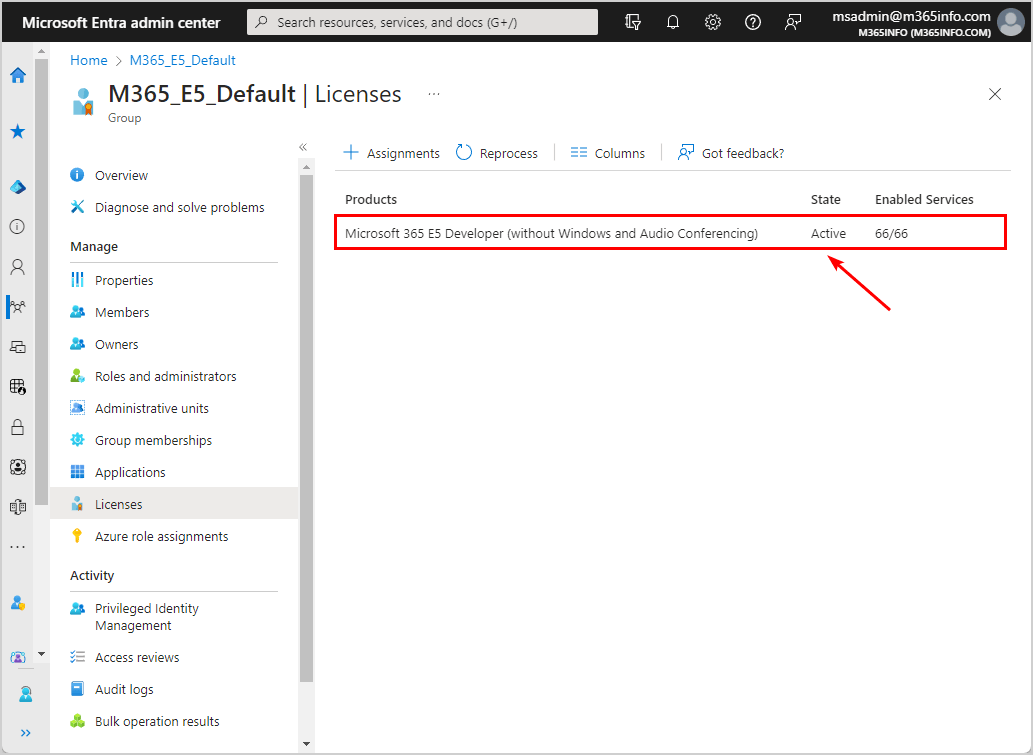
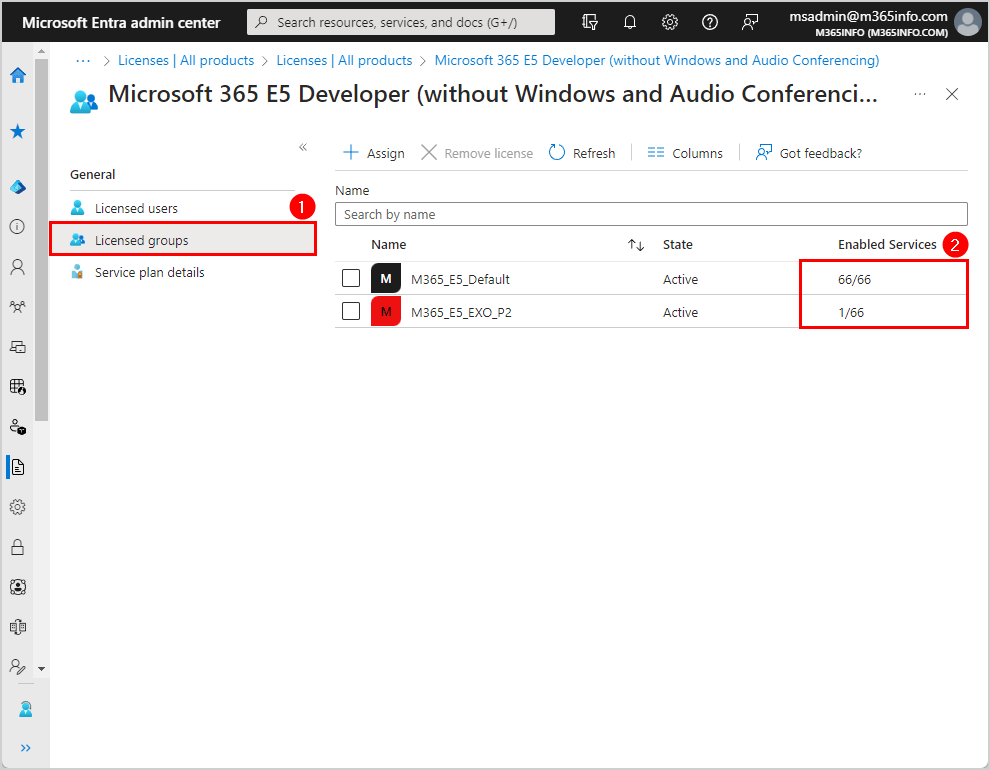
- Click on Licensed groups
It shows that the State is Active for both groups. The Enabled Services show how many services of the license (66/66) you assigned. For the group M365_E5_EXO_P2, we have only assigned the Exchange Online Plan 2 license (1/66).
You successfully assigned Microsoft 365 licenses with group-based licensing in the Microsoft Entra admin center!
Read more: Configure Certificate-Based Authentication to run automated PowerShell scripts »
Conclusion
You learned how to assign Microsoft 365 licenses with group-based licensing in Microsoft Entra ID. It’s easier to bulk assign Microsoft 365 licenses to all users when creating groups in Microsoft Entra ID. This way, you can find and manage your users’ licenses.
Did you enjoy this article? You may also like Export Microsoft 365 users licenses. Don’t forget to follow us and share this article.
This Post Has 0 Comments