After you install the Microsoft Graph module, you can connect to Microsoft Graph PowerShell. There…
How to Block Senders in Microsoft 365
Clicking on a spam message can cause many problems in an organization. To stop unwanted senders from sending spam emails to your organization, you need to block them. Microsoft has Exchange Online Protection (EOP) as its hygiene solution to combat spam mail. There are different methods to block email addresses and domains in Microsoft 365. In this article, you will learn how to block senders in Microsoft 365.
Table of contents
Blocked senders and domains in Exchange Online Protection
There are multiple methods to block email from unwanted senders with Exchange Online Protection (EOP). Microsoft recommends the following methods in order of most recommended:
- Block entries for domains and email addresses in the Tenant Allow/Block List
- Use the Blocked Senders list in Outlook
- Blocked sender lists or blocked domain lists
- Create a mail flow rule (transport rule)
- IP Block List (connection filtering)
In this article, we will show you all these methods in a clear step-by-step guide.
Method 1. Tenant Allow/Block List
The most recommended method to block senders from a domain is to use the Tenant Allow/Block list in the Microsoft Defender portal.
To block senders in Microsoft Defender portal, follow these steps:
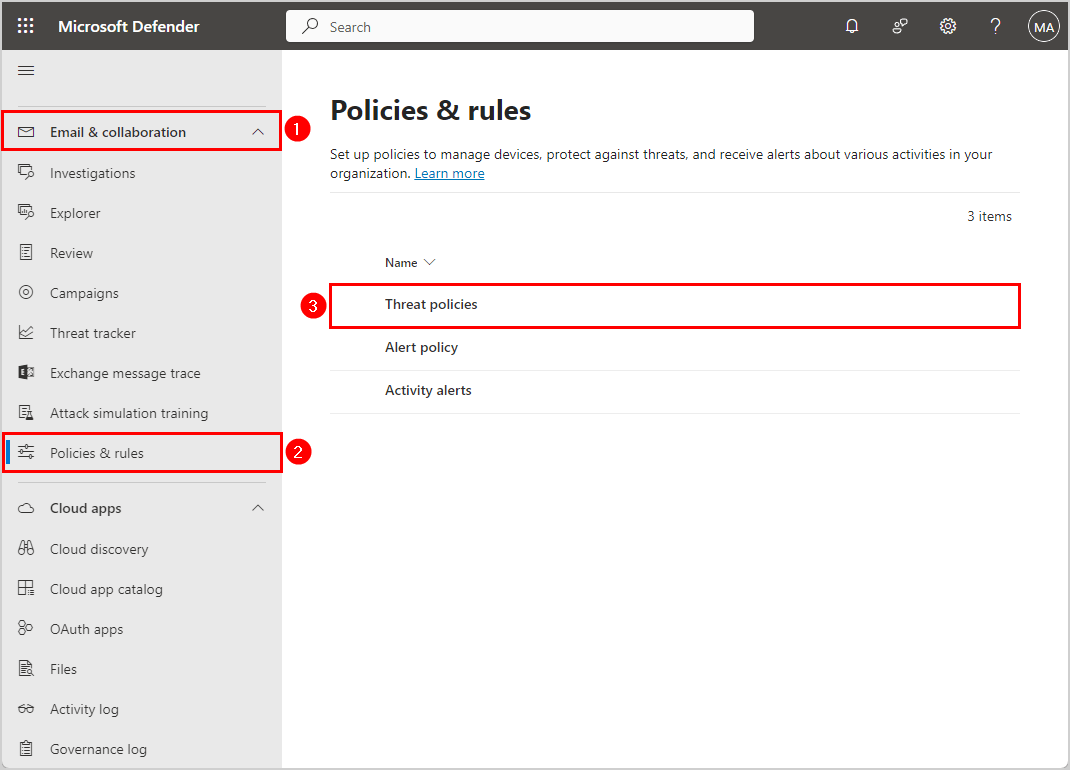
- Sign in to Microsoft Defender
- Click Email & collaboration > Policies & rules
- Click Threat policies

- Click Tenant Allow/Block Lists

- Click the tab Domain & addresses
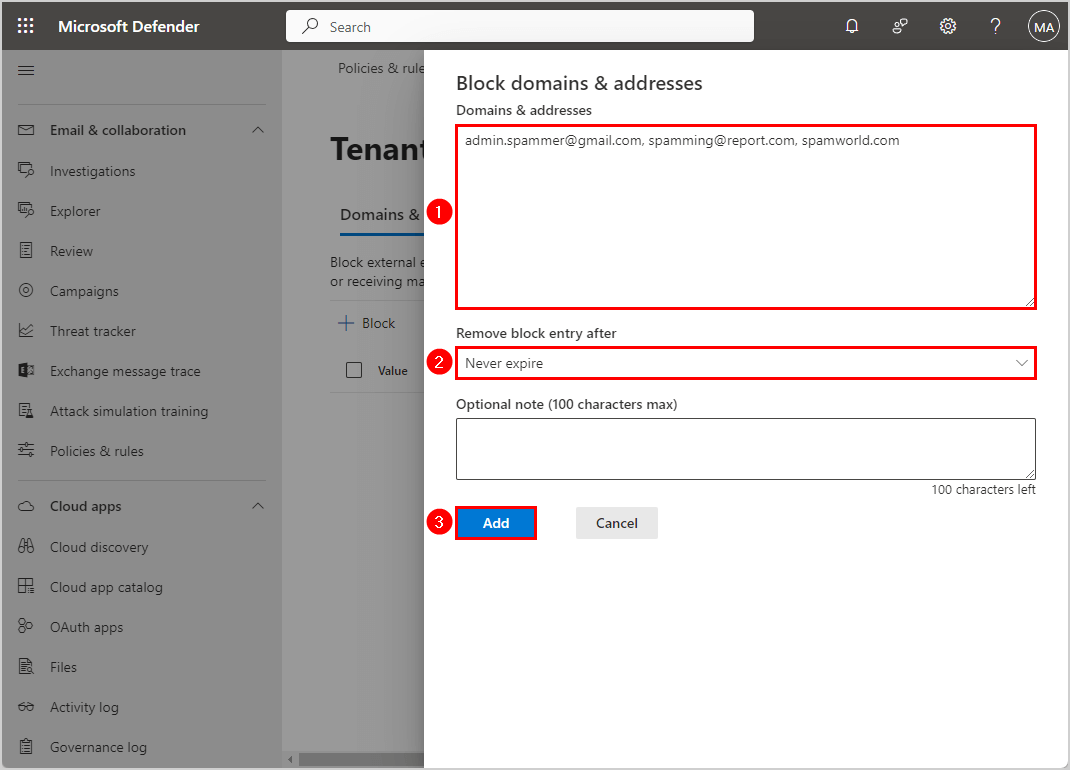
- Click + Block

- Type email addresses or domains you want to block
- Select the days in Remove block entry after
- Click Add
Note: Never put domains that you own or common domains such as microsoft.com and office.com onto the Allow and Block Lists.
- Confirm you see the email addresses and domains in the list
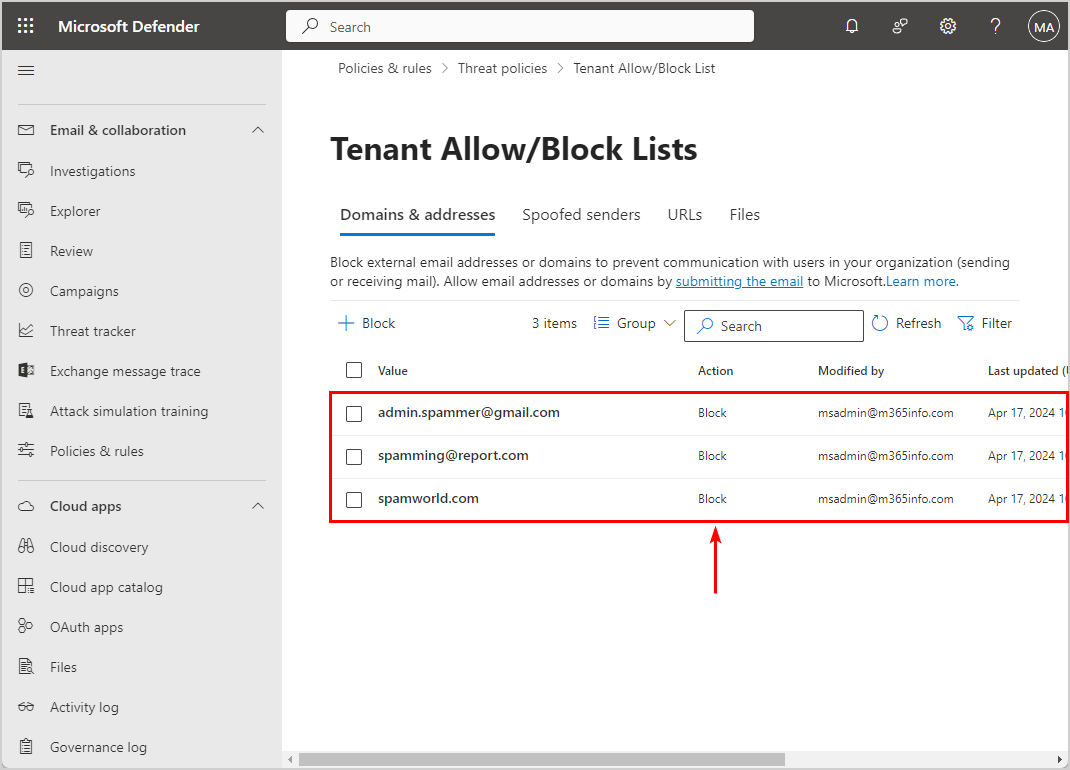
Important: It can take 15 minutes before it’s updated in the Microsoft cloud servers before the changes take effect.
Method 2. Blocked Senders list in Outlook
If some users in your organization receive spam or unwanted email, you can use the Blocked Senders list in Outlook. You can add the unwanted email address or domain to the Blocked Senders list in the mailbox with PowerShell.
You must first Connect to Exchange Online PowerShell to run the below PowerShell command.
Connect-ExchangeOnlineIn our example, we will add the unwanted email addresses for the user (Amanda.Hansen@m365info.com) to the Blocked Senders list in their Outlook.
Use the PowerShell command below to add multiple email addresses to the Blocked Senders list for a single mailbox.
Set-MailboxJunkEmailConfiguration -Identity "Amanda.Hansen@m365info.com" -BlockedSendersAndDomains "admin.spammer@gmail.com", "spamming@report.com"To add an email address to the Blocked Senders list for multiple mailboxes, use the below PowerShell command.
Get-Mailbox -ResultSize Unlimited | Set-MailboxJunkEmailConfiguration -BlockedSendersAndDomains "admin.spammer@gmail.com", "spamming@report.com"Check Outlook to verify you blocked these email addresses in the Blocked Senders list of a single mailbox.
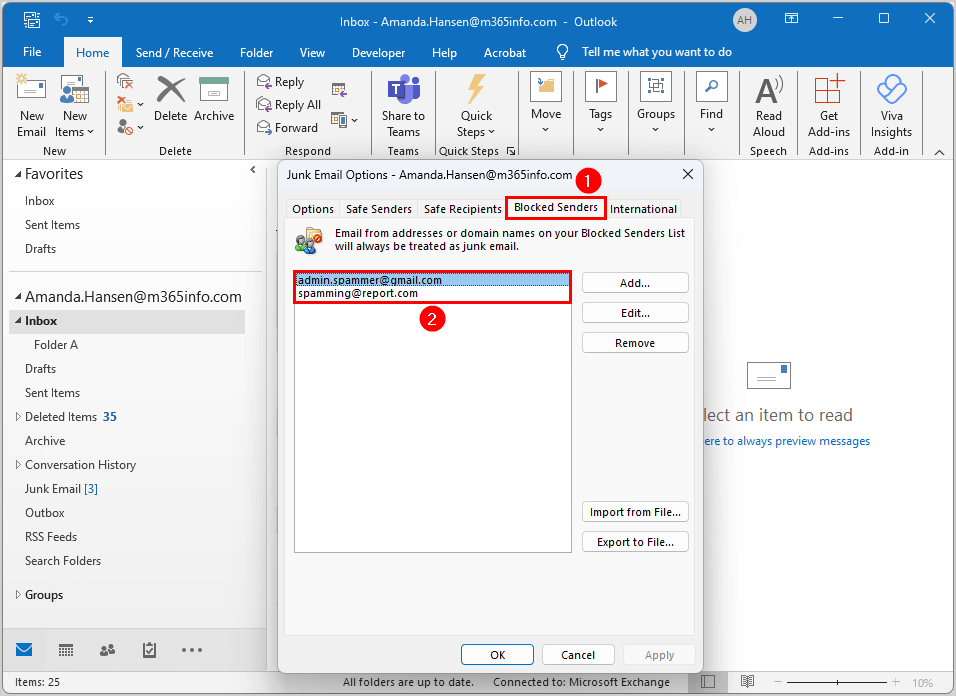
- Open Outlook
- Click the Home tab
- Click Junk > Junk E-mail Options

- Click Blocked Senders
- Verify the email addresses are on the list
Read more about Manage Safe Senders and Block Sender Lists using PowerShell.
Method 3. Use blocked sender or blocked domain lists
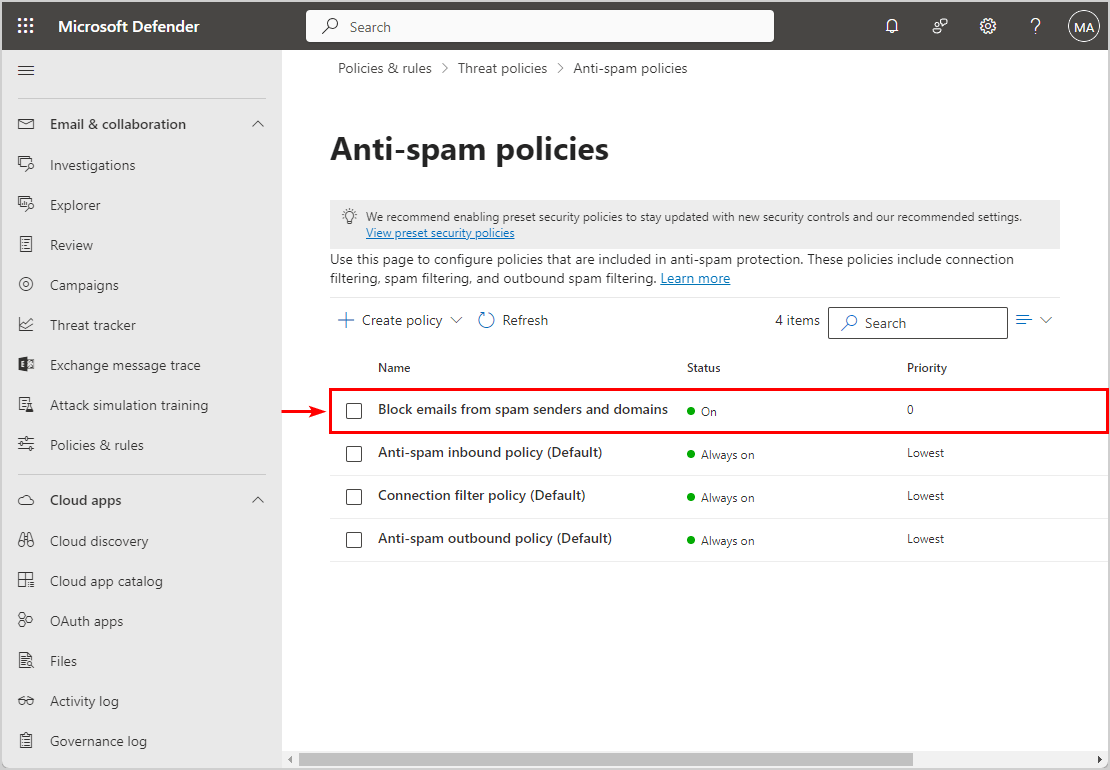
The next method is to use the anti-spam policies in Microsoft 365 Defender to block senders and domains by adding them to a list.
It’s best not to use the default anti-spam policies and keep their default settings. Therefore, we will create a new inbound anti-spam policy.
To create a new anti-spam policy in Microsoft Defender portal, follow these steps:
- Sign in to Microsoft Defender
- Click Email & collaboration > Policies & rules
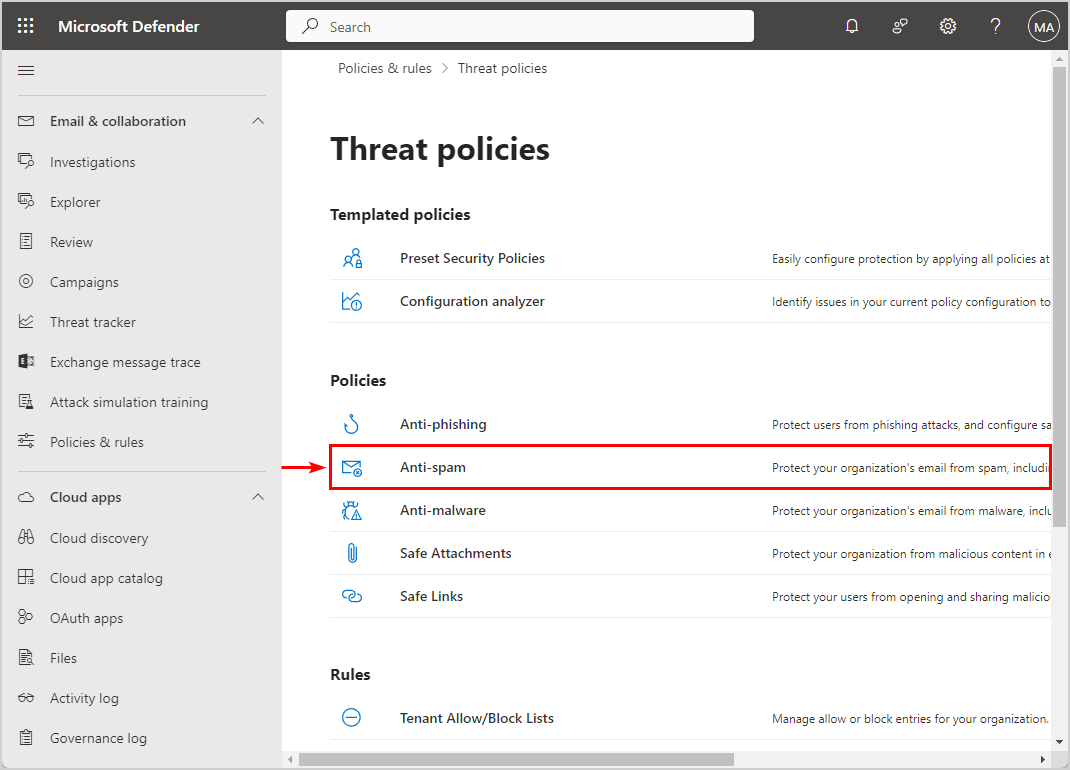
- Click Threat policies
- Click Anti-spam

- Click Create policy > Inbound
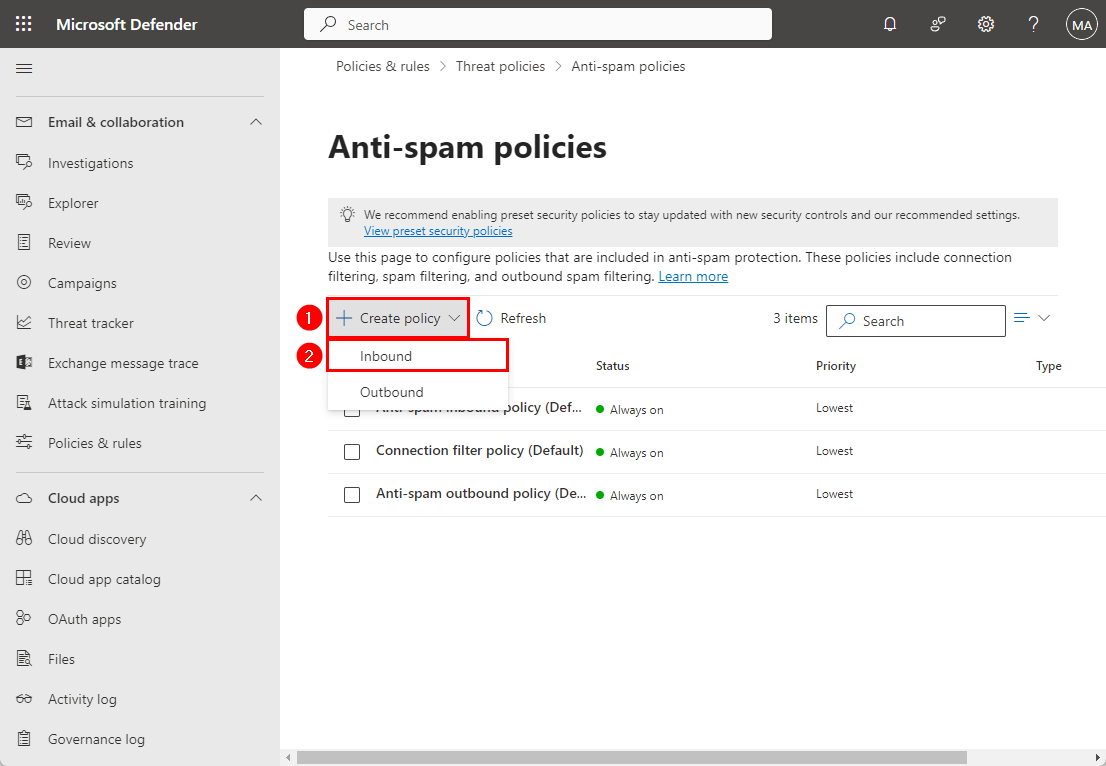
- Name your policy
- Click Next

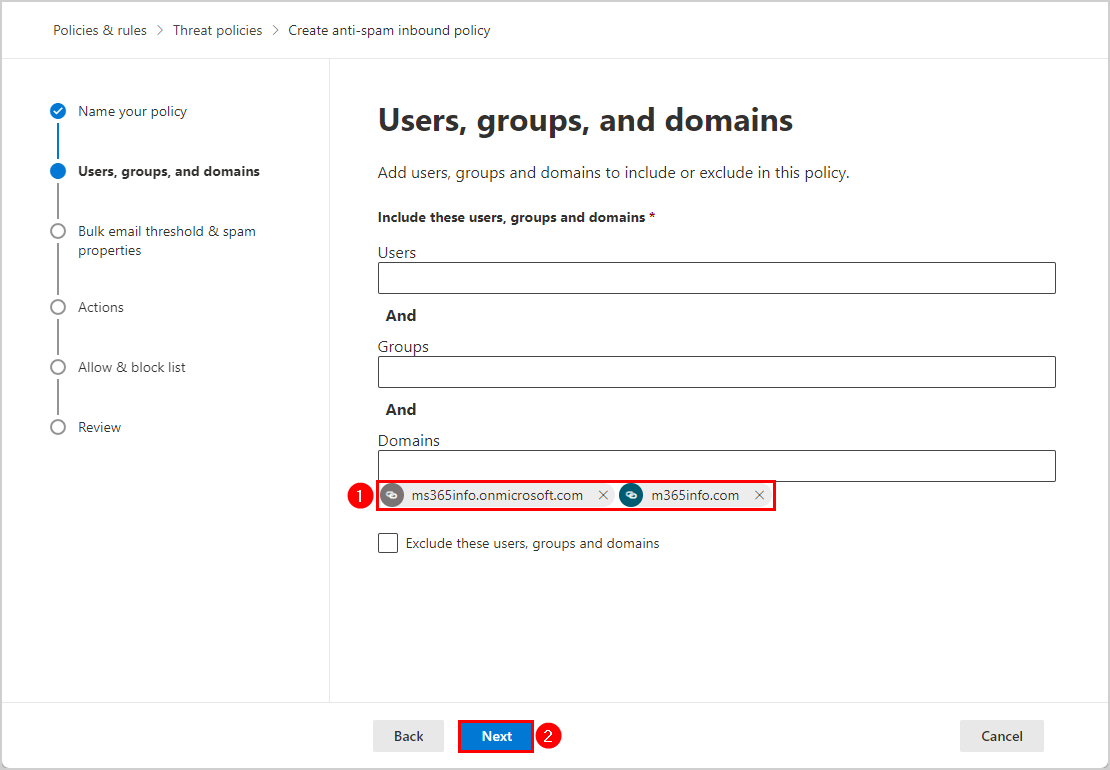
- Include your domains
- Click Next
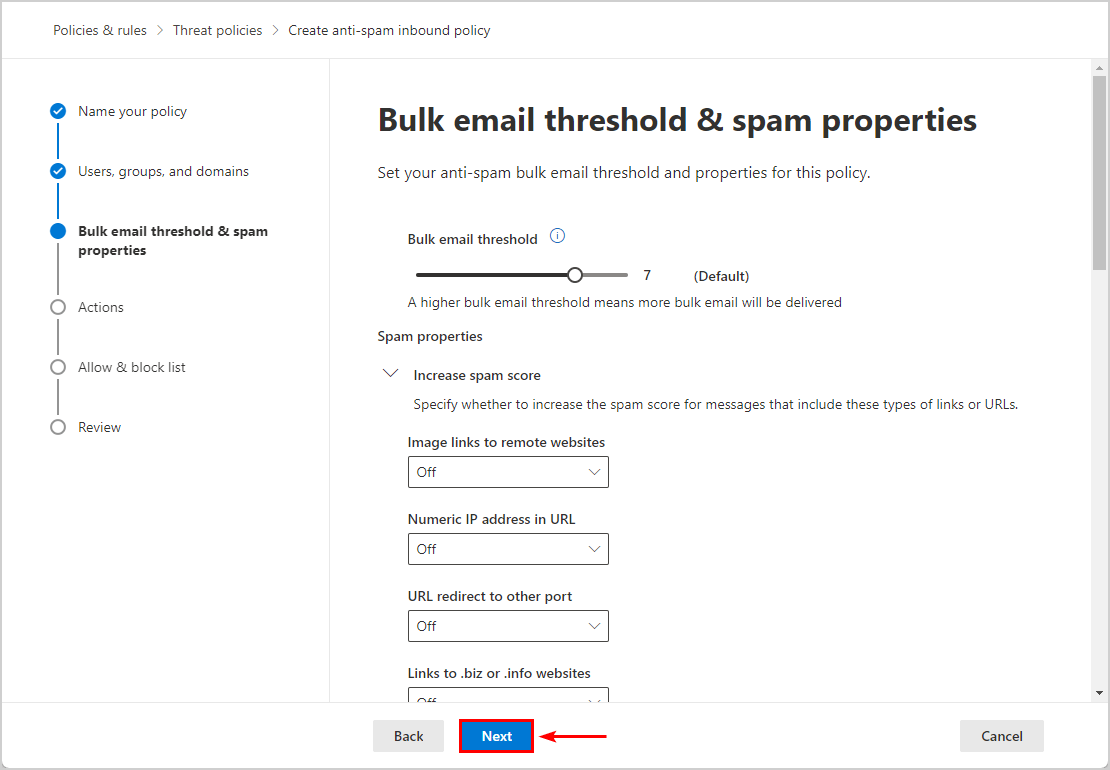
- Keep the default settings in Bulk email threshold & spam properties
- Click Next
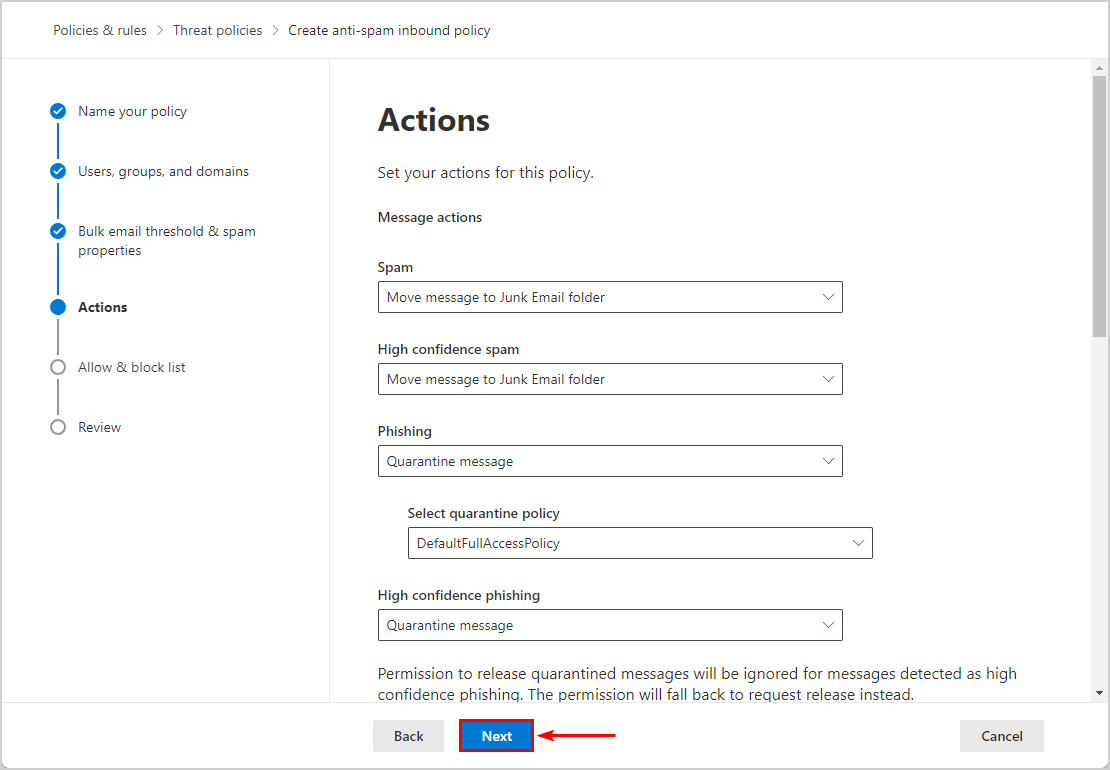
- Keep the default settings in Actions
- Click Next
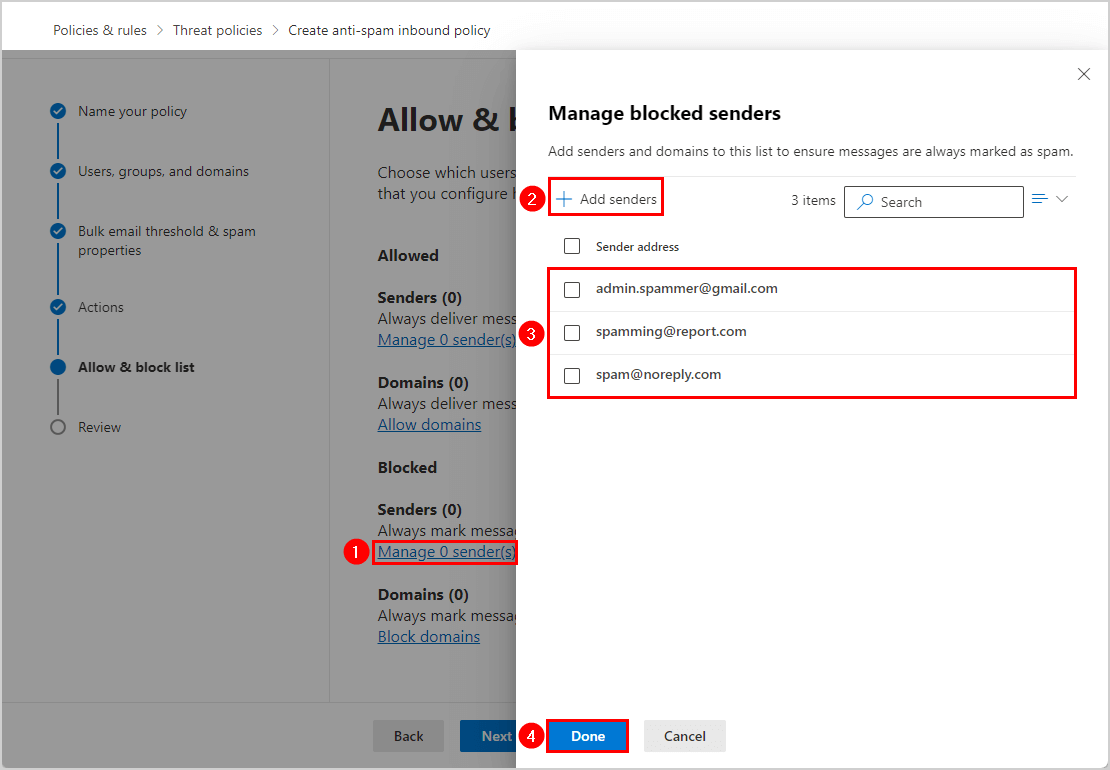
- Click Manage 0 sender(s)
- Click Add senders
- Type the sender addresses
- Click Done
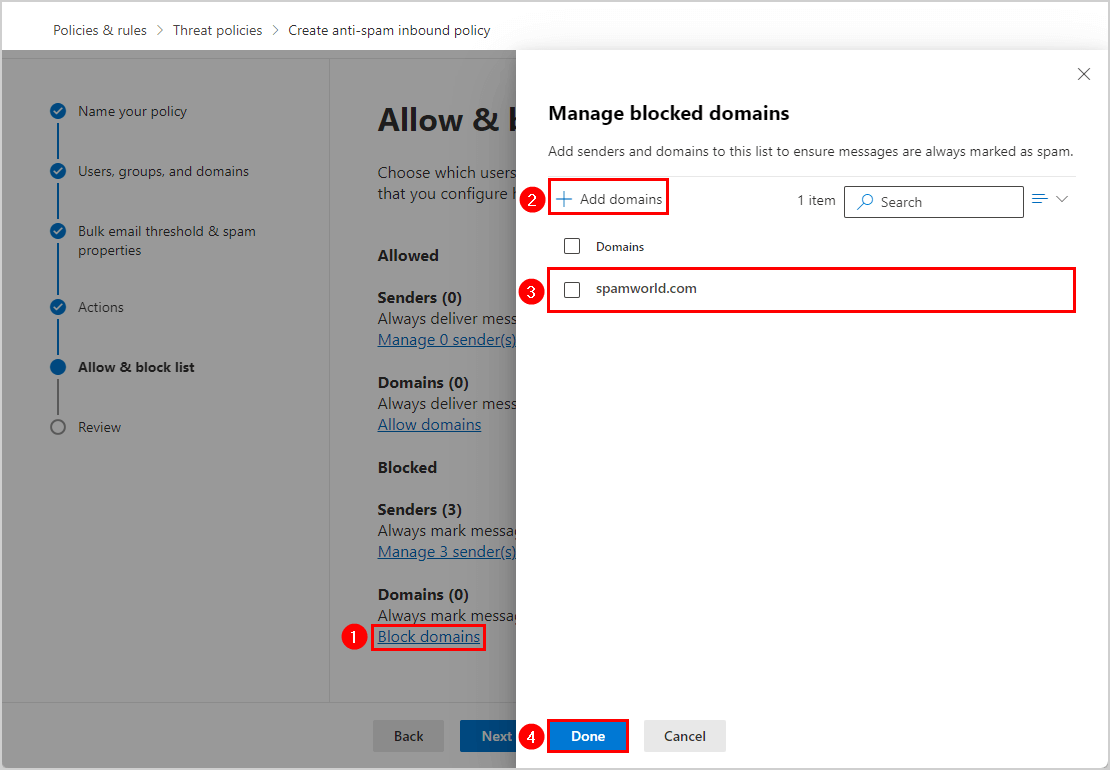
- Click Block domains
- Click Add domains
- Type the domains
- Click Done
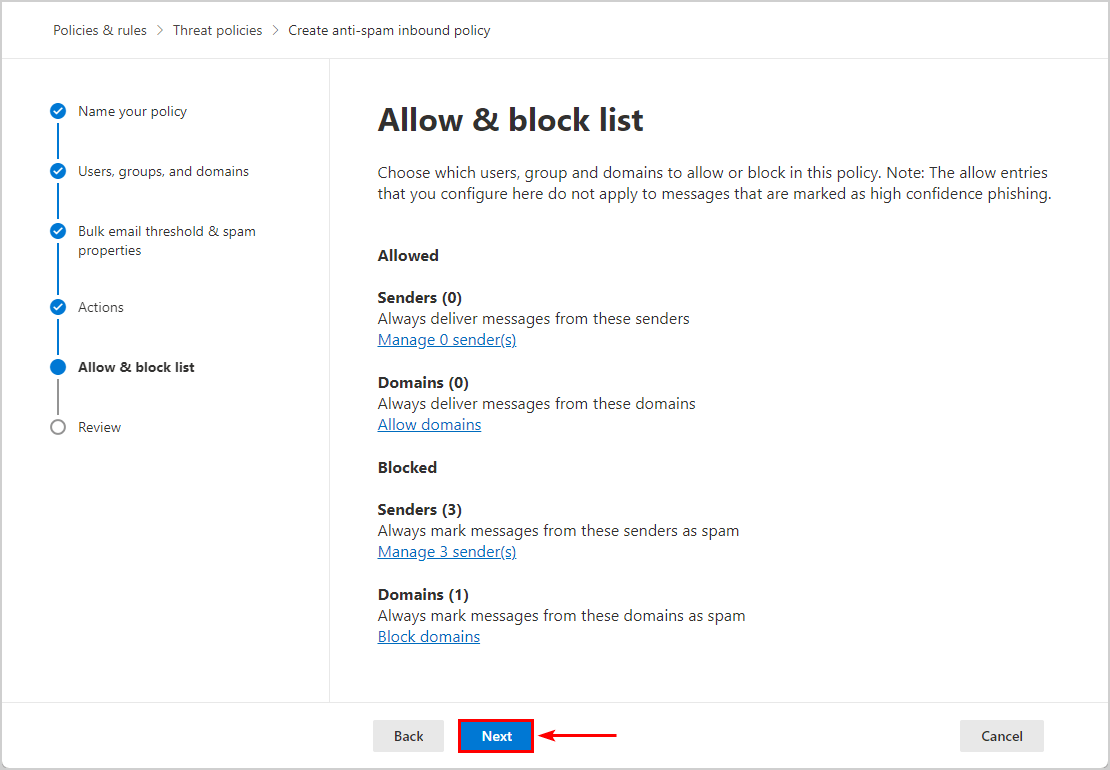
- Click Next
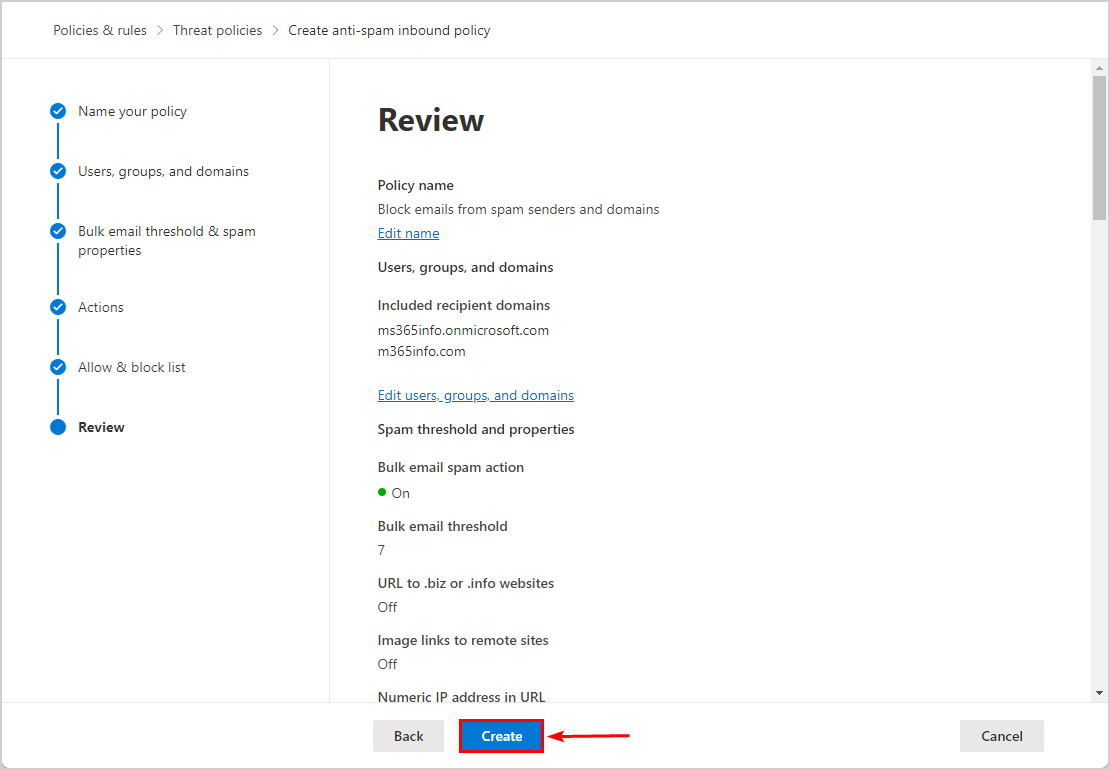
- Review and click Create
- Verify the new anti-spam policy is on the list with the status On
Read more about How to block Top-Level Domain in Microsoft 365.
Method 4. Create Mail flow rule
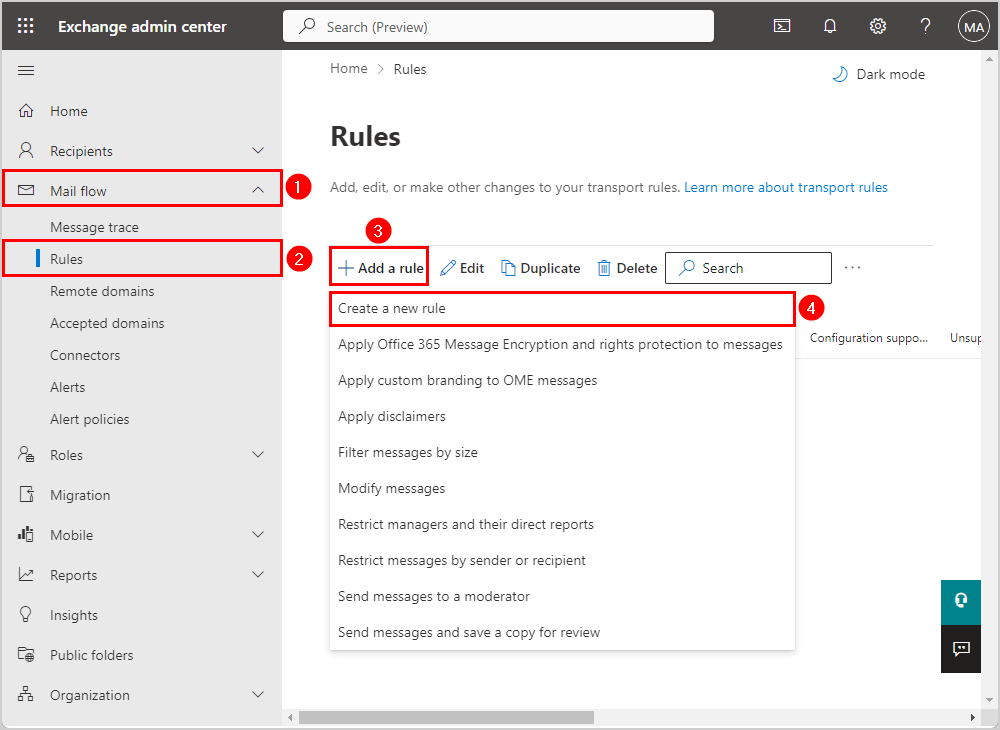
You can also create a mail flow rule, also known as a transport rule, in the Exchange admin center.
To create a mail flow in Exchange admin center, follow these steps:
- Sign in to Exchange admin center
- Click Mail flow > Rules
- Click + Add a rule
- Select Create a new rule
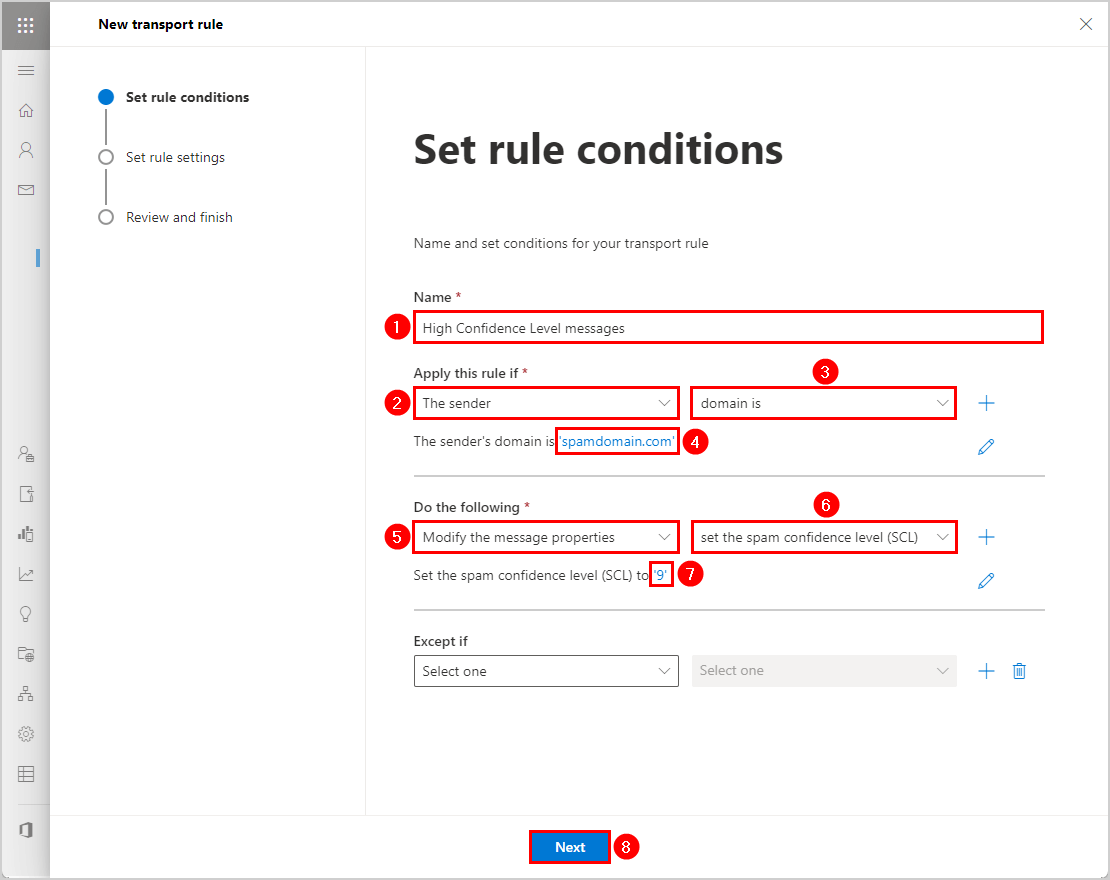
- Name the rule
- Apply this rule if The sender > domain is
- Specify domain (spamdomain.com)
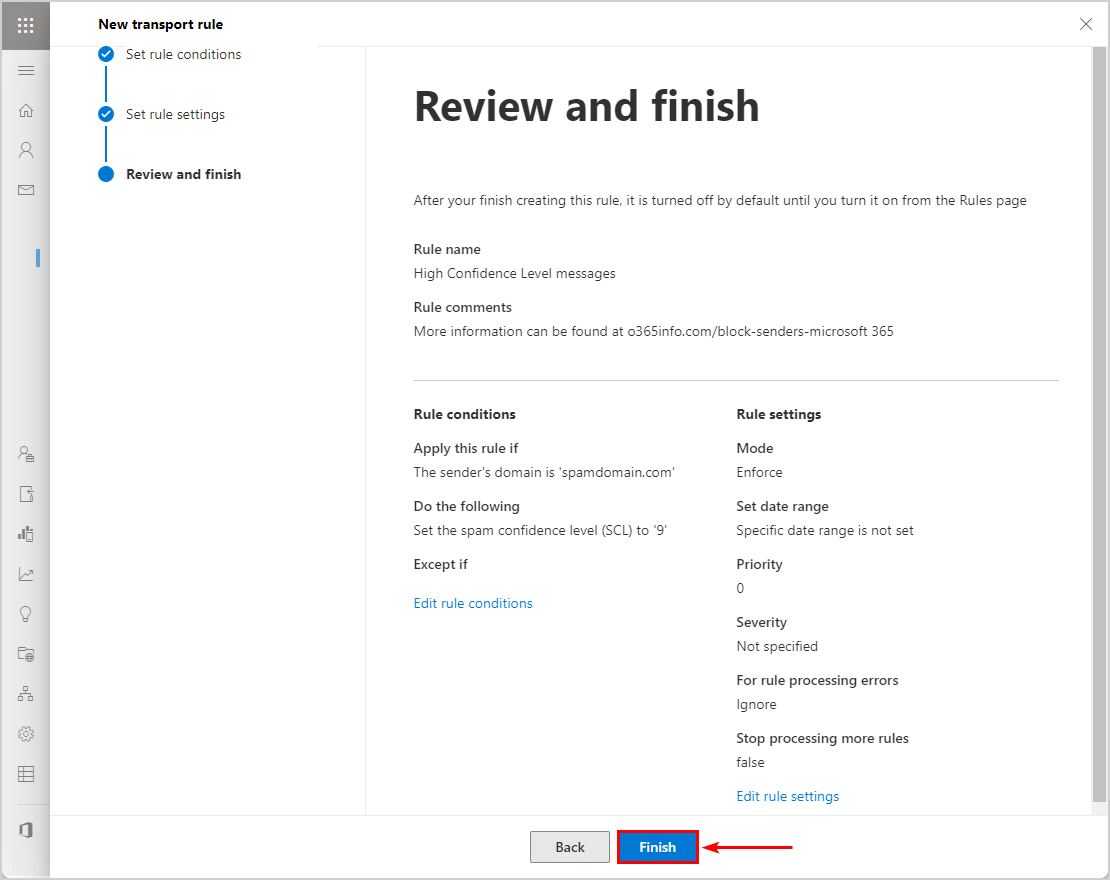
- Do the following Modify the message properties > set the spam confidence level (SCL)
- Specify SCL 9
- Click Next
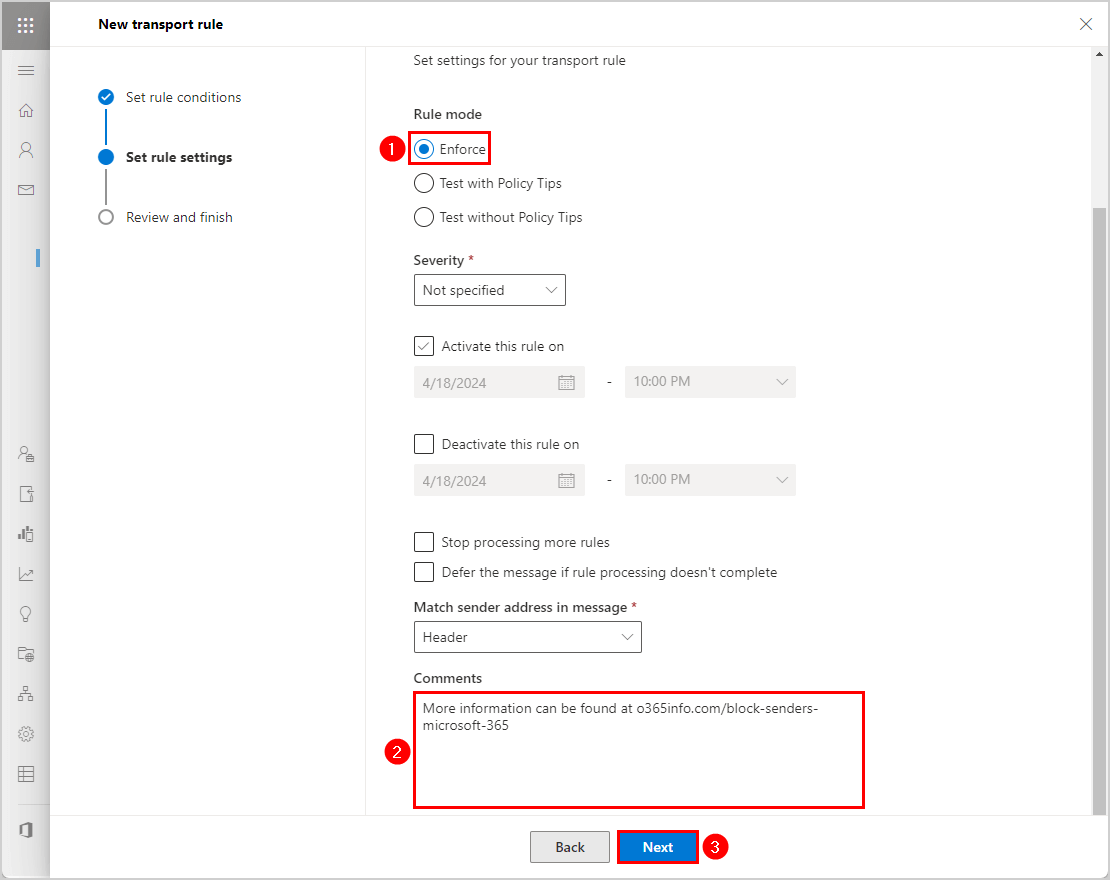
- Click Enforce
- Add the article URL to the Comments
- Click Next
- Click Finish
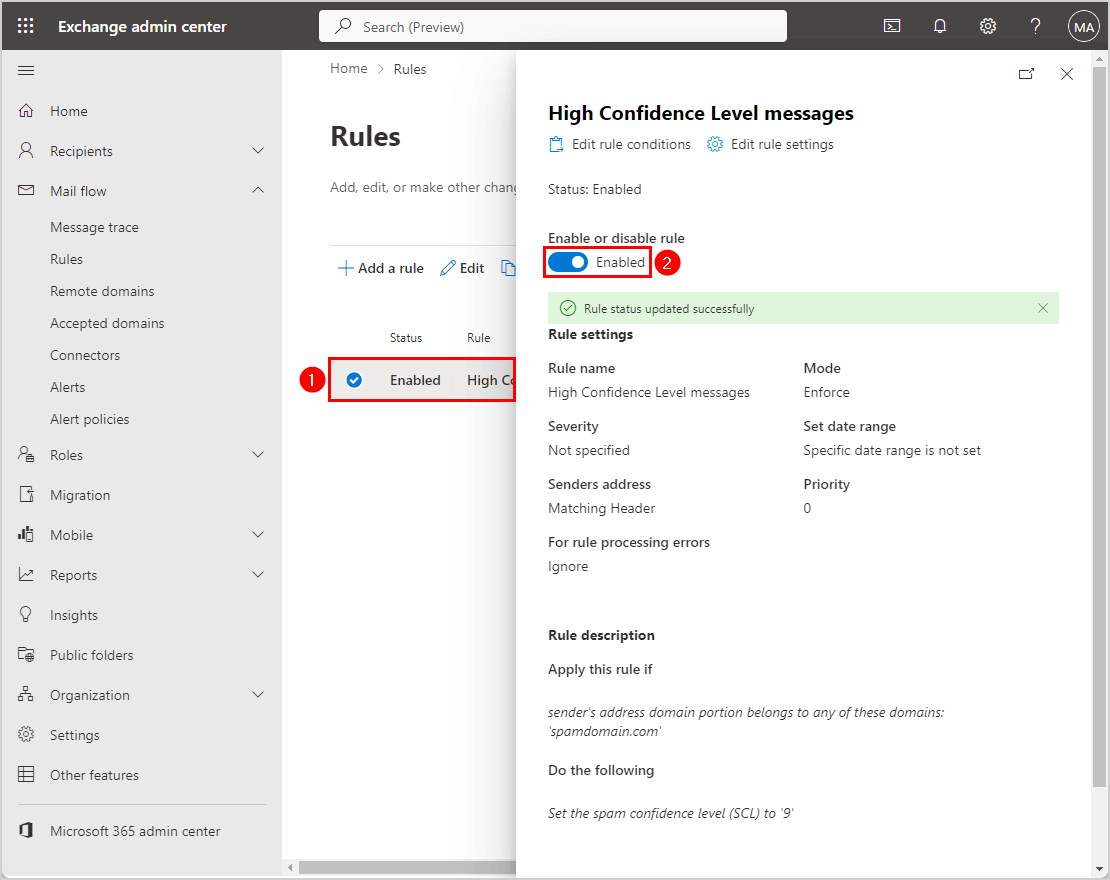
- The transport rule is created successfully
- Click the newly created mail flow rule in the list
- Click Enabled
Method 5. IP Block list
The least recommended method is to add an IP address to the connection filter policy in Microsoft 365 Defender. This will block unwanted spam emails from specific IP addresses.
The disadvantage is that SMTP servers change IP addresses, so if you block one now, you can still get spam from another SMTP server. Also, every sender from that IP address will be blocked.
To block IP addresses in Microsoft Defender portal, follow these steps:
- Sign in to Microsoft Defender
- Click Email & collaboration > Policies & rules
- Click Threat policies

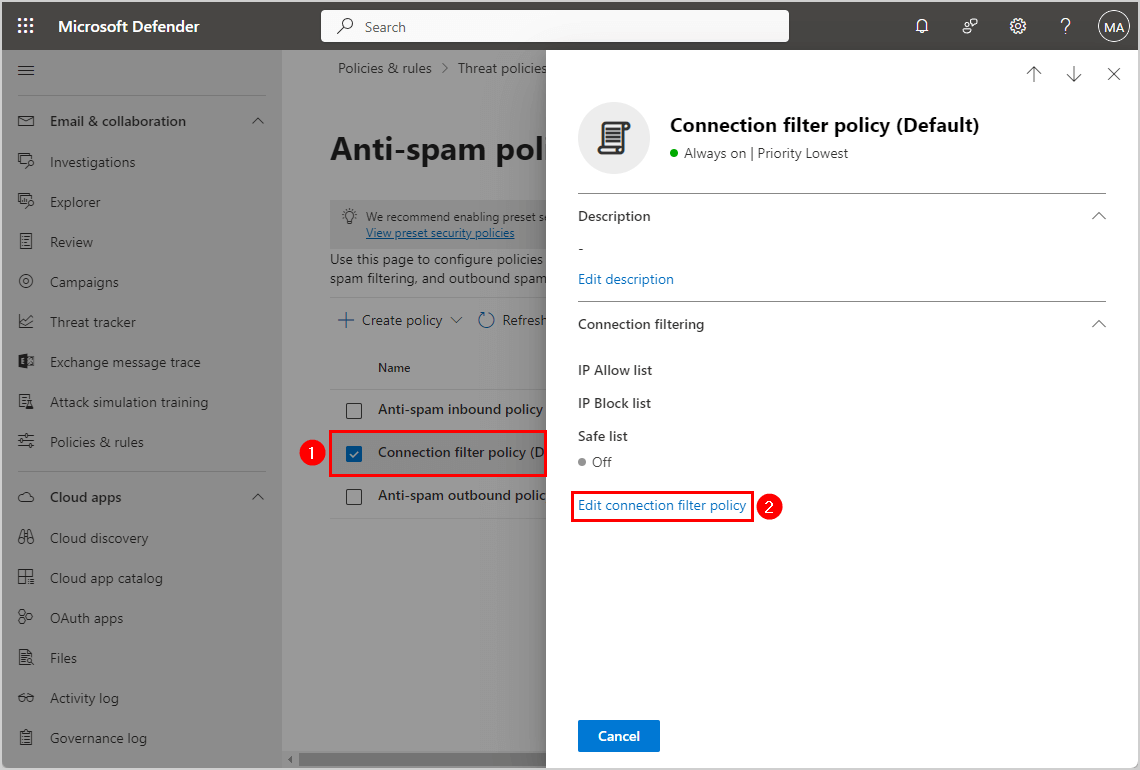
- Click Anti-spam
- Click Connection filter policy (Default)
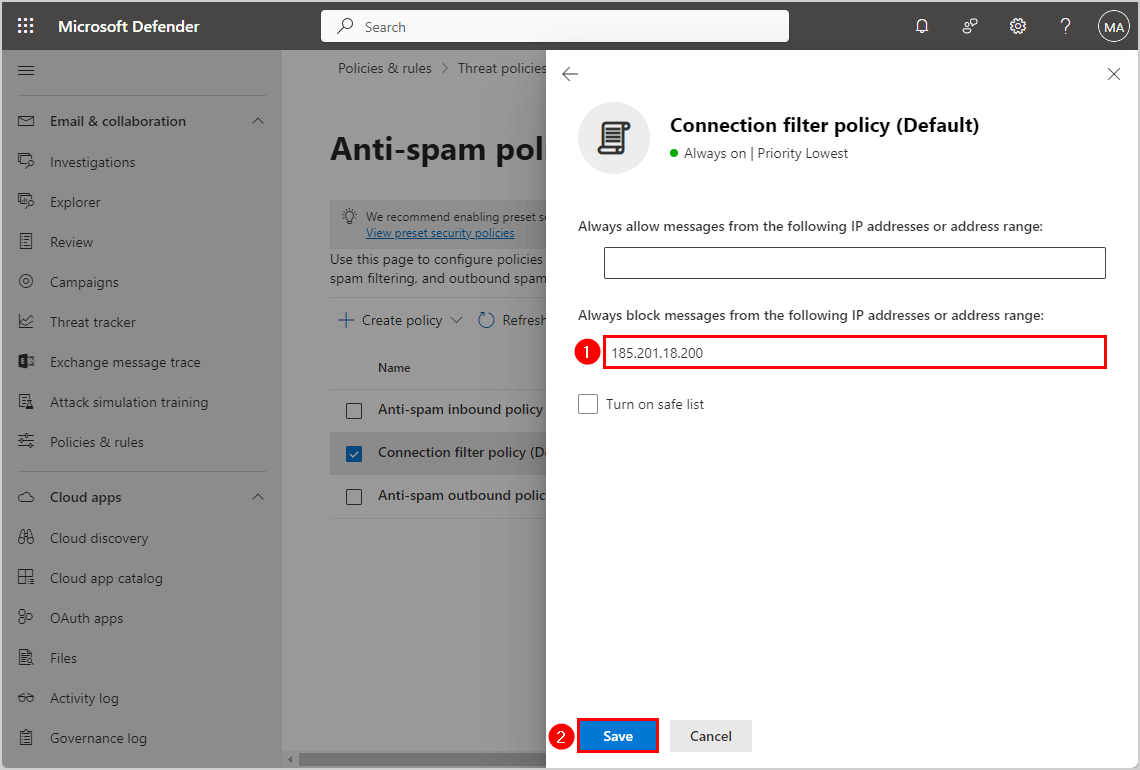
- Click Edit connection filter policy
- Type IP address in Always block messages from the following IP address or address range
- Click Save
- Verify the IP address is on the IP block list
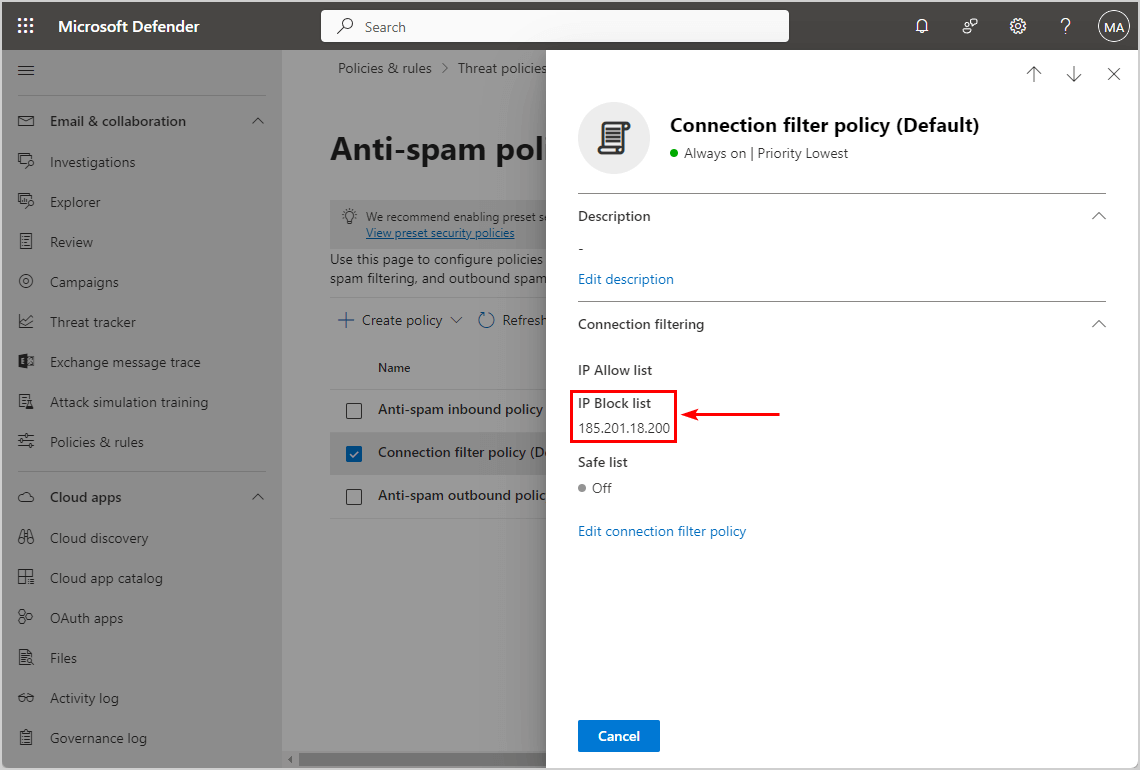
That’s it!
Read more: Block Microsoft 365 user sign-in »
Conclusion
You learned how to block senders in Microsoft 365 using different methods. The most recommended method to block entries for domains and email addresses is to use the Tenant Allow/Block Lists in Microsoft Defender. However, if that option doesn’t work for you, choose another method when blocking unwanted senders in your organization.
Did you enjoy this article? You may also like Configure Microsoft 365 quarantine retention period to 30 days. Don’t forget to follow us and share this article.
Excellent Review
One question, what is the difference between ‘Tenant Allow/Block List’ and ‘Use blocked sender or blocked domain lists’?
Thanks in advance.