We like to add new contacts, also known as external contacts in Microsoft 365. These…
Configure Microsoft 365 quarantine retention period to 30 days
Some email messages get quarantined and remain in the default Microsoft anti-spam inbound policy for only 15 days. You should change the quarantine retention days to the maximum days in the Microsoft 365 Defender portal. In this article, you will learn how to configure Microsoft 365 quarantine retention period to 30 days.
Table of contents
Quarantine period in Microsoft 365 Defender
The default quarantine retention period in the Microsoft security center is just 15 days. It’s highly recommended to extend it to a maximum of 30 days.
You can view, release, download, delete, and report false positive quarantined email messages or files captured by Microsoft Defender for Office 365 (MDO) for SharePoint Online, OneDrive for Business, and Microsoft Teams in Office 365. Keep messages in quarantine for 30 days to allow enough time for further investigation.
PowerShell error DefaultFullAccessPolicy
You can’t modify the built-in quarantine policies named AdminOnlyAccessPolicy or DefaultFullAccessPolicy with PowerShell.
If you try to change anything in these policies, you will get the below error in PowerShell.
PS C:\> Set-QuarantinePolicy -Identity "DefaultFullAccessPolicy" -QuarantineRetentionDays 30

Write-ErrorMessage : |Microsoft.Exchange.Management.Tasks.ValidationException|Quarantine policy "DefaultFullAccessPolicy"
is a default system policy. It cannot be edited. Please create a tag with a different name if you want to create a custom
policy.
It doesn’t mean you can’t adjust the default policy because you can do it within the Microsoft 365 Defender portal. Let’s look at that in the next step.
Configure quarantine period to 30 days
We will show you how to set the quarantine period to 30 days in the Microsoft 365 Defender:
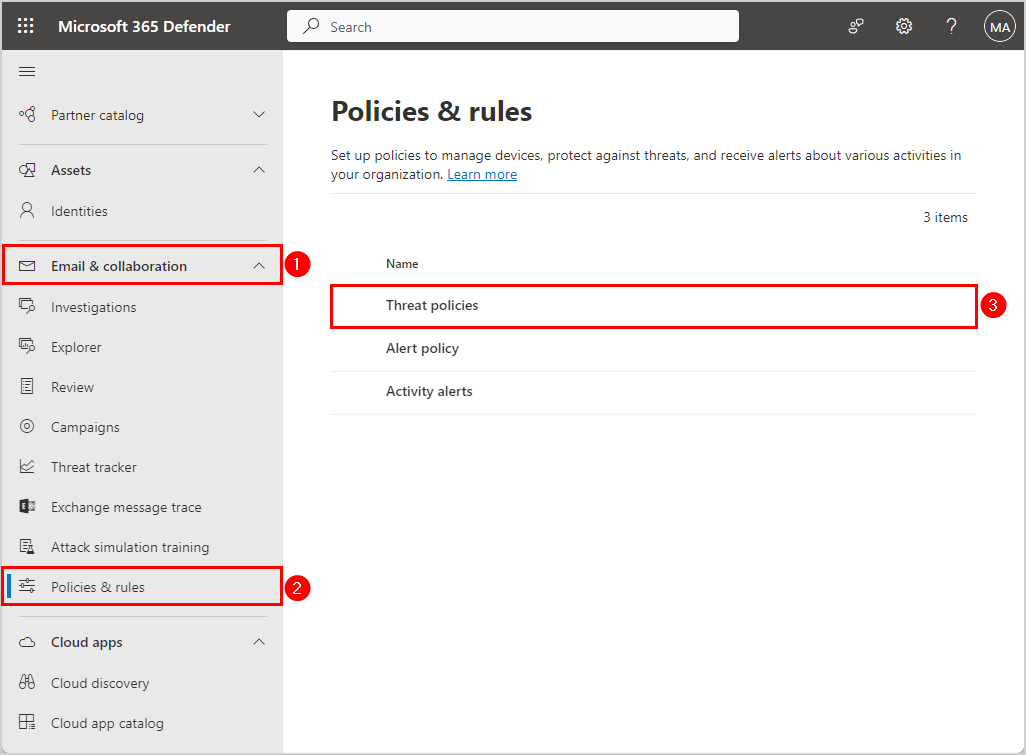
- Sign in to the Microsoft 365 Defender portal
- Click Email & collaboration > Policies & rules
- Click Threat policies
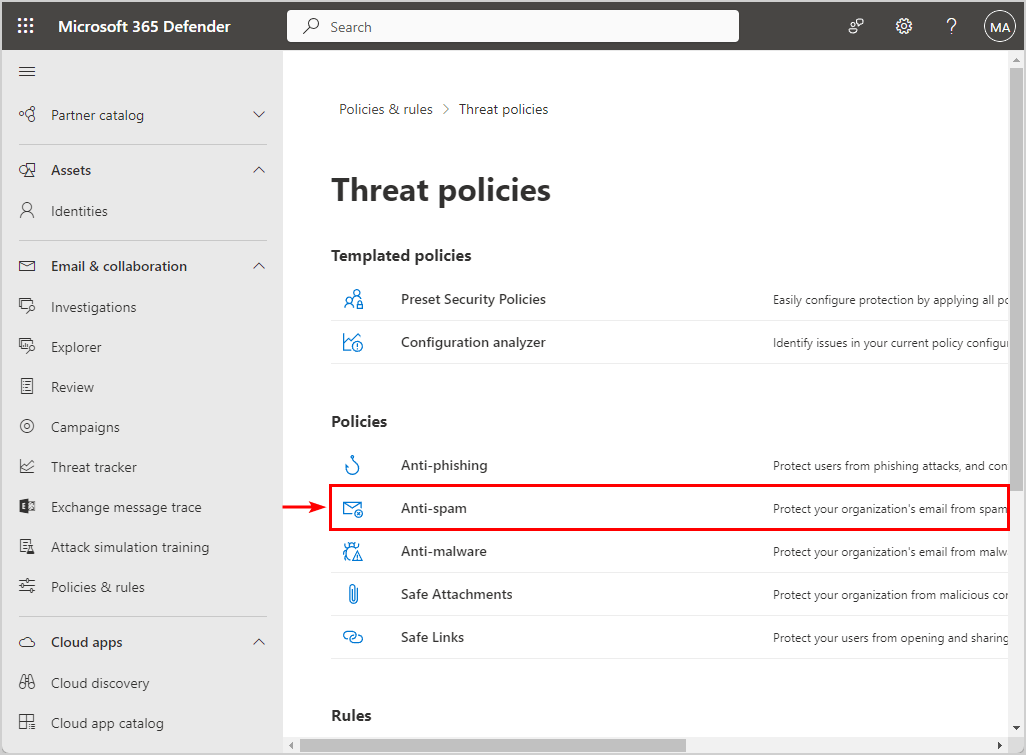
- Click Anti-spam
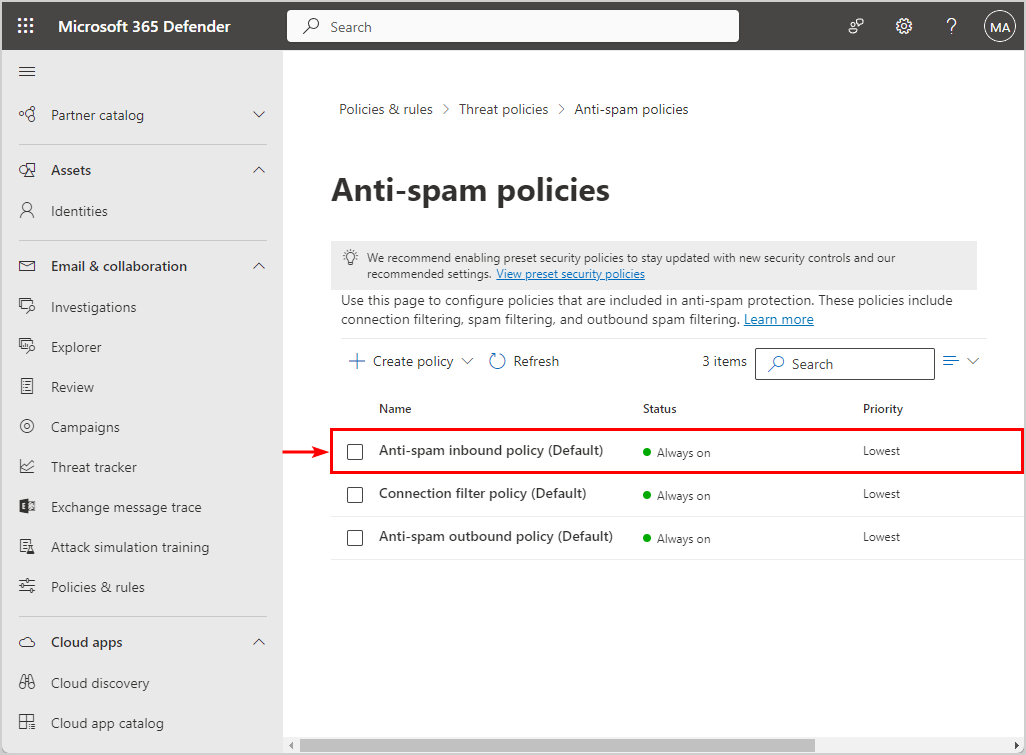
- Click Anti-spam inbound policy (Default)
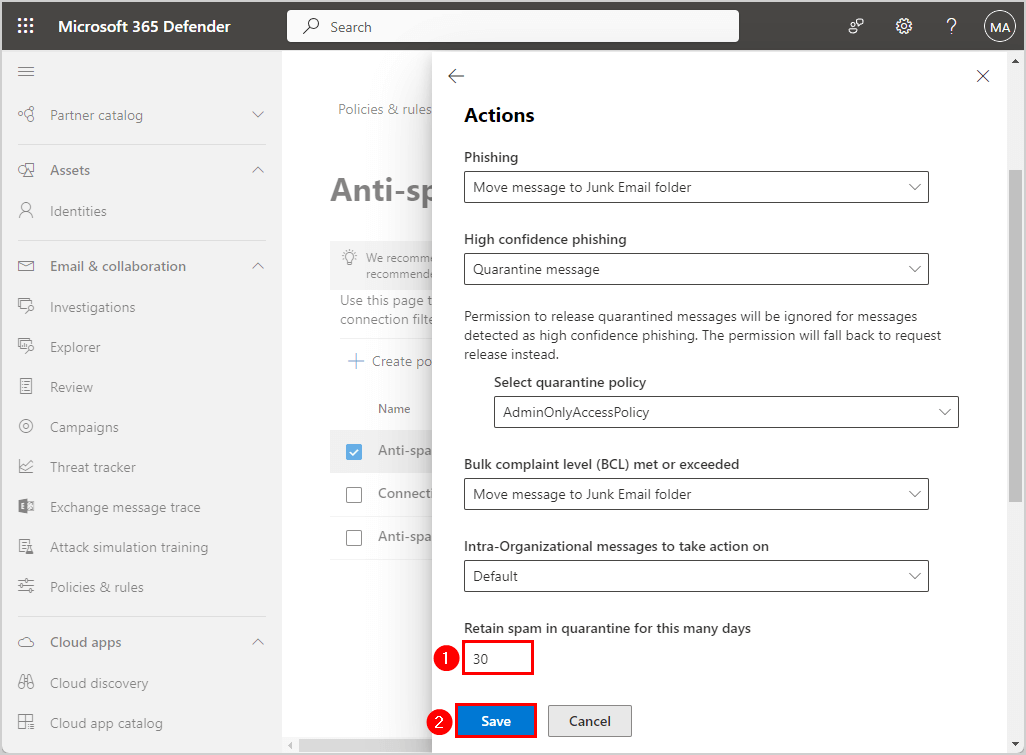
- Scroll down to Retain spam in quarantine for this many days
- Click Edit actions
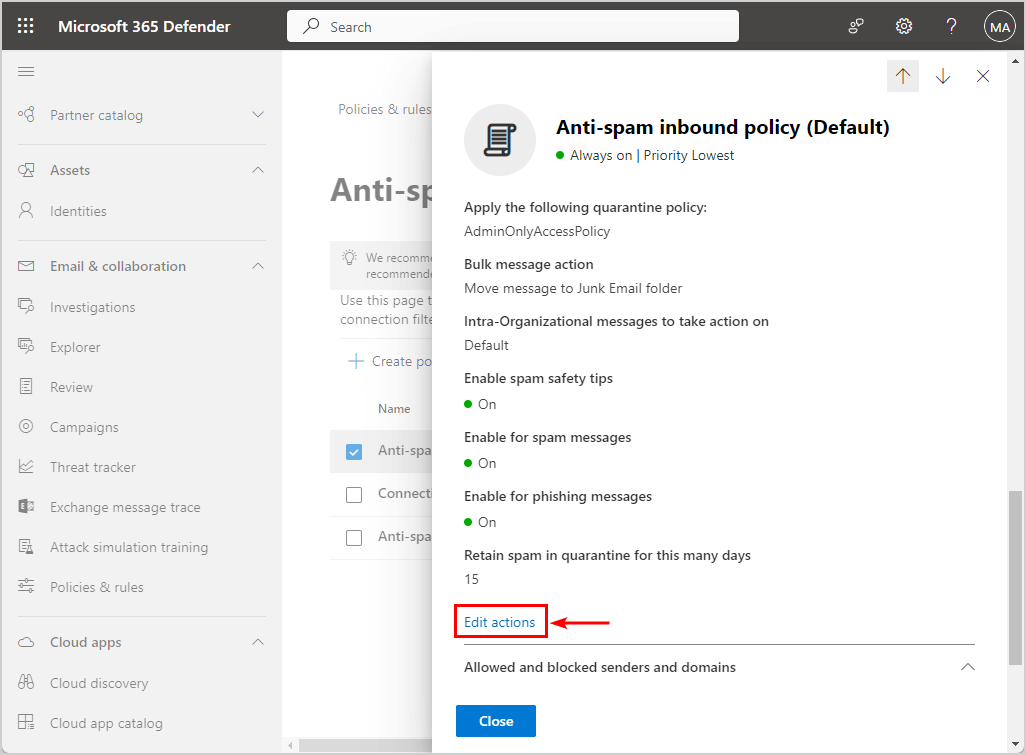
- Go to Retain spam in quarantine for this many days
- Change the number to 30
- Click Save
You successfully extended the quarantine retention period to 30 days in Microsoft 365 Defender.
Configuring the retain spam in quarantine setting and other best practices are available in the Office 365 Recommended Configuration Analyzer.
Check quarantine messages last 30 days
You can check your email messages that are quarantined for spam, phishing, malware, and other reasons.
How to check quarantine email messages:
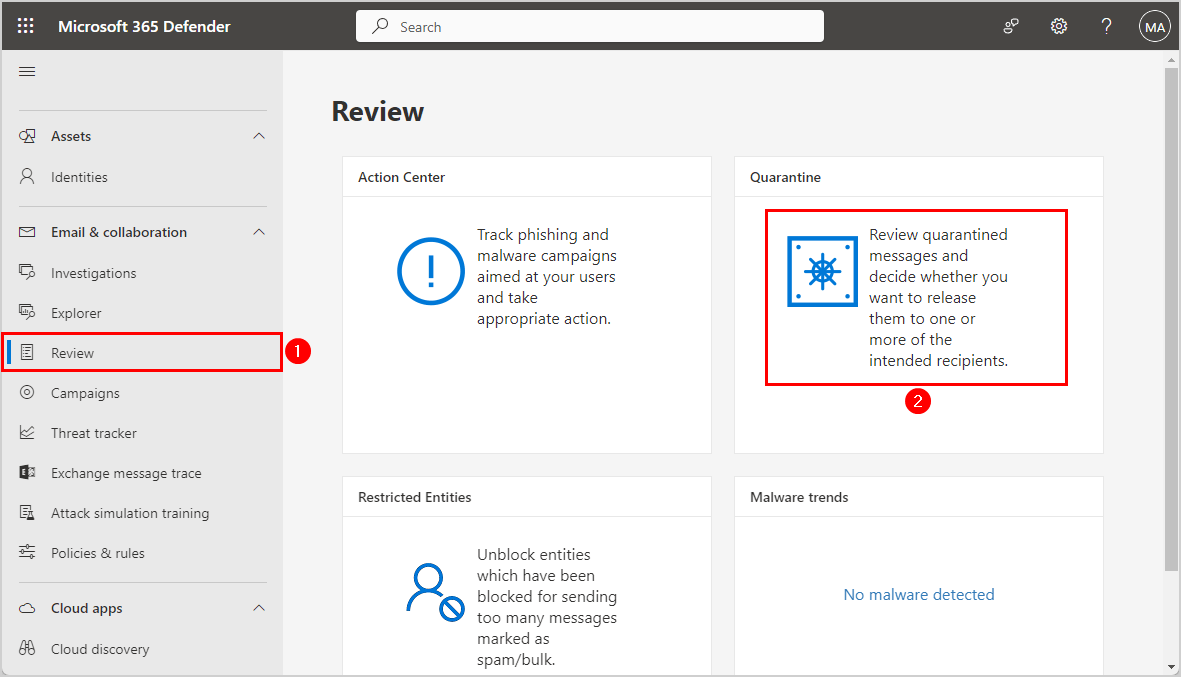
- Sign into Microsoft 365 Defender portal
- Go to Email & collaboration > Review
- Click Quarantine
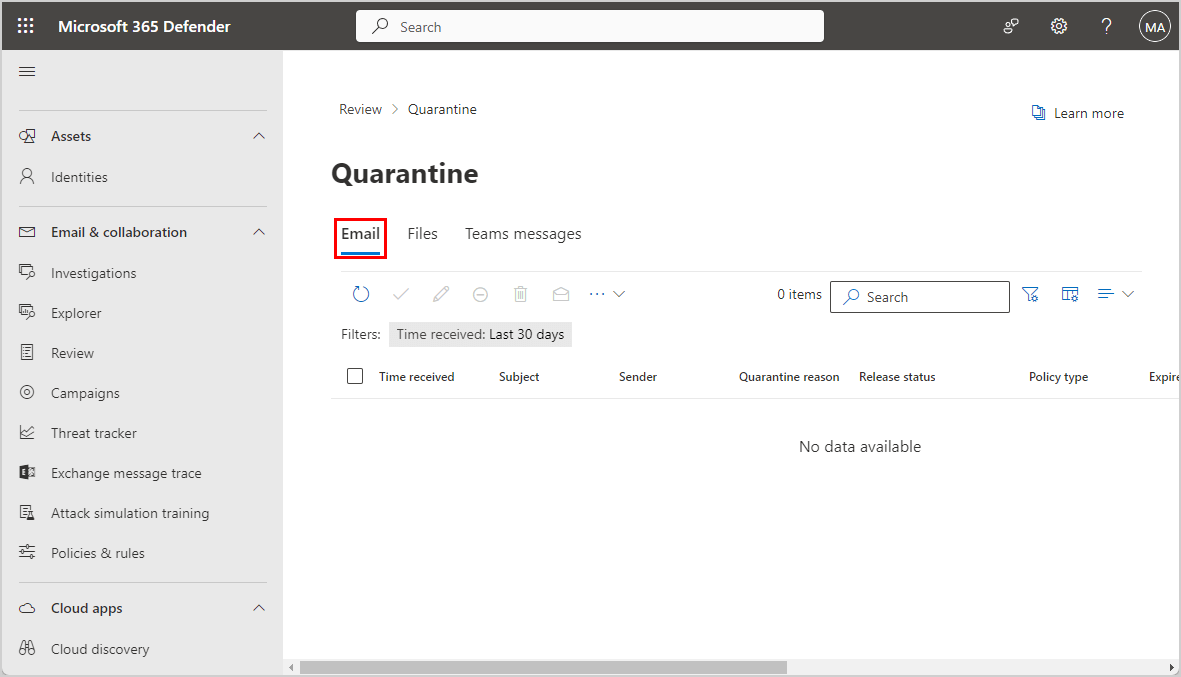
- Click the Email tab
- See the list of quarantine email messages
- Click on each email to view the message to see which actions to take
In our example, there are no quarantine messages, and the list shows no data available.
You successfully set the quarantine retention period in the Microsoft 365 security center to 30 days.
Read more: Configure DMARC record for Microsoft 365 »
Conclusion
You learned how to configure the Microsoft 365 quarantine retention period to 30 days for the default anti-spam inbound policy. Set the spam quarantine retention setting to a maximum of 30 days in the Microsoft 365 Defender portal instead of the default 15 days.
Did you enjoy this article? You may also like Unblock Microsoft 365 user sign-in. Don’t forget to follow us and share this article.
This Post Has 0 Comments