Do you want to export all Microsoft 365 mailbox storage size data? In Microsoft 365…
Connect to Microsoft Graph PowerShell
After you install the Microsoft Graph module, you can connect to Microsoft Graph PowerShell. There are different methods to connect to Microsoft Graph PowerShell. In this article, we will show you how to connect to Microsoft Graph with interactive mode, self-signed certificate, and client secret.
Table of contents
Microsoft Graph
The Azure Active Directory Graph API has been deprecated since June 30, 2023, so now you must migrate your apps to Microsoft Graph. Once you connect to Microsoft Graph, you can access Azure AD services and Microsoft 365 services.
Microsoft Graph has all the capabilities available in Azure AD Graph and new APIs like identity protection and authentication methods.
Install Microsoft Graph PowerShell module
First, you need to install the Microsoft Graph PowerShell module. The Microsoft Graph PowerShell SDK comes in 2 modules that you will install separately:
- Microsoft.Graph PowerShell module
- Microsoft.Graph.Beta PowerShell module
We recommend you update to the latest version because some of the cmdlets will not work.
Note: You need to install Microsoft Graph PowerShell module v2.x to connect with Microsoft Graph to run automated scripts.
Check Microsoft Graph PowerShell module
You can verify you have installed the Microsoft Graph PowerShell SDK and see which version the modules are running.
Run the below PowerShell commands.
Get-InstalledModule Microsoft.Graph | ft -AutoSize
Get-InstalledModule Microsoft.Graph.Beta | ft -AutoSize
The output shows which version you installed.
PS C:\> Get-InstalledModule Microsoft.Graph | ft -AutoSize
Get-InstalledModule Microsoft.Graph.Beta | ft -AutoSize

Version Name            Repository Description
------- ----            ---------- -----------
2.7.0   Microsoft.Graph PSGallery  Microsoft Graph PowerShell module


Version Name                 Repository Description
------- ----                 ---------- -----------
2.7.0   Microsoft.Graph.Beta PSGallery  Microsoft Graph PowerShell module
Update Microsoft Graph PowerShell module
You can always keep your Microsoft Graph PowerShell SDK up to date.
Run the below commands to update the Microsoft Graph and Microsoft Graph Beta modules.
Update-Module Microsoft.Graph -Force
Update-Module Microsoft.Graph.Beta -Force
After you have installed the Microsoft Graph PowerShell modules to the latest version, you can start to connect.
Three methods to connect to Microsoft Graph PowerShell
We will show you three methods to connect to Microsoft Graph PowerShell:
- Interactive mode (delegated access)
- Certificate Based Authentication (CBA)
- Client secret (password)
The first method is the easiest as you only need to connect with PowerShell. The other two methods are similar because it requires creating a new application in Azure AD. The difference between method 2 and 3 is that there are two ways to authenticate your newly created application in Azure Active Directory.
We will show you both ways but recommend to add a certificate (CBA) rather than a client secret for your application because they are not as secure.
1. Connect MgGraph with interactive mode
The first method is the quickest and easiest way to connect to Microsoft Graph API with PowerShell.
- Open PowerShell as administrator and run the below command.
Connect-MgGraph- Sign in with your admin credentials.
- If you have MFA enabled, you will get a verification code sent as a text message or to your Authentication app on your phone. If your MFA is disabled, you will not do anything here.
Now you must go back to the PowerShell windows, where you get this below output.
PS C:\> Connect-MgGraph
Welcome To Microsoft Graph!
Note: You can’t run automated scripts, but it is usable for testing or to run a script.
If you like to run an automated task, you should use the next method.
2. Connect MgGraph with Certificate Based Authentication
Before we can connect to Microsoft Graph with PowerShell, you need to register an application in Azure AD and assign API permissions. Then we will create a self-signed certificate to the application.
Register new application in Azure AD
First, you need to register an application, where you will get the Application (client) ID and Directory (tenant) ID.
Time needed: 10 minutes
How to register a new application in Microsoft Entra admin center:
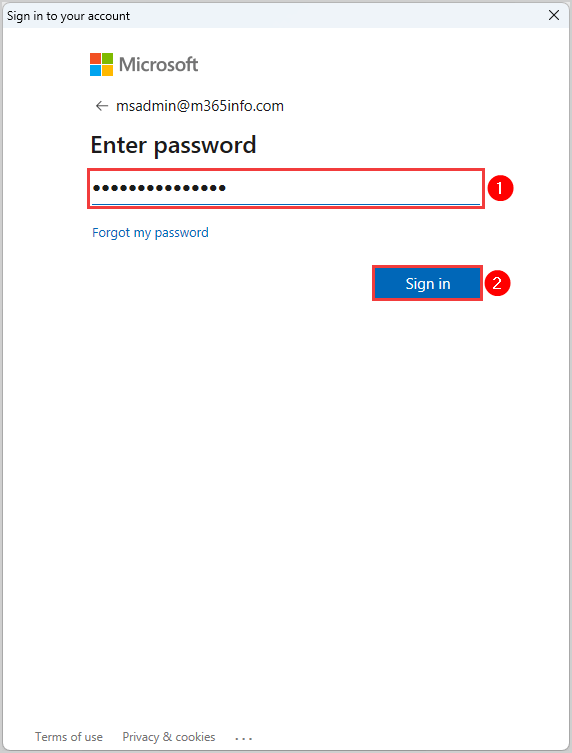
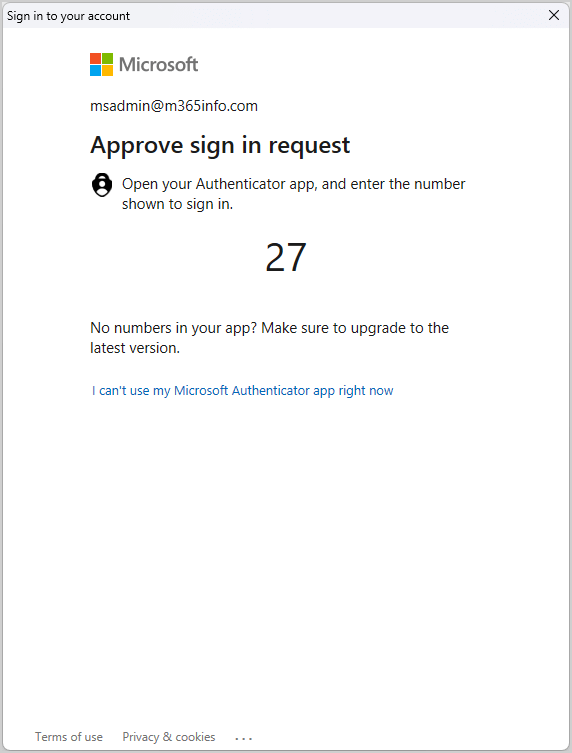
- Sign into Microsoft Entra admin center.
Sign in with your admin credentials
- Go to Azure Active Directory.
Click on Applications > App registrations
Click New registration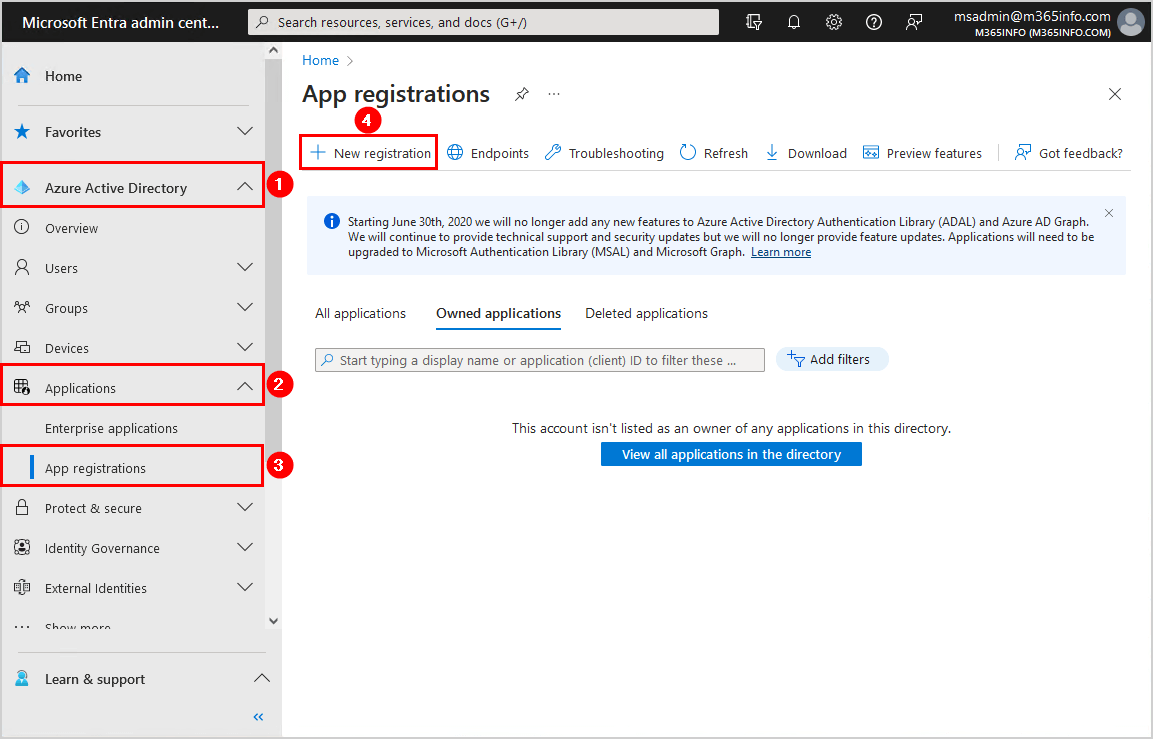
- Register an application.
Name your application MSGraph bot
Select Accounts in this organizational directory only (- Single tenant)
Click Register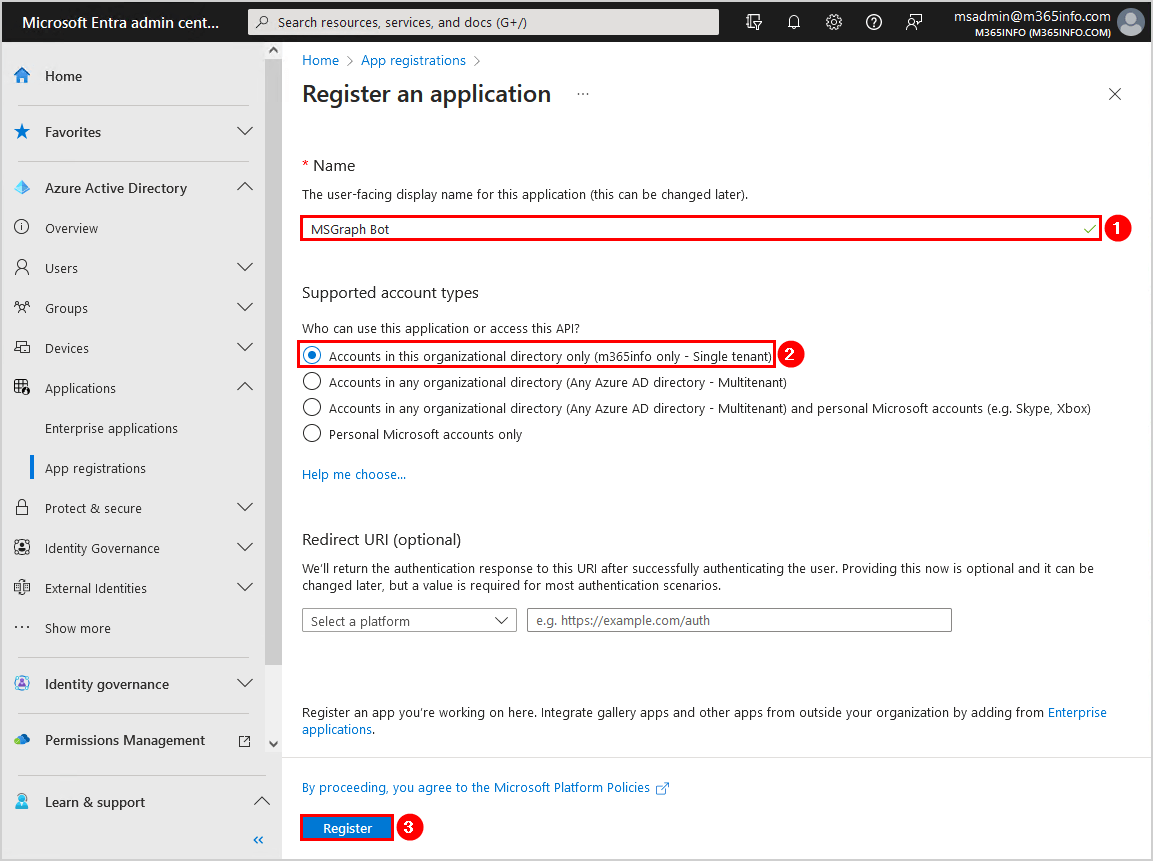
- Successfully created application MSGraph bot.
You will be redirected to the MSGraph bot overview page
Copy the Application ID and Directory ID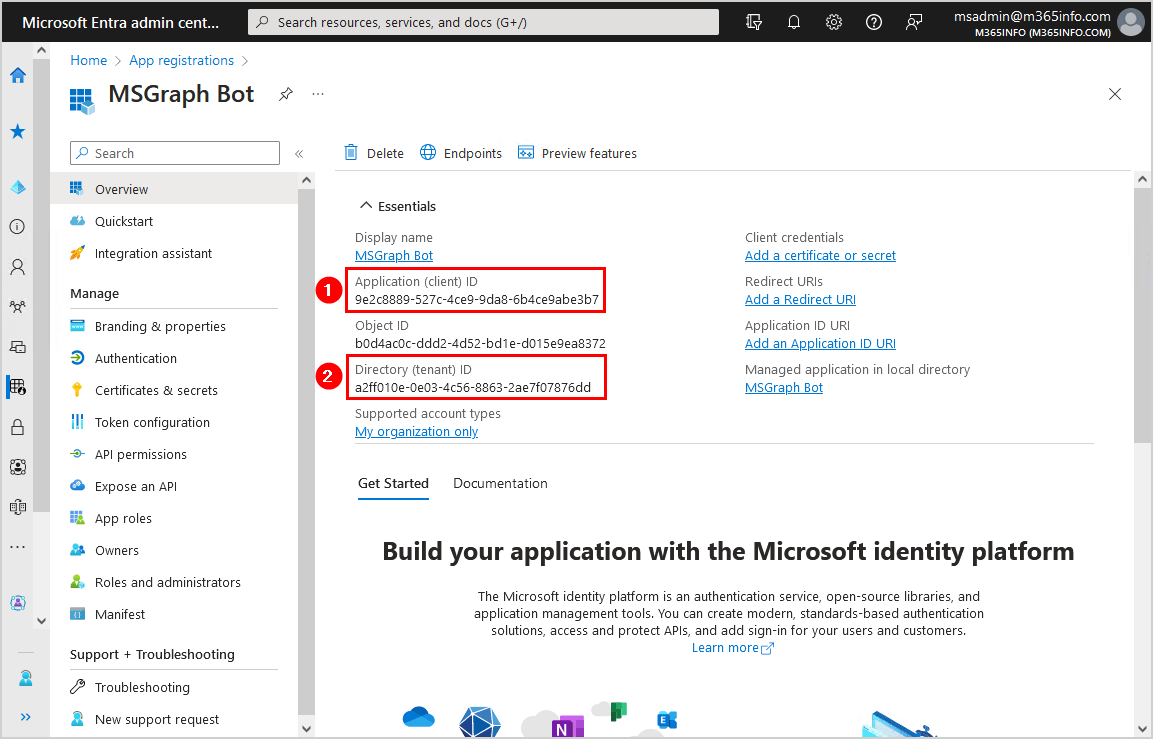
You need to copy the below values and paste them into Notepad because you need them later when connecting to Microsoft Graph:
- Application (client) ID
- Directory (tenant) ID
Assign API permissions
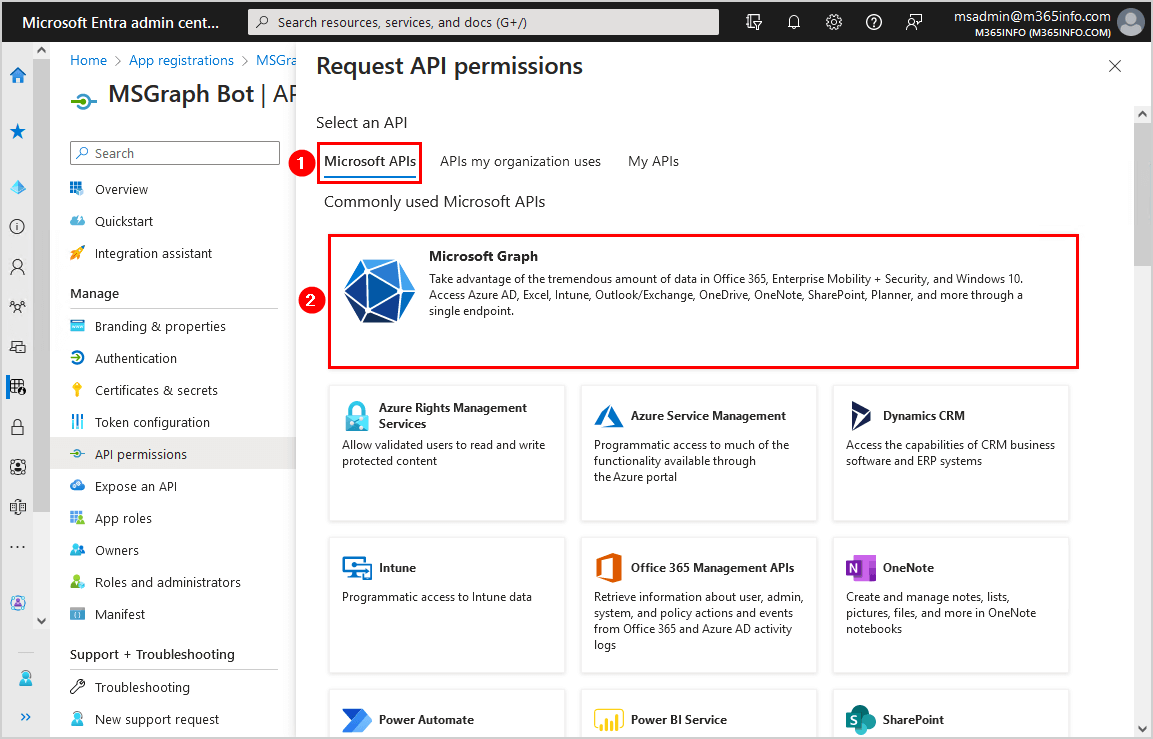
You must assign API permissions to the MSGraph bot application you created.
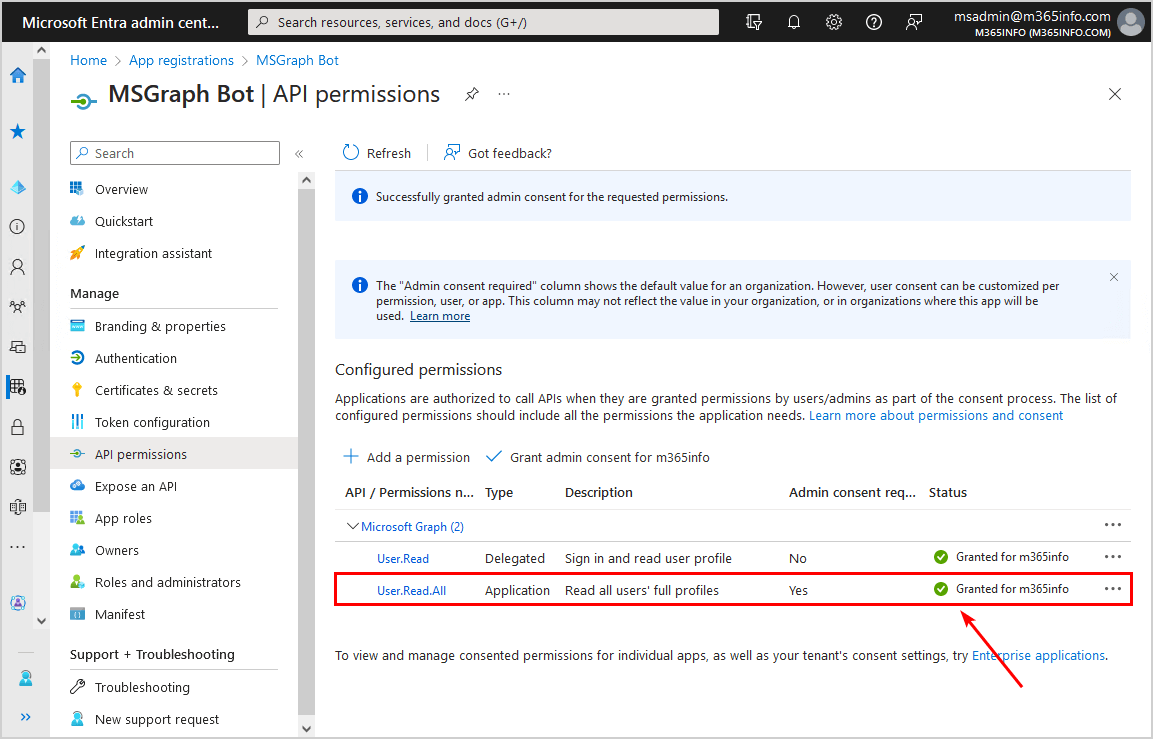
- Click API permission
- Click Add a permission

- Under the tab Microsoft APIs
- Click Microsoft Graph
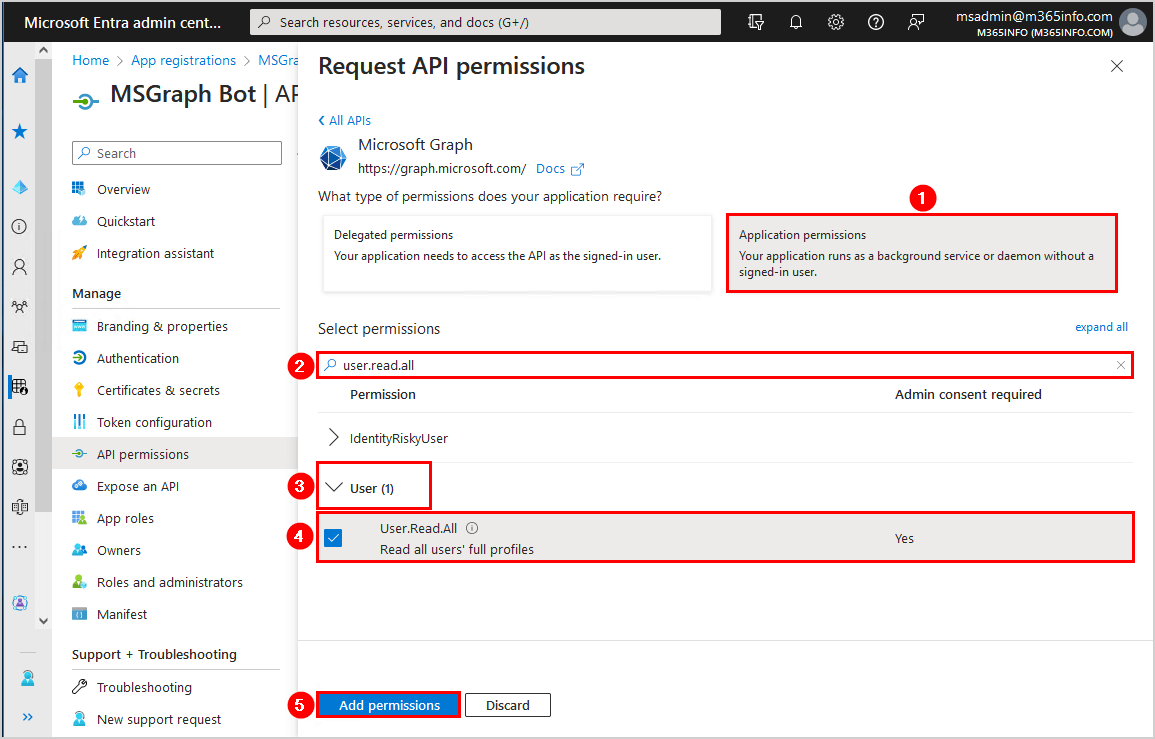
- Click Application permissions
- Search for User.Read.All
- Select User > User.Read.All
- Click Add permissions
- Click Grant admin consent for m365info
- Click Yes
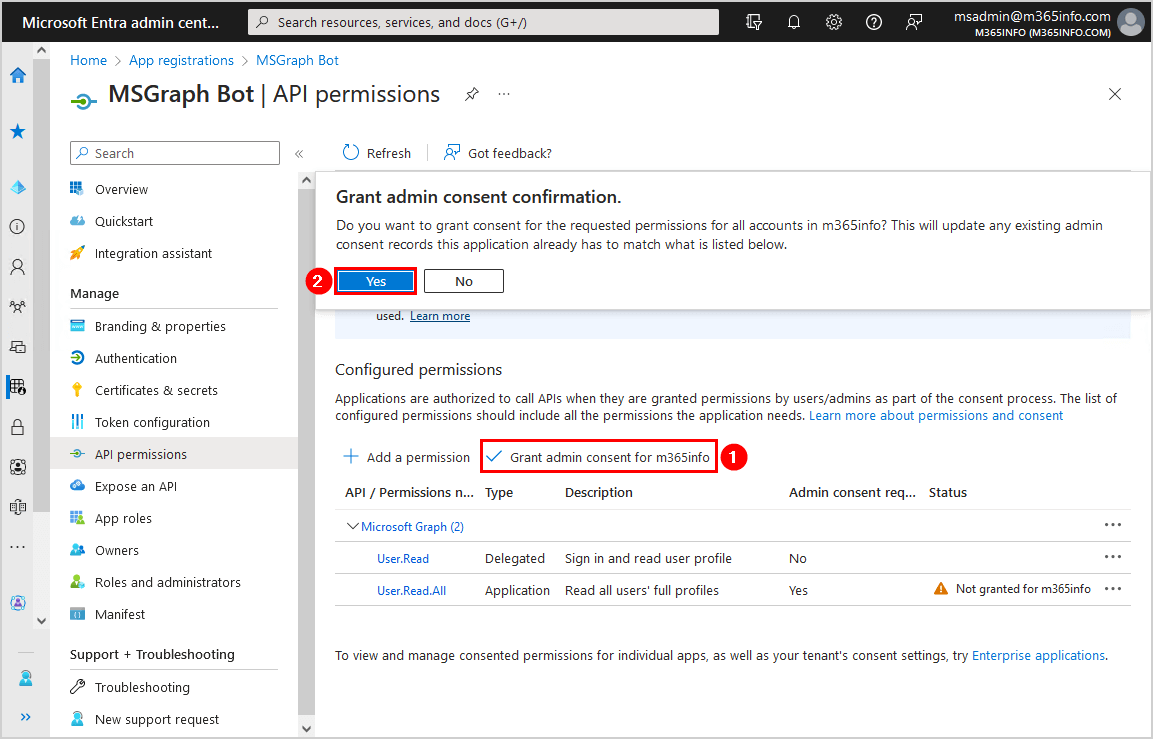
A green check mark appears that you granted admin consent successfully!
Create self-signed certificate
Once you created a new application, you can use a self-signed certificate to upload a .pfx file and .cer file to Azure AD.
First, you need to generate a self-signed certificate. It’s better to make the certificate on the same machine you want to run the unattended PowerShell script.
Log into any Windows Server or Desktop with Windows PowerShell as administrator.
Note: Self-signed certificate is valid for one year by default
In our example, we will add 5 years to the self-signed certificate to avoid yearly renewal.
Use the below PowerShell cmdlet to create a new self-signed certificate.
$mycert = New-SelfSignedCertificate -DnsName "m365info.com" -CertStoreLocation "cert:\LocalMachine\My" -NotAfter (Get-Date).AddYears(5) -KeySpec KeyExchange -FriendlyName "MSGraph Bot"The certificate is now stored, To view the thumbprint, use the below PowerShell cmdlet.
$mycert | Select-Object -Property Subject,Thumbprint,NotBefore,NotAfterCopy the Thumbprint and paste it into Notepad. You will need it later when you connect to Microsoft Graph PowerShell with CBA.
PS C:\> $mycert | Select-Object -Property Subject,Thumbprint,NotBefore,NotAfter

Subject         Thumbprint                               NotBefore             NotAfter
-------         ----------                               ---------             --------
CN=m365info.com 03D55A7B5A29D571BDEB21F1079541F130F93B26 7/19/2023 11:49:38 AM 7/19/2028 11:59:38 AM
Export to .cer file with PowerShell
We want to create a .cer file to upload later in Azure AD application. With a .cer file you can only connect to Microsoft Graph from the machine where the self-signed certificate is generated.
Create a folder named temp to save it in the C:\temp.
Use the below PowerShell cmdlet to export the certificate to .cer file.
$mycert | Export-Certificate -FilePath "C:\temp\MSGraphBot.cer"You will see the below output in PowerShell.
PS C:\> $mycert | Export-Certificate -FilePath "C:\temp\MSGraphBot.cer"


    Directory: C:\temp


Mode                LastWriteTime         Length Name
----                -------------         ------ ----
-a----        7/19/2023  12:00 PM            805 MSGraphBot.cer
You can find the .cer file on your computer in C:\temp.
Export to .pfx file
We will also create a .pfx file so that you can connect to Microsoft Graph from any machine. You can copy or send a .pfx file to a person so it can be installed on another machine, because the .pfx file will be retrieved during the authentication process.
$mycert | Export-PfxCertificate -FilePath "C:\temp\MSGraphBot.pfx" -Password $(ConvertTo-SecureString -String "P@ssw0Rd1234" -AsPlainText -Force)See the below output.
PS C:\> $mycert | Export-PfxCertificate -FilePath "C:\temp\MSGraphBot.pfx" -Password $(ConvertTo-SecureString -String "P@ssw0Rd1234" -AsPlainText -Force)


    Directory: C:\temp


Mode                LastWriteTime         Length Name
----                -------------         ------ ----
-a----        7/19/2023  12:02 PM           2709 MSGraphBot.pfx
You can find the .pfx file on your computer in C:\temp.
Upload certificate to app
Now we need to upload the self-signed certificate you created earlier.
From the MSGraph bot overview:
- Click Certificates & secrets
- Select Certificates
- Click Upload certificate
- Click on the browse icon to search in C:\temp and select the MSGraphBot.cer file
- Add description MSGraph bot
- Click Add
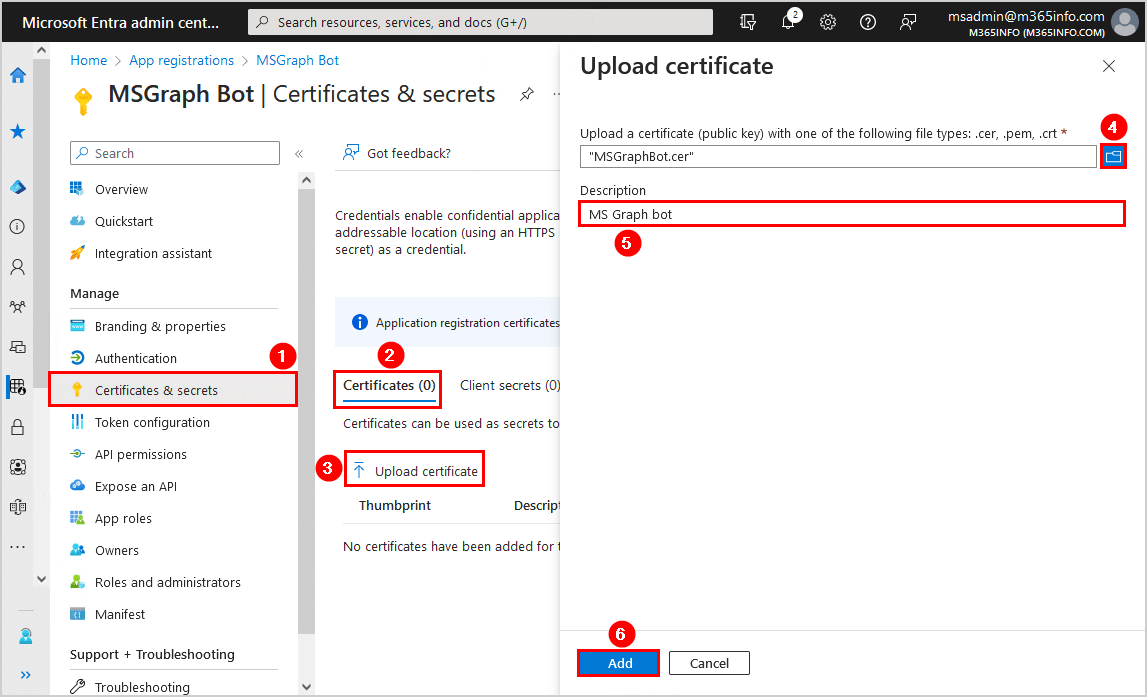
The certificate appears in the list with the thumbprint.
Note: Always ensure it has the same certificate thumbprint as the one you created previously.

Connect to Microsoft Graph with CBA
Type the below information to connect to Microsoft Graph PowerShell with Certificate Based Authentication:
- Fill in the App ID in line number 1
- Fill in the Tenant ID in line number 2
- Fill in the Certificate Thumbprint in line number 3
Run the below PowerShell script to connect to Microsoft Graph with CBA.
# Configuration
$ClientId = "9e2c8889-527c-4ce9-9da8-6b4ce9abe3b7"
$TenantId = "a2ff010e-0e03-4c56-8863-2ae7f07876dd"
$CertificateThumbprint = "03D55A7B5A29D571BDEB21F1079541F130F93B26"

# Connect to Microsoft Graph with CBA
Connect-MgGraph -ClientId $ClientId -TenantId $TenantId -CertificateThumbprint $CertificateThumbprint
You are connected to Microsoft Graph. An excellent way to verify is to run the below cmdlet.
Get-MgUser3. Connect MgGraph with Client Secret app
In the last method, we will show you how to create a Client Secret to the newly created application.
Register new application in Azure AD
See the above steps to register a new application in Azure. In our example, we will use the same application we created earlier.
Assign API permissions
See the above steps to assign API permissions to the Azure application. In our example, we already assigned API permissions to the application we created earlier.
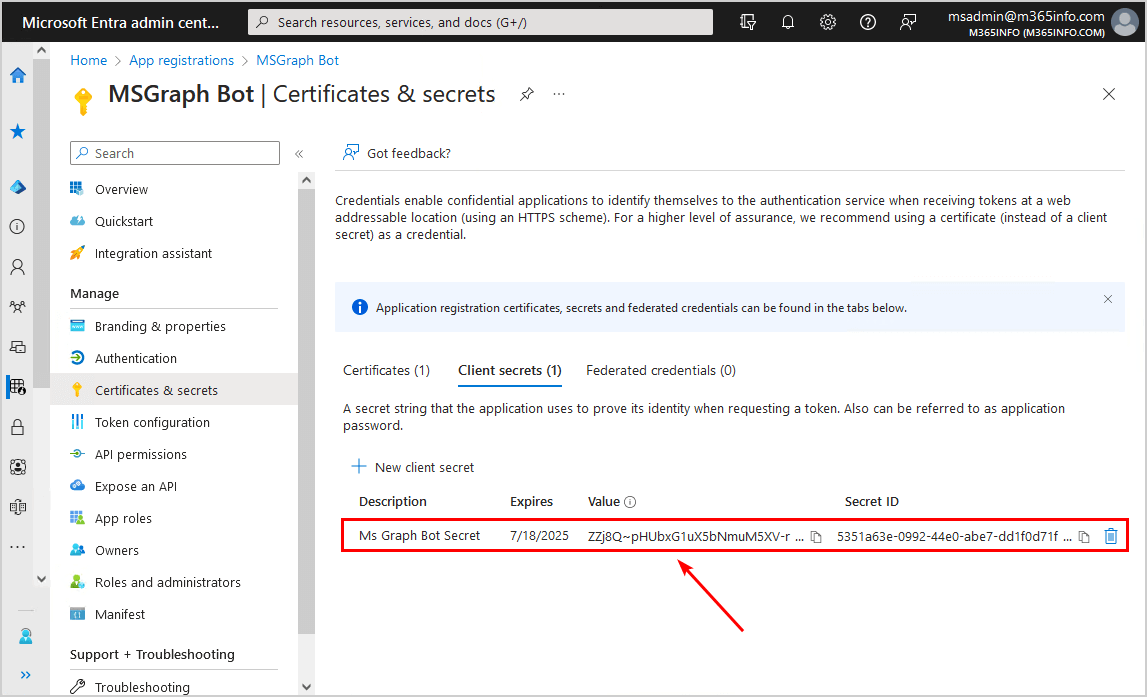
Create client secret
Go to the MSGraph bot application overview page in Azure AD.
To create a Client Secret for your application in Microsoft Entra portal, follow these steps:
- Click on Certificates & secrets
- Click Client secrets > New client secret
- Type the description
- Select an expiration date
- Click Add
Note: The Client Secret expiration date has a maximum of 24 months (2 years). You can Create unlimited Client Secret in Microsoft Entra ID with PowerShell.

- Copy the client secret Value and save it
Note: Client secret values cannot be viewed except immediately after creation. Remember to save the secret when created before leaving the page.
Connect to Microsoft Graph with Client Secret
You need to change the below parameters values to connect to MS Graph with Client Secret:
- Type the Application Client ID in line number 2
- Type the Directory Tenant ID in line number 3
- Type the Client Secret Value in line number 4
Run the below PowerShell script.
# Configuration
$ClientId = "9e2c8889-527c-4ce9-9da8-6b4ce9abe3b7"
$TenantId = "a2ff010e-0e03-4c56-8863-2ae7f07876dd"
$ClientSecret = "ZZj8Q~pHUbxG1uX5bNmuM5XV-rQb20tiWHEEkbsO"

# Convert the client secret to a secure string
$ClientSecretPass = ConvertTo-SecureString -String $ClientSecret -AsPlainText -Force

# Create a credential object using the client ID and secure string
$ClientSecretCredential = New-Object -TypeName System.Management.Automation.PSCredential -ArgumentList $ClientId, $ClientSecretPass

# Connect to Microsoft Graph with Client Secret
Connect-MgGraph -TenantId $TenantId -ClientSecretCredential $ClientSecretCredential
You are connected to Microsoft Graph. An excellent way to verify is to run the below cmdlet.
Get-MgUserThat’s it! You successfully connected to Microsoft Graph PowerShell!
Read more: Configure Certificate-Based Authentication to run automated scripts »
Conclusion
You learned how to connect to Microsoft Graph PowerShell with a self-signed certificate, client secret, and interactive mode. Remember to update MS Graph module to the latest version, create an application and assign API permissions if you connect with client secret or CBA. With CBA, there is no more user interactions, usernames, passwords, or MFA involved to run automated scripts.
Did you enjoy this article? You may also like Assign Microsoft 365 licenses with group-based licensing. Don’t forget to follow us and share this article.
This Post Has 0 Comments