If you send an email within the Microsoft 365 organization, you can recall the message…
How to improve Microsoft Entra MFA security
It’s necessary to protect your organization and have strong security to prevent MFA fatigue. That’s why you need to increase and improve MFA security for the tenant. To secure your MFA sign-ins, enable the features number matching, application name, and geographic location. In this article, you will learn to increase and improve Microsoft Entra MFA security in your Microsoft 365 tenant.
Table of contents
Configure MFA in Microsoft Entra
Before you start, you need to Configure MFA in Microsoft Entra with Conditional Access policy. Otherwise, the user or users will not have MFA security enabled correctly, and the below MFA security configuration will not work.
Note: Configure Microsoft Entra Multi-Factor Authentication for all users and exclude service accounts. It requires having Microsoft Entra ID P1 or Microsoft Entra ID P2.
Microsoft Entra MFA Security best practices
Enable the following three options in Microsoft Entra to increase and improve your Microsoft Entra MFA security:
- Require number matching for push notifications
When a user gets a notification to enter the number in the Microsoft Authenticator app.
- Show application name in push and passwordless notifications
The user receives a passwordless phone sign-in or MFA push notification in Microsoft Authenticator. They will see the application’s name that requests approval from where the sign-in is made.
- Show geographic location in push and passwordless notifications
The user receives a passwordless phone sign-in or MFA push notification in Microsoft Authenticator. The user will see a geographic location map that requests approval from where the sign-in is made.
Let’s see how to enable these three features in the next step.
Note: Microsoft will enforce MFA number matching by default for all Microsoft Authenticators users after May 8, 2023.
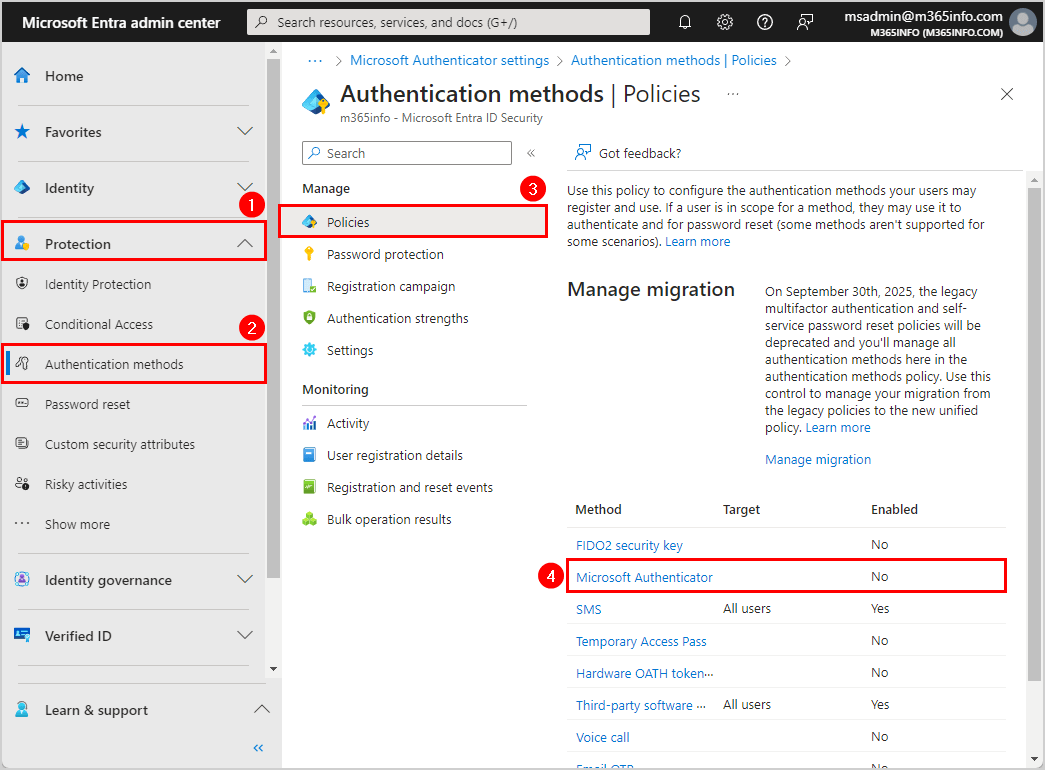
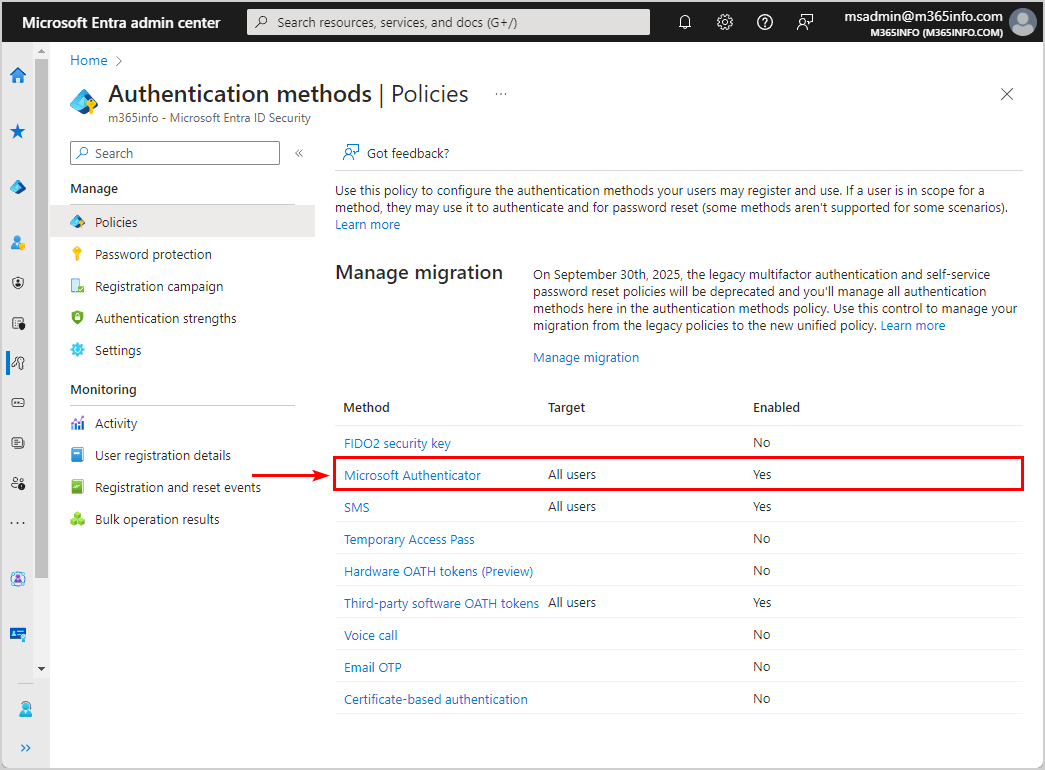
Enable Microsoft Authenticator for all users
To enable Microsoft Authenticator in Microsoft Entra admin center, follow the below steps:
- Sign in to Microsoft Entra admin center
- Expand Protection > Authentication methods
- Click Policies
- Click Microsoft Authenticator
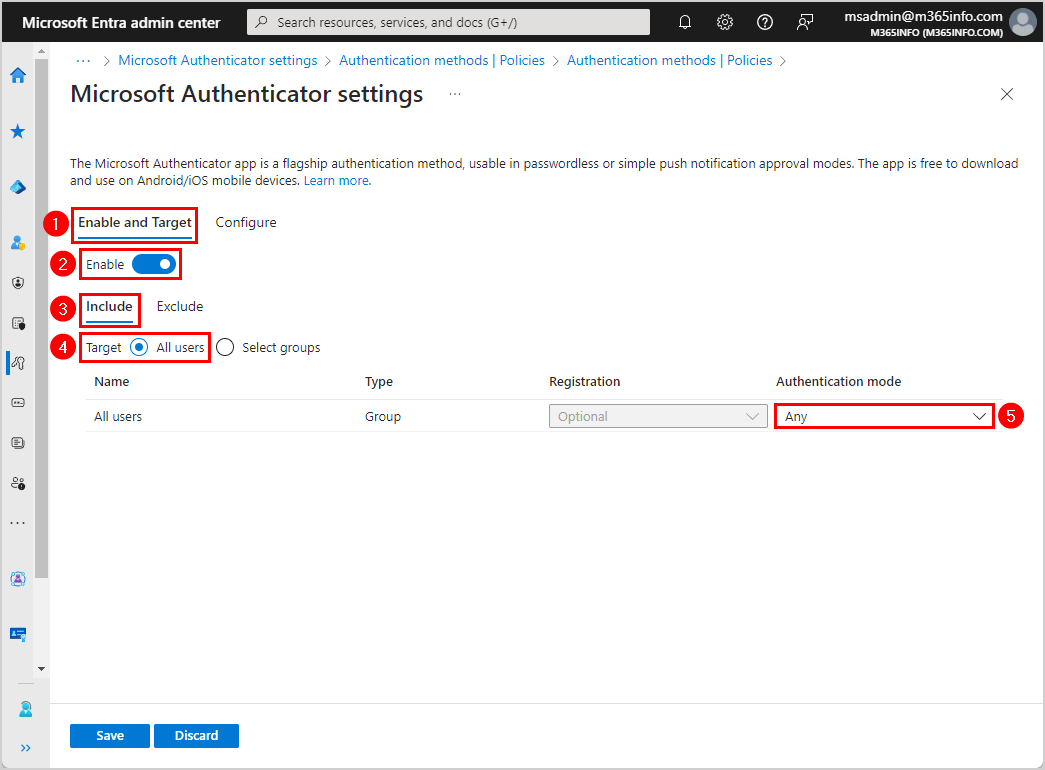
- Click the tab Enable and Target
- Enable > On
- Click the tab Include
- Select All users
- Authentication mode > Any
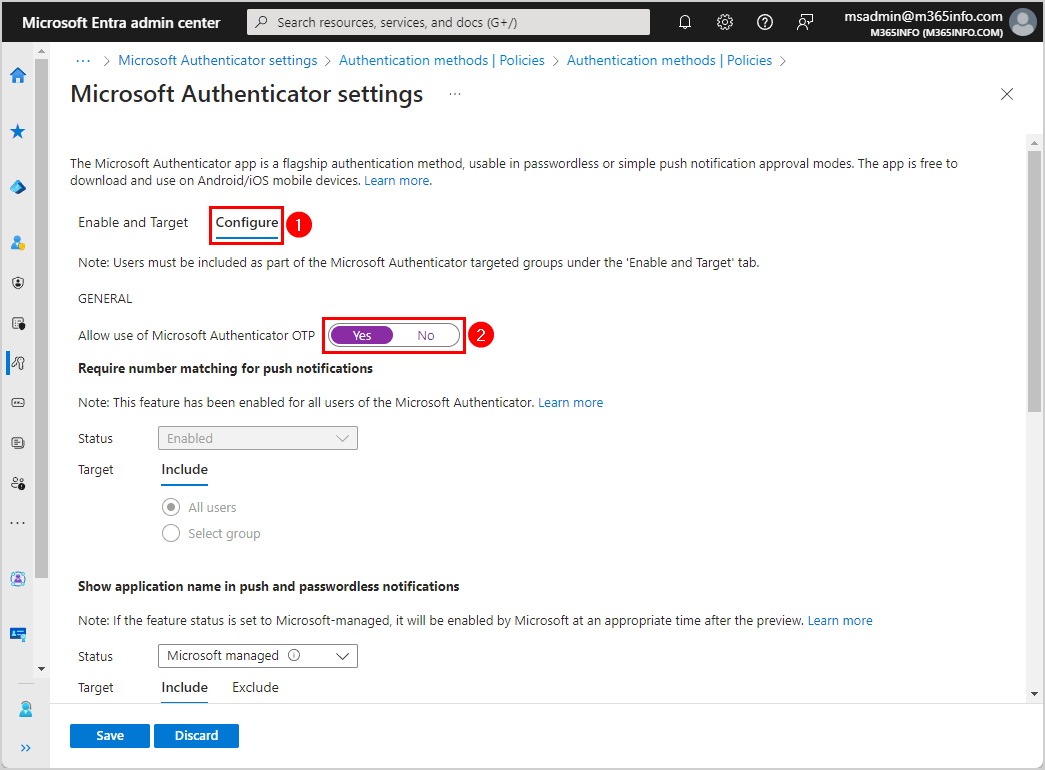
- Click the tab Configure
- Allow use of Microsoft Authenticator OTP > Yes
Note: Number Matching is enabled for all users of the Microsoft Authenticator app starting 27th of February 2023.
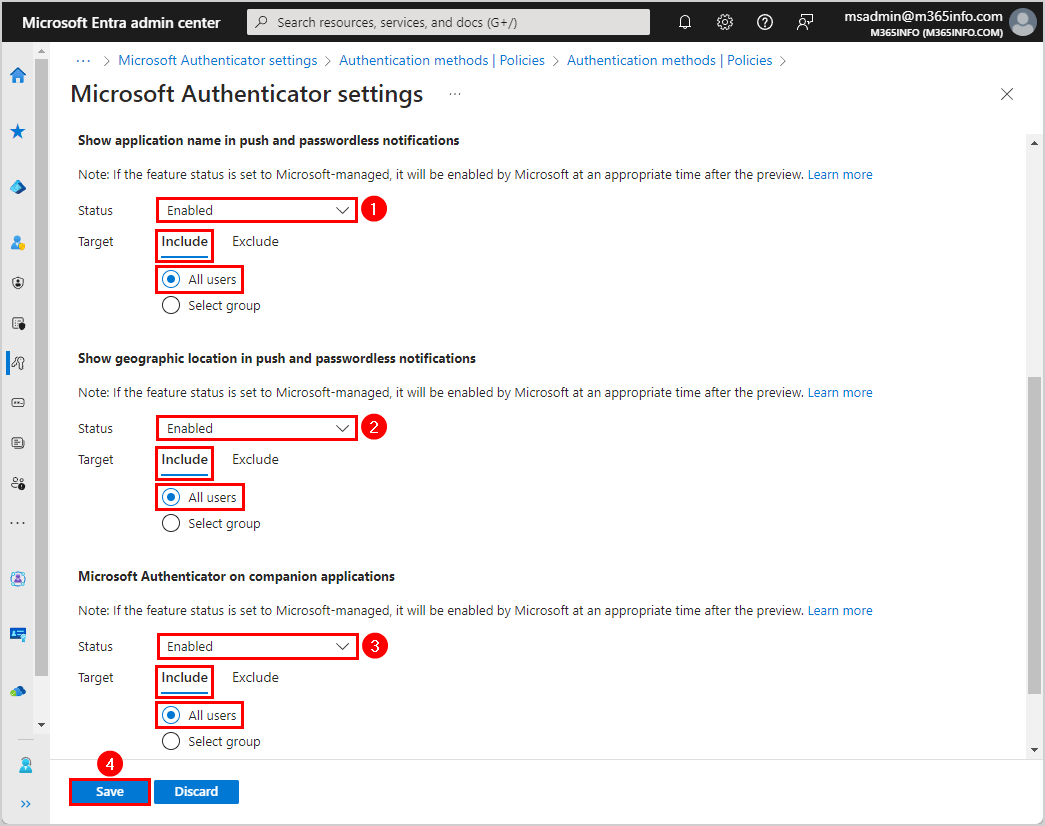
- Go to each one of the features:
- Show application name in push and passwordless notifications
- Show geographic location in push and passwordless notifications
- Microsoft Authenticator on companion applications
Change the below settings for all three features:
- Status > Enabled
- Target: Include > All users
- Click Save
- The policy was successfully saved notification appears, and the Microsoft Authenticator method shows the target (all users) and status (enabled)
It’s always essential to test the configuration once it’s active. Let’s look into that in the next step.
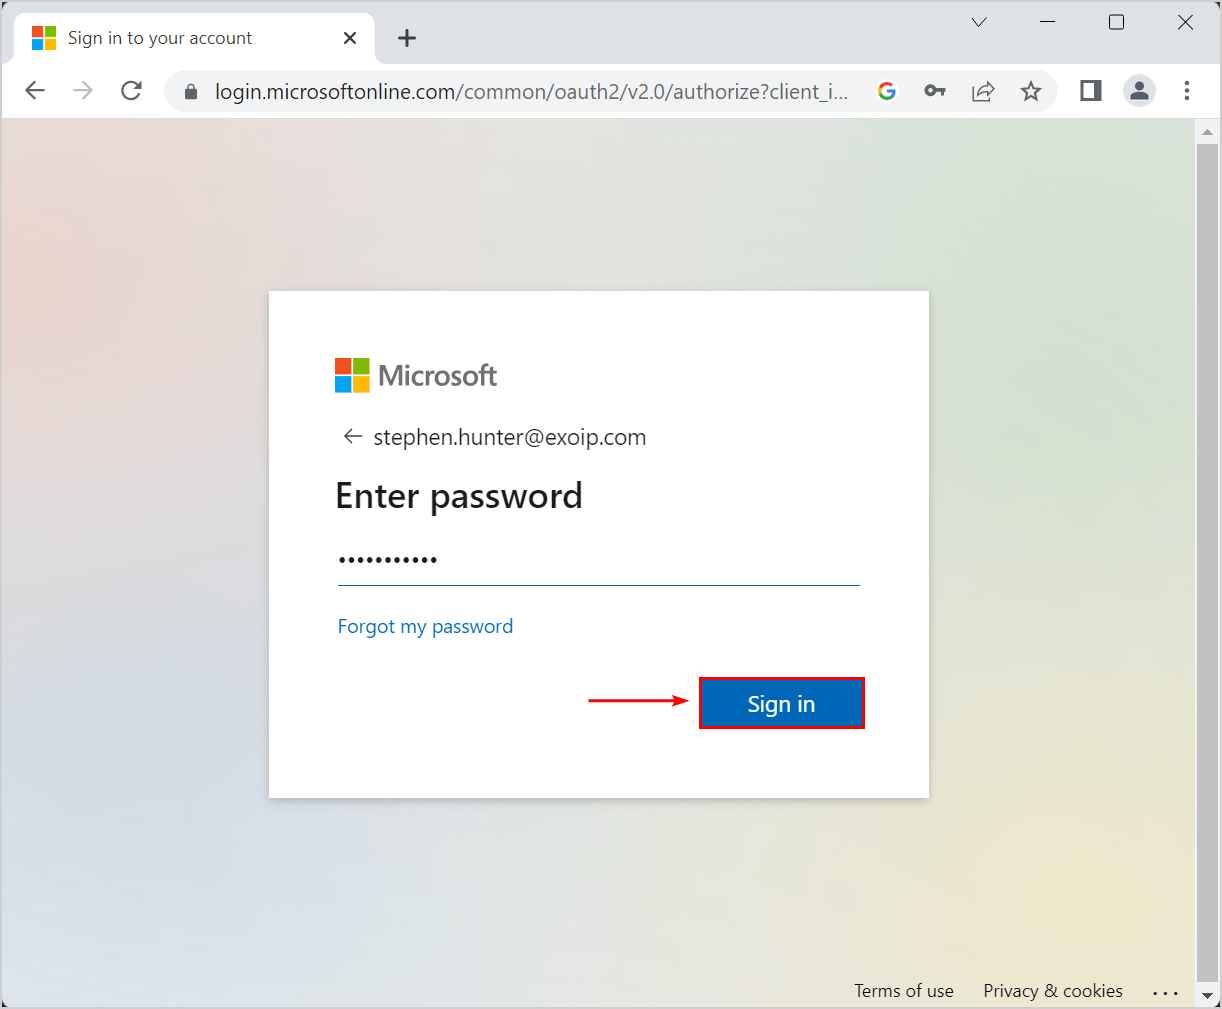
Check Microsoft Entra MFA security configuration
To ensure you enabled all three Microsoft Authenticator features correctly, follow the steps below:
- Sign in to Microsoft Office
- Type your user account and password
- Click Sign in
Note: The account needs to be MFA enabled, and the Authenticator app needs to be installed on the mobile device.
- A random number will display, which you need to enter in the Authenticator app
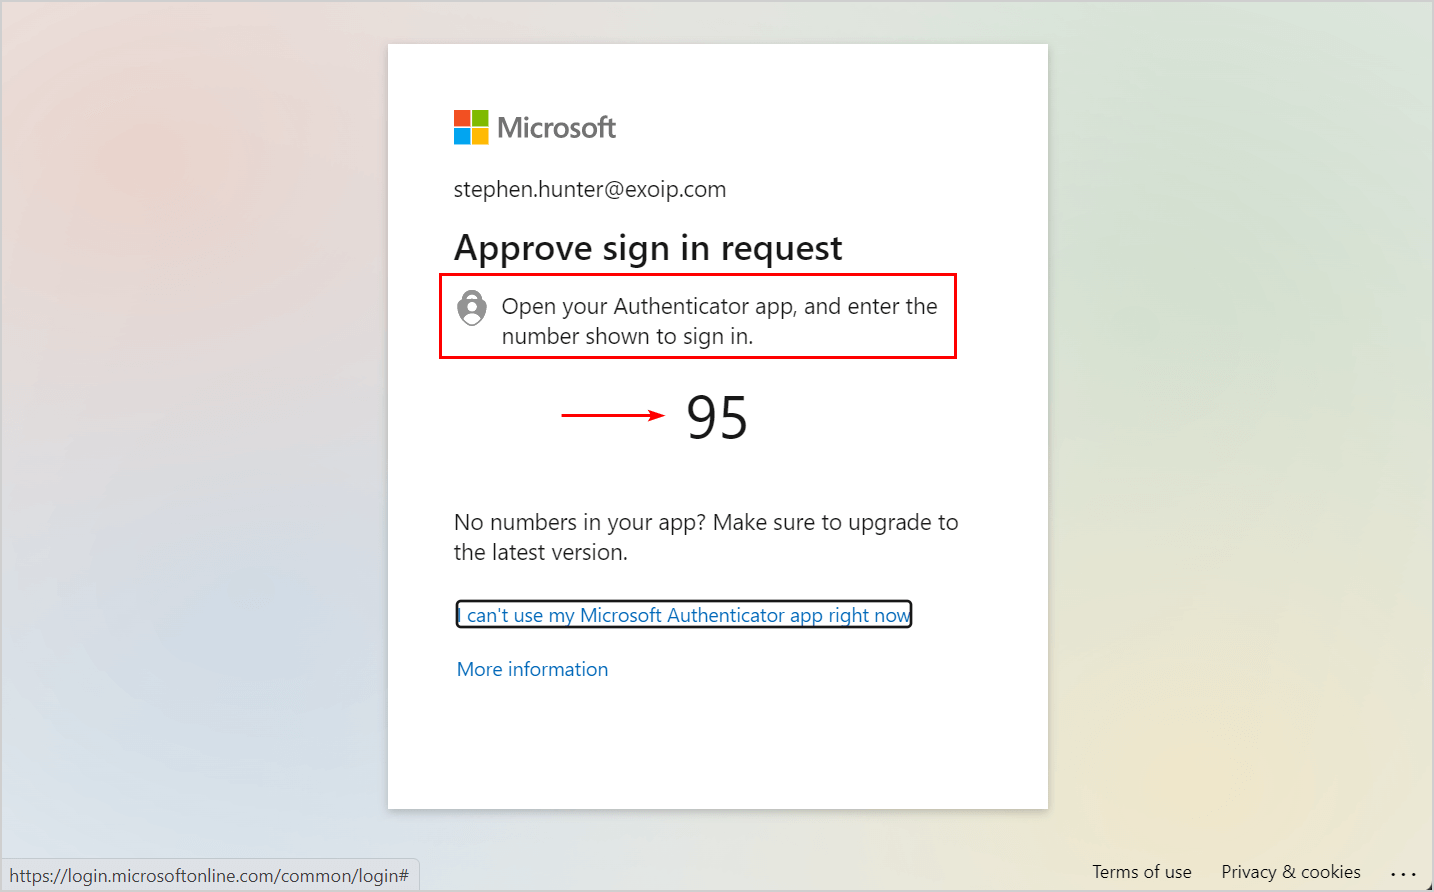
- Enter the number in the Authenticator app
- Tap on Yes
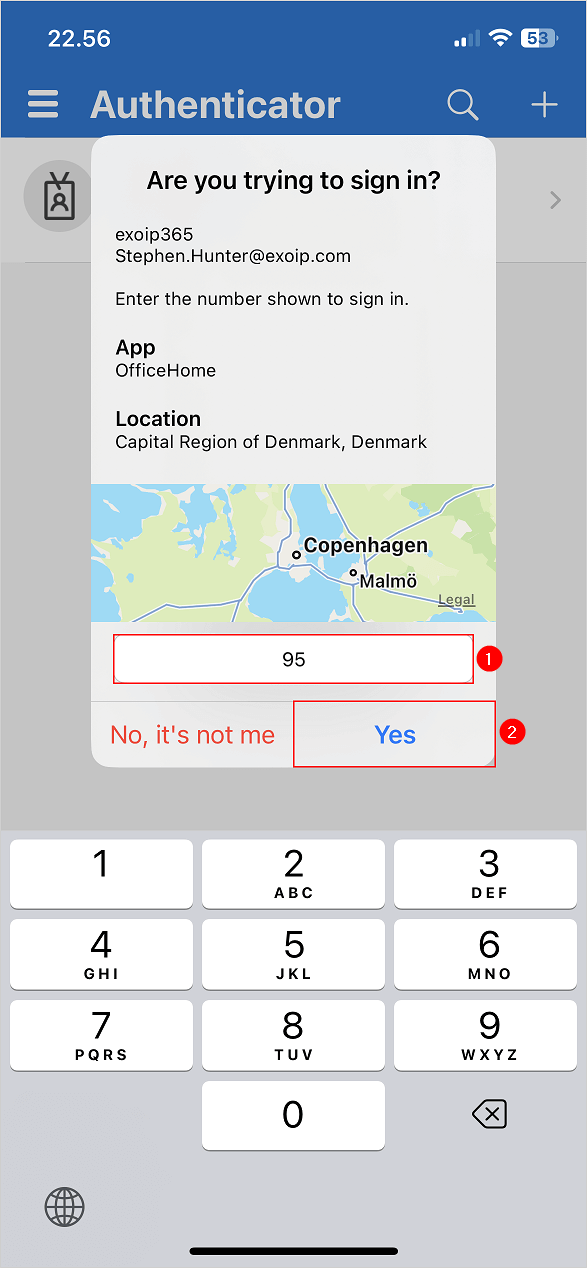
- You successfully signed in to your Microsoft 365 account with Microsoft Entra MFA security protection enabled
That’s it!
Read more: How to save sent items in shared mailbox »
Conclusion
You learned how to increase and improve Microsoft Entra MFA security. We recommend enabling number matching, application name, and geographic location to protect your organization.
Did you enjoy this article? You may also like Create unlimited Client Secret in Microsoft Entra ID. Don’t forget to follow us and share this article.
This Post Has 0 Comments