Microsoft recommends to set up an MFA with a Conditional Access policy when you have…
Bulk create Microsoft 365 users with CSV file
Most organizations want to create multiple users at once to save time. Therefore, you must create a CSV file with all the new users and choose how to create them in the cloud. The first method is to upload the CSV using the Microsoft Entra admin center. Another method is to create the users with Microsoft Graph PowerShell. In this article, you will learn how to bulk create Microsoft 365 users in Microsoft Entra ID and PowerShell with a CSV file.
Table of contents
Bulk create Microsoft 365 users in Microsoft Entra ID
1. Create CSV file
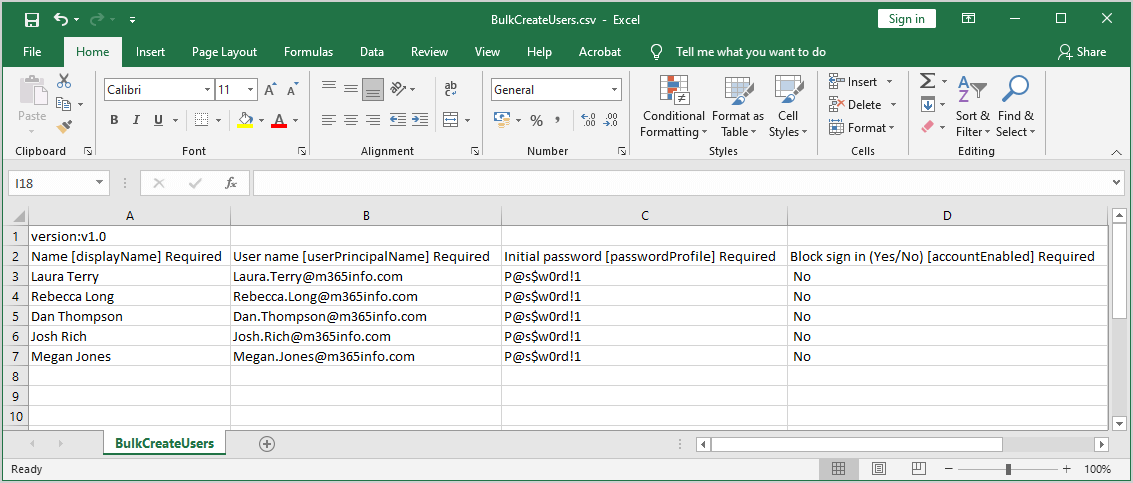
You need to download and save the BulkCreateUsers.csv file.
The CSV file includes the following values:
- Row 1: Contains the version number and must be included in the upload CSV.
- Row 2: Includes all the column headings. The format of the column headings looks like e.g., Name [displayName] Required.
- Examples row: In the CSV file, we have included examples of acceptable values for each column. You must remove the row’s contents and replace the examples with your entries.
Requirements when you fill in the CSV file:
- Do not remove or modify the first two rows of the BulkCreateUsers.csv file, or the upload can’t be processed.
- Do not add new columns to the CSV file.
- You must fill in the required columns with data.
- Ensure no extra whitespace exists before or after any field, such as UserPrincipalName.
In the next step, we will show you how to edit the CSV file with an application like Microsoft Excel.
2. Edit CSV file in Excel
To save the Excel file as CSV comma delimited, you need to make Excel use a comma for the list separator.
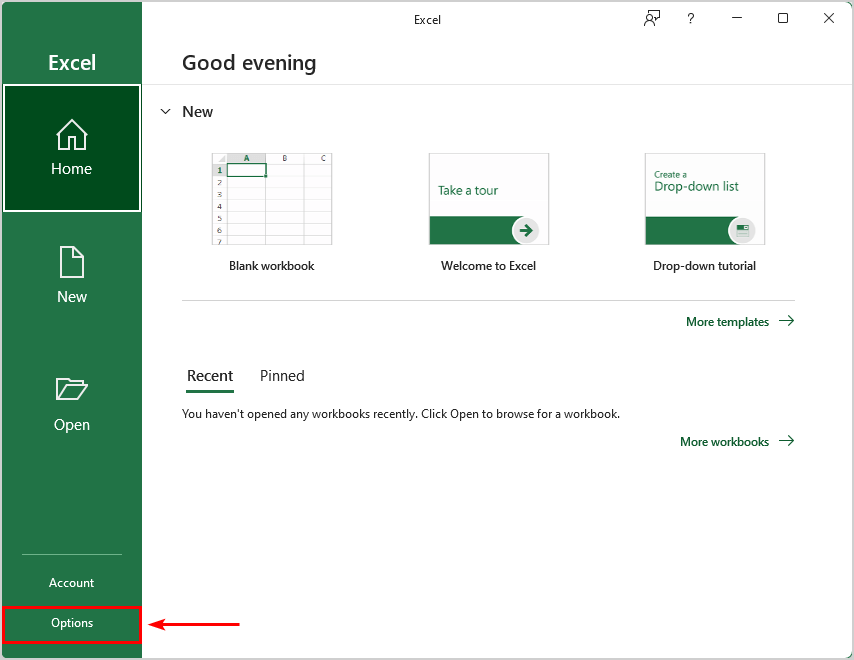
- Open Microsoft Excel
- Click Options
In the Excel Options, you need to make some changes:
- Click Advanced
- Under Editing options > Clear System separators
- Set Decimal separator to period (.)
- Set Thousands separator to comma (,)
- Click OK
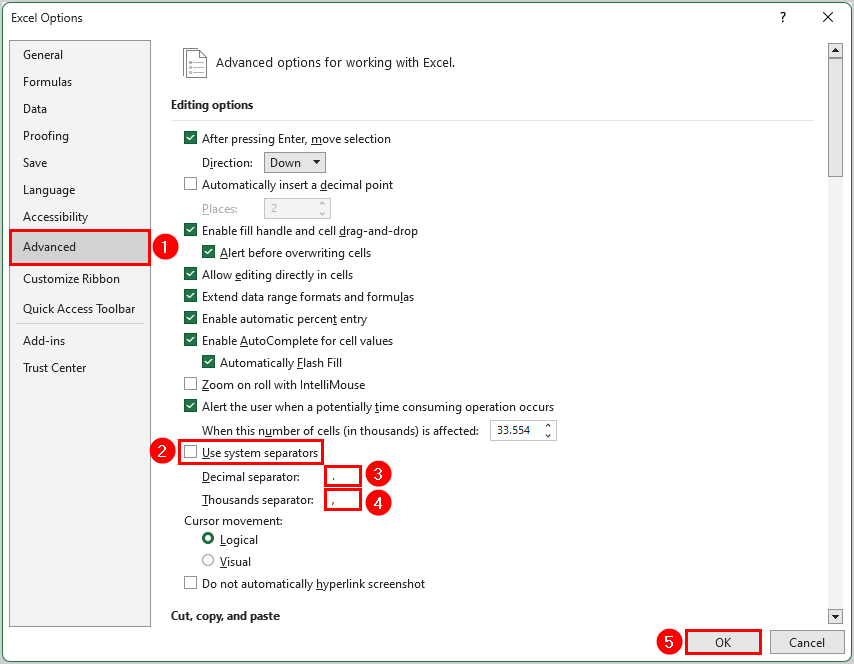
Note: Close the Microsoft Excel application to save the changes.
- Open the CSV file in Microsoft Excel and fill in the required data
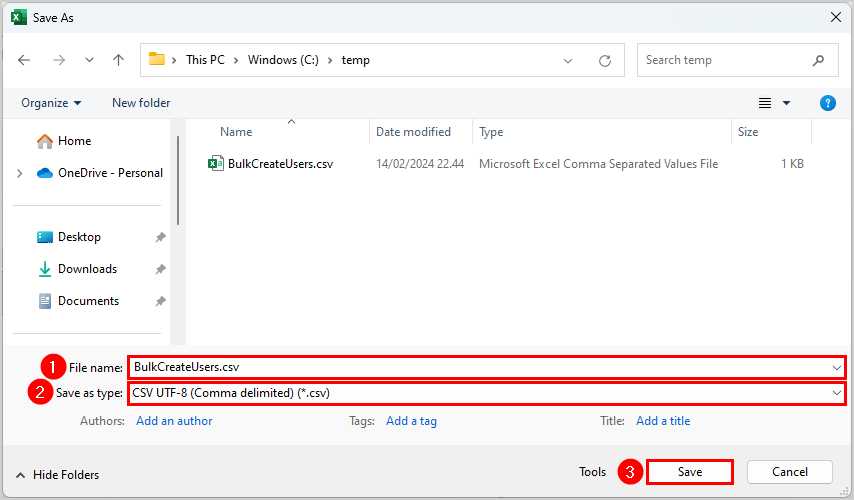
Once you finish the required data, save the file as .csv.
- Name the file BulkCreateUsers.csv
- Save as type CSV UTF-8 (Comma delimited) (*.csv)
- Click Save
In the next step, we will show you how to upload the CSV file in Microsoft Entra ID.
3. Bulk create Microsoft 365 users with CSV file in Microsoft Entra ID
Time needed: 10 minutes
How to bulk create users in Microsoft Entra ID with CSV file.
- Go to Microsoft Entra ID.
Sign in to the Microsoft Entra ID with your admin credentials.
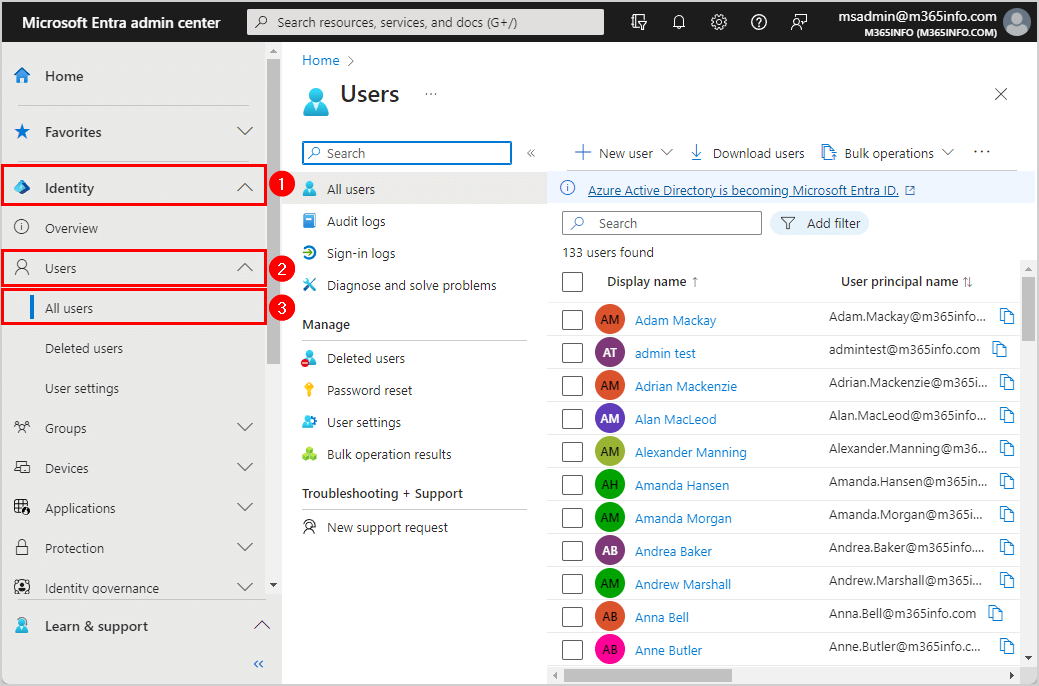
- Go to All users.
Click Identity > Users > All users.
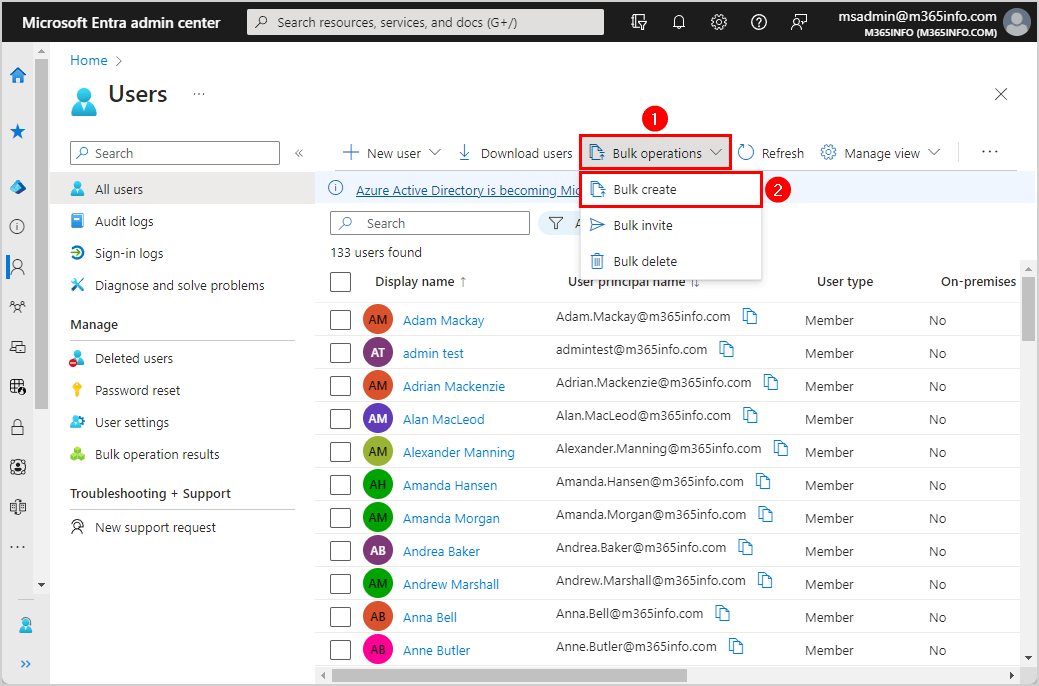
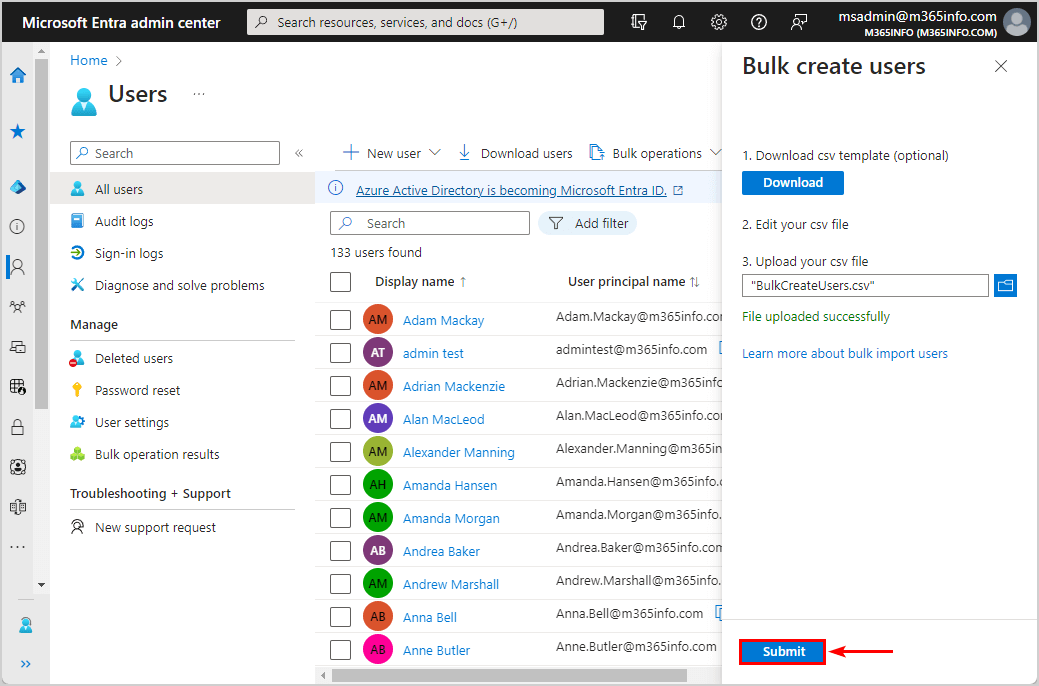
- You will be redirected to the Users preview.
Click on Bulk operations > Bulk create.
- Upload your CSV file.
Browse the CSV file in your folder.
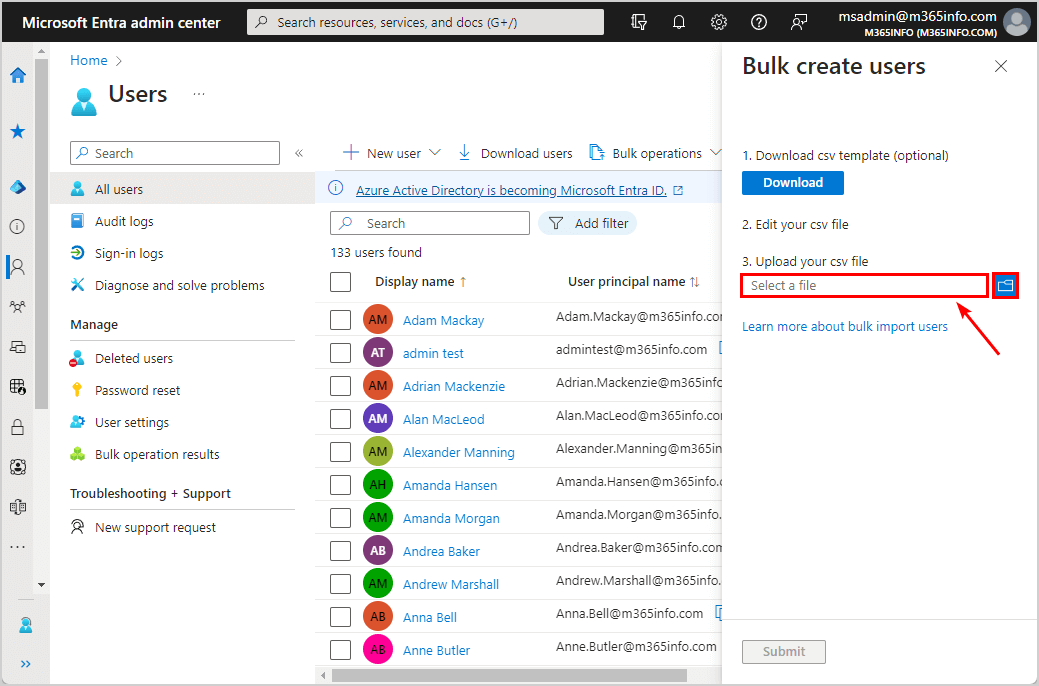
- Select your CSV file.
Select the CSV file you created and click Open.
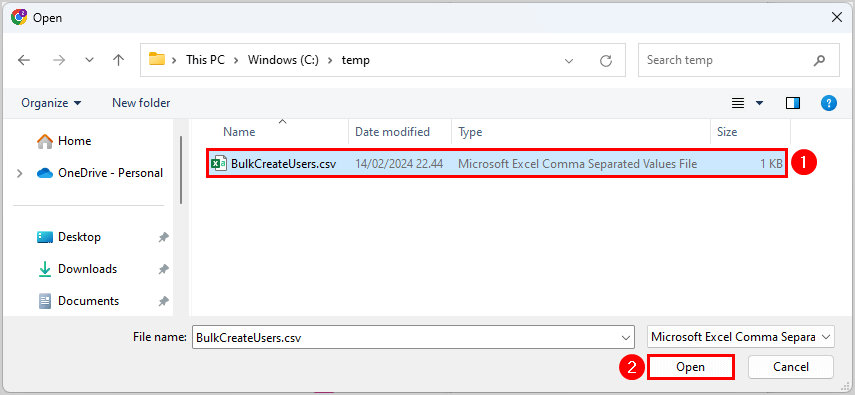
- File uploaded successfully.
Click Submit.
- View the status of bulk operation results.
Bulk operation in progress and succeeded.
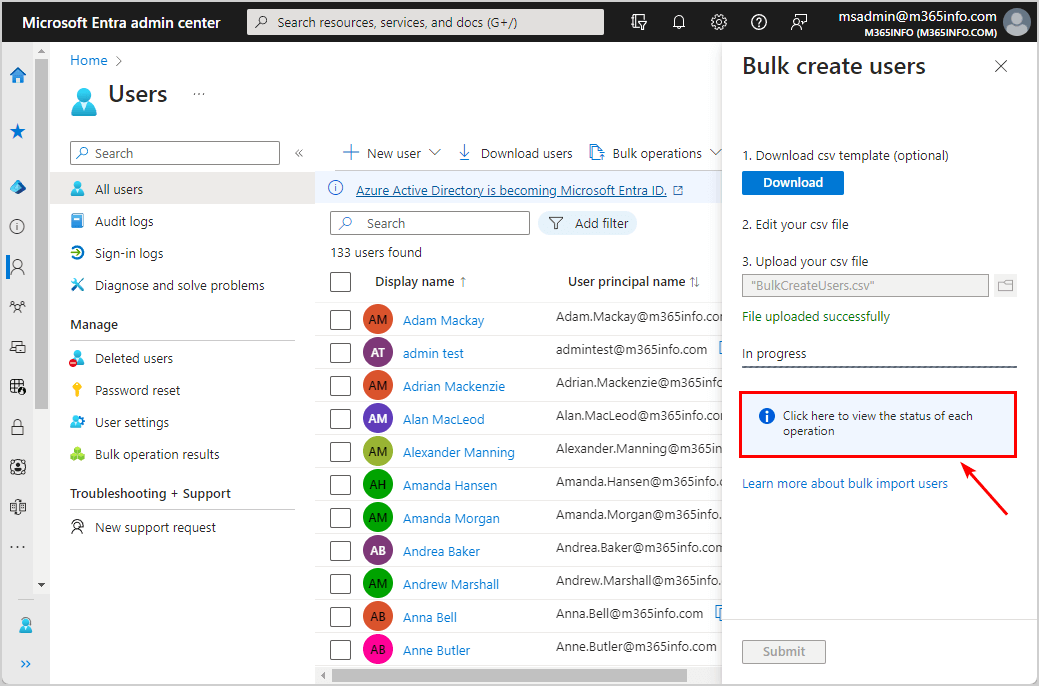
You will get a notification when the bulk operation is completed.
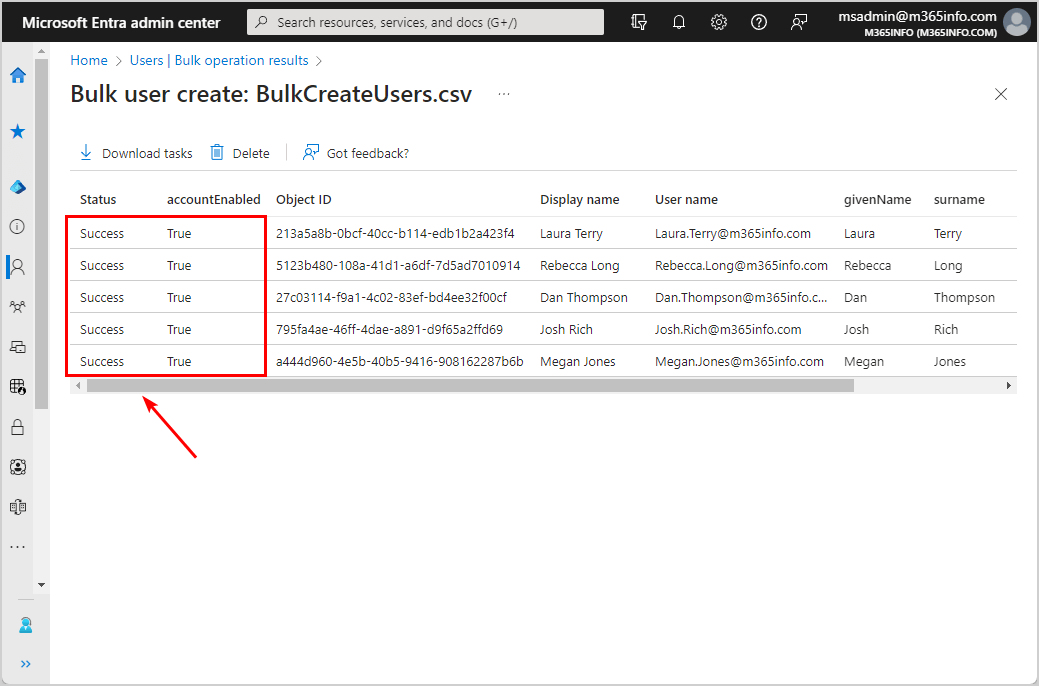
4. Check Microsoft 365 users bulk results in Microsoft Entra ID
To see if the bulk operation succeeded, follow the below steps in Microsoft Entra ID:
- Sign in Microsoft Entra admin center
- Expand Identity > Users > All users
- Click Bulk operation results
- Click on the file name BulkCreateUsers.csv
The status shows Completed with no errors.
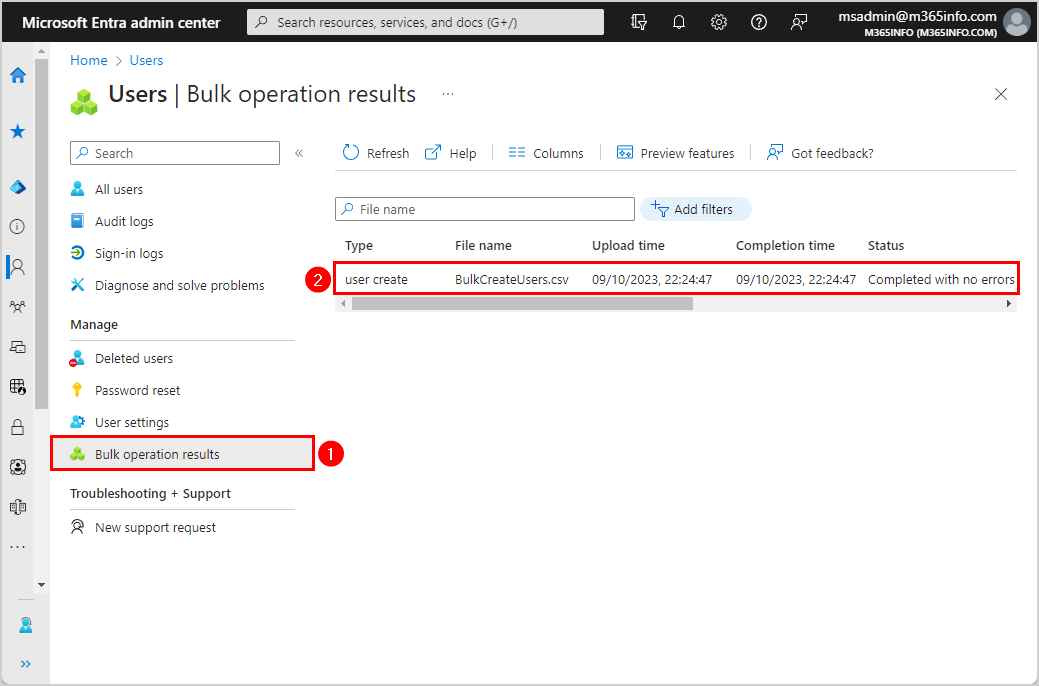
- It shows a list of all the new Microsoft 365 users, and the status shows Success for all 5 users we created in bulk
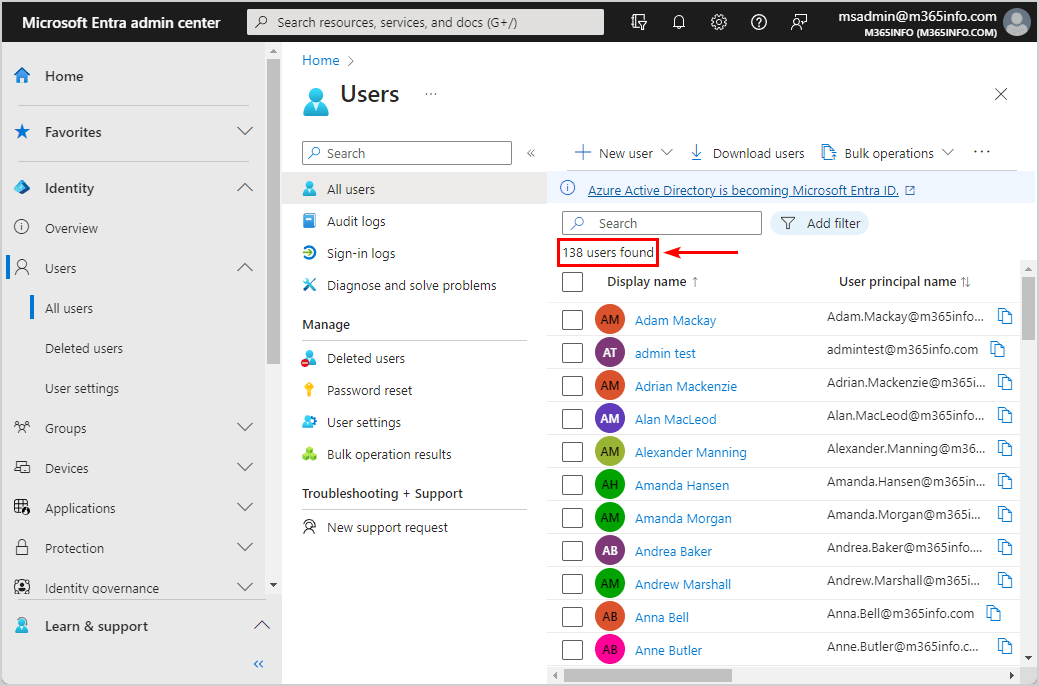
5. Verify all users in Microsoft Entra ID
Find the newly created users in Microsoft Entra ID:
- Sign in Microsoft Entra admin center
- Go to the Identity > Users > All users
- See the list of users found
All the new users you created in bulk are in the same list as the others. It also updates the total number of users (138). In our case, we bulk created 5 new users, and we started with 133 users.
See the next step to bulk create new users with Microsoft Graph PowerShell.
Bulk create Microsoft 365 users with PowerShell
You can create multiple new Microsoft 365 users from a CSV file with Microsoft Graph PowerShell.
1. Connect to Microsoft Graph PowerShell
Before you run the New-M365Users.ps1 PowerShell script, you need to Install Microsoft Graph PowerShell module.
Install-Module Microsoft.Graph -ForceRun the command below to Connect to Microsoft Graph PowerShell.
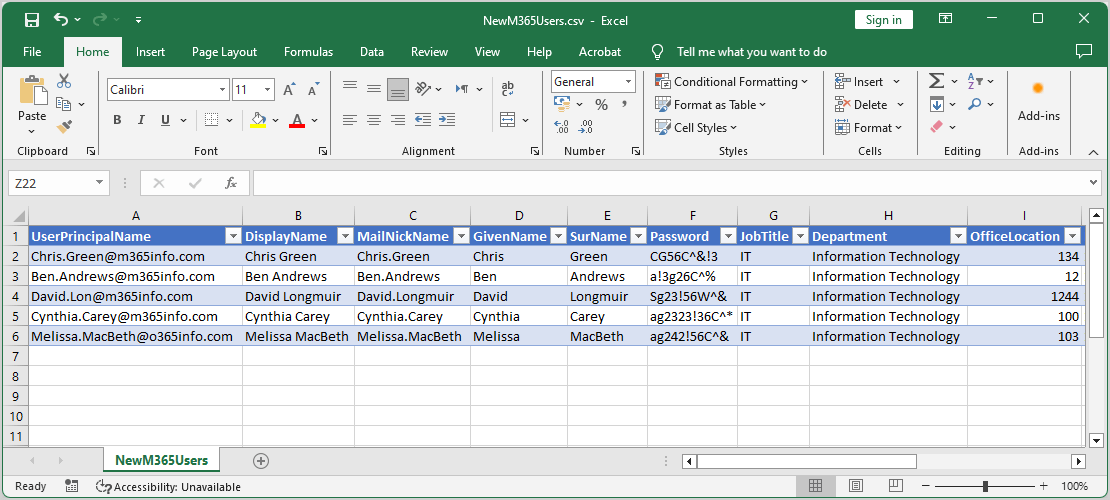
Connect-MgGraph -Scopes "User.ReadWrite.All"2. Create CSV file with new Microsoft 365 users
You need to create a CSV file with new Microsoft 365 users. Download the NewM365Users.csv that looks like the below example.
- Adjust the CSV file with new users, passwords, and properties
- Save the CSV file in the temp folder on your (C:) drive
3. Download New-M365Users PowerShell script
Follow the below steps to set up the PowerShell script:
- Download the New-M365Users.ps1 PowerShell script
- Or copy the script below into Notepad and save it as a New-M365Users.ps1 file
- Create a scripts folder if you don’t have it already
- Save it in the C:\scripts folder
# Connect to Microsoft Graph with user read/write permissions
Connect-MgGraph -Scopes User.ReadWrite.All

# Specify the path of the CSV file
$CSVFilePath = "C:\temp\NewM365Users.csv"

# Import data from CSV file
$Users = Import-Csv -Path $CSVFilePath

# Loop through each row containing user details in the CSV file
foreach ($User in $Users) {

    # Create password profile
    $PasswordProfile = @{
        Password                             = $User.Password
        ForceChangePasswordNextSignIn        = $true
        ForceChangePasswordNextSignInWithMfa = $true
    }
    $UserParams = @{
        UserPrincipalName = $User.UserPrincipalName
        DisplayName       = $User.DisplayName
        MailNickName      = $User.MailNickName
        GivenName         = $User.GivenName
        SurName           = $User.SurName
        JobTitle          = $User.JobTitle
        Department        = $User.Department
        OfficeLocation    = $User.OfficeLocation
        BusinessPhone     = $User.BusinessPhone
        MobilePhone       = $User.MobilePhone
        StreetAddress     = $User.StreetAddress
        City              = $User.City
        State             = $User.State
        PostalCode        = $User.PostalCode
        Country           = $User.Country
        EmployeeId        = $User.EmployeeId
        PasswordProfile   = $PasswordProfile
        AccountEnabled    = $true
    }

    try {
        $null = New-MgUser @UserParams -ErrorAction Stop
        Write-Host ("Successfully created the account for {0}" -f $User.DisplayName) -ForegroundColor Green
    }
    catch {
        Write-Host ("Failed to create the account for {0}. Error: {1}" -f $User.DisplayName, $_.Exception.Message) -ForegroundColor Red
    }
}
4. Run New-M365Users PowerShell script
Run PowerShell as administrator to run the script New-M365Users.ps1 in the C:\scripts folder.
C:\scripts\.\New-M365Users.ps1It will create new user accounts with the information from the CSV file. The PowerShell output shows the below result.
Successfully created the account for Chris Green
Successfully created the account for Ben Andrews
Successfully created the account for David Longmuir
Successfully created the account for Cynthia Carey
Failed to create the account for Melissa MacBeth. Error: [Request_BadRequest] : The domain portion of the userPrincipalName property is invalid. You must use one of the verified domain names in your organization.
5. Verify Microsoft 365 users created
Run the Get-MgUser cmdlet to find the newly created Microsoft 365 users.
# Specify the path of the CSV file
$CSVFilePath = "C:\temp\NewM365Users.csv"

# Import the CSV file
$users = Import-Csv $CSVFilePath

foreach ($user in $users) {
    if (Get-MgUser -UserId $user.UserPrincipalName -ErrorAction SilentlyContinue) {
        Write-Host "$($user.UserPrincipalName) exists" -ForegroundColor Green
    }
    else {
        Write-Host "$($user.UserPrincipalName) does not exist" -ForegroundColor Red
    }
}
That’s it!
Keep reading: Import PST file into Microsoft 365 »
Conclusion
You learned how to bulk create Microsoft 365 users with a CSV file. You can create multiple users for your organization in no time by uploading a CSV file into the Microsoft Entra admin center. Another way is to connect to Microsoft Graph PowerShell and bulk create new Microsoft 365 users with a PowerShell script.
Did you enjoy this article? You may also like Assign Microsoft 365 licenses with group-based licensing. Don’t forget to follow us and share this article.
is it possible to add alternative email address and have the username and password sent to the alternative email address?