After you install the Microsoft Graph module, you can connect to Microsoft Graph PowerShell. There…
Manage equipment mailbox with PowerShell
In this article, we will show how to manage a Microsoft 365 equipment mailbox with PowerShell. Learn how to create, manage and modify an equipment mailbox. You can also view and export information about the equipment mailbox, convert it to another type, and bulk soft delete it.
Table of contents
Microsoft 365 mailbox types
There are four different mailbox types in Microsoft 365:
- User mailbox
- Shared mailbox
- Room mailbox
- Equipment mailbox
In this article, we will cover how to manage the equipment mailbox with PowerShell.
Resource mailbox
The resource mailbox doesn’t require a license and is used to manage meetings. Resource mailboxes are useful for managing the schedule of a conference room and allow users to reserve a timeslot.
There are two types of resource mailboxes:
- Room mailbox is assigned to a physical location such as a meeting room or conference place.
- Equipment mailbox is assigned to objects, not location-specific, such as laptops, cars, or microphones.
Connect to Exchange Online PowerShell
To be able to run the PowerShell commands specified in the current article, you will need to Connect to Exchange Online PowerShell.
Start Windows PowerShell as administrator and run the Connect-ExchangeOnline cmdlet.
Connect-ExchangeOnline1. Create new equipment mailbox
PowerShell command syntax:
New-Mailbox -Name "<Name>" -EquipmentRun the below PowerShell command example to create a new equipment mailbox.
New-Mailbox -Name "Projector 11" -EquipmentThe PowerShell output looks like the below example.
PS C:\> New-Mailbox -Name "Projector 11" -Equipment

Name                      Alias           Database                       ProhibitSendQuota
----                      -----           --------                       -----------------
Projector 11              Projector11     EURPR02DG257-db113             49.5 GB (53,150...
2. Manage equipment mailbox properties
You can manage and change equipment mailbox properties with PowerShell commands.
Change display name and SMTP address
Change the display name and primary SMTP address for an equipment mailbox.
Run the below PowerShell command example.
Set-Mailbox "Projector 11" -DisplayName "Project Pool 11" -EmailAddresses SMTP:ProjectPool11@m365info.com,smtp:Projector11@m365info.comVerify you changed an equipment mailbox correctly.
Get-Mailbox "Projector 11" | Format-List DisplayName,RecipientTypeDetails,PrimarySmtpAddressThe PowerShell output shows the display name, type, and SMTP email address.
PS C:\> Get-Mailbox "Projector 11" | Format-List DisplayName,RecipientTypeDetails,PrimarySmtpAddress


DisplayName          : Project Pool 11
RecipientTypeDetails : EquipmentMailbox
PrimarySmtpAddress   : ProjectPool11@m365info.com
Allow booking requests for equipment mailbox
Configure equipment mailboxes to allow booking requests to be scheduled only during working hours.
Run the below PowerShell command to allow booking requests.
Get-Mailbox -ResultSize unlimited -Filter "RecipientTypeDetails -eq 'EquipmentMailbox'" | Set-CalendarProcessing -ScheduleOnlyDuringWorkHours $trueTo verify that you changed the properties for an equipment mailbox, run the Get-Mailbox cmdlet.
PowerShell command example
Get-Mailbox -ResultSize unlimited -Filter "RecipientTypeDetails -eq 'EquipmentMailbox'" | Get-CalendarProcessing | Fl Identity,ScheduleOnlyDuringWorkHoursThe result of the PowerShell output show if the schedule during working hours is enabled (True) for each equipment mailbox.
PS C:\> Get-Mailbox -ResultSize unlimited -Filter "RecipientTypeDetails -eq 'EquipmentMailbox'" | Get-CalendarProcessing | Fl Identity,ScheduleOnlyDuringWorkHours


Identity                    : Projector 11
ScheduleOnlyDuringWorkHours : True

Identity                    : Projector 8
ScheduleOnlyDuringWorkHours : True

Identity                    : Projector 21
ScheduleOnlyDuringWorkHours : True
Enable automatic booking for equipment mailbox
You can manage to enable automatic booking for an equipment mailbox
Use the PowerShell command syntax.
Set-CalendarProcessing "<Identity>" -AutomateProcessing AutoAcceptRun the below PowerShell command example.
Set-CalendarProcessing "Projector 11" -AutomateProcessing AutoAcceptVerify that you enabled the automatic booking for a specific equipment mailbox.
Run the below PowerShell command example.
Get-CalendarProcessing "Projector11" | Fl Identity,AutomateProcessingSee the results of the PowerShell output about this specific equipment mailbox below.
PS C:\> Get-CalendarProcessing "Projector11" | Fl Identity,AutomateProcessing


Identity           : Projector 11
AutomateProcessing : AutoAccept
Bulk enable automatic booking for equipment mailbox
Enable automatic booking for all equipment mailboxes in one PowerShell command
Run the below PowerShell command example.
Get-MailBox | Where {$_.ResourceType -eq "Equipment"} | Set-CalendarProcessing -AutomateProcessing:AutoAcceptYou can also check that you enabled the automatic booking correctly using the Get-CalendarProcessing cmdlet.
To verify, run the below PowerShell command example.
Get-Mailbox -ResultSize unlimited -Filter "RecipientTypeDetails -eq 'EquipmentMailbox'" | Get-CalendarProcessing | Fl Identity,AutomateProcessingThe PowerShell output shows all the equipment mailboxes and whether the automatic booking is enabled.
PS C:\> Get-Mailbox -ResultSize unlimited -Filter "RecipientTypeDetails -eq 'EquipmentMailbox'" | Get-CalendarProcessing | Fl Identity,AutomateProcessing


Identity           : Projector 11
AutomateProcessing : AutoAccept

Identity           : Projector 8
AutomateProcessing : AutoAccept

Identity           : Projector 21
AutomateProcessing : AutoAccept
3. Manage equipment mailbox permissions
Assign Send on Behalf permission to equipment mailbox
You can assign a user Send on Behalf permission on a single equipment mailbox.
PowerShell command syntax:
Set-CalendarProcessing "<Identity>" –ResourceDelegates "<Identity>"Powershell command example:
Set-CalendarProcessing "Projector8@m365info.com" –ResourceDelegates "Chris Lucas"Now the user “Chris Lucas” is a delegate that can Send on Behalf of the equipment mailbox “Projector8@m365info.com”.
Assign Send As permission equipment mailbox
You can assign a user Send As permission on a single equipment mailbox.
PowerShell command syntax:
Add-RecipientPermission "<Identity>" -Trustee "<Identity>" -AccessRights SendAs -Confirm:$FalsePowerShell command example:
Add-RecipientPermission "Projector8" -Trustee "David Kent" -AccessRights SendAs -Confirm:$FalseThe PowerShell output shows the following result.
PS C:\> Add-RecipientPermission "Projector8" -Trustee "David Kent" -AccessRights SendAs -Confirm:$False

Identity    Trustee                              AccessControlType AccessRights Inherited
--------    -------                              ----------------- ------------ ---------
Projector 8 eec2668a-0773-4947-93ba-2223f6acfe55 Allow             {SendAs}     False
Assign Full Access permission to equipment mailbox
You can assign a user Full Access permission on a single equipment mailbox.
PowerShell command syntax:
Add-MailBoxPermission "<Identity>" -User "<Identity>" -AccessRights FullAccessPowerShell command example:
Add-MailBoxPermission "Projector8" -User "Brenda Smith" -AccessRights FullAccessThe PowerShell output shows the following result.
PS C:\> Add-MailBoxPermission "Projector8" -User "Brenda Smith" -AccessRights FullAccess

Identity             User                 AccessRights                    IsInherited Deny
--------             ----                 ------------                    ----------- ----
Projector 8          S-1-5-21-70143928... {FullAccess}                    False       False
4. Display equipment mailbox information
View a list of all Office 365 equipment mailboxes.
Get-Mailbox -Filter '(RecipientTypeDetails -eq "EquipmentMailBox")' | Select Name,AliasThe PowerShell output looks like the below example.
PS C:\> Get-Mailbox -Filter '(RecipientTypeDetails -eq "EquipmentMailBox")' | Select Name,Alias

Name         Alias
----         -----
Projector 11 Projector11
Projector 8  Projector8
Projector 21 Projector21
Display equipment mailbox calendar settings
View the calendar settings for a single equipment mailbox.
PowerShell command syntax:
Get-Mailbox "<Identity>" | Select ResourceType,RejectMessagesFrom,RejectMessagesFromDLMembers,RejectMessagesFromSendersOrMembers,SendModerationNotificationsPowerShell command example:
Get-Mailbox "Projector8" | Select ResourceType,RejectMessagesFrom,RejectMessagesFromDLMembers,RejectMessagesFromSendersOrMembers,SendModerationNotificationsThe PowerShell output shows the below result.
PS C:\> Get-Mailbox "Projector8" | Select ResourceType,RejectMessagesFrom,RejectMessagesFromDLMembers,RejectMessagesFromSendersOrMembers,SendModerationNotifications


ResourceType                       : Equipment
RejectMessagesFrom                 : {}
RejectMessagesFromDLMembers        : {}
RejectMessagesFromSendersOrMembers : {}
SendModerationNotifications        : Always
Display equipment mailbox calendar processing settings
You can view information for a single equipment mailbox.
PowerShell command syntax:
Get-Mailbox "<Identity>" | Get-CalendarProcessing | FLPowerShell command example:
Get-Mailbox "Projector8" | Get-CalendarProcessing | FLDisplay equipment mailbox calendar permission
You can view all the calendar access rights for a single equipment mailbox.
PowerShell command syntax:
Get-MailBoxFolderPermission <Equipment:\Calendar> | Select FolderName,User,AccessRightsPowerShell command example:
Get-MailBoxFolderPermission "Projector8:\Calendar" | Select FolderName,User,AccessRightsThe PowerShell output shows the below result.
PS C:\> Get-MailBoxFolderPermission "Projector8:\Calendar" | Select FolderName,User,AccessRights

FolderName User        AccessRights
---------- ----        ------------
Calendar   Default     {LimitedDetails}
Calendar   Anonymous   {None}
Calendar   Chris Lucas {Editor}
Export list of equipment mailboxes to CSV file
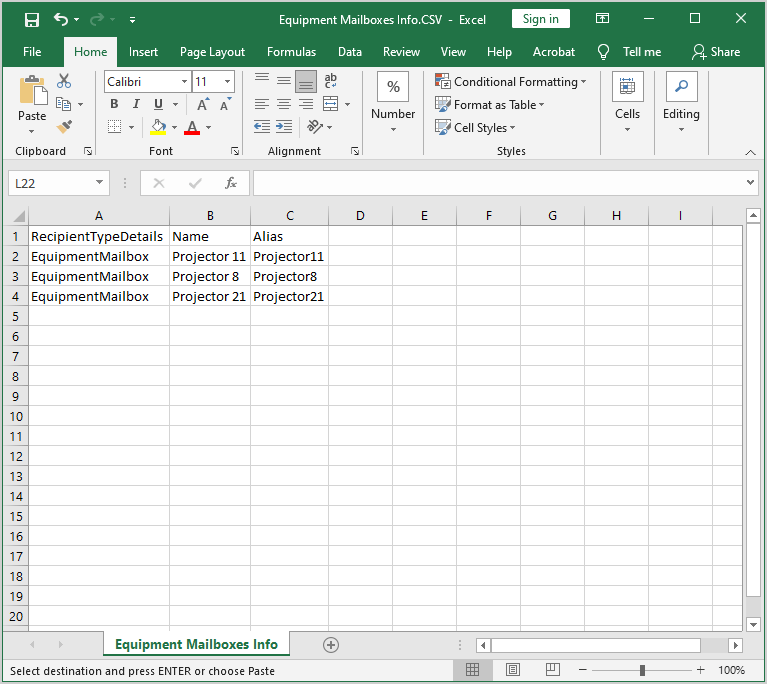
You can export information about all equipment mailboxes to a single CSV file. This way, you can easily search for the equipment mailboxes.
PowerShell command syntax:
Get-Mailbox -Filter '(RecipientTypeDetails -eq "EquipmentMailbox")' | Select RecipientTypeDetails,Name,Alias | Export-CSV <Path>PowerShell command example:
Get-Mailbox -Filter '(RecipientTypeDetails -eq "EquipmentMailbox")' | Select RecipientTypeDetails,Name,Alias | Export-CSV "C:\temp\Equipment Mailboxes Info.CSV" –NoTypeInformation -Encoding UTF8Once you export the information, you can find the CSV file in the C:\temp folder.
Open the CSV file with an application like Microsoft Excel to see the results.
5. Convert equipment mailbox
You can convert an equipment mailbox to another mailbox type.
Run the PowerShell command to convert the equipment mailbox to a shared mailbox.
Get-Mailbox "Projector 11" | Set-Mailbox -Type SharedUse the PowerShell command to convert the equipment mailbox to the room mailbox.
Get-Mailbox "Projector 11" | Set-Mailbox -Type RoomRun the PowerShell command to convert the equipment mailbox to a regular user mailbox.
Get-Mailbox "Projector 11" | Set-Mailbox -Type RegularNote: When you convert an equipment mailbox to a user mailbox, you must assign an Exchange Online license within 30 days to activate it.
6. Delete equipment mailbox
You can easily soft delete a specific equipment mailbox with PowerShell. It means the deleted equipment mailbox will stay in the Azure AD recycle bin for 30 days before it is permanently deleted. You can restore deleted equipment mailboxes in Manage Microsoft 365 users recycle bin.
Soft delete equipment mailbox
You can soft delete a single equipment mailbox.
PowerShell command syntax:
Remove-Mailbox -Identity "<Equipment Identity>" -Confirm:$falsePowerShell command example:
Remove-Mailbox -Identity "Projector 11" -Confirm:$falseBulk soft delete equipment mailbox
Run the below PowerShell command to bulk soft delete equipment mailboxes.
Get-Mailbox -Filter '(RecipientTypeDetails -eq "EquipmentMailBox")' -ResultSize Unlimited | Remove-Mailbox -Confirm:$falseHard delete equipment mailbox
If you want to hard delete a mailbox permanently, you need to go through a couple of steps. Read more about it in the article Force delete Microsoft 365 mailbox with PowerShell.
Did this help you to manage Office 365 equipment mailbox with PowerShell?
Conclusion
You learned how to manage equipment mailboxes with PowerShell. There are a lot of possibilities when it comes to managing an equipment mailbox. The most essential tasks are to create, convert, delete, assign permissions, and export a list of equipment mailboxes.
Did you enjoy this article? You may also like Export Microsoft 365 user licenses. Don’t forget to follow us and share this article.
This Post Has 0 Comments