The catch all mailbox is a special mailbox that receives all the email messages that…
Fix error: Couldn’t remove OwaMailboxPolicy
An error appears when you want to delete an OWA mailbox policy from Exchange Online. That’s because the OWA mailbox policy is associated with a single or multiple users. To remove the OWA mailbox policy permanently, you need to set another mailbox policy as default for the users, so the old policy is not set to any users, and you can delete it. In this article, you will learn how to fix error couldn’t remove OwaMailboxPolicy in PowerShell and Exchange admin center.
Table of contents
How to remove Outlook mailbox policies
When you create a new Outlook web app policy, you can set it to single or multiple users. Let’s say you created a mailbox policy to Prevent Microsoft 365 users from changing their photos. Now, the organization wants to let the users change their photos, so you must delete the Outlook web app mailbox policy. So how will you do that?
There are two methods to remove an OWA mailbox policy:
- Exchange admin center
- Exchange Online PowerShell
Sometimes, you can encounter errors that prevent you from deleting an OWA mailbox policy. We will show you how to remove any Outlook mailbox policy you created and how to fix the error if you can’t remove a mailbox policy.
Error: Outlook web app policy deletion failed
How to delete a mailbox policy in the Exchange admin center:
- Sign in to Exchange admin center
- Expand Roles > Outlook web app policies
- Select the policy
- Click Delete
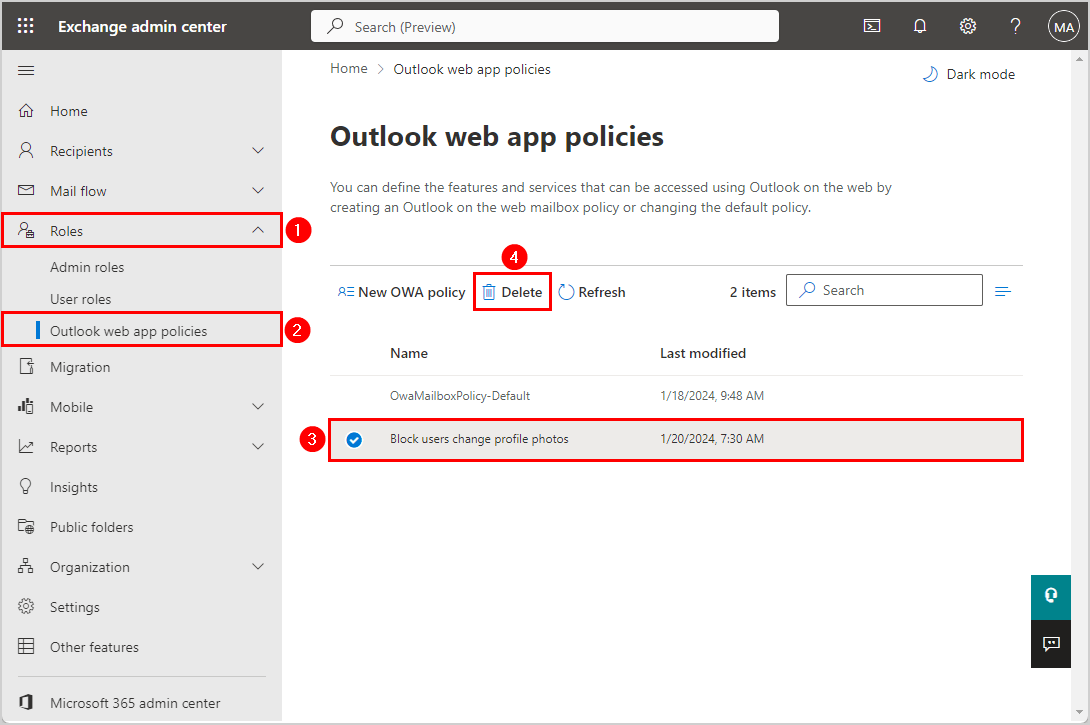
- Click Confirm
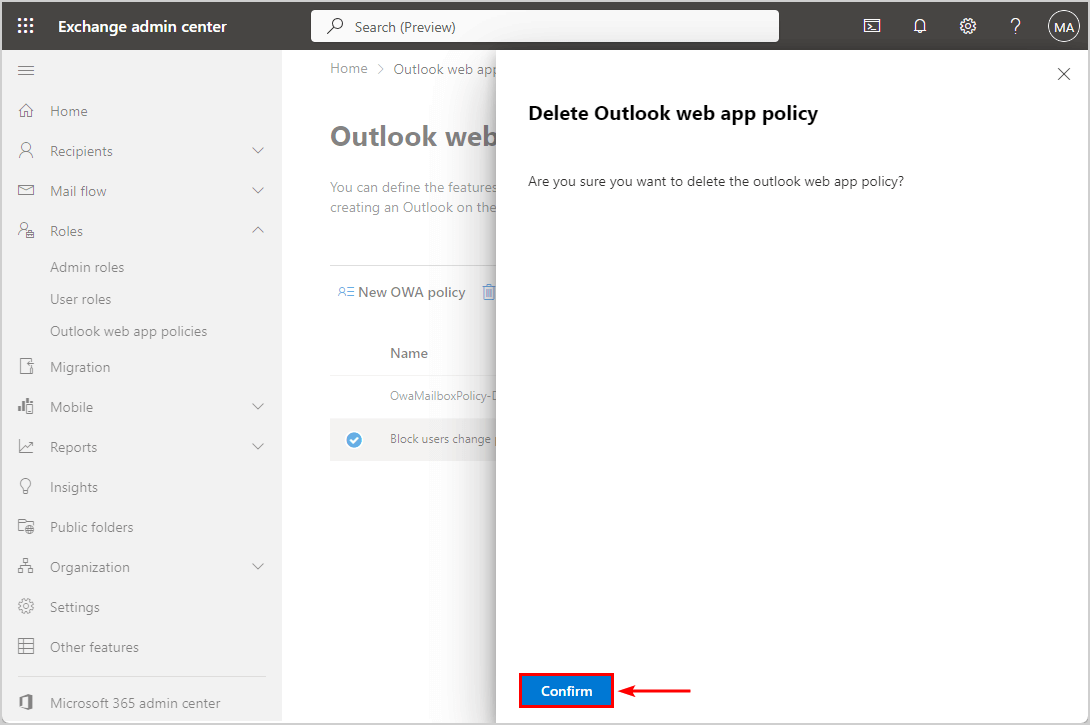
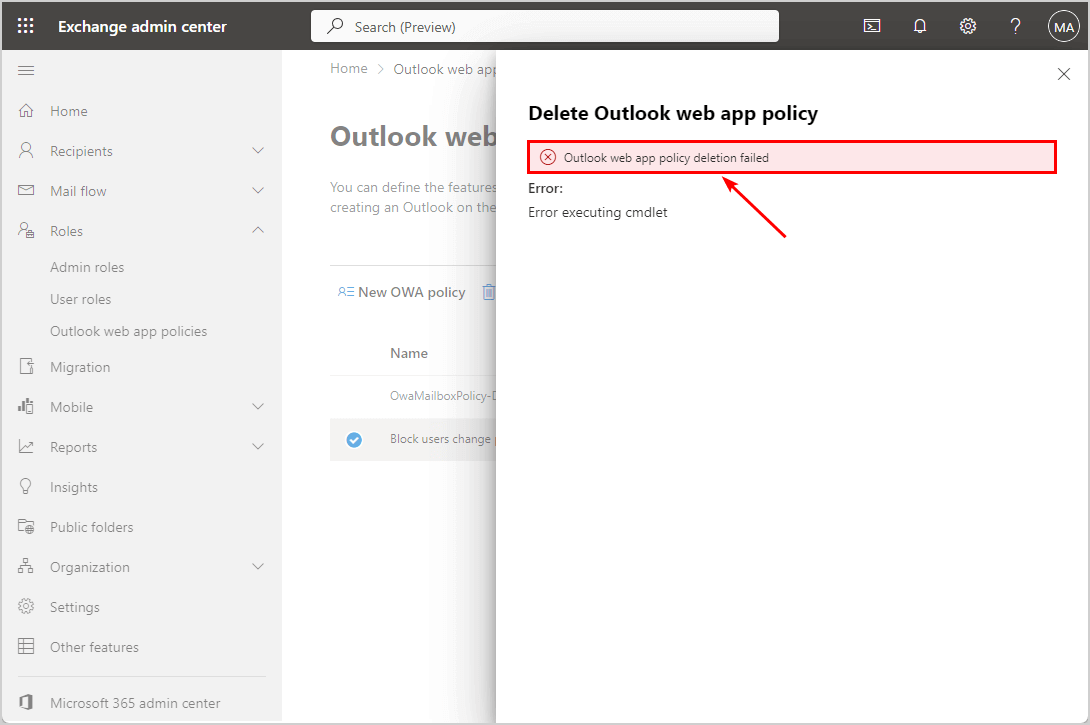
It should delete the mailbox policy, but in this case, it shows the below error in Exchange admin center:
Outlook web app policy deletion failed
Error:
Error executing cmdlet
Microsoft doesn’t clearly describe the problem or how to remove the mailbox policy. The other problem is that you can’t do anything from the Exchange admin center, so the only way to fix this is to use PowerShell in the next step.
Error: Remove OwaMailBoxPolicy
You have an OWA mailbox policy you want to remove in PowerShell.
To be able to run PowerShell commands, you must Connect to Exchange Online PowerShell. Open Windows PowerShell as administrator, run the below cmdlet, and sign in with your admin credentials.
Connect-ExchangeOnlineTo delete an OWA mailbox policy, we need to use the Remove-OwaMailboxPolicy PowerShell cmdlet. We will add -Confirm:$false to suppress the confirmation prompt.
In our example, we want to remove a mailbox policy (Block users change profile photos).
Run the below PowerShell command to remove the OwaMailboxPolicy completely.
Get-OwaMailboxPolicy "Block users change profile photos" | Remove-OwaMailboxPolicy -Confirm:$falseThis should do the trick, but in some cases the PowerShell output shows the below error.
Remove-OwaMailboxPolicy: ExCB739F|Microsoft.Exchange.Management.Tasks.CannotDeleteAssociatedMailboxPolicyException|
Couldn't delete mailbox policy Block users change profile photos because it is associated with users.
Error: Couldn’t delete mailbox policy “OWA Mailbox Policy name” because it is associated with users.
Fix couldn’t delete mailbox policy
The problem is that users are associated with the mailbox policy you want to delete. Therefore, you need to know which mailbox policies your organization has.
Run the below PowerShell command to see all the mailbox policies.
Get-OwaMailboxPolicy | ft Name, IdentityThe PowerShell output shows all the OWA mailbox policies in your organization.
Name                              Identity
----                              --------
Block users change profile photos Block users change profile photos
OwaMailboxPolicy-Default          OwaMailboxPolicy-Default
In our example, we want to delete the mailbox policy (Block users change profile photos).
1. Get OwaMailboxPolicy licensed users
We want to see which users are associated with a specific mailbox policy (Block users change profile photos).
Run the below PowerShell command to check which mailboxes have set this policy.
Get-CasMailbox -ResultSize Unlimited | Where-Object { $_.OwaMailboxPolicy -eq "Block users change profile photos" } | ft Name, Id, DisplaynameThe PowerShell output shows a list of the mailboxes.
Name                                 Id                                   DisplayName
----                                 --                                   -----------
41377e9c-dc47-46c0-b4a5-1d5bbdcb5cc5 41377e9c-dc47-46c0-b4a5-1d5bbdcb5cc5 Amanda Hansen
0f38d53f-cbe0-4844-86e9-1032a45ba31b 0f38d53f-cbe0-4844-86e9-1032a45ba31b Brenda Smith
52a6c1c7-77d2-4109-99b9-a4076167b6e2 52a6c1c7-77d2-4109-99b9-a4076167b6e2 Carl Hawk
c32b2b27-d809-439a-a3e3-eb7a749eeb72 c32b2b27-d809-439a-a3e3-eb7a749eeb72 Stephen Hunter
The result displays licensed mailboxes linked to the mailbox policy (Block users change profile photos). Unlicensed users will not appear in the PowerShell output.
Important: It’s possible that other users were assigned to the mailbox policy but currently have unlicensed user mailboxes. These unlicensed users are still linked to the mailbox policy, even if you removed their licenses.
2. Assign licenses to mailboxes associated with OwaMailboxPolicy
You can’t see all the mailboxes that are linked to a mailbox policy because there might be users who initially set this policy but are now unlicensed.
The only solution is to assign licenses to the users that were linked to the mailbox policy (Block users change profile photos). Unfortunately, you can’t know which unlicensed users were associated with the OWA mailbox policy.
Note: Adding a license to an unlicensed user will automatically get the OwaMailboxPolicy-Default policy and not the last assigned OWA mailbox policy.
In our example, the user (Anna.Bell@m365info.com) was associated with the mailbox policy. But now it’s an unlicensed mailbox, and therefore you can’t see it in the list of the mailbox policy. Once we assign the Exchange Online license, the mailbox will automatically get the OwaMailboxPolicy-Default.
3. Set another Owa Mailbox Policy for all users
You need to set another mailbox policy for the users. In our example, we will set the OwaMailboxPolicy-Default policy for all the mailboxes so all the licensed mailboxes will get that policy.
Get-CASMailbox -ResultSize Unlimited | Set-CASMailbox –OWAMailboxPolicy "OwaMailboxPolicy-Default"All the users associated with the old mailbox policy are unassigned because you set another default mailbox policy for them.
In the next step, you can remove the OWA mailbox policy without errors.
Remove OwaMailBoxPolicy in PowerShell
Now, you can delete the OwaMailboxPolicy without errors.
Run the below PowerShell command to completely remove the OwaMailBoxPolicy. We will add -Confirm:$false to suppress the confirmation prompt.
Get-OwaMailboxPolicy "Block users change profile photos" | Remove-OwaMailboxPolicy -Confirm:$false You successfully removed the OwaMailboxPolicy with PowerShell. The next step shows you how to delete the OwaMailboxPolicy in the Exchange admin center.
Delete OWA mailbox policy in Exchange admin center
To delete an OWA mailbox policy in the Exchange admin center, follow these steps:
- Sign in to Exchange admin center
- Expand Roles > Outlook web app policies
- Select the policy
- Click Delete
- Click Confirm
The screenshot below shows you deleted the mailbox policy successfully.
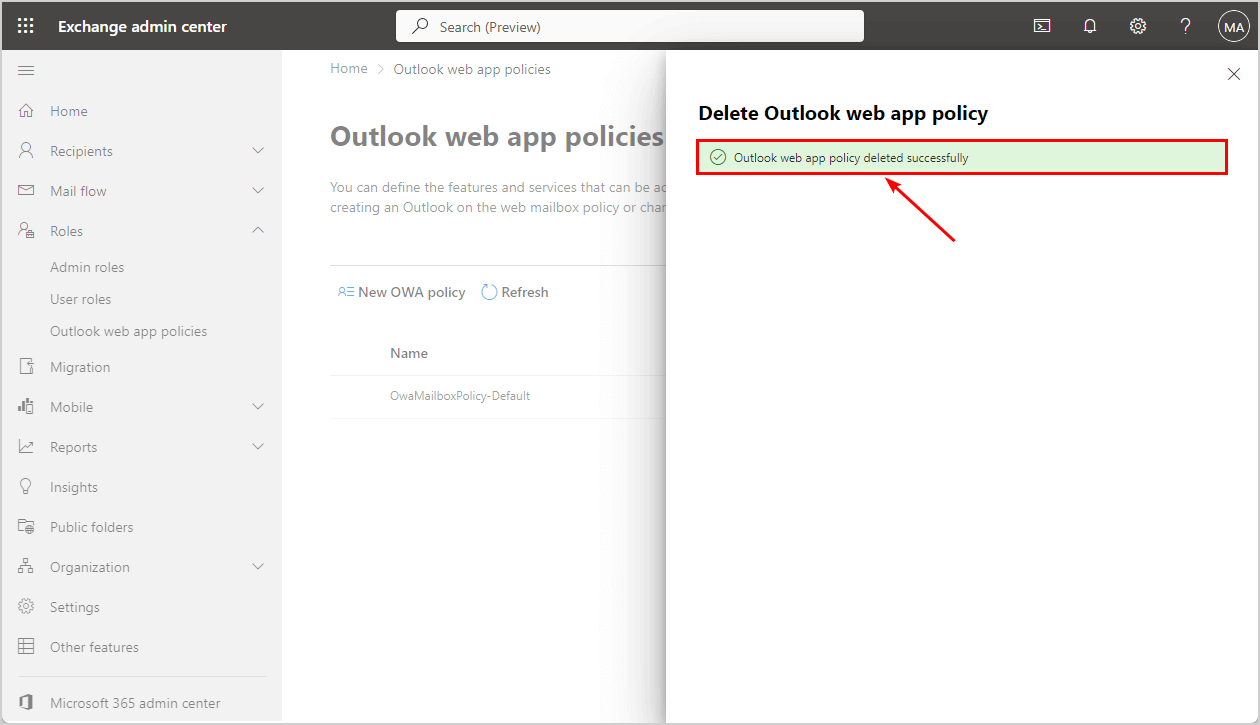
That’s it!
Read more: How to delete corrupted hidden Exchange inbox rules using MFCMAPI »
Conclusion
You learned how to fix the error couldn’t remove the OwaMailboxPolicy in Exchange Online PowerShell and Exchange admin center. To avoid errors, you must ensure no users are associated with the OWA mailbox policy you want to delete. Then, you can remove the OwaMailboxPolicy in PowerShell or Exchange admin center.
Did you enjoy this article? You may also like How to delete members from Distribution Group. Don’t forget to follow us and share this article.
This Post Has 0 Comments