There are times that you want to find the Microsoft tenant name. It can be…
Bulk import contacts to Microsoft 365 using PowerShell
We like to add new contacts, also known as external contacts in Microsoft 365. These are suppliers, customers, and business partners. Using PowerShell scripts will simplify and streamline the process of importing data from the CSV file. In this article, you will learn how to bulk import contacts to Microsoft 365 using PowerShell.
Table of contents
Required attributes to create a mail contact in Microsoft 365
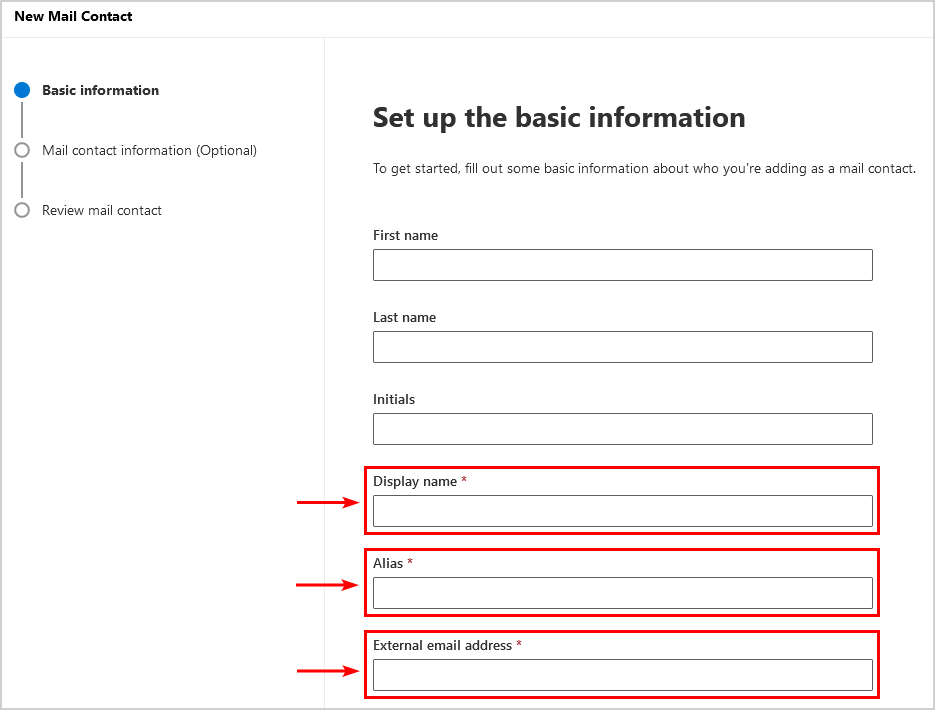
To create a mail contact in Microsoft 365 with PowerShell, you need the minimum required attributes:
- -Display name
- -Alias
- -External email address
Note: You can see the fields that are mandatory with the displayed asterisk as shown in the below screenshot.
Connect to Exchange Online PowerShell
To be able to run PowerShell commands, you must Connect to Exchange Online PowerShell. Open Windows PowerShell as administrator, run the below cmdlet, and sign in with your admin credentials.
Connect-ExchangeOnlineImport contacts to Microsoft 365 PowerShell scripts
There are two scripts that you will use to add and update the Microsoft 365 contacts.
Add-M365Contacts.ps1 PowerShell script will go through the CSV file and create the contacts with their information in the Microsoft 365 tenant:
- Name
- FirstName
- LastName
- DisplayName
- Alias
- ExternalEmailAddress
Update-M365Contacts.ps1 PowerShell script will go through the CSV file and update the Microsoft 365 contacts in the tenant with the additional information:
- StreetAddress
- StateOrProvince
- City
- PostalCode
- Phone
- MobilePhone
- HomePhone
- Company
- Department
- CountryOrRegion
- Fax
- Initials
- Title
- Notes
- Office
- Manager
- Hidden (HiddenFromAddressListsEnabled)
Note: Suppose you already have the contacts in Microsoft 365, and you want to update them with new values, only use the Update-M365Contacts.ps1 PowerShell script.
How to import contacts to Microsoft 365 with PowerShell
Let’s go through the steps to create bulk contacts in Microsoft 365 from CSV file.
Step 1: Download CSV template
Without a CSV file, you can’t use the scripts to add and update the contacts in Exchange Online – Microsoft 365.
Download the CSV file M365Contacts.csv and place it in the C:\Temp folder. If you don’t have a Temp folder, create one.
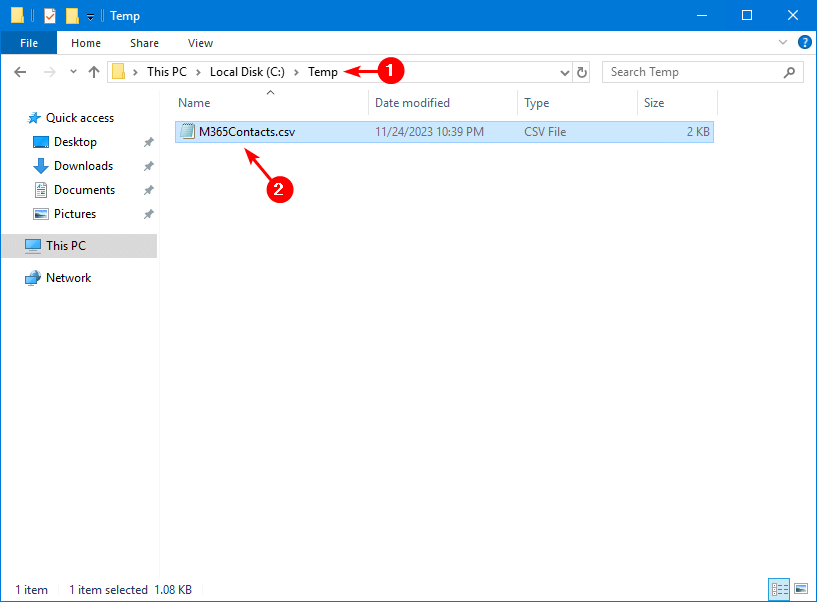
Open the CSV file and fill in the contact details you want to import.
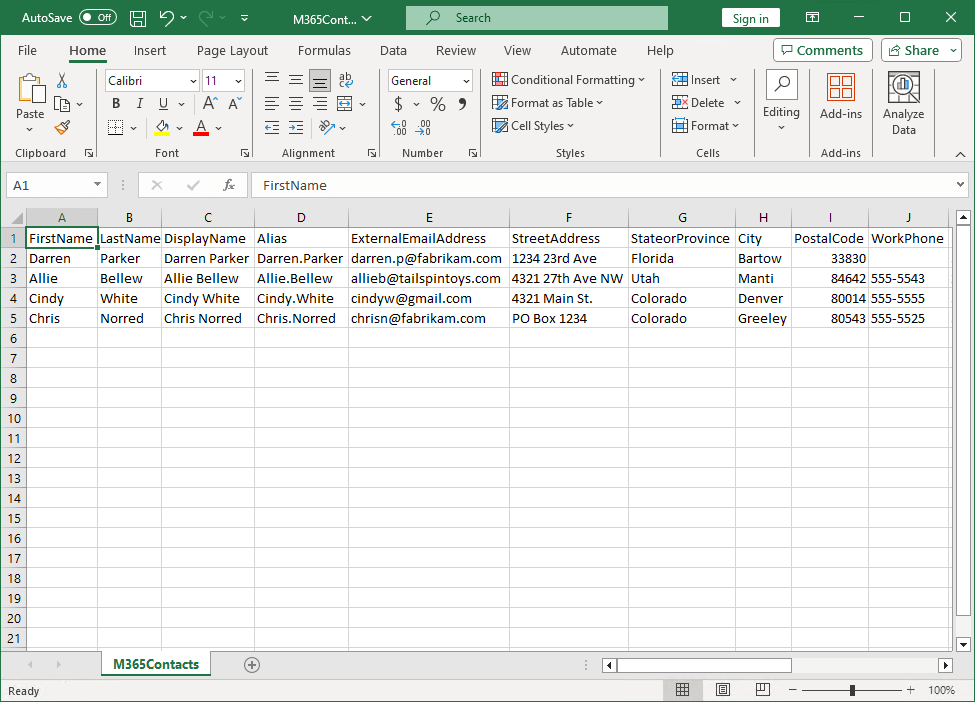
Step 2: Check CSV file for import
Always verify that your CSV file is readable before you run the script. An excellent way is to start PowerShell as administrator and run the Import-Csv cmdlet.
Import-Csv "C:\Temp\M365Contacts.csv" | Format-TableThe output appears as columns.
FirstName LastName DisplayName   Alias         ExternalEmailAddress    StreetAddress    StateorProvince City    PostalCode WorkPhone
--------- -------- -----------   -----         --------------------    -------------    --------------- ----    ---------- ---------
Darren    Parker   Darren Parker Darren.Parker darren.p@fabrikam.com   1234 23rd Ave    Florida         Bartow  33830
Allie     Bellew   Allie Bellew  Allie.Bellew  allieb@tailspintoys.com 4321 27th Ave NW Utah            Manti   84642      555-5543
Cindy     White    Cindy White   Cindy.White   cindyw@gmail.com        4321 Main St.    Colorado        Denver  80014      555-5555
Chris     Norred   Chris Norred  Chris.Norred  chrisn@fabrikam.com     PO Box 1234      Colorado        Greeley 80543      555-5525
You can use the Out-GridView cmdlet to have all the content shown in a separate window.
Import-Csv "C:\Temp\M365Contacts.csv" | Out-GridViewThis is how it looks.
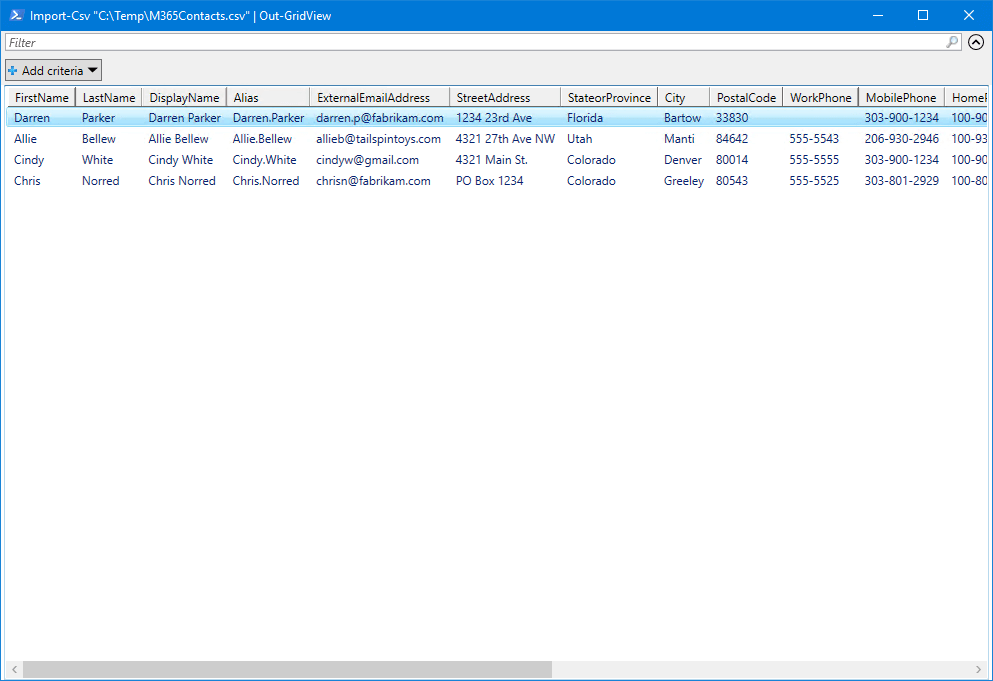
Now that the CSV file with all the contacts is set up correctly, let’s look at the next step.
Step 3: Run Add-M365Contacts PowerShell script
Download and place Add-M365Contacts.ps1 PowerShell script in the C:\scripts folder. If you don’t have a scripts folder, create one.
Ensure the file is unblocked to prevent errors when running the script. Read more in the article Not digitally signed error when running PowerShell script.
$csvFilePath = "C:\temp\M365Contacts.csv"

try {
    $Contacts = Import-Csv $csvFilePath

    foreach ($Contact in $Contacts) {
        try {
            if ((Get-MailContact -Filter "DisplayName -eq '$($Contact.DisplayName)' -or ExternalEmailAddress -eq '$($Contact.ExternalEmailAddress)'" -ErrorAction SilentlyContinue) -ne $null) {
                Write-Host "Contact $($Contact.ExternalEmailAddress) already exists" -ForegroundColor Yellow
            }
            else {
                $null = New-MailContact `
                    -Name $Contact.DisplayName `
                    -FirstName $Contact.FirstName `
                    -LastName $Contact.LastName `
                    -DisplayName $Contact.DisplayName `
                    -Alias $Contact.Alias `
                    -ExternalEmailAddress $Contact.ExternalEmailAddress `
                    #-WhatIf
                    Write-Host "Contact $($Contact.ExternalEmailAddress) added successfully" -ForegroundColor Green
            }
        }
        catch {
            Write-Host "Failed to add contact $($Contact.ExternalEmailAddress). Error: $_" -ForegroundColor Red
        }
    }
}
catch {
    Write-Host "Failed to import CSV file. Error: $_" -ForegroundColor Red
}
Run the script to create the contacts in Microsoft 365.
C:\Scripts\.\Add-M365Contacts.ps1The output will show whether the contacts were successfully or unsuccessfully created with a message.
Contact darren.p@fabrikam.com added successfully
Contact allieb@tailspintoys.com added successfully
Contact cindyw@gmail.com added successfully
Contact chrisn@fabrikam.com already exists
Step 4: Run Update-M365Contacts PowerShell script
Download and place Update-M365Contacts.ps1 PowerShell script in the C:\scripts folder. If you don’t have a scripts folder, create one.
Ensure the file is unblocked to prevent errors when running the script. Read more in the article Not digitally signed error when running PowerShell script.
$csvFilePath = "C:\temp\M365Contacts.csv"

try {
    $Contacts = Import-Csv $csvFilePath

    foreach ($Contact in $Contacts) {
        try {
            $existingContact = Get-MailContact -Filter "DisplayName -eq '$($Contact.DisplayName)' -or ExternalEmailAddress -eq '$($Contact.ExternalEmailAddress)'" -ErrorAction SilentlyContinue

            if ($existingContact.Count -eq 0) {
                Write-Host "Contact $($Contact.ExternalEmailAddress) does not exists" -ForegroundColor Red
            }
            else {
                # Set contact information
                Set-Contact `
                    -Identity $Contact.DisplayName `
                    -StreetAddress $Contact.StreetAddress `
                    -StateOrProvince $Contact.StateorProvince `
                    -City $Contact.City `
                    -PostalCode $Contact.PostalCode `
                    -Phone $Contact.WorkPhone `
                    -MobilePhone $Contact.MobilePhone  `
                    -HomePhone $Contact.HomePhone `
                    -Company $Contact.Company `
                    -Department $Contact.Department `
                    -CountryOrRegion $Contact.CountryOrRegion `
                    -Fax $Contact.Fax `
                    -Initials $Contact.Initials `
                    -Title $Contact.Title `
                    -Notes $Contact.Notes `
                    -Office $Contact.Office `
                    -Manager $Contact.Manager `
                    -ErrorAction SilentlyContinue

                $HiddenFromAddressListsEnabled = [System.Convert]::ToBoolean($Contact.Hidden)
                if ($HiddenFromAddressListsEnabled -ne (Get-MailContact -Identity $Contact.DisplayName).HiddenFromAddressListsEnabled) {
                    Set-MailContact `
                        -Identity $Contact.DisplayName `
                        -HiddenFromAddressListsEnabled $HiddenFromAddressListsEnabled
                }
                Write-Host "Contact $($Contact.ExternalEmailAddress) updated successfully" -ForegroundColor Green
            }
        }
        catch {
            Write-Host "Failed to update contact $($Contact.ExternalEmailAddress). Error: $_" -ForegroundColor Red
        }
    }
}
catch {
    Write-Host "Failed to import CSV file. Error: $_" -ForegroundColor Red
}
Run the below script to import all the contact information to the contacts in Microsoft 365.
C:\Scripts\.\Update-M365Contacts.ps1The output will show whether the contacts were successfully or unsuccessfully updated with a message.
Contact darren.p@fabrikam.com updated successfully
Contact allieb@tailspintoys.com updated successfully
Contact cindyw@gmail.com updated successfully
Contact chrisn@fabrikam.com updated successfully
Step 5: Verify contacts in Microsoft 365
It’s essential to check that the external contacts appear in Exchange Online. There are two ways to do that: with PowerShell and in Exchange admin center.
Run the Get-MailContact cmdlet to find the new contacts in the tenant.
Get-MailContactThe output appears.
Name Alias RecipientType
---- ----- -------------
Allie Bellew Allie.Bellew MailContact
Chris Norred Chris.Norred MailContact
Cindy White Cindy.White MailContact
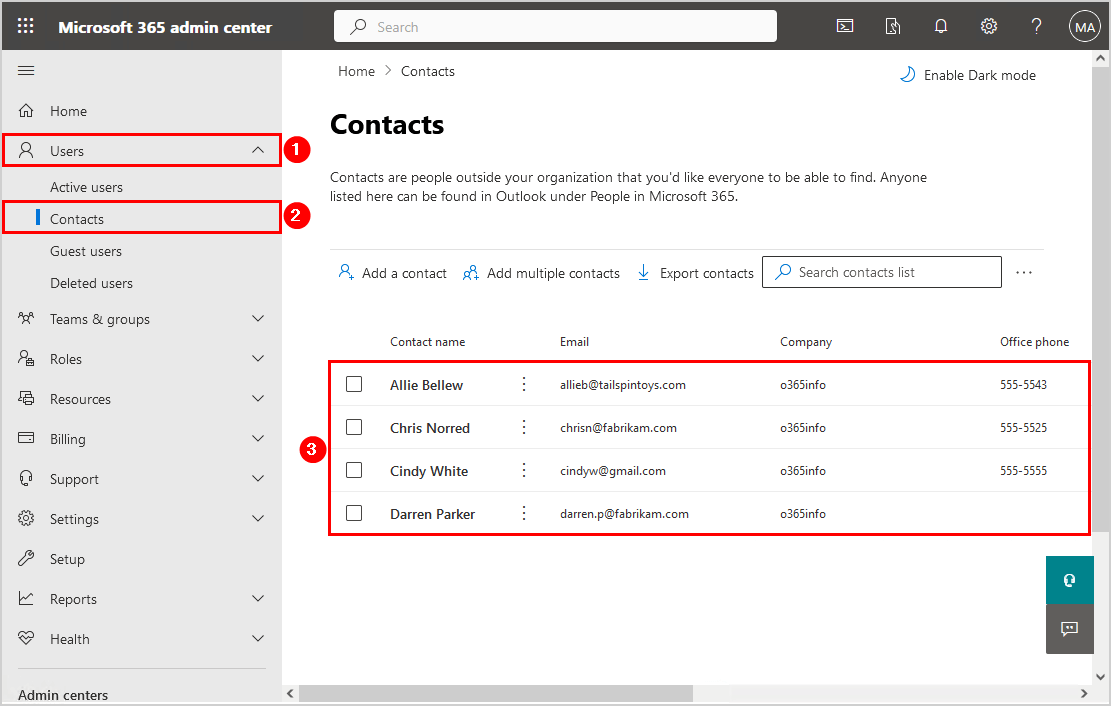
Darren Parker Darren.Parker MailContactAnother way is to sign in to the Microsoft 365 admin center and verify the newly created contacts.
- Click Users > Contacts
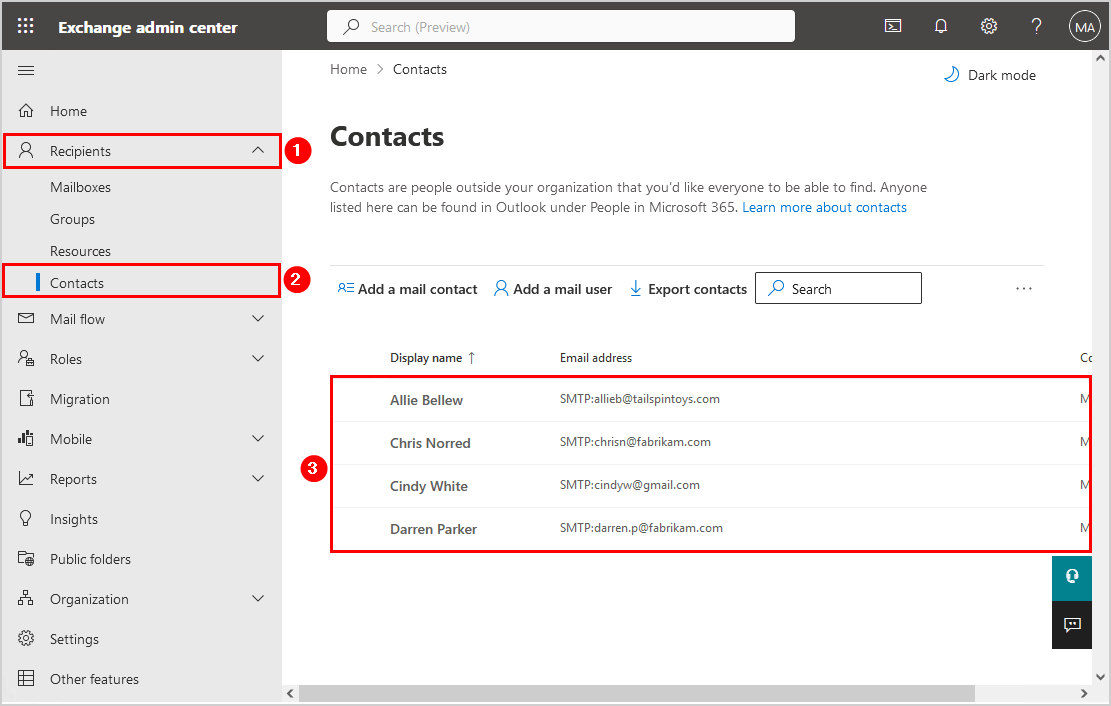
Or sign in to the Exchange admin center for more contact details.
- Click Recipients > Contacts
That’s it!
Did this help you to create external contacts in Microsoft 365 from CSV file with PowerShell?
Read more: How to import Google contacts to Outlook »
Conclusion
You learned how to import contacts to Microsoft 365 using PowerShell. First, prepare the CSV file and ensure all the information is filled in. Next, you need both the scripts Add-M365Contacts.ps1 to create new external contacts and Update-M365Contacts to update the new contacts in Exchange Online. The update script also works for updating existing contacts. The last part is to check that the contacts are created successfully.
Did you enjoy this article? You may also like Configure Certificate-Based Authentication to run automated PowerShell scripts. Don’t forget to follow us and share this article.
This Post Has 0 Comments