skip to Main Content

DKIM flow in Office 365 | Part 3#10

The desired goal we seek to achieve is – to implement a successful process in which the sender mail infrastructure for use DKIM to Digitally sign the outgoing E-mail message. This option will enable the destination recipient to verify the DKIM data meaning – the sender identity.

The purpose of the current article is to take a peek behind the curtain looking at the events that occur in a standard DKIM flow.

The scenario which we use for describing the “DKIM flow”, is related to “Office 365 sender” meaning, an Office 365 customer whom his mail infrastructure is hosted by Exchange Online.

Although the scenario describes the Office 365 environment, most of the DKIM flow that will review is relevant for any DKIM implementation.

Our DKIM scenario characters

In our scenario, two organizations support the DKIM standard.

  • “Our organization” – an organization that is represented by the public domain name – o365pilot.com that his mail infrastructure is hosted at Exchange Online (Office 365).
  • The “destination organization” – organization that is represented by the public domain name – o365pilot.com

Source recipient and destination recipient

  • In our scenario, the sender is a user named Suzan that uses the E-mail address – Suzan@o365pilot.com
  • The destination recipient is Justin that uses the E-mail address Justin@thankyouforsharing.org

The Exchange Online server who host the mail infrastructure of o365pilot.com was configured to support DKIM signature for the domain name – o365pilot.com
Each E-mail message which has an E-mail address that includes the domain name o365pilot.com will be digitally signed (DKIM Digital Signature).

Suzan, want to send E-mail message to her friend Justin that is working for a company named – “thank you for sharing” and his E-mail address is – Justin@thankyouforsharing.org

Suzan addresses her mail server, asking him to deliver her E-mail message to the destination recipient.

DKIM – Domain Keys Identified Mail in Office 365 – Outbound DKIM signing -01

The required pre-configuration for enabling the mail infrastructure supports DKIM standard

Before we begin with the detailed description of the DKIM flow in an Office 365 based environment, it’s important that we briefly review that required configuration setting that needs to implement on the mail infrastructure that needs to be configured to support DKIM standard.

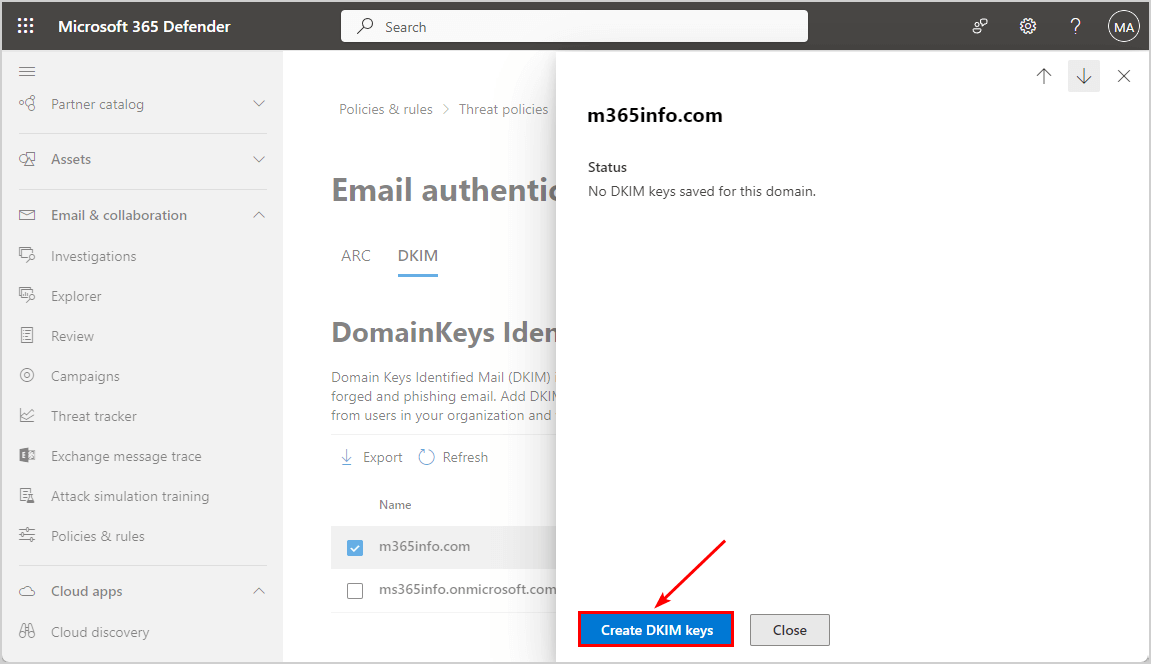
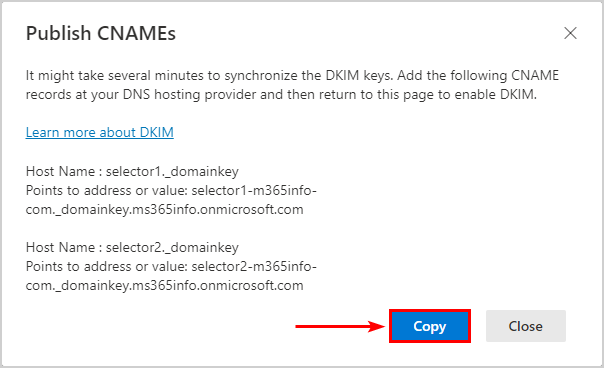
In Office 365 based environment, we will need to “activate” the DKIM option that will be used for signing outgoing E-mail message using a DKIM Digital signature + publish a new CNAME record in the DNS server who host our domain name (o365pilot.com in our scenario).

Requirement number 1 – Public certificate

The DKIM signature is implemented via the use of a Public Key and Private Key.

In on-Premises mail environment, the need for this “Key pair” is obtained via the purchase
of a Public certificate.

In Office 365 based environment, the certificate is already created and can be used by every Office 365 customer.

In Office 365 we don’t need to generate this Public certificate or install this certificate on our Exchange Online mail infrastructure.

All we need to do is to use a public DNS record that will point to a TXT record that contains the value of the required public key that should publish.

DKIM – Domain Keys Identified Mail in Office 365 – Outbound DKIM signing -02

Requirement number 2 – Public DNS record

The information about the Public key value should be published in a public DNS server.
In a non-Office 365 environment, we need to create a TXT record that will serve as a “logical container” for the value of the Public Key.

In Office 365 based environment, we use the same concept, but in a different way-

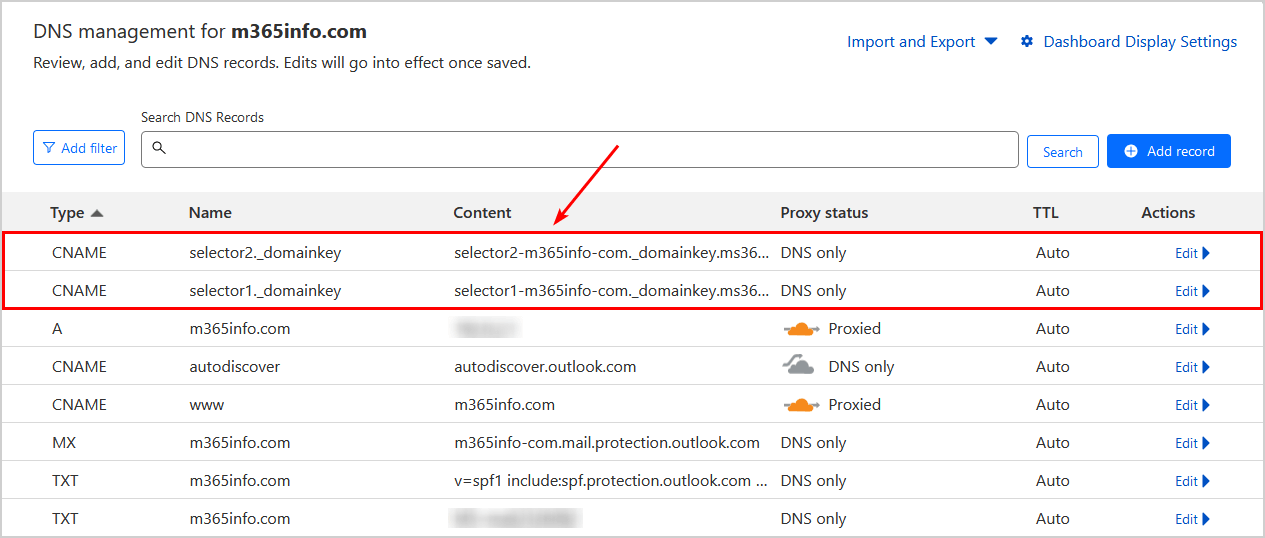
We create a CNAME record that will redirect requests (DNS query) about the “standard DKIM record” to – a particular Office 365 DNS DKIM record that represents our particular domain name.

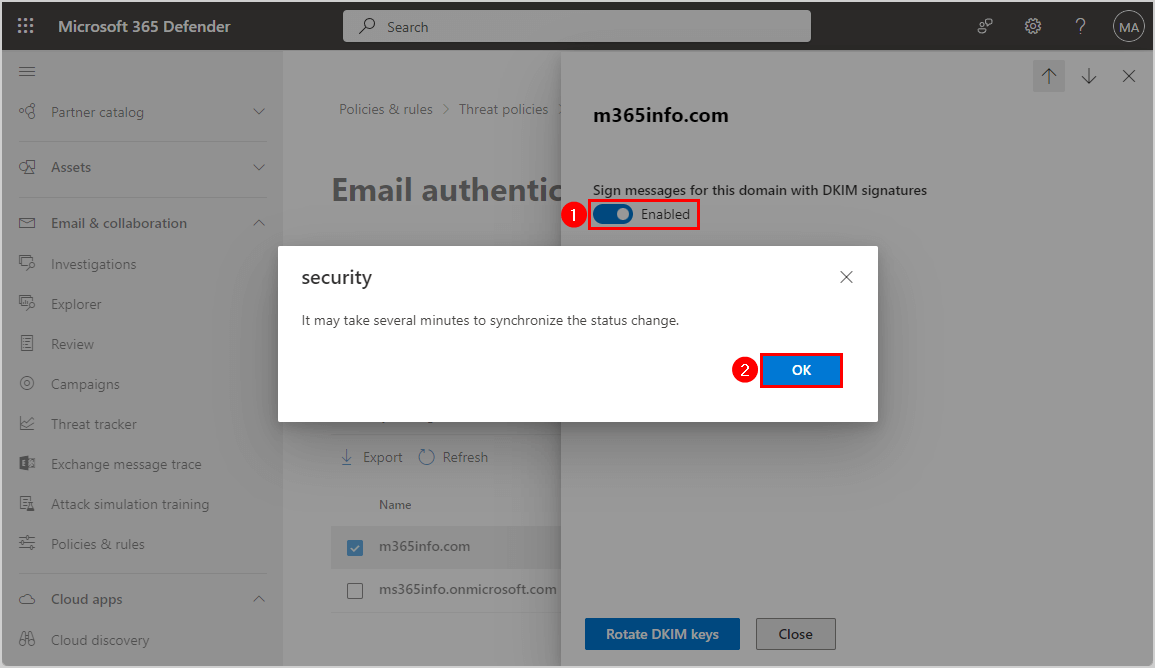
The “dedicated Office 365 TXT DKIM record” is automatically created when we enable the DKIM for our domain in the Exchange Online admin.

The “DKIM entity” that needs to sign digitally outgoing E-mail message describes as a “SELECTOR”.

In Office 365 based environment, we use two predefined host names who represent the Office 365 “selector entity”:

  • selector1
  • selector2

In the DKIM based environment, we address the “selector entity” by using his FQDN (Fully Qualified Domain Name).

The term FQDN includes the following parts – hostname + DKIM predefined sub domain name + the particular organization domain name.

In Office 365 based environment the DNS infrastructure that points to the required DKIM host records will include two different host names:

  1. The “standard DKIM host name”.
  2. Dedicated Office 365 DKIM host name for a specific domain name.

In Office 365 base environment, we need to “point” DKIM DNS query to the specific Office 365 host names.

To be able to point the requests to the specific Office 365 hostnames, we will need to use a “little trick” that will “forward” client request query about the “formal DKIM record hostname” to the Office 365 specific DKIM record hostname.

The “trick” will implement by using a CNAME record.

For example, in an Office 365 based environment the FDDNs (the full host name) that represent the DKIM selectors for the domain – o365pilot.com are:

  • selector1._domainkey.o365pilot.com
  • selector2._domainkey.o365pilot.com

In a non-Office 365 environment, the same naming convention should be used, but the difference is that in a non-Office 365 based environment, we can choose any host name (the left part of the FQDN) that we want instead of “selector”.

In Office 365 based environment, we need to redirect DNS queries that use the “primary DKIM hostname” to a particular Office 365 DKIM host name record that automatically created when we enable the option of DKIM in the Office 365 portal.

In our specific scenario, the additional Office 365 DKIM record name will be –
selector1-o365pilot-com._domainkey.o365info2.onmicrosoft.com

If you want to get more information about the naming convention of the DKIM infrastructure in an Office 365 based environment, you can read the article – Outbound DKIM signing and DNS infrastructure | Building the required DNS records for Office 365 | Part 4#10

DKIM – Domain Keys Identified Mail in Office 365 – Outbound DKIM signing -03

DKIM and DNS infrastructure | “non-Office 365” environment

In the following diagram, we can see an example of the DKIM selector record that should be created.

In our specific scenario, the host name (the FQDN) of the TXT record is:

selector1._domainkey.o365pilot.com

DKIM and DNS infrastructure | Office 365 environment

In the following diagram, we can see an example of the required DNS setting in a scenario of Office 365 customers.

In Office 365 we need to create a CNAME record that will include information about two “DKIM hosts”.

The CNAME record will “redirect” queries about the hostname –

selector1._domainkey.o365pilot.com

For a special Office 365 DNS record that represents the DKIM selector of the domain – o365pilot.com.

In our specific scenario the host name is:

selector1-o365pilot-com._domainkey.o365info2.onmicrosoft.com

DKIM – Domain Keys Identified Mail in Office 365 – Outbound DKIM signing -04

The DNS server answers to the “receiver” (the mail server that represents the destination recipient) will include infrastructure about the “additional hostname”.

This name who appears in the DNS server answer is the host name of dedicated Office 365 record that created when we enabled the DKIM option in the Office 365 portal.

The receiving mail server, will have to create a new DNS query and address the Office 365 DNS servers.

DKIM – Domain Keys Identified Mail in Office 365 – Outbound DKIM signing -05

DKIM flow in an Office 365 based environment | Outbound DKIM signing

Our DKIM flow begins when the organization user, addresses the mail server and asks him to deliver an email message to the destination recipient.

In a scenario, we enabled the option of Outbound DKIM signing in the Exchange Online server for our hosted domain – o365pilot.com

Each “outgoing E-mail message” that has an E-mail address that includes the domain name – o365pilot.com will by Digitally signed by the Exchange Online server.

DKIM – Domain Keys Identified Mail in Office 365 – Outbound DKIM signing -06

When the E-mail message that sent by Suzan reaches her mail server (the Exchange Online mail server in our scenario), the mail server will start the following process-
1. Use the HASH function to HASH the information that appears in the following mail fields:

  • From:
  • To:
  • Date:
  • Subject:
  • Message-ID:
  • Content-Type:
  • MIME-Version

2. Encrypt the HASH value using his Private key

The Exchange Online will add a Digital signature. The Digital signature is implemented by encrypting the HASH value using the server Private key.

DKIM – Domain Keys Identified Mail in Office 365 – Outbound DKIM signing -07

3. Add to the E-mail message the Digital signature
4. Add to the E-mail message “DKIM information” such as the HASH algorithm that was used for HASHING the mail fields.
5. Deliver the E-mail message

After the completion of this step, the mail server “pack” the E-mail message and deliver the E-mail message to her destination (the mail server that represents the organization thankyouforsharing.org)

DKIM – Domain Keys Identified Mail in Office 365 – Outbound DKIM signing -08

DKIM flow | Inbound DKIM validation

In the following section, we will describe the storylines of the process which is implemented by the mail server that represent the destination recipient.

The process in which the “receiver” validates the DKIM signature in the E-mail message described as – Inbound DKIM validation.

Note: In Office 365 based environment, the Exchange Online infrastructure is automatically configured to use “inbound DKIM validation”.

To be able to verify the DKIM signature, the destination mail server (in our scenario the mail server that hosts the recipient Justin@thankyouforsharing.org) will need to perform the following list of “operations”:

DKIM – Domain Keys Identified Mail in Office 365 – inbound DKIM validation -01
DKIM – Domain Keys Identified Mail in Office 365 – inbound DKIM validation -02

As we can see in the diagram above, the receiver has quite a few tasks ahead.

In the next sections, we will review each of this “tasks.”

Verify if the E-mail message includes a DKIM signature.

The first task that needs to be implemented by the receiving mail server is, to look “inside” the E-mail message and check if the E-mail message includes the DKIM signature.

In our specific scenario, the E-mail message includes a DKIM signature that was created by the Exchange Online server who represents the domain – o365pilot.com

DKIM – Domain Keys Identified Mail in Office 365 – inbound DKIM validation -03

The receiving mail server will need to read the “DKIM instructions” that attached to the
E-mail message.

The DKIM information includes the following parts:

  1. The HOST name of the DKIM selector – the term “DKIM selector” describes the entity that digitally sign the E-mail message.
  2. The information about the specific mail filed that their contact was HASHED by the sender.

The E-mail message includes additional part – the DKIM Digital signature.
The Digital signature includes a HASH value that is encrypted by the Private key of the sender (Exchange Online server who represents the o365pilot.com domain) and the HASHED value of a specific E-mail field.

The DKIM process that is implemented by the receiving mail server will need to verify two different security requirements

  1. The identity of the sender – verify the identity of the sender. This step will be implemented by using a procedure, in which the receiver mail server decrypts the encryption of the HASH value that appearing the Digital Signature.
  2. Data integrity – verify the E-mail message data integrity. This step will be implemented by using a procedure, in which the receiver mail server collocates a new HASH value and compares this HASH value to the HASH value that was sent by the sender (the mail server that represents the source recipient).

Part 1#2 | Implementing the DKIM sender identity verification phase

To be able to complete the phase of “verify the sender identity” the receiving mail server will need to get the sender Public key for decrypting the encrypted HASH value.
The purpose of the “decryption” is to be able to verify the identity of the sender.
The decryption can be implemented only by using the Public key of the sender.

A quick reminder

  • The value of the Public key is stored in a TXT record.
  • The TXT record that holds the Public key of the sender domain is hosted on the DNS server who represents the sender domain name (o365pilot.com in our scenario).
  • Only the owner of the sender domain could have published this information in the DNS that hosts the domain – o365pilot.com
  • Only the Public key that is part of the “key pair” can use for decrypting information that was encrypted by the Private key of the sender.
  • The E-mail message, include HASH values that were encrypted by using the Private key of the sender (the Exchange Online mail server that represents the domain name o365pilot.com).
  • To be able to get the information about the Public key, the receiver mail server will need to query DNS server with the hostname the described as the “DKIM selector” that represent the domain name o365pilot.com
  • The information about the DKIM selector appears in the E-mail message as part of the DKIM information.
  • The information about the “DKIM selector” includes only a “partial part” of the FQDN (fully qualified domain name) of the DKIM host.
  • The receiving mail server will “fetch” the “partial DKIM host name” and complete by himself, the “middle part” of the DKIM host name by adding the Sub-Domain name – _domainkey
DKIM – Domain Keys Identified Mail in Office 365 – inbound DKIM validation -04

In our specific scenario, the E-mail message includes the following DKIM information about
the DKIM selector:

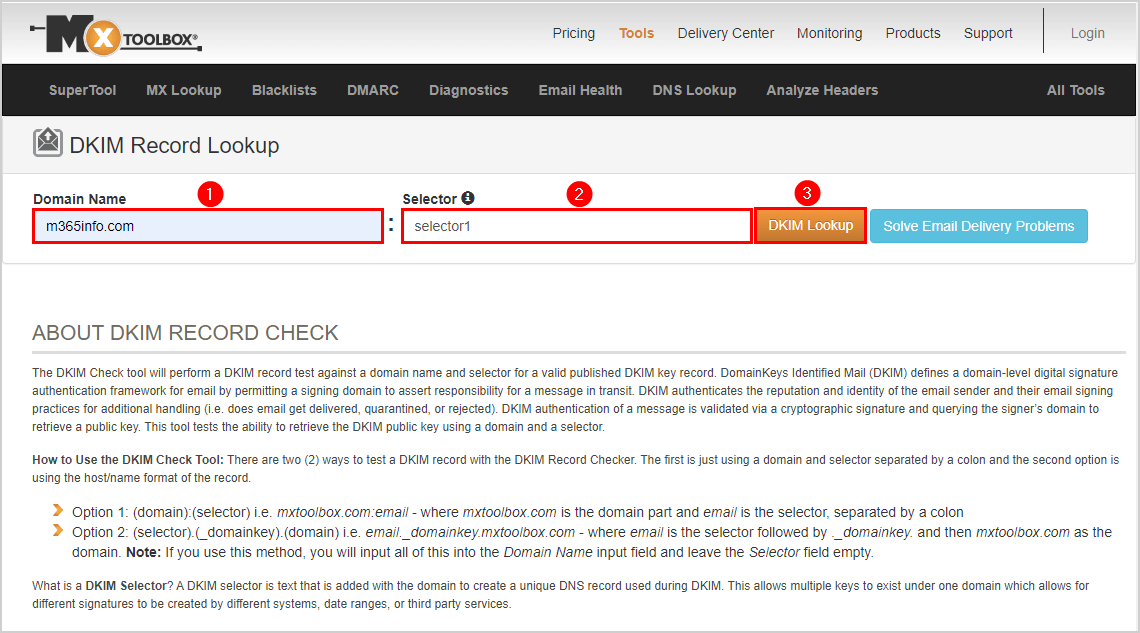
d=o365pilot.com; s=selector1

  • The “d” letter stands for domain.
  • The “s” letter stands for the selector (the host name of the entity the Digitally sign the
    E-mail).
DKIM – Domain Keys Identified Mail in Office 365 – inbound DKIM validation -05

In the following screenshot, we can see an example of the E-mail message that was sent by the Exchange Online mail server that represents the domain o365pilot.com

The information about the entity that Digitally signed the E-mail message appears as part of the “DKIM information” that is attached to the E-mail header.

DKIM – Domain Keys Identified Mail in Office 365 – inbound DKIM validation -06

“Generated” the DKIM selector FQDN

The receiving mail server implemented a procedure in which he “build” the complete host name (FQDN) of the DKIM selector.

The “full host name” of the DKIM record is built from three parts:

Part 1#3 – the first part is the host name – represented by the “s” letter – in our specific example, the host name is – selector1

Note: Vs. non-Office 365 environment, in which the host name considers as the arbitrary name, in an Office 365 based environment, the host name defines by using a “fixed” host names – selector1 and selector2

In Office 365 environment, we need to define two different DKIM selectorsselector1 and selector2. In our specific scenario, we will relate only to the default DKIM selectorselector1

Part 2#3 – the second part of the DKIM hostname defines as “Sub-Domain” and the value is
a “fix value”. The DKIM Sub-Domain name is _domainkey

If you look at the screenshot above, you will notice that the information of the Sub-Domain name doesn’t appear as part of the information about the DKIM host name.

This part is “added” automatically by the receiver mail server that adds this name to the information that he “pulls” from the E-mail message header.

Part 3#3 – the third part of the DKIM host name is the domain name of the organization that signs
the E-mail message. The domain is represented by the letter “d”. In our example, the domain name is o365pilot.com

DKIM – Domain Keys Identified Mail in Office 365 – inbound DKIM validation -07

Query DNS server for information about the DKIM host name

In this phase, the receiving mail server will need to access DNS server and “ask him” about the DKIM host name.

As mentioned, in DKIM implementation that DKIM host record is a TXT record that serves as a logical container for the value of the Public Key.

In a non-Office 365 environment, the DNS answer should be the “content” of the TXT record of the DKIM selector.

In Office 365 based environment, the receiver mail server will not get from the DNS server the required content, but instead, because the DKIM selector was configured by using a CNAME record, the DNS answer will be a “redirection” to an additional DKIM host name.

This “additional DKIM hostname” is the dedicated DNS record that is created on the Office 365 DNS infrastructure when we enable the DKIM option for a particular domain.

The “additional DKIM host name” uses the “onMicrosoft domain name” and not the public domain name of the Office 365 tenants.

This process looks like a confusing process, but the explanation of this “redirection” procedure is that Office 365 consider as a hosted mail infrastructure and in reality, there is not a real option for providing a dedicated certificate for each of the Office 365 tenants and each of the Office 365 tenant domain names.

Instead, Office 365 environment will use a “major DKIM selector entity” that will “represent all the Office 365 tenets.

Each Office 365 tenet will create a “dedicated DKIM selector record” that will apparently “lead” to his “dedicated DKIM selector” but in reality, the CNAME record will redirect the receiving mail server request to the special Office 365 record that is used to Digitally sign all the E-mail messages of each Office 365 tenant who activate the option of outbound DKIM signing.

The receiving mail server will query the public DNS looking for the hostname –
selector1. _domainkey.o365pilot.com (the hostname who appears in the E-mail message)

DKIM – Domain Keys Identified Mail in Office 365 – inbound DKIM validation -08

In Office 365 based environment, the published information about the DKIM host is implemented by using a CNAME record.

If you want to get more information about the naming convention of the DKIM infrastructure in an Office 365 based environment, you can read the article – Outbound DKIM signing and DNS infrastructure | Building the required DNS records for Office 365 | Part 4#10

In our specific scenario, the CNAME record that was created for representing the DKIM selection of the domain name – o365pilot.com, includes the following two host names:

  1. selector1._domainkey.o365pilot.com
  2. selector1-o365pilot-com._domainkey.o365info2.onmicrosoft.com

Each of the DNS queries for the host name – selector1._domainkey.o365pilot.com, will be redirected to the Office 365 special DNS host name – selector1-o365pilot-com._domainkey.o365info2.onmicrosoft.com

DKIM – Domain Keys Identified Mail in Office 365 – inbound DKIM validation -09

When using a CNAME record, the “DNS answer” is – when you are looking for host A, please contact the host B.

The DNS will answer the receiver mail query by providing him a “redirection” to the hostname:
selector1-o365pilot-com._domainkey.o365info2.onmicrosoft.com

DKIM – Domain Keys Identified Mail in Office 365 – inbound DKIM validation -10

In the following screenshot, we can see an example of a process in which we use the NSLOOKUP command line tool, to query the DNS about a specific CNAME record.
When we ask the DNS server “what he can tell us” about a CNAME record of the host named- selector1._domainkey.o365pilot.com

The DNS “answer” is:

selector1-o365pilot-com._domainkey.o365info2.onmicrosoft.com

DKIM – Domain Keys Identified Mail in Office 365 – inbound DKIM validation -11

Query DNS server for information about the “New DKIM hostname”

In the phase, the receiving mail server starts a second DNS query, but this time, looking for the “real DKIM hostname” meaning:

selector1-o365pilot-com._domainkey.o365info2.onmicrosoft.com

DKIM – Domain Keys Identified Mail in Office 365 – inbound DKIM validation -12

Just a quick reminder – in DKIM implemented, the DNS record, serve as a logical container for the DKIM data.

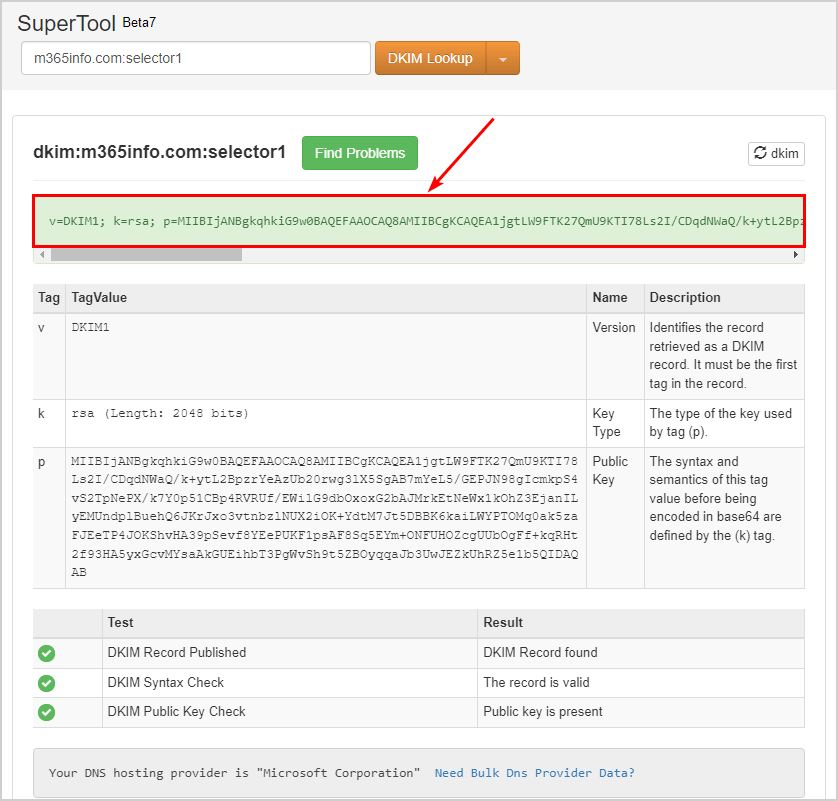
Vs. a “standard” DNS record in which we want to get the IP address of the particular host name when using a TXT record, we don’t wish to get the IP address of the Hostname, but instead, we would like to get the content that included in the TXT record.

When the receiving mail server asks about the “content” of the TXT record, the “DNS answer’ will include all the content that is “stored” in the TXT record.

In a DKIM scenario, the content of the TXT record will include different DKIM parameters.

One of those “parameters” is the Public Key of the “sender domain” (o365pilot.com in our scenario).

DKIM – Domain Keys Identified Mail in Office 365 – inbound DKIM validation -13

In the following screenshot, we can see an example of a process in which we use the NSLOOKUP command line tool to query about the DNS TXT record that uses the hostname-

selector1-o365pilot-com._domainkey.o365info2.onmicrosoft.com we can see that the DNS answer includes the content of the TXT record

DKIM – Domain Keys Identified Mail in Office 365 – inbound DKIM validation -14

The receiving mail server “fetch” the value of the Public Key that represents the DKIM selector of the sender domain (o365pilot.com in our scenario).

If we want to be more precise, we can see that the Information that provided by the TXT record include additional information such as – the HASH algorithm that was used by the sender mail server for generating the DKIM HASH value.

Later on, we will see how the receiver mail server uses this information for generating
a “new HASH value” from the information that appears in the E-mail message.

Using the public key for decrypting the HASH value

In this part, the receiving mail server uses the Public key that he got for the purpose of trying to decrypt the encrypted HASH value that was created by the sender (the Exchange Online mail server that represents the domain name o365pilot.com).

In case that the receiving mail server manages to decrypt the encrypted HASH value, this is a sure sign of the sender identity.

In this phase the receiving mail server that host Justin (our destination recipient) can be sure that the E-mail message was indeed sent by Suzan or in other words, from a mail server that is authorized to represent the domain name – o365pilot.com

DKIM – Domain Keys Identified Mail in Office 365 – inbound DKIM validation -15

Recap

At the moment, the receiving mail server completes only the first part of the DKIM standard requirements in which he can trust beyond doubt that sender identity.

Now, the receiver mail server will need to complete the second part of the DKIM standard specification in which he needs to verify the data integrity of the information that appears in the DKIM E-mail header.

Part 2#2 | Implementing the DKIM data integrity phase

In the section, we will review the steps that are implemented by the receiving mail server for verifying the Data integrity of the E-mail message.

The verification process implemented by using the following steps

  1. Read from the E-mail message headers, information about the E-mail fielded that was HASHED by the sender.
  2. Using a HASH function for HASH the value of this specific E-mail field.
  3. Compare the HASH value that he got to the HASH value that appears in the Digital signature of the sender

Regarding the question – how does the receiver mail server know what are the E-mail fields that are included in the HASH results, the answer is that this information is provided by the sender mail server as part of the E-mail message.

In the following diagram, we can see the E-mail fields that used by the DKIM process for implementing the data integrity requirement.

These specific E-mail fields are used by the sender mail server when using the HASH function, and the same E-mail fields should be “used” by the receiving mail server for calculating the HASH value.

DKIM – Domain Keys Identified Mail in Office 365 – inbound DKIM validation -16

In the following screenshot, we can see an example of a DKIM information that appears in the E-mail message.

The letter “h” represent the information about the E-mail header that their value is hashed.

DKIM – Domain Keys Identified Mail in Office 365 – inbound DKIM validation -17

Additional information that appears in the E-mail message header is the information about the
HASH algorithm that was used for calculating the HASH value by the “sender mail server”.

The reason that this information is mentioned is because the receiver mail server will need to use the same HASH algorithm for generating HASH value of his own.

The receiving mail server will use the HASH value that he calculates by himself to the HASH value that appears in the E-mail message.

In our specific example, the HASH algorithm is rsa-sha256 (represent by the letter “a“)

DKIM – Domain Keys Identified Mail in Office 365 – inbound DKIM validation -18

In the following diagram, we can see the logic of the process that will be implemented by the receiving mail server.

  1. The receiving mail server will use the HASH function for calculating the HASH value of the E-mail fields that was “marked”.
  2. The receiving mail server will compare the result of the HASH value that he got to HASH value that was sent by the sender in our scenario, the Exchange Online server that represent the domain o365pilot.com
  3. In case that the HASH value is equal, this is a sign that the information is “reliable” and didn’t modify in any way.
DKIM – Domain Keys Identified Mail in Office 365 – inbound DKIM validation -19

The “comparison test” that implemented by the receiving mail server designed for verifying that the data in the particular mail fields were not altered or changed in any way, in other words, to be sure that the data is the original data that sent by the “sender mail server.”

If, for some reason, the “original data” that was created by the sender mail server was changed or altered, the HASH function that is implemented by the receiving mail server will produce a different HASH value.

DKIM – Domain Keys Identified Mail in Office 365 – inbound DKIM validation -20

Because all the DKIM test and verification process were completed successfully by the receiving mail server, we can be sure that the sender is the original sender and for this reason, we can trust his identity and safely deliver the E-mail message to the destination recipient.

DKIM – Domain Keys Identified Mail in Office 365 – inbound DKIM validation -21

The next article in the current article series

In the next article – Outbound DKIM signing and DNS infrastructure | Building the required DNS records for Office 365 | Part 4#10, we will review what are the required DNS record that we need to create for implementing outbound DKIM signing in Office 365 based environment and in addition, we learn that required naming convention that we need to use when creating this DNS record.

The o365info Team

The o365info Team

This article was written by our team of experienced IT architects, consultants, and engineers.

This Post Has 0 Comments

Leave a Reply

Your email address will not be published. Required fields are marked *