A user gets an error message when accessing Outlook on the web. Even if the…
How to disable Outlook reactions
Organizations want to turn off reactions to emails in Microsoft Outlook to avoid distractions. Microsoft gave us an option to disable Outlook reactions. You can disallow reactions to any email sent outside and inside an organization. In this article, you will learn how to disable Outlook reactions in the Exchange admin center and with PowerShell.
Table of contents
What are Outlook reactions?
In Outlook, you can respond to an email with emoji reactions. You can send a thumbs up or smiley face without replying to the email. When a recipient adds a reaction to an email message, the email sender receives a notification. Some organizations find this distracting and want to disable this feature to react with emojis to emails.
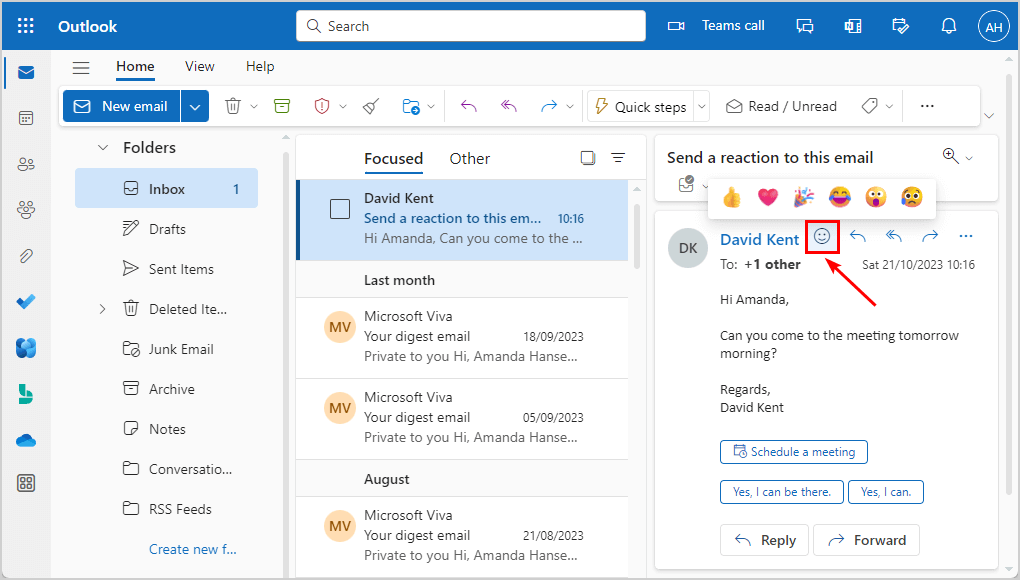
At first, there was no option to disallow reactions. Now, it’s possible to turn off reactions on a single email or all emails in your organization.
Disallow reactions on sent email in Outlook on the web (OWA)
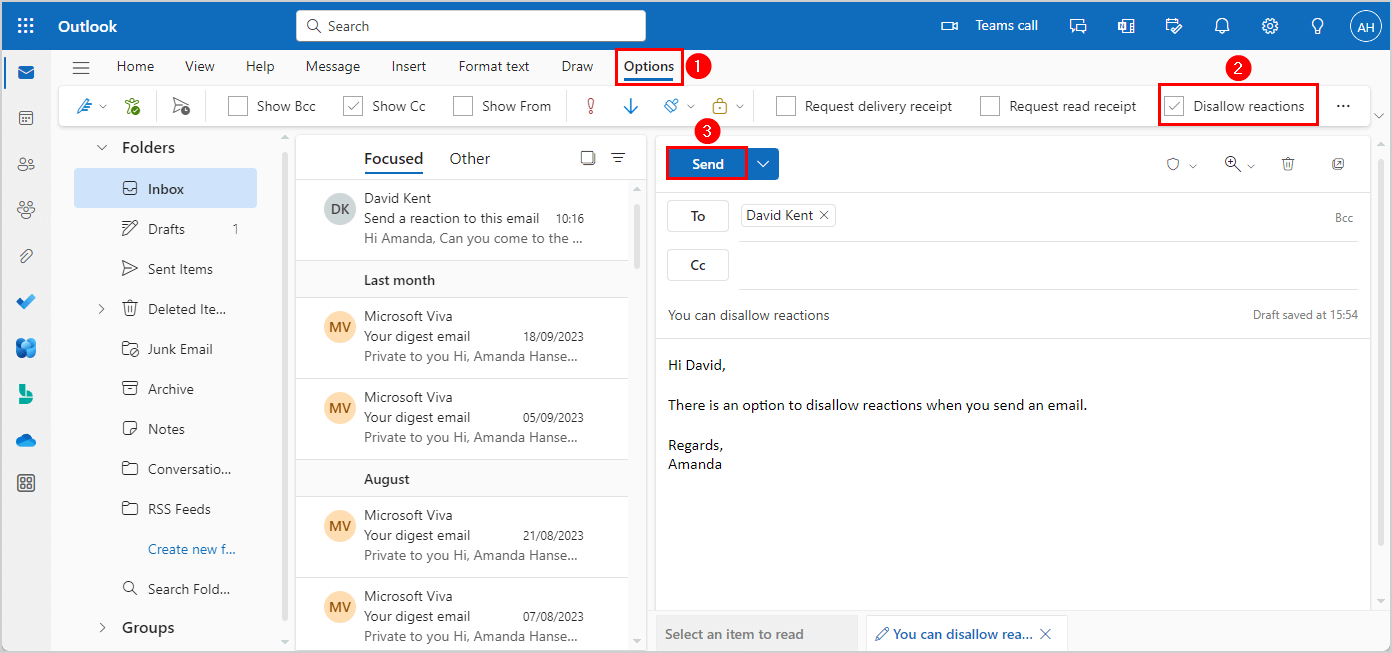
Microsoft started rollout to disallow reaction on emails in September 2023, but the updates are not yet available to all. You can disallow reactions in Outlook on the Web and the New Outlook for Windows. The option will be available when users are still drafting their email and can’t be changed after the email is sent.
Follow the below steps to disallow reactions:
- Sign in to Outlook on the web
- Click on New email and open it in a new window
- Click on Options
- Enable Disallow reactions
- Send the email
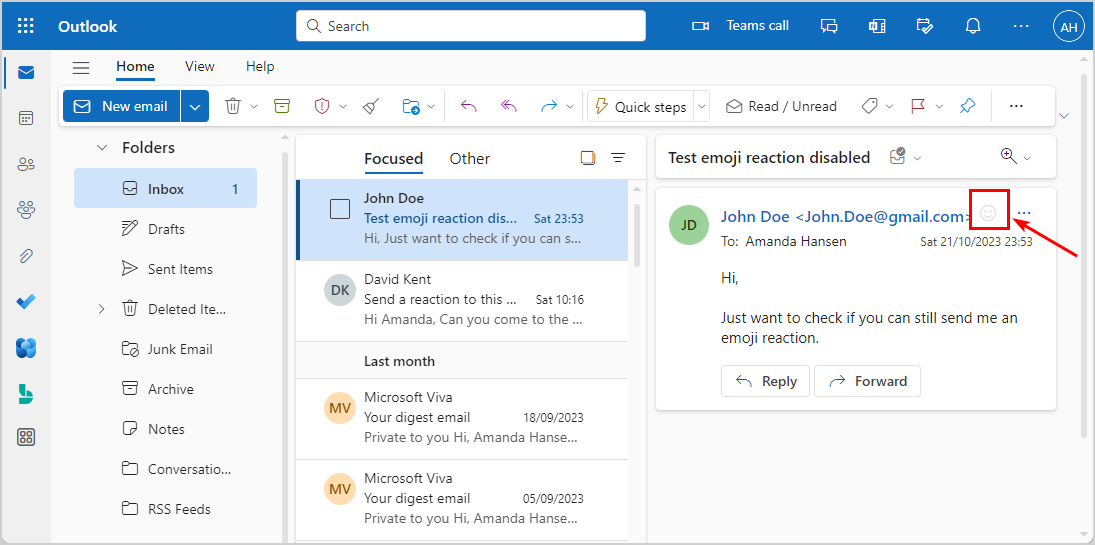
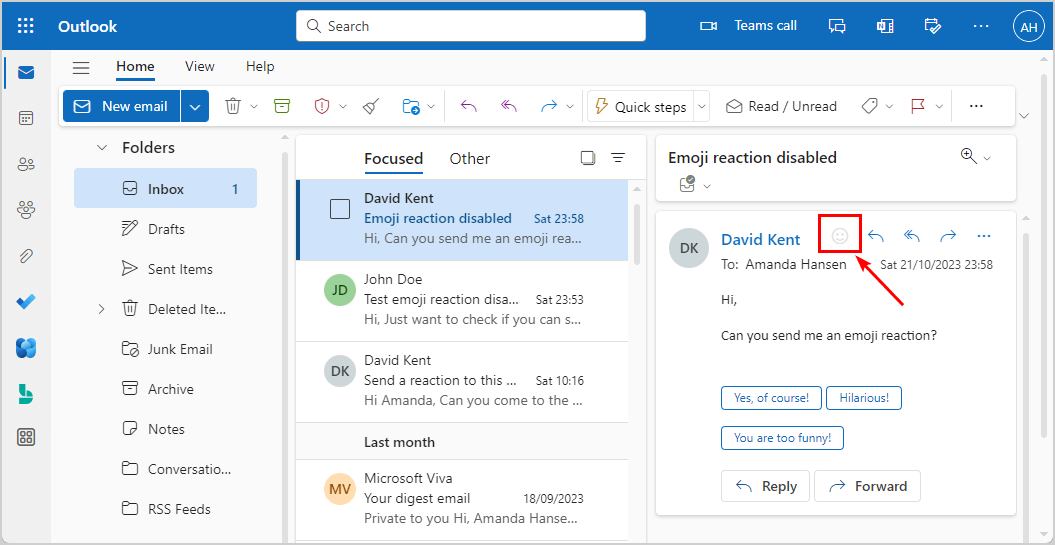
- The recipient, David Kent, opens the email message
- The emoji reactions feature is grayed out
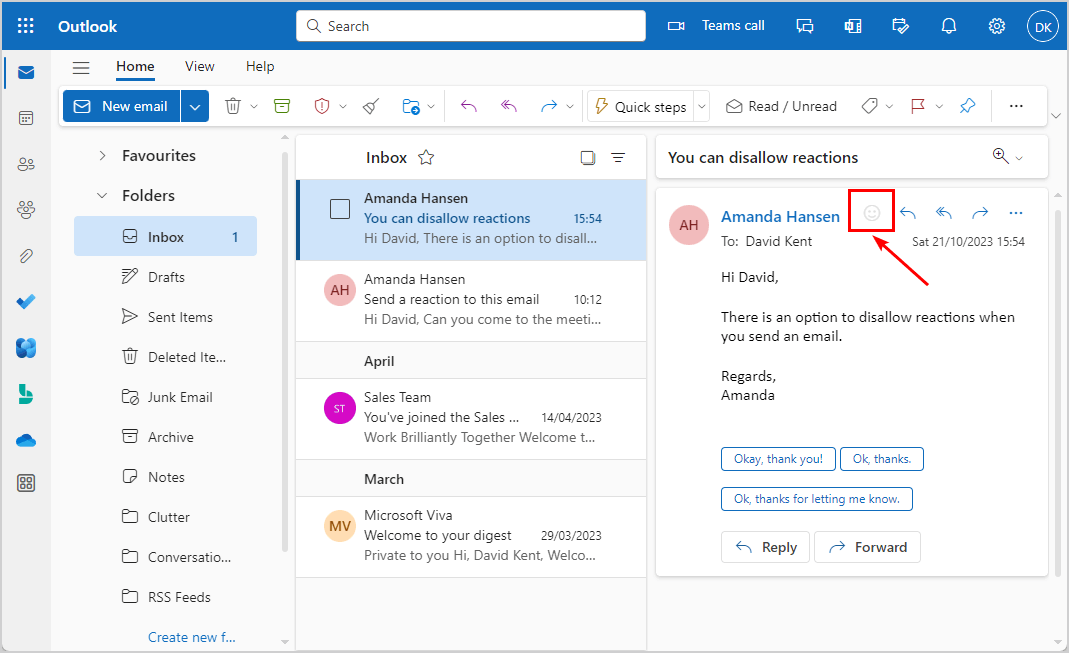
The disadvantage is that this option is unavailable in the Outlook app, so it will not work from there. Some organization users can’t see this option in Outlook on the Web (OWA). Therefore, it’s best to create a mail flow rule for the entire organization.
We will show you how to disable reactions in Outlook in the following ways:
- Exchange admin center
- Exchange Online PowerShell
Disable reactions in Exchange admin center
We will show you how to create a mail flow rule that disallows reactions to emails received from inside and outside the organization.
Create new mail flow rule disallow reactions
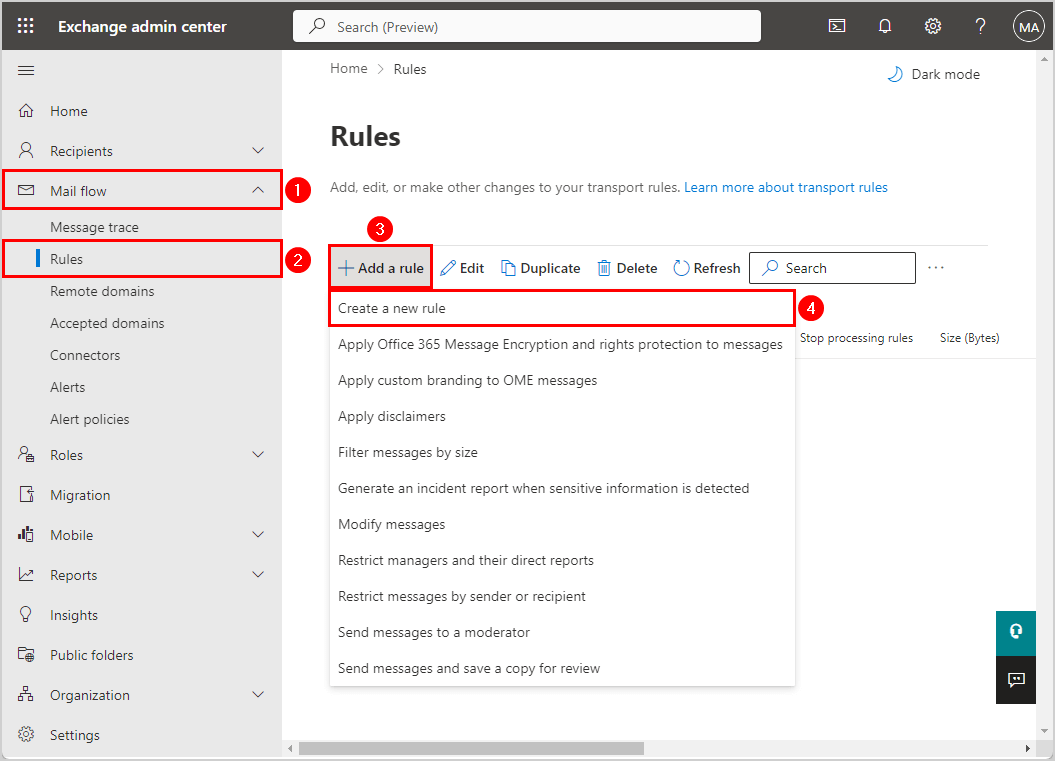
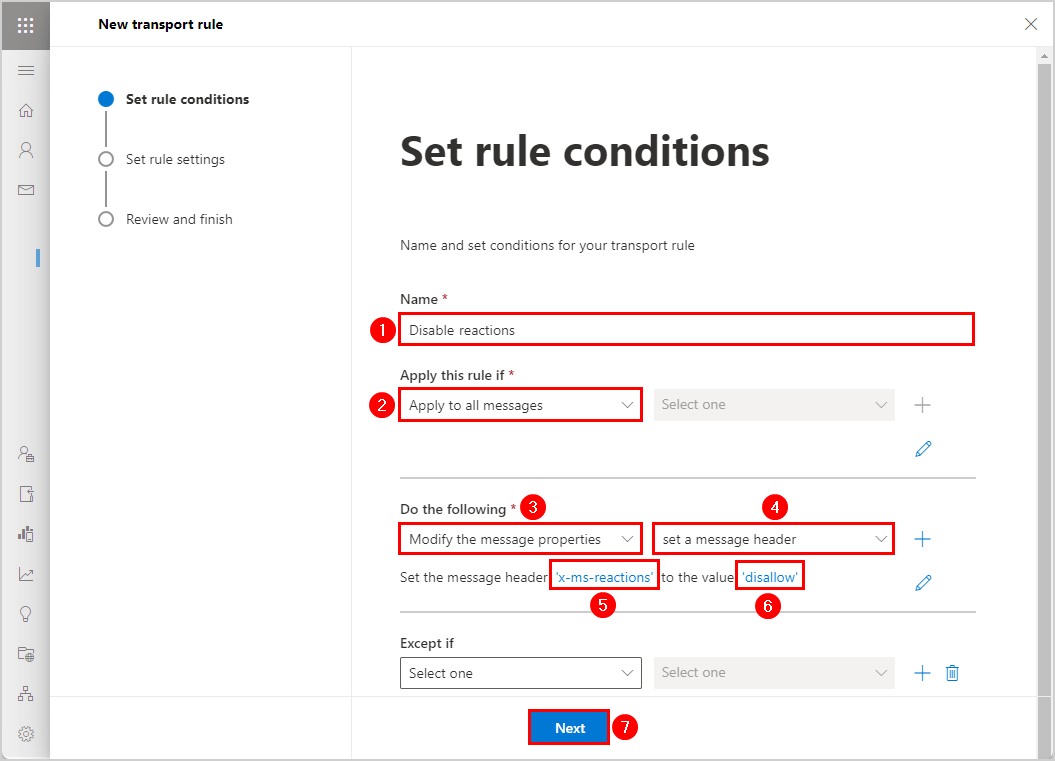
How to create a new mail flow rule for senders outside the organization:
- Go to the Exchange admin center
- Click Mail flow > Rules
- Click Add a rule
- Select Create a new rule
- Name the rule Disable reactions
- Set the below conditions
- Click Next
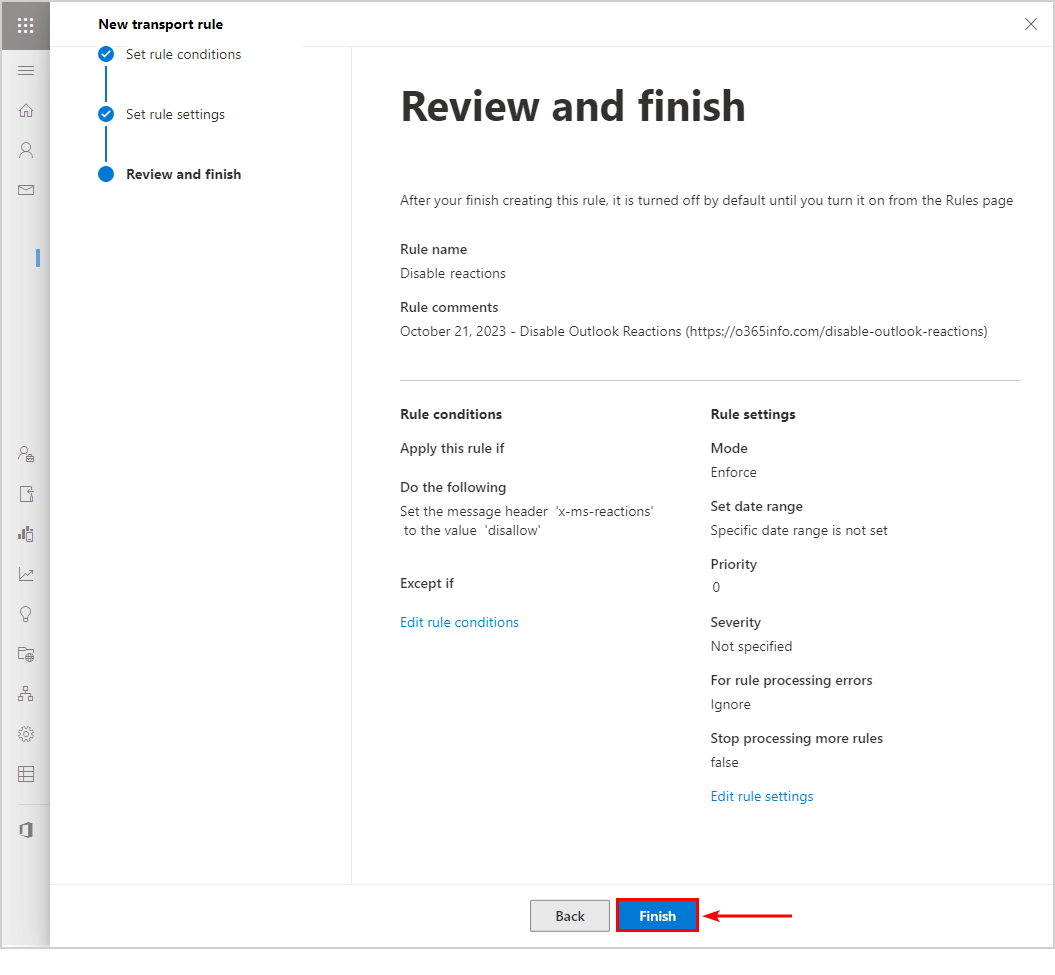
- Fill in the comments section with the current date and the link to the article so you or your colleagues are always up to date.
- Click Next

- Click Finish
- Click Done
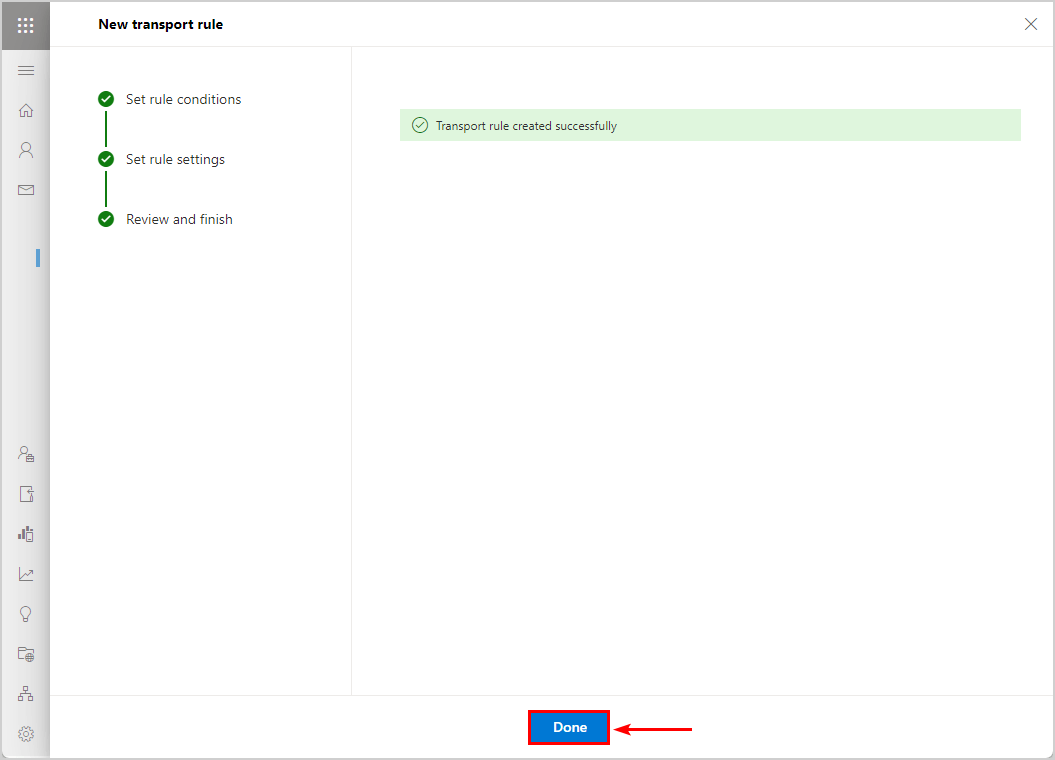
- Go to Rules list
- Click on newly created rule Disable reactions
- Enable the rule

You successfully have set up a mail flow rule that disallows reactions to emails received from inside and outside the organization.
Disable reactions with PowerShell
Let’s look at how to create a mail flow rule with Exchange Online PowerShell that disallows reactions to emails received from inside and outside the organization.
Connect to Exchange Online
To be able to run the PowerShell commands specified, you will need to Connect to Exchange Online PowerShell.
Start Windows PowerShell as administrator and run the cmdlet Connect-ExchangeOnline.
Connect-ExchangeOnlineCreate new mail flow rule disallow reactions
First, you must create a mail flow rule to disallow any reactions in Outlook. We defined the customer header and its value.
Run the below PowerShell script.
$CustomHeaderName = "x-ms-reactions"
$CustomHeaderValue = "disallow"
$RulePriority = 1

New-TransportRule -Name "Disable Reactions" -SetHeaderName $CustomHeaderName -SetHeaderValue $CustomHeaderValue -Priority $RulePriority
The PowerShell output shows you have created the mail flow rule that will disable reactions to emails.
Name              State   Mode    Priority IsRuleConfigurationSupported Comments
----              -----   ----    -------- ---------------------------- --------
Disable Reactions Enabled Enforce 1        True
The mail flow rule Disable Reactions is enabled, so you don’t need to do anything. Check if the transport rule works in the next step.
Verify reactions disabled in Outlook
You can check if the reactions are disabled in Outlook. The emoji reactions should be grayed out in Outlook for all the users in your organization.
Check email sent from external
We sent an email from outside the organization (Gmail) to a recipient in our organization.
Check email sent from external sender:
- Sign in to Outlook on the web
- Open the email
- The emoji reactions feature is grayed out
Check email sent from internal
We sent an email from an internal sender to an internal recipient.
Check email sent from internal sender:
- Sign in to Outlook on the web
- Open the email
- The emoji reactions feature is grayed out
Did this help you to disable reactions in your organization?
Read more: Enable or disable Exchange ActiveSync mailboxes »
Conclusion
You learned how to disable Outlook reactions for the entire organization. First, create a new mail flow rule in the Exchange admin center or with PowerShell. After that, it will disallow reactions in Outlook for the users in your organization.
Did you enjoy this article? You may also like Configure Catch all Mailbox in Microsoft 365. Don’t forget to follow us and share this article.
Brilliant! Sometimes we need things without knowing that we need it. This could be one of those things 😁