In the following article, we will review seven major common Autodiscover flow in a different…
Connecting users to their Exchange Online mailbox – Stage migration – solving the mystery | Part 2#2 | Part 36#36
The current article is the second article in which we review the subject of the challenges and optional solution for the task of creating a new Outlook mail profile for the users whom their mailbox was migrated to Exchange Online using an Exchange stage migration.
Table of contents
- Exchange Stage migration and Autodiscover infrastructure | The article series
- Option 1: Enabling users to connect Exchange Online mailbox by using the onmicrosoft E-mail address
- Option 2: Enabling users to connect Exchange Online mailbox by updating the local registry + HOSTS file
- Converting existing Exchange on-Premises server mailboxes to MEU
Exchange Stage migration and Autodiscover infrastructure | The article series
The article series include the following articles:
- Stage migration, Exchange and Autodiscover infrastructure | Part 1#2 | Part 35#36
- Connecting users to their Exchange Online mailbox – Stage migration – solving the mystery | Part 2#2 | Part 36#36
The concept of “obstacle” of stage migration in which the Autodiscover infrastructure is pointing to Exchange on-Premises.
The optional solution that we can use for “bypass” this obstacle.
The current article is dedicated to the “how to” part or the technical description of the method which I describe as “client-side solution”.
In a scenario in which we cannot implement the “server-side side solution” in which we delete the Exchange on-Premises user mailbox and create a new MEU (mail-enabled user), we will need to use the “client side” solution, in which we use a particular solution for creating a new Outlook mail profile for the migrated users.
As mention in the previous article, when implementing an Exchange stage migration, there are two types of solutions for the task of creating a new Outlook mail profile – the client side and the server side.
There are advantages and disadvantages for each of the methods.
For example, the “server-side” solution, in which we delete the existing Exchange on-Premises user mailbox and create an MEU (mail-enabled user) which includes a search engine of E-mail address can. Theoretically, implement manually but in reality, the “manual” solution is Ineffective and clumsy.
To be able to perform the required procedure in an efficient manner, we will need to automate this process by using a PowerShell script.
At the current time, we can use a set of a PowerShell script that is provided by Microsoft but…
I have experienced many problems with the provided PowerShell script, and the option of writing a custom PowerShell script is suitable only for those of us that know how to write the required PowerShell syntax.
The “client side solutions”, are based on configuration settings that are relatively simple but requires to implement this configuration separately for each of the user’s desktops.
The available “client side” solutions, which can implement are:
- Updating the local registry + HOSTS file.
- Creating a new Outlook mail profile by using the onmicrosoft E-mail address.
A quick reminder
In the Exchange stage migration scenario, we would like to find a way to change the default “Autodiscover behavior” of our mail client (Outlook) so, the Autodiscover processes will not be implemented via the local Exchange CAS server but instead, via the Office 365 Autodiscover infrastructure (Exchange Online).
Scenario description
Before we begin with the “how to” explanation, the examples will be based on the following scenario:
- Alice is a user whom he mailbox was migrated to Exchange Online (from the Exchange On-Premise server).
- The Alice E-mail address is – Alice@o365info.com
- The additional Office 365 E-mail address that Alice has is – Alice@o365info2.onmicrosoft.com
After the successful complication of Alice’s mailbox migration, we want to accomplish two goals:
1. Prevent from Alice to connect to her Exchange On-Premise mailbox.
2. Enable Alice to connect to her Exchange Online mailbox.
Note: In a stage migration environment the migrated users will have two mailboxes at the same time because the stage migration process “Copy” the mailbox content from the Exchange On-Premise server to Exchange Online instead of “Moving” the mailbox to Exchange Online.

Option 1: Enabling users to connect Exchange Online mailbox by using the onmicrosoft E-mail address
In the following section, we will review the “preferred solution” for the challenge that we have in an Exchange stage migration environment.
I describe this solution is a “preferred solution” because, vs. the other option that we will cover in the next section that requires editing the registry and, the HOSTS file; the current method is simpler.
When using the method of creating a new Outlook mail profile and providing the onmicrosoft user E-mail address, we don’t need to edit local OS configuration files.
The following method based on a little trick that we can use in the Office 365 environment.
By default, in Office 365 a user UPN (login name) is also his primary E-mail address.
For example, Alice UPN name is – Alice@o365info.com and her primary E-mail address are also the same.
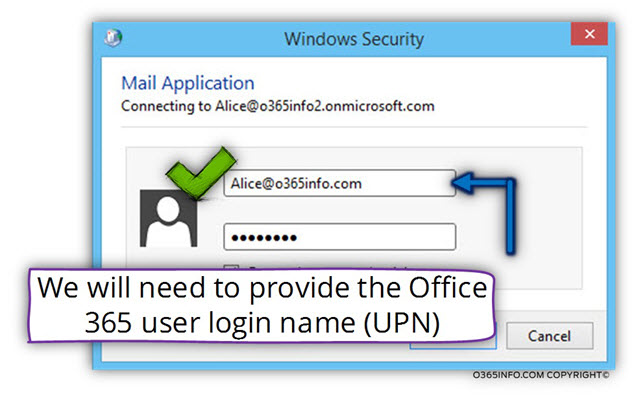
When Alice needs to create a new Outlook mail profile, she will need to provide her E-mail address – Alice@o365info.com and at the end, Alice will identify herself to the Exchange Online server by providing her Office 365 login name – Alice@o365info.com

The Alice E-mail address will be used of Outlook, to look for the Autodiscover Endpoint. Outlook will “extract” the “right part” from Alice E-mail address, and start to look for an Autodiscover Endpoint named – o365info.com or, autodiscover.o365info.com
Because the Autodiscover infrastructure points to the Exchange on-Premises, the result will be that Outlook will locate, address and connect to the local Exchange on-Premises server.
In our scenario, we would like to avoid this default behavior from happening because we don’t want the Outlook to look to find the local Exchange CAS server.
We can tweak this default behavior by using Alice “Office 365 E-mail address” instead her standard E-mail address, for configuring the new Outlook mail profile.
In Office 365 environment that uses a public domain name, each of the Exchange Online recipients, have at least two E-mail addresses-
- The E-mail address that uses the custom domain name of the organization that was registered at Office 365, in our example- o365info.com
- An additional email address that is based on the Office 365 tenant name. In our example- Alice@o365info2.onmicrosoft.com

To be able to bypass the “standard Autodiscover process” that will find the local Exchange CAS server, we will use the “other E-mail address” that Alice has for creating the Outlook mail profile.
In our example, when Alice creates a new Outlook mail profile, the E-mail address that Alice will provide is – Alice@o365info2.onmicrosoft.com
When Outlook starts the Autodiscover process, Outlook will look for an Autodiscover Endpoint named – o365info2.onmicrosoft.com
This search will lead him to “Office 365 element” that will redirect him to his required destination, the Exchange Online server.
In the last part of the “new Outlook mail profile”, Alice will need to provide her credentials. In this part, Alice will have to provide her Office 365 login name – Alice@o365info.com
This is the “confusing part” because we are used to a scenario in which the user
The e-mail address and the login username are identical.
The explanation is that we can “play” with the Office 365 user E-mail address and provide “other E-mail addresses” but we cannot with the Office 365 login name.
Each of the Office 365 users has only one login name but, more than E-mail one address.

Creating a new Outlook mail profile using the onmicrosoft E-mail address
In the following section, we will demonstrate the step by step procedure for creating a new Outlook mail profile using the onmicrosoft E-mail address.
Note: The screenshot is taken from Windows 8 desktop and Office 2013, but the instruction is almost identical to previous versions of Office.
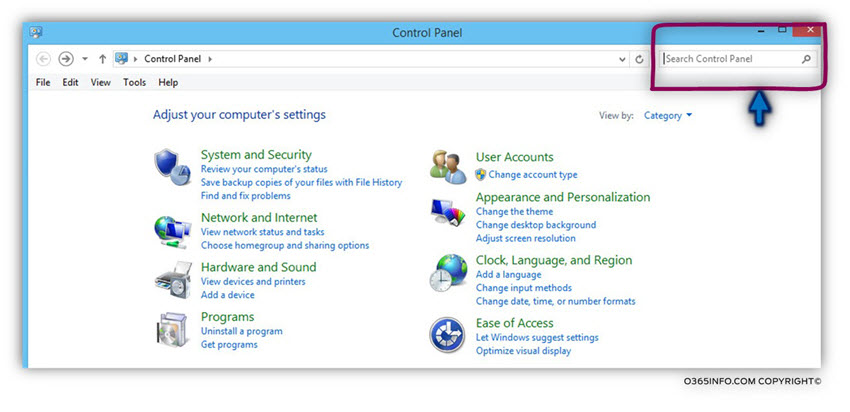
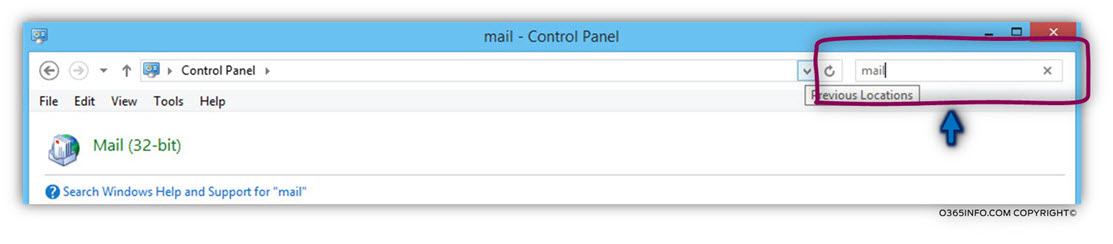
- Open the control panel and look for the search box
- In the search box type – mail
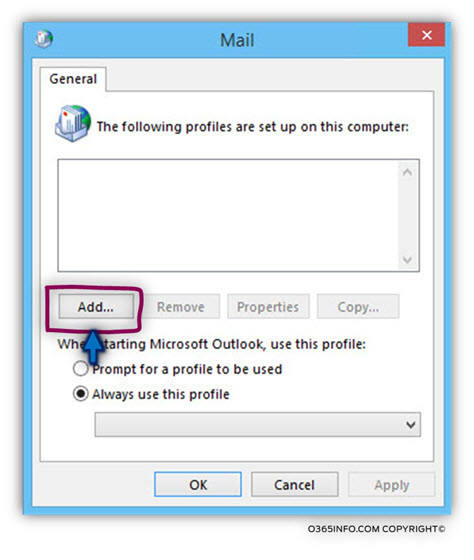
- In the Outlook new mail profile window that appears, click on the Add button.
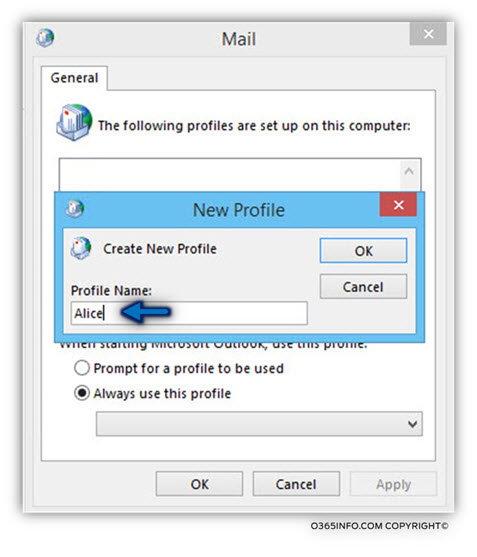
- On the profile name windows, add the profile name (Alice in our example).
In the E-mail address box, add the “Office 365 tenant” E-mail address instead of the “standard user E-mail address”.
In our example, we will add the following E-mail address – Alice@o365info2.onmicrosoft.com

The Autodiscover process starts automatically.
Notice that Outlook will use Alice “Office 365 E-mail address” as the base for the process, in which the Autodiscover client (Outlook) will look for an Autodiscover Endpoint named –
o365info2.onmicrosoft.com
If he cannot find the IP for this hostname, Outlook will create a new DNS query looking for the host named – autodiscover.o365info2.onmicrosoft.com

In the following screenshot, we can see a warning message that informs us a redirection process.
The Autodiscover client (Outlook) address host named – autodiscover.o365info2.onmicrosoft.com and this host try to “point” him to a different Potential Autodiscover
Endpoint named – autodiscover-s.outlook.com
Note – this is a normal procedure in an Office 365 environment. In case that you want to read more information about this process, read the article – Autodiscover flow in an Office 365 environment | Part 1#3 | Part 29#36
Click on the Allow button, and the Next button

In the windows Security Windows, we can see that Outlook uses the E-mail address – Alice@o365info2.onmicrosoft.com as the username because Outlook assumes that the e-mail address and the usernames are identical.
In our scenario, this assumption is wrong because the, in this case, we need to use a different username (Office 365 login name) from the E-mail address.

In our example the Office 365 user UPN is – Alice@o365info.com
The task of creating a new Outlook mail profile completed.
Click on the Finish button.

When we open the new Outlook mail profile, we can see that the mailbox includes the “standard Alice E-mail address.”

When looking at the properties of Alice, we can see the “standard E-mail address”. The Office 365 E-mail address (the onmicrosoft E-mail address) is hidden by default.
The Office 365 E-mail address that we use for creating the mew Outlook mail profile will not “effect” the standard setting of the user mailbox.

Option 2: Enabling users to connect Exchange Online mailbox by updating the local registry + HOSTS file
The following option based on updates that we need to implement by – adding a new registry DWORD and by adding the host name and IP to the HOSTS file.
This option is less preferred because – it’s more complicated and some of us, doesn’t feel comfortable with editing the local registry.
In case that you want or need to implement this registry setting by using Group Policy instead of using manual settings, you can read an instruction in the article – Outlook Autodiscover decision process | Choosing the right Autodiscover method | Part 14#36
In the following section, we will continue to use the same scenario in which we need to create a new Outlook mail profile to a user named Alice which her E-mail address is –
Alice@o365info.com
Just a quick reminder-
Our mission is to create a new Outlook mail profile to a user whom his mailbox was migrated to the cloud using Exchange stage migration.
To be able to connect Outlook to the “cloud mailbox” instead of – the default process in which Outlook client will locate and address the local Exchange on-Premises, we want to prevent the following operations:
- We want to “disable” the option, in which Outlook client will try to use the Autodiscover method in which he connects the local Active Directory environment and asks for an Exchange server list.
- We want to prevent from the Outlook client to connect to the DNS server looking for the hostname – autodiscover.o365info.com because in our scenario, this host named is “mapped” to the IP address of the Exchange on-Premises server.
We will make this “magic” happened by adding information to the local HOSTS file (this option will “replace” the need to connect the DNS server) and adding a DWORD to the registry that will disable the Active Directory Autodiscover method.

1. Edit the local HOSTS file.
In this step, will “point” Outlook client to the Office 365 Autodiscover Endpoint instead of the “standard Autodiscover Endpoint” meaning Exchange on-Premises server.
To be more specific, we will map the Autodiscover Endpoint FQDN name to the IP address of an Office 365 component named – autodiscover.outlook.com

Sounds a bit confusing?
Yes, it’s a bit confusing!
Autodiscover in Office 365 and Exchange Online environment
Before we begin, a short explanation about the way that the Autodiscover service is implemented in Office 365 (Exchange Online) environment.
Office 365 provides a “component” or element named – autodiscover.outlook.com that serves as a “logical router” for Autodiscover clients in an Office 365 environment.
To be able to “redirect” Autodiscover client to this “element” (autodiscover.outlook.com), we use a dedicated CNAME record in the DNS, which her purpose is to redirect an Autodiscover client requests to an Office 365 host named – autodiscover.outlook.com
When using the option of Exchange stage migration, we will implement this configuration only after all the Exchange On-Premise mailboxes will be migrated to the cloud (Exchange Online) and after we decommission the existing Exchange On-Premise infrastructure.
As long as the Exchange stage migration continues, we cannot implement this step.
In our particular scenario, we will need to provide a solution for all the users whom their mailboxes will migrated throughout the migration process.
Because of the CNAME record the point Autodiscover client such as Outlook to the Office 365 infrastructure is not existed, and the current Autodiscover record points to the Exchange on-Premises server, we need to find a way to “block” Outlook client of users that their mailbox migrated from using the “standard” Autodiscover infrastructure and instead, use the Office 365 Autodiscover infrastructure.
Providing a decoy to the Outlook client
In the next section, we will learn how to prevent from Outlook the default Autodiscover in which a domain joined desktop address the local Active Directory for Autodiscover services.
When we “deny” from the Outlook client to use the option of Active Directory for getting the name of an available Autodiscover Endpoint (the local Exchange CAS server), Outlook will create a DNS query looking for a host named – o365info.com and, if he cannot find this hostname, Outlook will create a new DNS query looking for the hostname –
autodiscover.o365info.com

In our scenario, the Exchange server is
- Public facing Exchange server – meaning provides service for the external mail client.
- The DNS server includes an A record which “map” the host names o365info.com to the IP address of the Exchange on-Premises server.
Now, we are facing a dilemma-
On one hand, we want to enable the Outlook client to use the Autodiscover services for connecting the user whom his mailbox was migrated to Exchange Online, using Office 365 Autodiscover infrastructure.
On the other hand – we cannot change the information in the Public DNS because, as you remember, the Exchange On-Premise still serves many other Exchange
On-Premise recipients who did not migrated to Exchange Online.
Sound like a dead end?
The good news is that there is a solution!
The solution implemented by using a little trick.
Step 1 – we get the public IP address of the Office 365 element named – autodiscover.outlook.com
Step 2 – we use the local HOSTS file for – map this IP address (the IP of autodiscover.outlook.com) to the “standard Autodiscover Endpoint” name.
In our scenario, Outlook client will look for the Autodiscover Endpoint by using the host name – autodiscover.o365info.com (in our scenario; the host name o365info.com is used by the company pubic web site and not as a host name for the Exchange Online Autodiscover services.
The “formula” for updating the information in the HOSTS file will be implemented as follows:
IP address of autodiscover.outlook.com = autodiscover.o365info.com
For example:
157.56.252.185 = autodiscover.o365info.com
Another question that we did not answer, until now, is – what will cause the Outlook client to look at the information stored in the HOSTS file instead of creating a standard DNS query?
The answer is that the windows OS, is programmed to use information stored in the HOSTS file before creating a DNS query.
Updating the local HOSTS file – Step by step instructions
1. Getting the IP address of the hosts – autodiscover.outlook.com
Open the CMD

Type the command – ping autodiscover.outlook.com
In the following screenshot, we can see the IP address of the host autodiscover.outlook.com/span>
The IP address that appears is affected by a couple of parameters such as geographical location, etc.
Technically, there is more than a reasonable chance, that you will get a different IP address than the IP address that appears is this example.
Additionally, using a static mapping of IP address is not considered as the best practice, but our assumption that this workaround is just a temporary solution until the stage migration ends.

Before we start, I would like to demonstrate the information that Outlook “see” before we make the change.
Step 1 – Exchange on-Premises Autodiscover infrastructure | before the update
In our scenario, Alice E-mail address is – Alice@o365info.com
Outlook client will try to look for an Autodiscover Endpoint named – autodiscover.o365info.com
In our example, we can see the public IP address of the Public facing Exchange CAS server – 212.25.80.239
In the next steps we will update, the local HOSTS file so the Outlook client will find a different IP address when he tries to look for this hostname.

Step 2 – Office 365 Autodiscover infrastructure | after updating HOSTS file
In Windows 7 and Windows 8, you will need to open the HOSTS file as Administrator.
To open the HOSTS file as Administrator, we will use the OS text editor- the Notepad.
In windows 8 start the search menu and type – Notepad, right click on the notepad icon and choose the option of – Run as administrator

In the Notepad, choose the File menu and the open menu
The HOSTS file is located in the following path:
C:\windows\system32\drivers\etc
The etc folder looks empty, but it’s not.
The notepad displays by default a TXT file and the HOSTS is a file without an extension.

To be able to view the HOSTS file, in the file suffix section, choose the option – All Files
After choosing this option, we will be able to view a list of file.
Select the file named – HOSTS

Note: Just a quick reminder, Alice Outlook client will look for a hostname – autodiscover.o365info.com In the HOSTS file
In our scenario, we will take the IP address from the previous step and add the hostname – autodiscover.o365info.com
In the following screenshot, we can see the result-
157.56.252.185 autodiscover.o365info.com
On the file menu choose, the Save option or close the HOSTS file.

To verify that the information was successfully updated, we will implement the following test:
Ping the hostname – autodiscover.o365info.com
In the following screenshot, we can see that now, the result is the IP address that we entered.

Part 2 – Adding a new registry DWORD
To be able to prevent from Outlook client from starting the Autodiscover process by access the local Active Directory and, ask for the name of the name of the local Exchange server\s that that stored in the Active Directory SCP, we will need to add a registry key.

We will need to add a new DWORD named – ExcludeScpLookup with the value “1” to the following registry path:
HKEY_CURRENT_– USER\Software\Microsoft\Office\X\Outlook\Autodiscover
Note that the value “X” represents the Microsoft Office version, which installed on the local user desktop.
We will need to replace the “X” value with one of the following options:
- Microsoft Office 2007 = 12.0
- Microsoft Office 2010 = 14.0
- Microsoft Office 2013 = 15.0
After adding the required DWORD (ExcludeScpLookup) will prevent from Outlook to start the Autodiscover process by trying to access the local Active Directory SCP.
In the following example, we will manually add the required DWORD in the registry. In the particular scenario, we will create the necessary setting for Outlook 2013.
1. Open the run menu and type RegEdit

2. Look for the Autodiscover key
In the registry, look for the following path
HKEY_CURRENT_– USER\Software\Microsoft\Office\15.0\Outlook\Autodiscover
In the Autodiscover “folder”, right click on the white area, choose the new option and choose the option: DWORD (32 bit) value.

Use the name- ExcludeScpLookup for the new DWORD

Double click on the new ExcludeScpLookup and in the value data box, type “1” (without the quotation mark)

Using batch file for updating the registry
For your convenience, I have prepared a batch file, which can update the registry.
The advantage of using a batch file is that we can add additional configuration settings, for example – add the required configuration for all the Microsoft Office versions such as – Office 2007, 2010 and 2013.
Adding additional registry values that relate to the Autodiscover process.
Additional example for the advantaged of using a batch file is the ability to add additional configuration settings such as – disabling the Autodiscover step of looking for the root domain.
Autodiscover client such as Outlook will always start the Autodiscover process in a non-Active Directory environment, by searching for the Autodiscover Endpoint by using the E-mail address SMTP domain name.
Most of the time, the domain name is not mapped to the Exchange infrastructure and this default Autodiscover phase, just add none required time for the Autodiscover process.
To be able to cancel the default Autodiscover search for the root domain name, we can use the DWORD value – ExcludeHtppsRootDomain
The batch file that I have created – Add-Outlook-reg-All-Office-versions.bat will update the registry by adding the required key for all the available office versions such as 12.0 key for the Microsoft Office 2007, 14.0 key for Microsoft Office 2010, etc.
The batch file includes a registry command that will add to registry key (DWORD) – ExcludeScpLookup and ExcludeHtppsRootDomain
In the following screenshot, we can see the content of the
Add-Outlook-reg-All-Office-versions.bat file.

To activate the Add-Outlook-reg-All-Office-versions.bat file, you can open a command prompt and drag the Add-Outlook-reg-All-Office-versions.bat file into the command line window and press Enter.

In the following screenshot, we can see the information about each of the values that were added by the Add-Outlook-reg-All-Office-versions.bat file.

To be able to see the “new values” that were added to the registry, open the Registry Editor from the Run menu and type- RegEdit

In the following screenshot, we can see the result of running the Add-Outlook-reg-All-Office-versions.bat file
We can see that the Add-Outlook-reg-All-Office-versions.bat batch file adds key for all of the available Microsoft Office versions (12.0, 14.0, 15.0)

When looking at the registry path:
HKEY_CURRENT_– USER\Software\Microsoft\Office\15.0\Outlook\Autodiscover
We can see that there are two “new DWORD” values – ExcludeScpLookup and ExcludeHtppsRootDomain

We can see that the data value is:”1″
The value “1” mean: enable or activate.

Converting existing Exchange on-Premises server mailboxes to MEU
Technically speaking, most of the time I would prefer “server side solutions” over “client side solution” because the concept of creating the required configuration setting in one central location (the Exchange On-Premise server) instead of implementing configuration setting in each of the migrated users’ desktop is more efficacious.
The concept of the “server side solution” is that – the information about Exchange users whom their mailbox already migrated to Exchange Online in the stage migration process, will continue to exist in the Exchange on-Premises server.
The main issue is that the Exchange on-Premises user mailbox will cease to exist as a standard user mailbox and instead, will exist as MEU.
When an organization’s user whom their mailbox migrated to Exchange Online connects the Exchange on-Premises server, the Exchange on-Premises CAS server, send a redirection notification to the recipient and point him to his “cloud mailbox” (his Exchange Online mailbox).
The “redirection” mechanism should implement in the following way:
- We will need to copy the information from the “migrated user mailbox” into a temporary location.
- Delete the Exchange on-Premises mailbox – in a stage migration, the Exchange on-Premises mailbox content is copied and not moved (the Exchange on-Premises mailbox not deleted).
To be able to avoid the scenario in which the user has two mailboxes at the same time, we will need to delete the “Exchange on-Premises mailbox” - Create a new MEU – the Exchange on-Premises server will need to “know” how to handle a request from users whom their mailbox migrated to Exchange Online. These users “doesn’t know” that their mailbox migrated.We will need to implement a procedure, in which the Exchange will be able to “recognize” these users and provide then the required redirection message to their Exchange Online mailbox.
The way that the Exchange on-Premises server called “recognize” this user enables by creating a Mail User (MEU) for each of the users whom their mailbox was already migrated to Exchange Online. - Copy the information from the “deleted mailbox” to the new MEU – the MEU object will need to be populated with the “Office 365 recipient E-mail address”.
Each time that a user whom his mailbox was migrated to Exchange Online will connect the Exchange on-Premises server, the server will respond with a redirection message using the recipient “365 E-mail address” (the onmicrosoft E-mail address).

What Others Are Reading


This Post Has 0 Comments