A user gets an error message when accessing Outlook on the web. Even if the…
How to add members to Microsoft 365 Group
A Microsoft 365 group allows a set of people to send emails and share files, calendars, and other resources. There are times when you have to update the Microsoft 365 group members. In this article, you will learn how to add members to a Microsoft 365 group in the Microsoft Entra admin center and PowerShell.
Table of contents
- Microsoft 365 Group
- Add members to Microsoft 365 group in Microsoft Entra ID
- Adding members to Microsoft 365 group with PowerShell
- Connect to Microsoft Graph PowerShell
- Add member to Microsoft 365 Group
- Add multiple members to Microsoft 365 Group
- Add bulk all members to Microsoft 365 Group
- Add users from specific department to Microsoft 365 Group
- Add multiple members to Microsoft 365 Group from CSV
- Add members to multiple Microsoft 365 Groups from CSV
- Add single user to all Microsoft 365 Groups from CSV
- Conclusion
Microsoft 365 Group
Each organization can create a maximum number of 500,000 groups in Microsoft 365.
| Microsoft 365 Group | Maximum value |
|---|---|
| Number of owners per group | 100 |
| Number of members per group | More than 1,000* |
| Single user can create groups | 250 |
| Admin can create groups | 500,000 (default tenant limit) |
| Number of groups a user can be a member of | 1,000 |
| File storage | 1 TB 10 GB per subscribed user Additional storage purchased (unlimited) |
| Mailbox size | 50 GB |
*Only 1,000 can access the group conversations together.
Note: Users might notice delays when accessing calendars and conversations in very large groups in Outlook.
Add members to Microsoft 365 group in Microsoft Entra ID
To add members to a Microsoft 365 group in the Microsoft Entra admin center, follow these steps:
- Sign into Microsoft Entra admin center
- Expand Identity > Groups > All groups
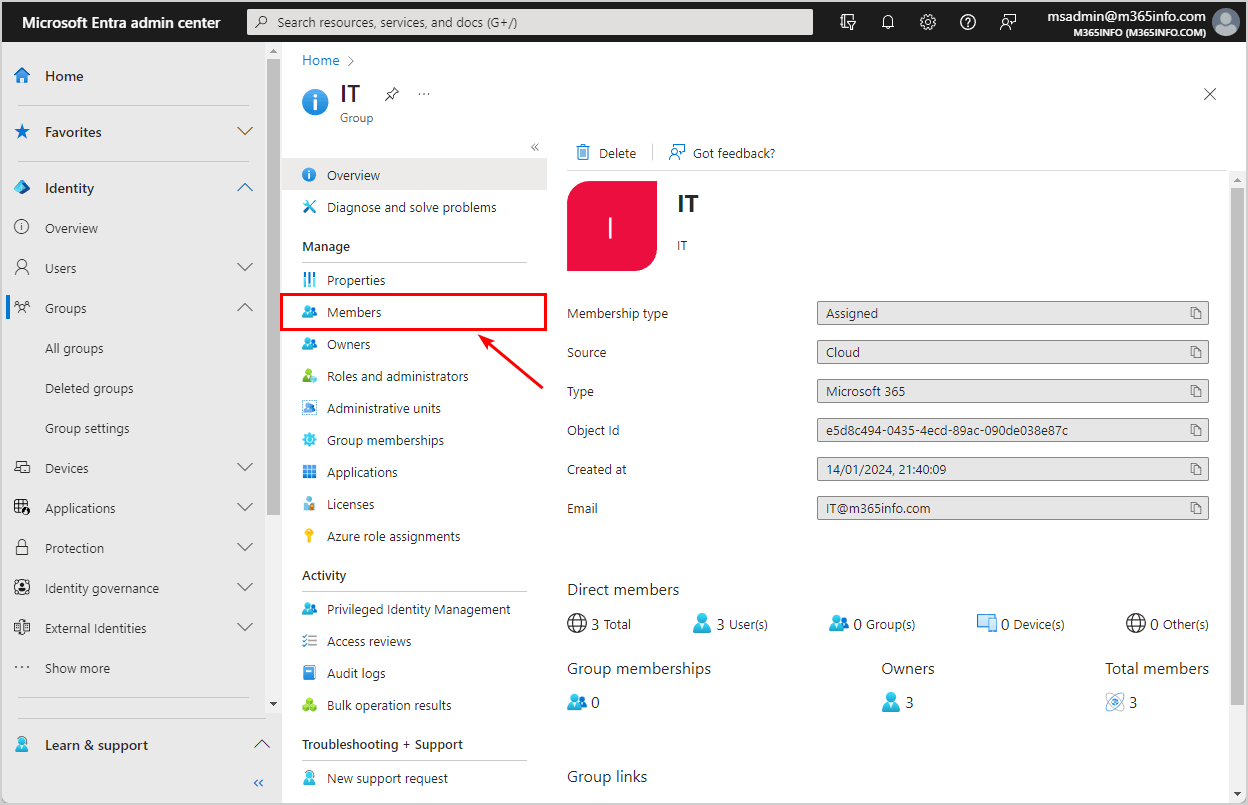
- Click on the Microsoft 365 group from the list
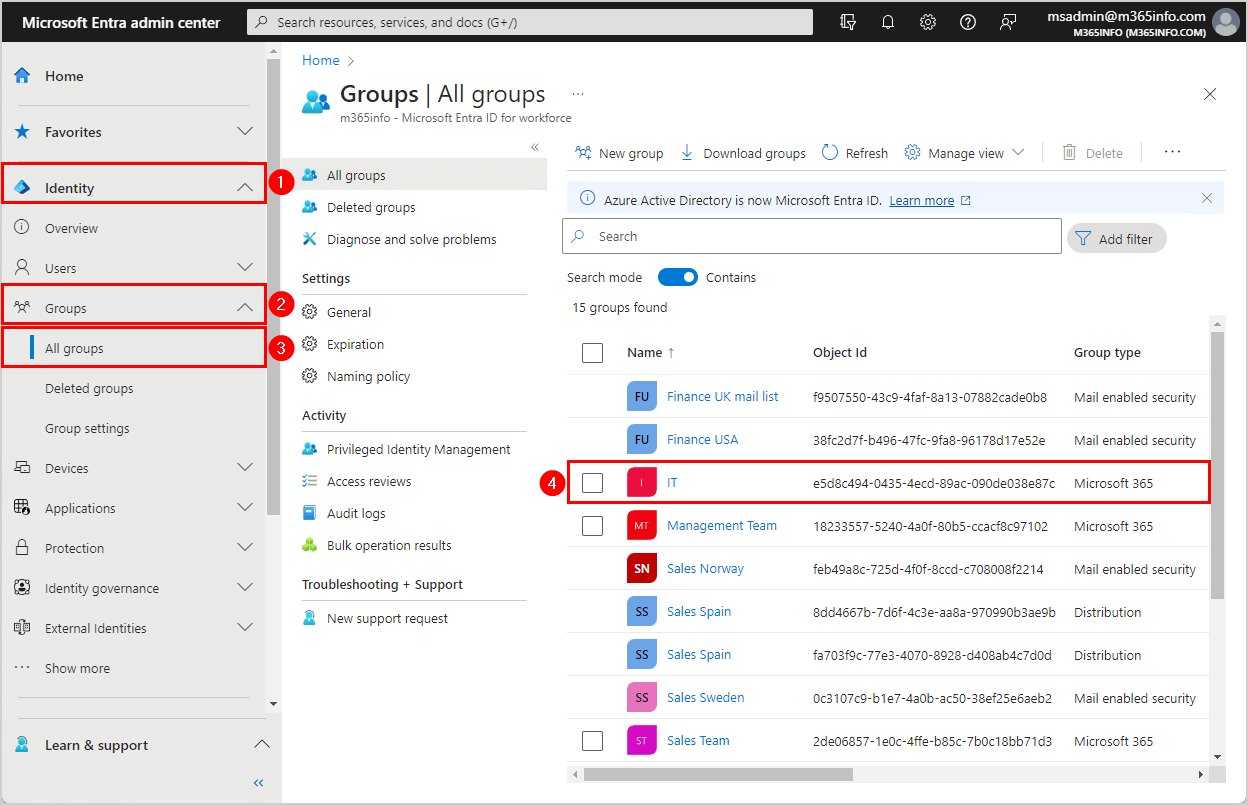
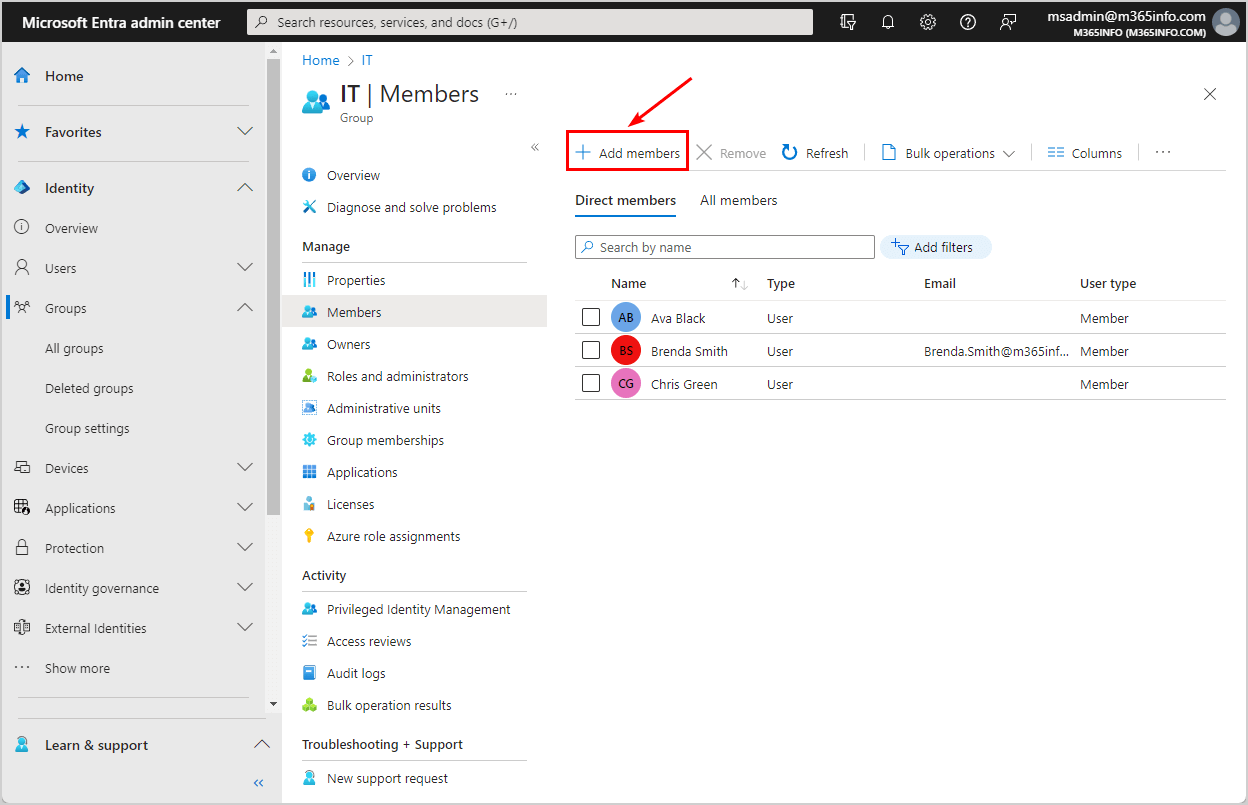
- Click Members
- Click Add members
- Select the users
- Click Select
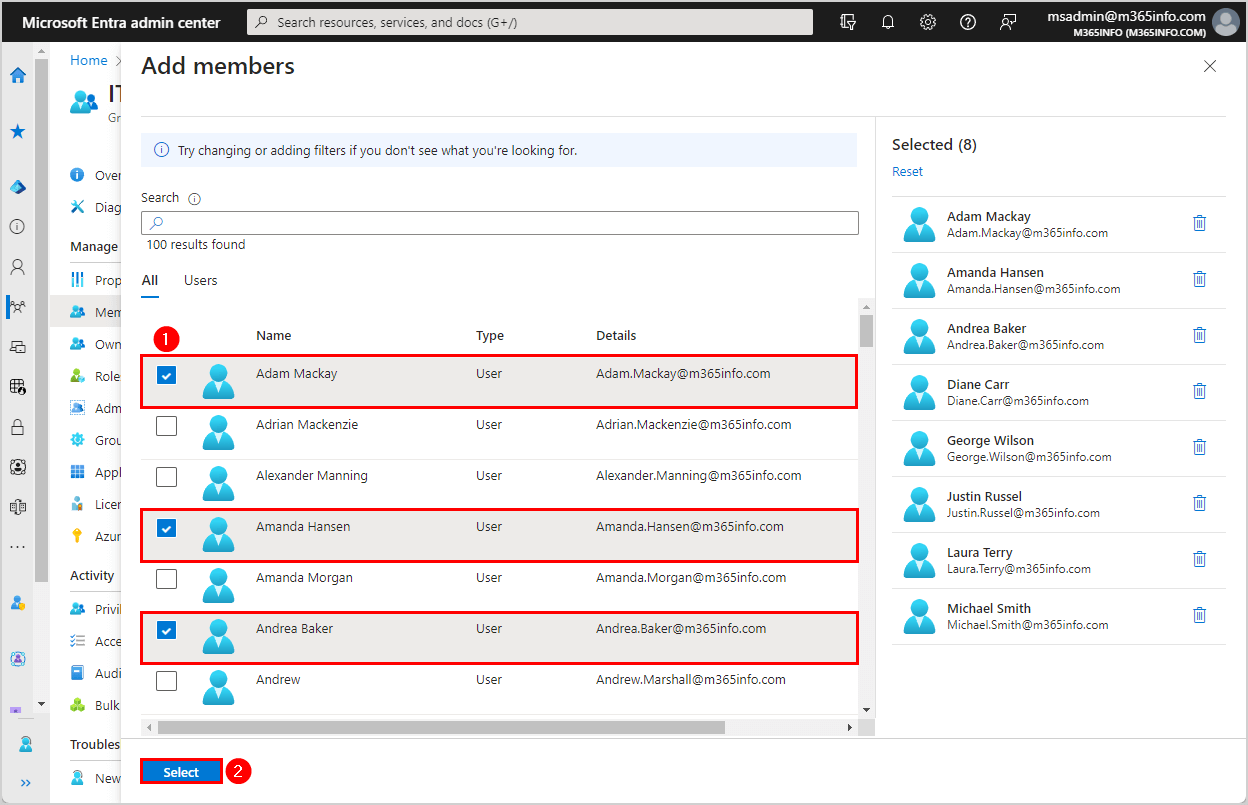
You successfully added group members to the Microsoft 365 group.
Note: In the Microsoft Entra admin center, you can select up to 100 users and add them as members. So, you need to repeat the step if you want to add more than 100 members to the group. Another method is to use PowerShell to avoid this.
Adding members to Microsoft 365 group with PowerShell
We will show how to add members to an existing Microsoft 365 group with PowerShell:
- Add a single member to a Microsoft 365 group
- Add multiple members to a single Microsoft 365 group
- Add bulk members to a single Microsoft 365 group
- Add multiple members to all Microsoft 365 groups
- Add a single member to all Microsoft 365 groups
For this, we need to use the New-MgGroupMember PowerShell cmdlet.
Connect to Microsoft Graph PowerShell
Before you start, you must Install the Microsoft Graph PowerShell module. Start Windows PowerShell as administrator and run the below command.
Install-Module Microsoft.Graph -ForceImportant: Always install the latest Microsoft Graph PowerShell module version before you run a cmdlet or script to prevent errors and incorrect results.
Run the Connect-MgGraph cmdlet with the below scopes to authenticate with Microsoft Graph.
Connect-MgGraph -Scopes "User.ReadWrite.All", "Group.ReadWrite.All", "GroupMember.ReadWrite.All"Now that you are all set, you can use the commands with Microsoft Graph PowerShell.
Add member to Microsoft 365 Group
You can add single or multiple members to a Microsoft 365 group with MS Graph PowerShell using the New-MgGroupMember PowerShell cmdlet.
In our example, we will add multiple members to the Microsoft 365 group (Management Team).
See the PowerShell syntax to add a member to a Microsoft 365 group.
New-MgGroupMember -GroupId "Group Object Id" -DirectoryObjectId "User Object ID"Run the below PowerShell command to add a member to a Microsoft 365 group.
New-MgGroupMember -GroupId "031f52ea-cb97-40fc-ab0f-73598f3fc66d" -DirectoryObjectId "41377e9c-dc47-46c0-b4a5-1d5bbdcb5cc5"Add multiple members to Microsoft 365 Group
To add multiple members to the Microsoft 365 group, you can also specify the UserPrincipalName instead of the Object ID.
- Type the UPN of the users you want to add at the top of the script
- Type the Group Object Id
- Run the below PowerShell script
$upns = @(
    "Amanda.Hansen@m365info.com",
    "Oliver.Taylor@m365info.com",
    "Anna.Bell@m365info.com",
)
$GroupId = "031f52ea-cb97-40fc-ab0f-73598f3fc66d"

$Group = Get-MgGroup -GroupId $GroupId -ErrorAction SilentlyContinue

if ($Group) {

    foreach ($upn in $upns) {
        $User = Get-MgUser -Filter "userPrincipalName eq '$upn'"

        if ($User) {
            $UserId = $User.Id
            $ExistingMember = Get-MgGroupMember -GroupId $GroupId

            if ($ExistingMember.Id -eq $UserId) {
                Write-Host "User $($User.UserPrincipalName) already exists in the group." -ForegroundColor Yellow
            }
            else {
                New-MgGroupMember -GroupId $GroupId -DirectoryObjectId $UserId
                Write-Host "User $($User.UserPrincipalName) added to the group." -ForegroundColor Green
            }
        }
        else {
            Write-Host "User $upn does not exist." -ForegroundColor Red
        }
    }
}
else {
    Write-Host "Group $GroupId does not exist." -ForegroundColor Red
}
Add bulk all members to Microsoft 365 Group
You can add all members to a single Microsoft 365 group. With MS Graph PowerShell, you can add more than 100 members at a time.
- Specify the Microsoft 365 Group Id in line number 1
- Run the below PowerShell script to add all the users to a single Microsoft 365 group
$GroupId = "031f52ea-cb97-40fc-ab0f-73598f3fc66d"

$Group = Get-MgGroup -GroupId $GroupId -ErrorAction SilentlyContinue

if ($Group) {
    $Users = Get-MgUser -All

    foreach ($User in $Users) {
        $ExistingMember = Get-MgGroupMember -GroupId $GroupId

        if ($ExistingMember.Id -eq $User.Id) {
            Write-Host "User $($User.UserPrincipalName) already exists in the group." -ForegroundColor Yellow
        }
        else {
            New-MgGroupMember -GroupId $GroupId -DirectoryObjectId $User.Id
            Write-Host "User $($User.UserPrincipalName) added to the group." -ForegroundColor Green
        }
    }
}
else {
    Write-Host "Group $GroupId does not exist." -ForegroundColor Red
}
Add users from specific department to Microsoft 365 Group
In our example, we want to add all the users from the Marketing department to the Microsoft 365 group (ManagementTeam@m365info.com).
- Type the Microsoft 365 Group Id in line 1
- Run the below PowerShell script
$GroupId = "031f52ea-cb97-40fc-ab0f-73598f3fc66d"

$Group = Get-MgGroup -GroupId $GroupId -ErrorAction SilentlyContinue

if ($Group) {
    $Users = Get-MgUser -All -Filter "Department eq 'Marketing'"

    foreach ($User in $Users) {
        $ExistingMember = Get-MgGroupMember -GroupId $GroupId

        if ($ExistingMember.Id -eq $User.Id) {
            Write-Host "User $($User.UserPrincipalName) already exists in the group." -ForegroundColor Yellow
        }
        else {
            New-MgGroupMember -GroupId $GroupId -DirectoryObjectId $User.Id
            Write-Host "User $($User.UserPrincipalName) added to the group." -ForegroundColor Green
        }
    }
}
else {
    Write-Host "Group $GroupId does not exist." -ForegroundColor Red
}
It will add the users from the Marketing department to the Microsoft 365 group (ManagementTeam@m365info.com).
Add multiple members to Microsoft 365 Group from CSV
You can add multiple members to a single Microsoft 365 group from a CSV file.
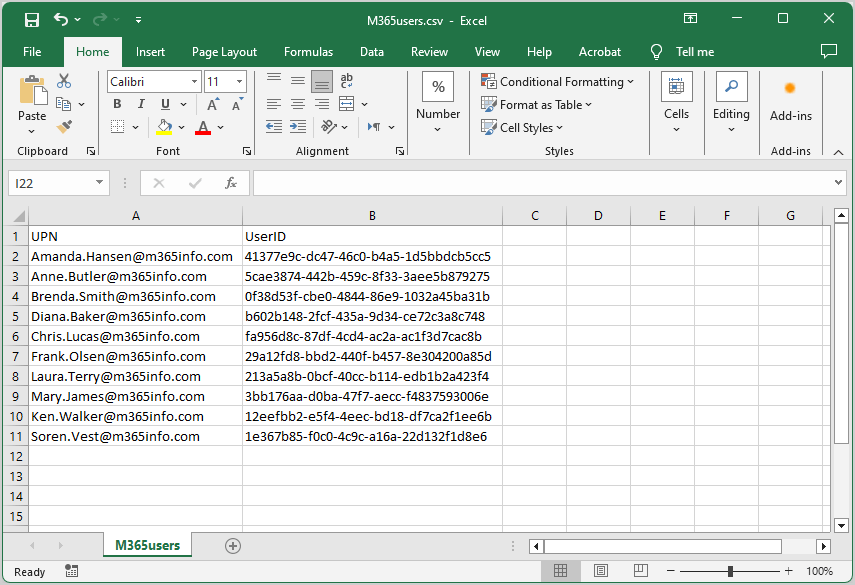
Create a CSV file with two columns:
- Open Microsoft Excel
- Type UPN as the header of the first column
- Specify the UserPrincipalName
- Type UserID as the header of the second column
- Specify the member Object ID
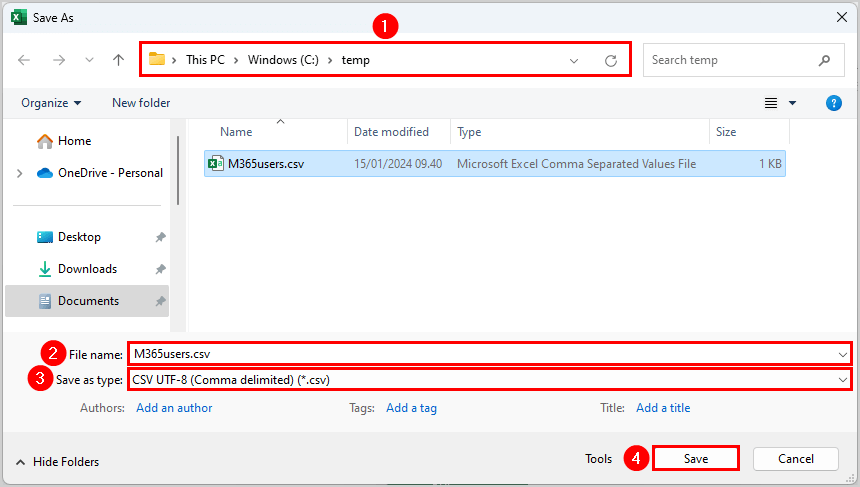
- Create the folder temp if you don’t have it already in the (C:) drive
- Name the file M365users.csv
- Save as type CSV (Comma delimited (*.csv)
- Click Save
- Specify the CSV file path in line 1
- Type the Microsoft 365 Group Id in line 2
- Run the below PowerShell script
$CsvFilePath = "C:\temp\M365users.csv"
$GroupId = "031f52ea-cb97-40fc-ab0f-73598f3fc66d"

$Group = Get-MgGroup -GroupId $GroupId -ErrorAction SilentlyContinue

if ($Group) {
    $CsvUsers = Import-Csv -Path $CsvFilePath

    foreach ($CsvUser in $CsvUsers) {
        $CsvUserID = $CsvUser.UserId
        $User = Get-MgUser -Filter "Id eq '$CsvUserID'" -ErrorAction SilentlyContinue

        if ($User) {
            $UserId = $User.Id
            $ExistingMember = Get-MgGroupMember -GroupId $GroupId

            if ($ExistingMember.Id -eq $UserId) {
                Write-Host "User $($User.UserPrincipalName) already exists in the group." -ForegroundColor Yellow
            }
            else {
                New-MgGroupMember -GroupId $GroupId -DirectoryObjectId $UserId
                Write-Host "User $($User.UserPrincipalName) added to the group." -ForegroundColor Green
            }
        }
        else {
            Write-Host "User $CsvUserID does not exist." -ForegroundColor Red
        }
    }
}
else {
    Write-Host "Group $GroupId does not exist." -ForegroundColor Red
}
The PowerShell output result shows if:
- The Microsoft 365 group does not exist or is misspelled
- The user is already a member of the Microsoft 365 group
- The user is added to the Microsoft 365 group
- The user does not exist or is misspelled
Add members to multiple Microsoft 365 Groups from CSV
You can add existing users to multiple Microsoft 365 groups from a CSV file. You need to create a CSV file consisting of two columns. The first two columns will include a list of Microsoft 365 groups. The third and fourth columns will include a list of users you want to add as a member.
Create a CSV file with four columns:
- Open Microsoft Excel
- Type GroupName as the header of the first column
- Specify the Microsoft 365 group email
- Type GroupID as the header of the second column
- Specify the Microsoft 365 Group Id
- Type UserName as the header of the third column
- Specify the member UserPrincipalName
- Type MemberId as the header of the fourth column
- Specify the member Object ID
See the below CSV file example.

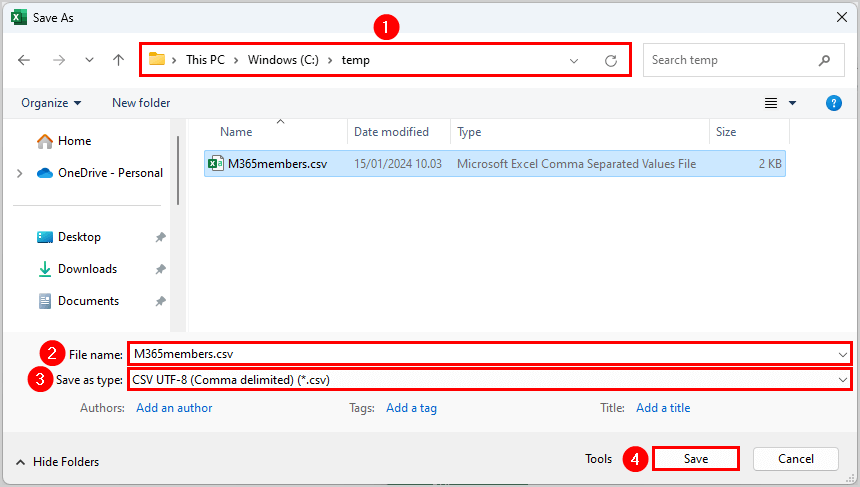
- Create the folder temp if you don’t have it already in the (C:) drive
- Name the file M365members.csv
- Save as type CSV (Comma delimited (*.csv)
- Click Save
- Specify the CSV file path in line 1
- Run the below PowerShell script
$CsvFilePath = "C:\temp\M365members.csv"

$Csv = Import-Csv $CsvFilePath

foreach ($row in $Csv) {
    $GroupId = $Row.GroupId
    $MemberId = $Row.MemberId

    $Group = Get-MgGroup -GroupId $GroupId -ErrorAction SilentlyContinue

    if ($Group) {
        $ExistingMember = Get-MgGroupMember -GroupId $GroupId

        if ($ExistingMember.Id -eq $MemberId) {
            Write-Host "User $MemberId already exists in the group." -ForegroundColor Yellow
        }
        else {
            $User = Get-MgUser -Filter "Id eq '$MemberId'" -ErrorAction SilentlyContinue

            if ($User) {
                New-MgGroupMember -GroupId $GroupId -DirectoryObjectId $MemberId
                Write-Host "User $MemberId added to the group." -ForegroundColor Green
            }
            else {
                Write-Host "User $MemberId doesn't exist" -ForegroundColor Red
            }
        }
    }
    else {
        Write-Host "Group $GroupId does not exist." -ForegroundColor Red
    }
}
The PowerShell output result shows if:
- The Microsoft 365 group does not exist or is misspelled
- The user is already a member of the Microsoft 365 group
- The user added to the Microsoft 365 group
- The user does not exist or is misspelled
Add single user to all Microsoft 365 Groups from CSV
To add a user to multiple Microsoft 365 groups, you need to create a CSV file.
In our example, we want to add a user (Amanda Hansen) to multiple Microsoft 365 groups.
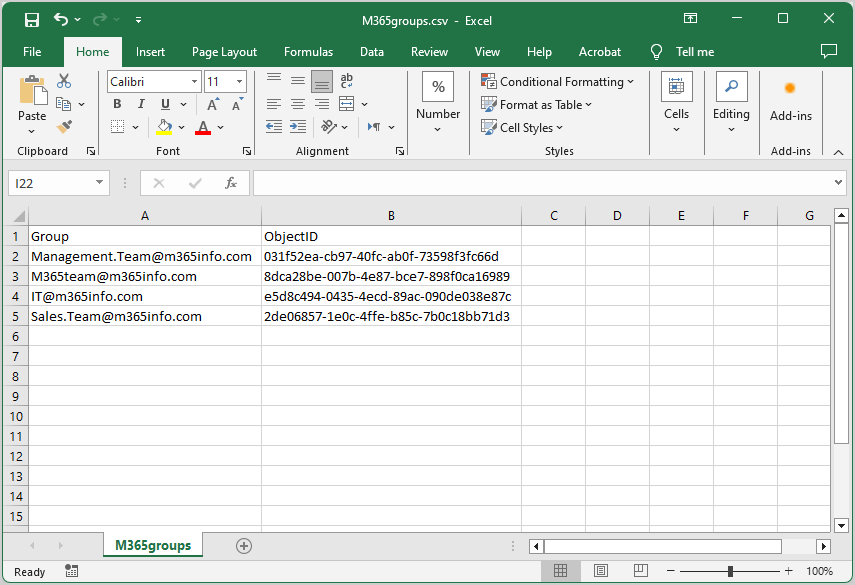
Create a CSV file with two columns:
- Open Microsoft Excel
- Type Group as the header of the first column
- Specify the Microsoft 365 group primary SMTP address
- Type ObjectID as the header of the second column
- Specify the Microsoft 365 group Object Id
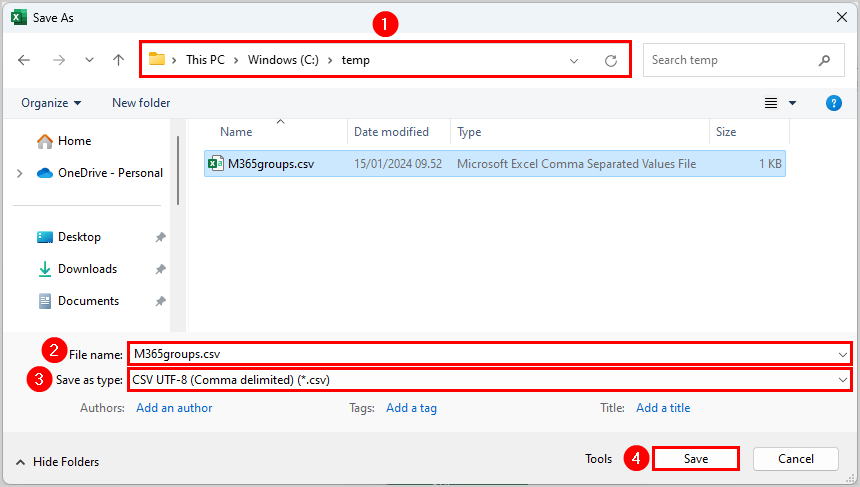
- Create the folder temp if you don’t have it already in the (C:) drive
- Name the file M365groups.csv
- Save as type CSV (Comma delimited (*.csv)
- Click Save
- Specify the CSV file path in line 1
- Type the user Object ID in line 2
- Run the below PowerShell script
$CsvFilePath = "C:\temp\M365groups.csv"
$UserId = "41377e9c-dc47-46c0-b4a5-1d5bbdcb5cc5"

# Check if the user exists
$User = Get-MgUser -UserId $UserId -ErrorAction SilentlyContinue

if ($User) {
    $CsvGroups = Import-Csv -Path $CsvFilePath

    foreach ($row in $CsvGroups) {
        $GroupId = $Row.ObjectID

        $Group = Get-MgGroup -GroupId $GroupId -ErrorAction SilentlyContinue

        if ($Group) {
            $ExistingMember = Get-MgGroupMember -GroupId $GroupId

            if ($ExistingMember.Id -eq $UserId) {
                Write-Host "User $UserId already exists in the group." -ForegroundColor Yellow
            }
            else {
                New-MgGroupMember -GroupId $GroupId -DirectoryObjectId $UserId
                Write-Host "User $UserId added to the group." -ForegroundColor Green
            }
        }
        else {
            Write-Host "Group $GroupId does not exist." -ForegroundColor Red
        }
    }
}
else {
    Write-Host "User $UserId does not exist." -ForegroundColor Red
}
That’s it!
Read more: How to add members to Distribution Group with PowerShell »
Conclusion
You learned how to add members to a Microsoft 365 group in the Microsoft Entra admin center and with PowerShell. Adding a single, multiple, or all users as members to a Microsoft 365 group can be done with both methods. If you want to add members to multiple Microsoft 365 groups, it’s better to create a CSV file and use the PowerShell script.
Did you enjoy this article? You may also like How to export Full Access mailbox permission. Don’t forget to follow us and share this article.
Teşekkürler!