You can add multiple users to an existing distribution list or mail-enabled security group in…
Restore mailbox content to another mailbox with PowerShell
When you delete a user mailbox, it’s soft-deleted, which means it will stay in the recycle bin for 30 days. Within these 30 days, you can choose to restore the mail items from the soft-deleted mailbox and move the content to another mailbox. In this article, you will learn how to restore mailbox content to another mailbox with the New-MailboxRestoreRequest PowerShell cmdlet.
Table of contents
- Restore mail items of deleted mailbox to another mailbox
- 1. Connect to Exchange Online Powershell
- 2. Delete the user mailbox
- 3. Create a new user mailbox
- 4. Enable archive for the user mailbox
- 5. Restore mail items to new user mailbox
- 6. Restore the mailbox archive folder to the new user mailbox
- 7. Verify mail items restored from deleted to new user mailbox
- Conclusion
Restore mail items of deleted mailbox to another mailbox
If you delete a user mailbox, it becomes inactive, and you can choose to restore the mail items within 30 days. These mail items can be moved to any other active mailbox. It’s only possible to restore the content of an inactive mailbox with the New-MailboxRestoreRequest PowerShell cmdlet.
There are various reasons why you want to restore the mail items of a soft-deleted mailbox:
- You mistakenly removed a user mailbox and created a new empty mailbox for the user. Therefore, you need to restore the old mail items and copy them to the new user mailbox.
- When an employee comes to the organization with a new user mailbox you want to give the mail items of the old employee (soft-deleted user mailbox).
Note: If you want to recover the deleted mail items to the same user mailbox, you can use one of these methods: Recover deleted items from Microsoft 365 mailbox or Recover deleted mail items with MFCMAPI.
1. Connect to Exchange Online Powershell
To be able to run the PowerShell commands specified in the current article, you need to Connect to Exchange Online PowerShell.
Start Windows PowerShell as administrator and run the Connect-ExchangeOnline cmdlet.
Connect-ExchangeOnline2. Delete the user mailbox
First, we will delete a user mailbox that also has a mailbox archive enabled. This is not the archive you get by default in your mailbox but an online archive you need to enable yourself. If you have already deleted the user mailbox, you can skip this step.
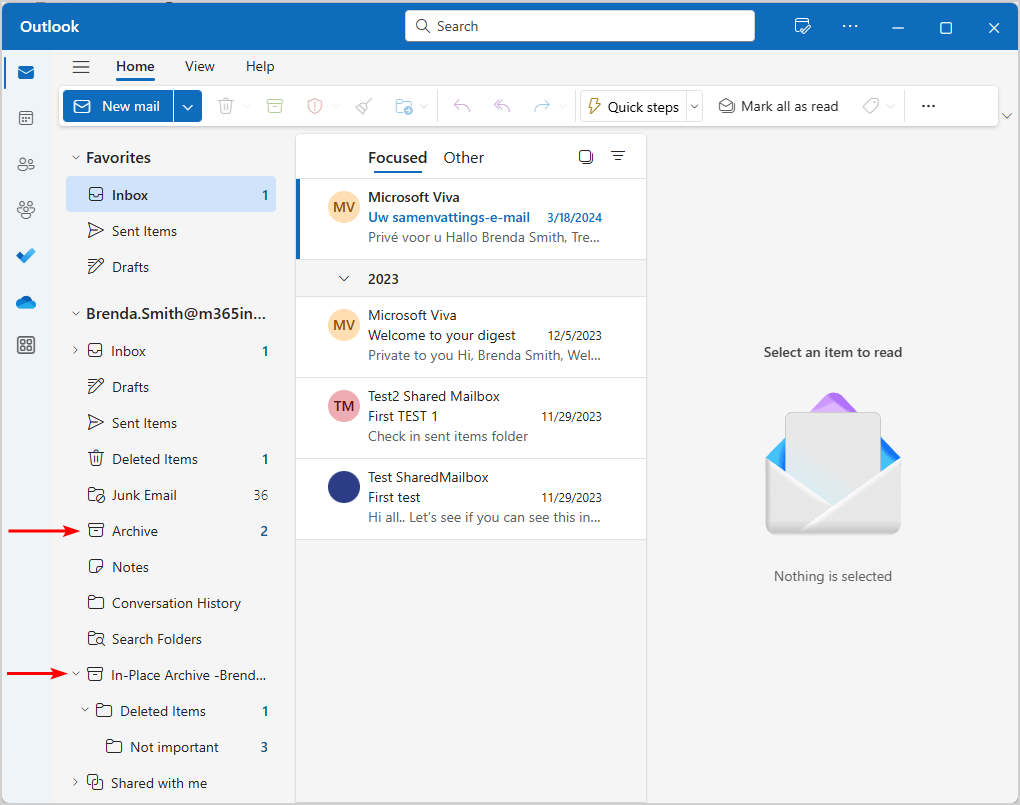
In our example, the user mailbox has multiple mail items, and the In-Place Archive folder is present in the Outlook app and OWA (Outlook on the web).
In our example, we will delete the user mailbox (Brenda.Smith@m365info.com) with the PowerShell command below.
Remove-Mailbox -Identity "Brenda.Smith@m365info.com" -Confirm:$falseIt will automatically unassign the user licenses and delete the user account. To verify the mailbox is soft-deleted in the recycle bin, run the PowerShell command below.
Get-Mailbox -SoftDeletedMailbox "Brenda.Smith@m365info.com"The PowerShell output shows the below result.
Name                      Alias        Database           ProhibitSendQuota    ExternalDirectoryObjectId
----                      -----        --------           -----------------    -------------------------
ba91f357-14b2-4116-8f51-… Brenda.Smith EURPR02DG596-db290 99 GB (106,300,440,… ba91f357-14b2-4116-8f51-d9197d086a27
3. Create a new user mailbox
If you don’t want to restore the content to an existing mailbox, you need to create a new user mailbox. If you already have a user mailbox with licenses that you want to restore the content to, you can skip this step.
In our example, we will create a new user with the same username and primary email address.
Note: You can create a new user mailbox with the exact same username as the soft-deleted mailbox or use a different username.
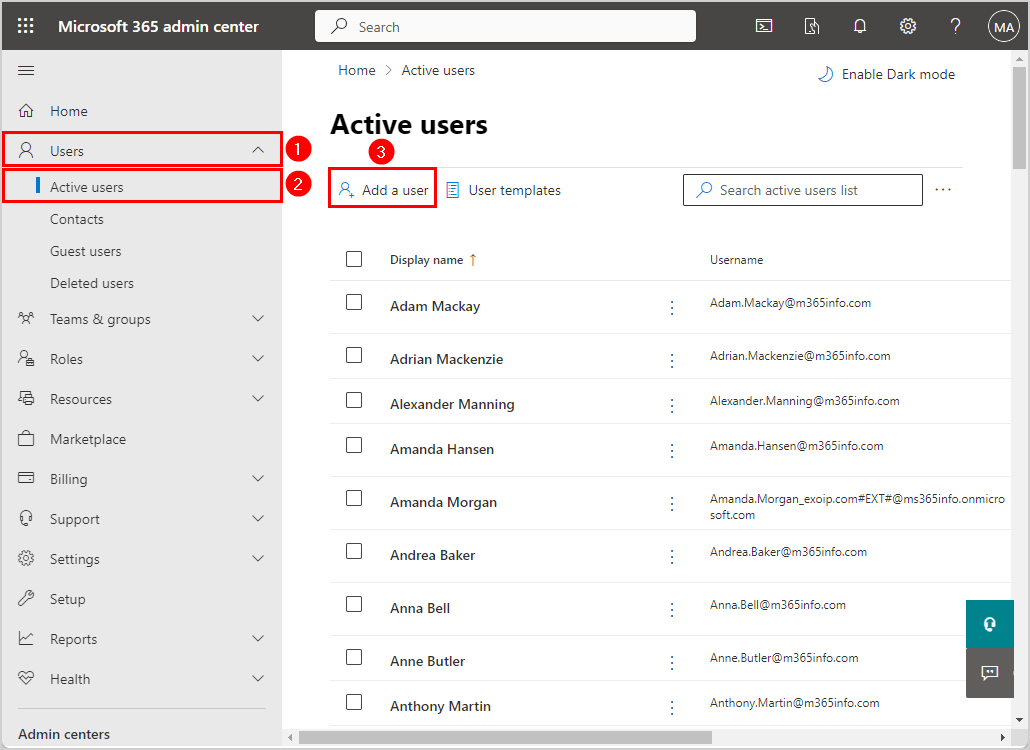
- Sign in to Microsoft 365 admin center
- Click Users > Active users
- Click Add a user
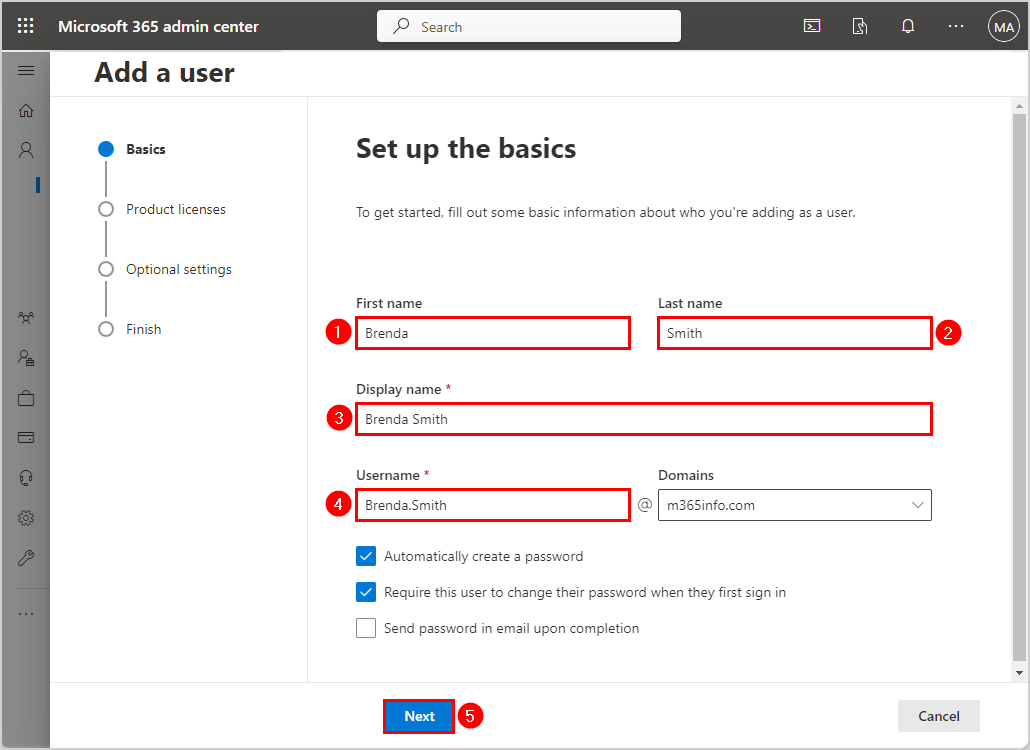
- Type First name
- Type Last name
- Type Display name
- Type Username
- Click Next
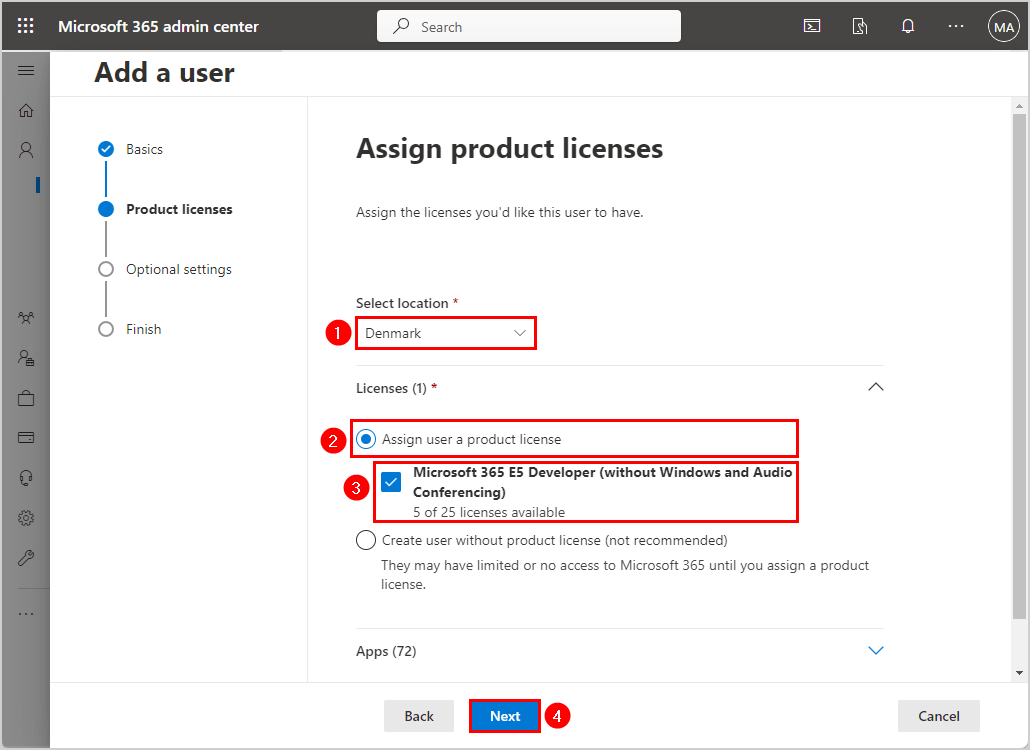
- Select location
- Select Assign user a product license
- Select Microsoft 365 E5 Developer
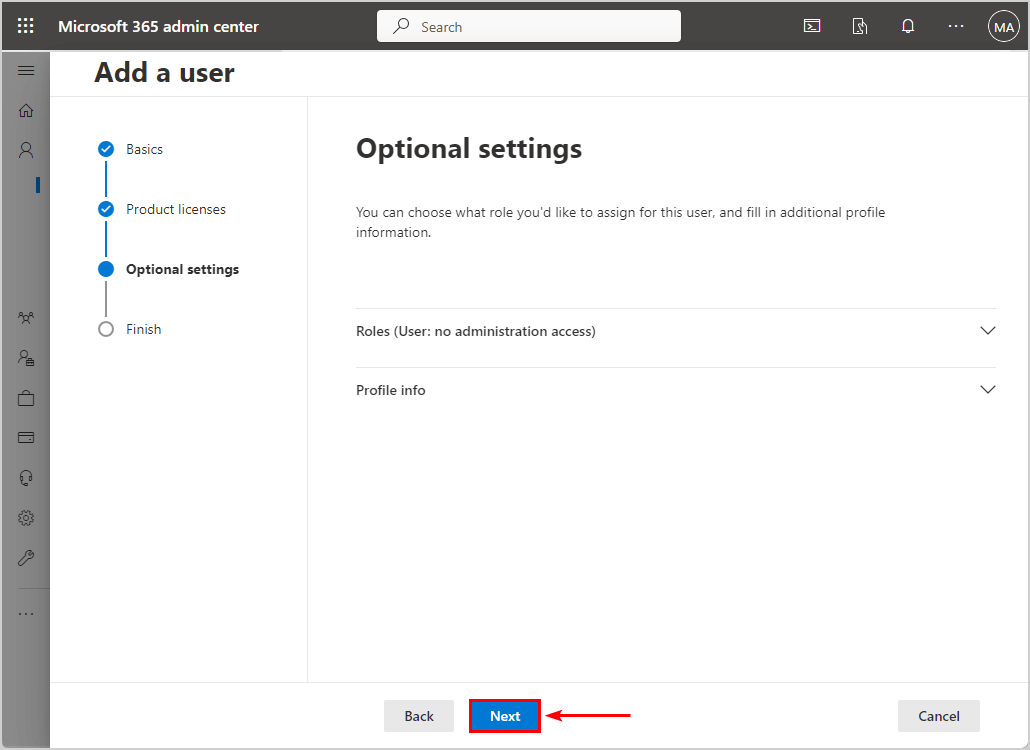
- Click Next
- Click Next
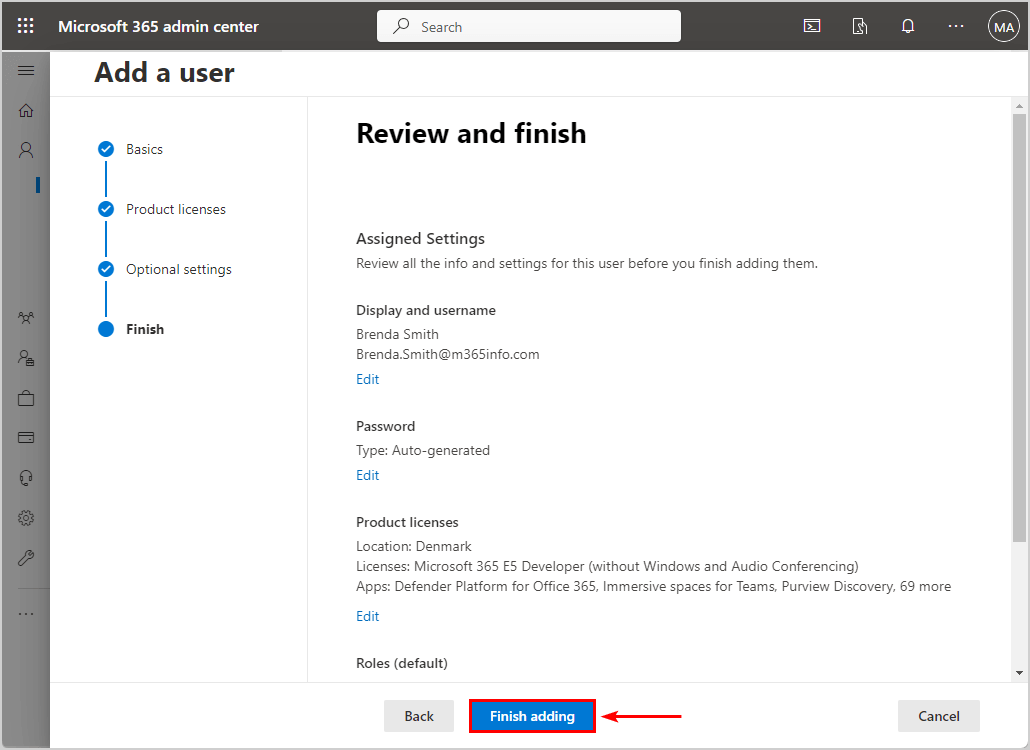
- Click Finish adding
- Click Close
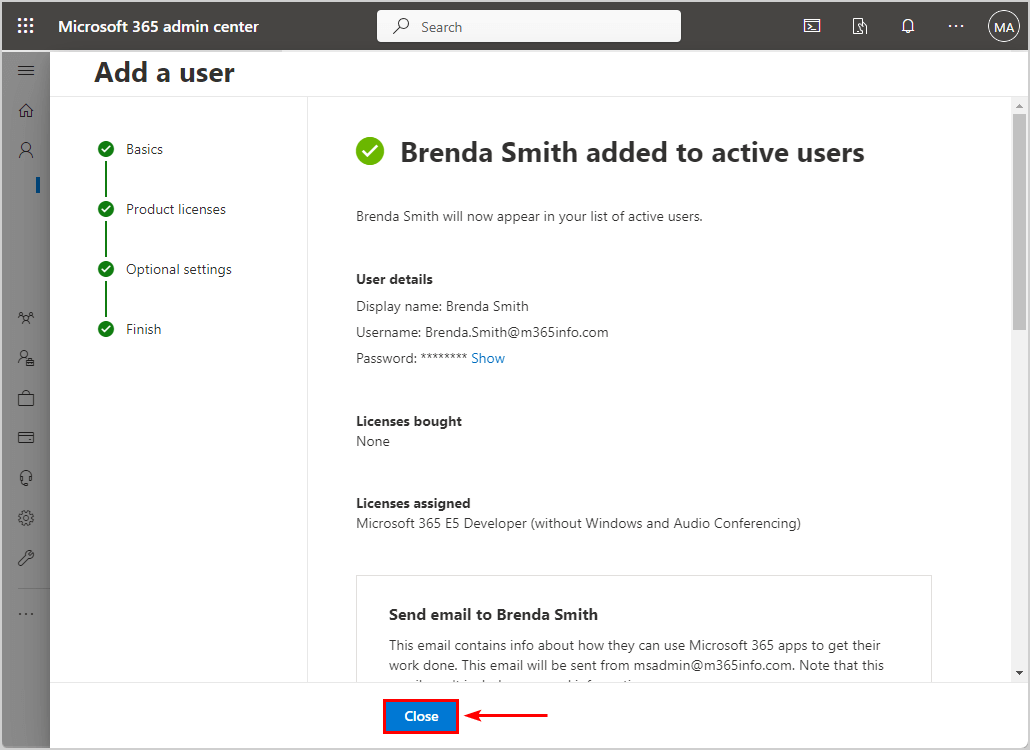
- The new user will now appear in the active users list
4. Enable archive for the user mailbox
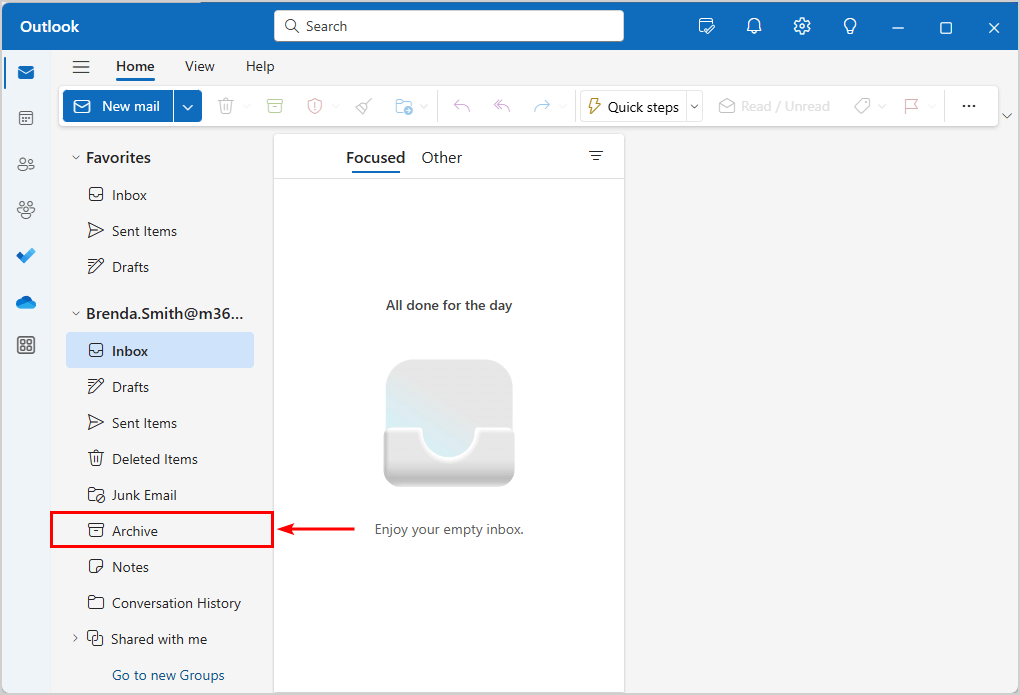
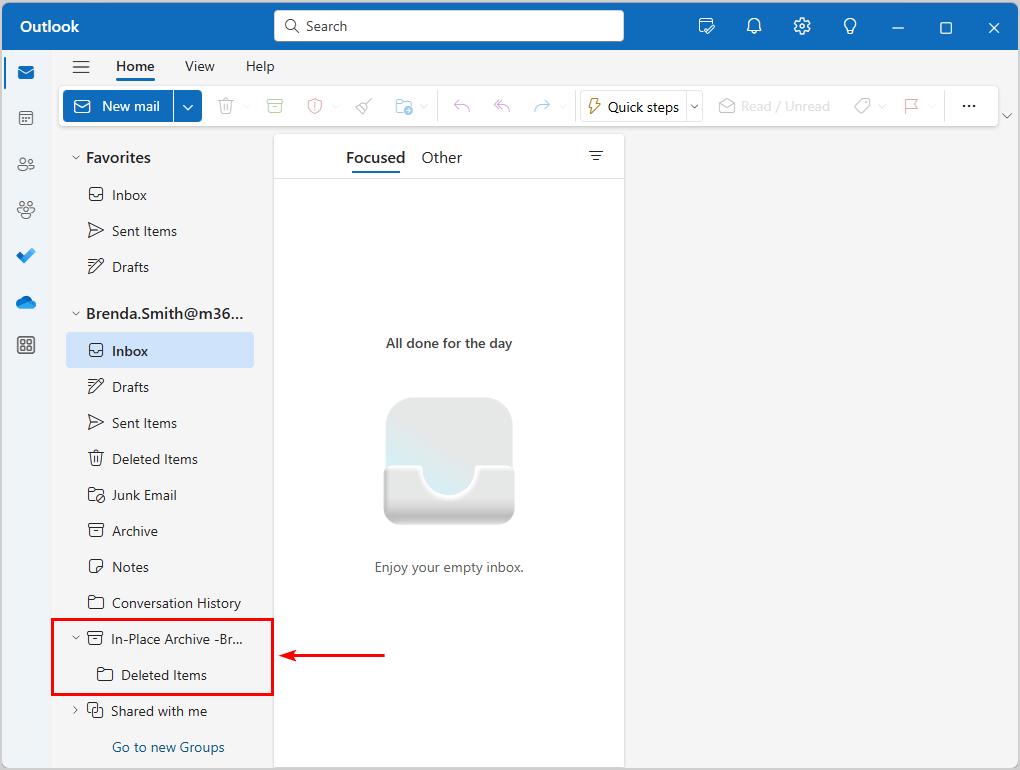
The new user mailbox content is empty in the Outlook app and OWA (Outlook on the web). In our example, the user has not enabled the mailbox archive, so you can only find the default archive.
If you also want to move the In-Place Archive folder from the soft-deleted mailbox in Outlook, you need to enable the mailbox archive for the new user mailbox.
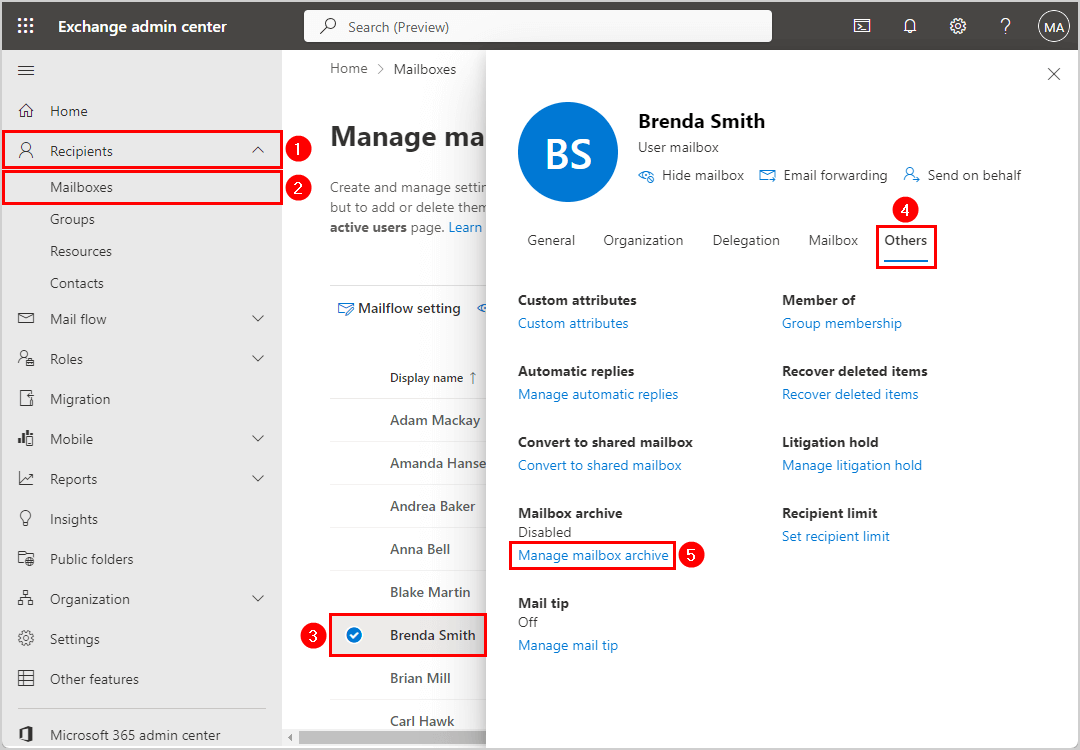
To enable the mailbox archive in the Exchange admin center, follow these steps:
- Sign in to Exchange admin center
- Click Recipients > Mailboxes
- Click on the user mailbox
- Click Others
- Click Manage mailbox archive
- Click Enabled
- Name the folder, or you will get a name by default (In-Place Archive -Brenda Smith)
- Click Save
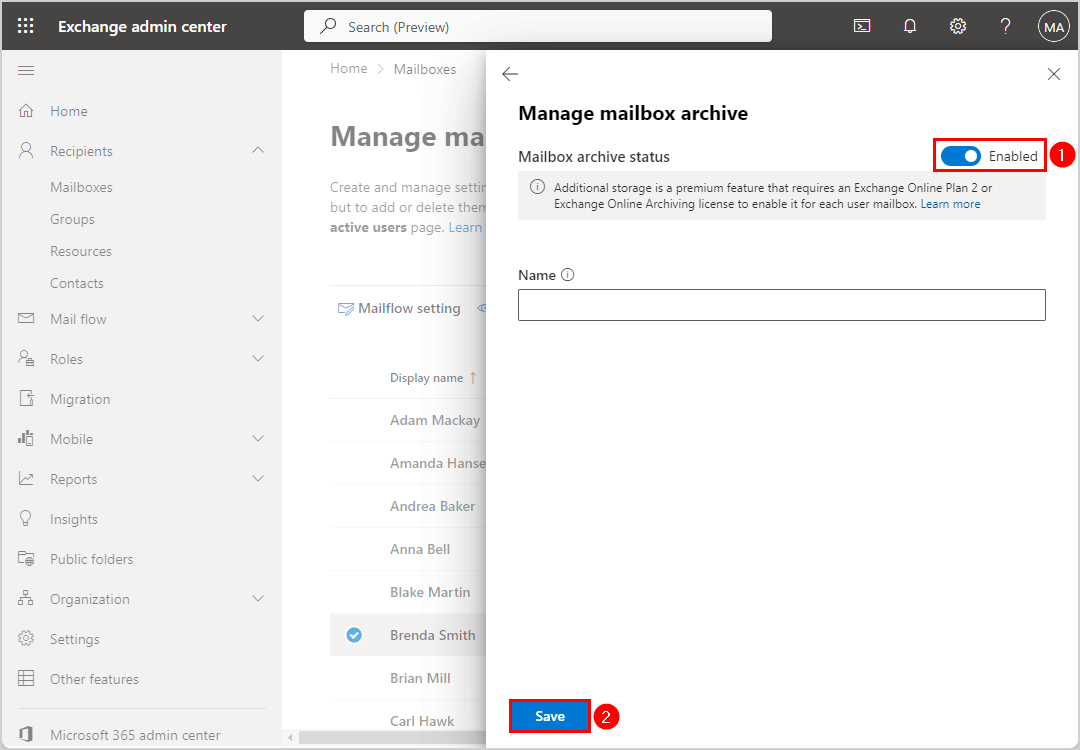
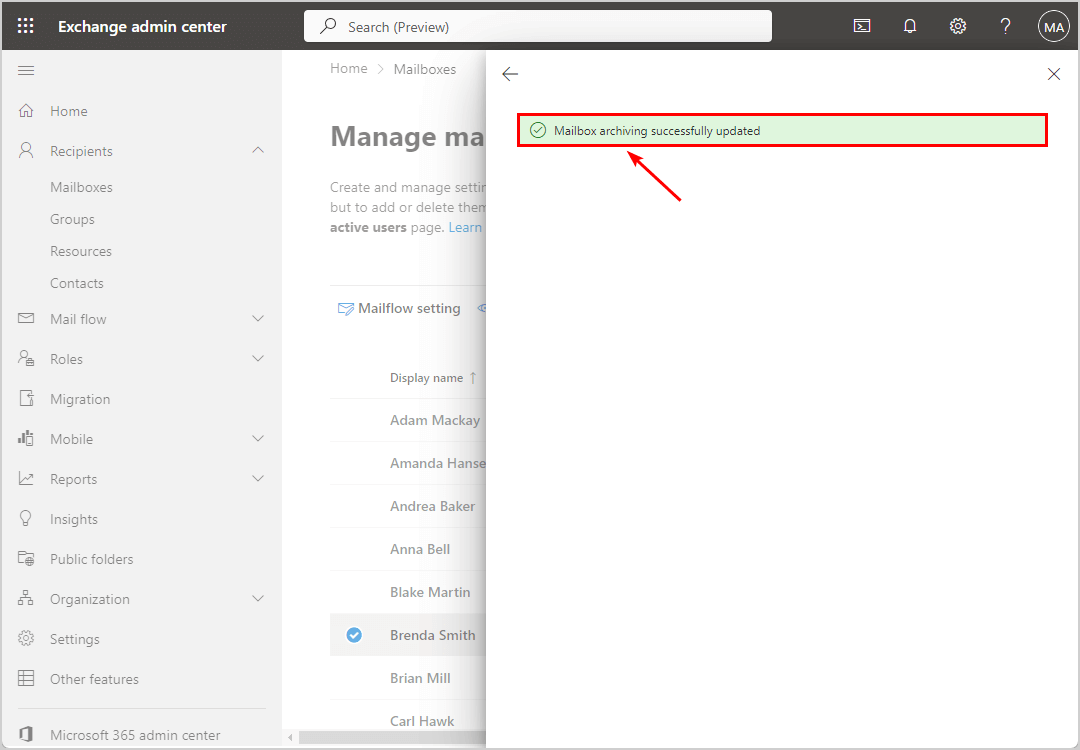
- It creates the mailbox archive for the user
Note: You need to wait a few minutes to see the user mailbox archive folder in Outlook.
You can also enable archive with the below PowerShell command.
Enable-Mailbox -Identity "Brenda.Smith@m365info.com" -ArchiveThe PowerShell output shows the below results.
Name                      Alias           Database           ProhibitSendQuota    ExternalDirectoryObjectId
----                      -----           --------           -----------------    -------------------------
59901125-70e0-40ea-a3dd-… Brenda.Smith    EURPR02DG436-db147 99 GB (106,300,440,… 59901125-70e0-40ea-a3dd-143025fb310f
If the user opens the Outlook app or signs in to OWA, you can see the mailbox is empty and there is an In-Place Archive folder.
In the next step we will restore the mail items of the deleted user mailbox into the new user mailbox.
5. Restore mail items to new user mailbox
Use the New-MailboxRestoreRequest PowerShell cmdlet with the -SourceMailbox and -TargetMailbox parameters to restore the content of the soft-deleted or inactive mailbox and move it to an existing mailbox. The content of the source mailbox will stay and not be deleted once it’s moved to the target mailbox. So, you can move it to many more mailboxes if you like.
Note: You can’t copy mail items from a connected mailbox. Only soft-deleted and disabled mailboxes can be restored.
In our example, the new user mailbox has the same email address as the soft-deleted mailbox. Therefore, you can’t copy the mailbox items with the PowerShell command below.
New-MailboxRestoreRequest -SourceMailbox "Brenda.Smith@m365info.com" -TargetMailbox "Brenda.Smith@m365info.com" -AllowLegacyDNMismatchThe PowerShell output will show the following error.
New-MailboxRestoreRequest: Ex9E65A2|Microsoft.Exchange.Configuration.Tasks.ManagementObjectAmbiguousException|The operation couldn't be performed because 'Brenda.Smith@m365info.com' matches multipleentries.The solution to this problem is to get the GUID (Globally Unique Identifier) value of the new user mailbox and the soft-deleted mailbox.
Run the below PowerShell command to get the GUID of the soft-deleted mailbox.
Get-Mailbox -SoftDeletedMailbox "Brenda.Smith@m365info.com" | Format-List Alias, ExchangeGuidThe PowerShell output shows the below results.
Alias        : Brenda.Smith
ExchangeGuid : ba91f357-14b2-4116-8f51-d9197d086a27
Run the below PowerShell command to get the GUID of the new user mailbox.
Get-Mailbox "Brenda.Smith@m365info.com" | Format-List Alias, ExchangeGuidThe PowerShell output shows these results.
Alias        : Brenda.Smith
ExchangeGuid : 2d7a7ec1-bc3c-4e9d-a523-cff17abaaedd
Now that you have the GUID value of both mailboxes, run the below PowerShell command to restore all the mail items to the new user mailbox.
New-MailboxRestoreRequest -SourceMailbox "ba91f357-14b2-4116-8f51-d9197d086a27" -TargetMailbox "2d7a7ec1-bc3c-4e9d-a523-cff17abaaedd" -AllowLegacyDNMismatchThe PowerShell output results.
Name           TargetMailbox                        Status
----           -------------                        ------
MailboxRestore 59901125-70e0-40ea-a3dd-143025fb310f Queued
Some mailboxes will get the below warning if the inactive mailbox has archive enabled.
WARNING: There exists an archive mailbox that will need to be restored separately.
Check if the restore request is completed with the Get-MailboxRestoreRequest PowerShell cmdlet.
Get-MailboxRestoreRequest | Format-ListTo check why the restore request failed, use the Get-MailboxRestoreRequestStatistics PowerShell cmdlet to view detailed information.
Get-MailboxRestoreRequest -Status Failed | Get-MailboxRestoreRequestStatistics -IncludeReport | Format-ListTo delete all the (failed, queued, and completed) mailbox restore requests, run the below PowerShell command.
Get-MailboxRestoreRequest | Remove-MailboxRestoreRequest6. Restore the mailbox archive folder to the new user mailbox
You restored all the mail items from the soft-deleted mailbox to the new user mailbox. However, if you also want to move the mailbox archive to the new user mailbox, you must use the -SourceIsArchive and -TargetIsArchive parameters with the New-MailboxRestoreRequest PowerShell cmdlet.
Note: You must first copy the mail items to the new user mailbox, as shown in the previous step, before you can move the mailbox archive. Remember to enable the archive for the new user mailbox before you move the In-Place Archive folder from the deleted user mailbox.
To move the In-Place Archive folder to the new user mailbox, run the below PowerShell command.
New-MailboxRestoreRequest -SourceMailbox "2d7a7ec1-bc3c-4e9d-a523-cff17abaaedd" -SourceisArchive -TargetMailbox "9c62f7de-a696-4ac8-bd87-738926089082" -TargetisArchive -AllowLegacyDNMismatchThe PowerShell output shows the below.
Name            TargetMailbox                        Status
----            -------------                        ------
MailboxRestore1 59901125-70e0-40ea-a3dd-143025fb310f Queued
The inactive mailbox archive is merged into the folders of the new user mailbox archive folder. If you want to transfer the old archive to a specific folder, you need to use the -TargetRootFolder parameter and specify the name.
7. Verify mail items restored from deleted to new user mailbox
Check if all the mail items are restored to the new user mailbox:
- Sign in to the Outlook app or OWA
- Verify the mail items in all the folders of the user mailbox
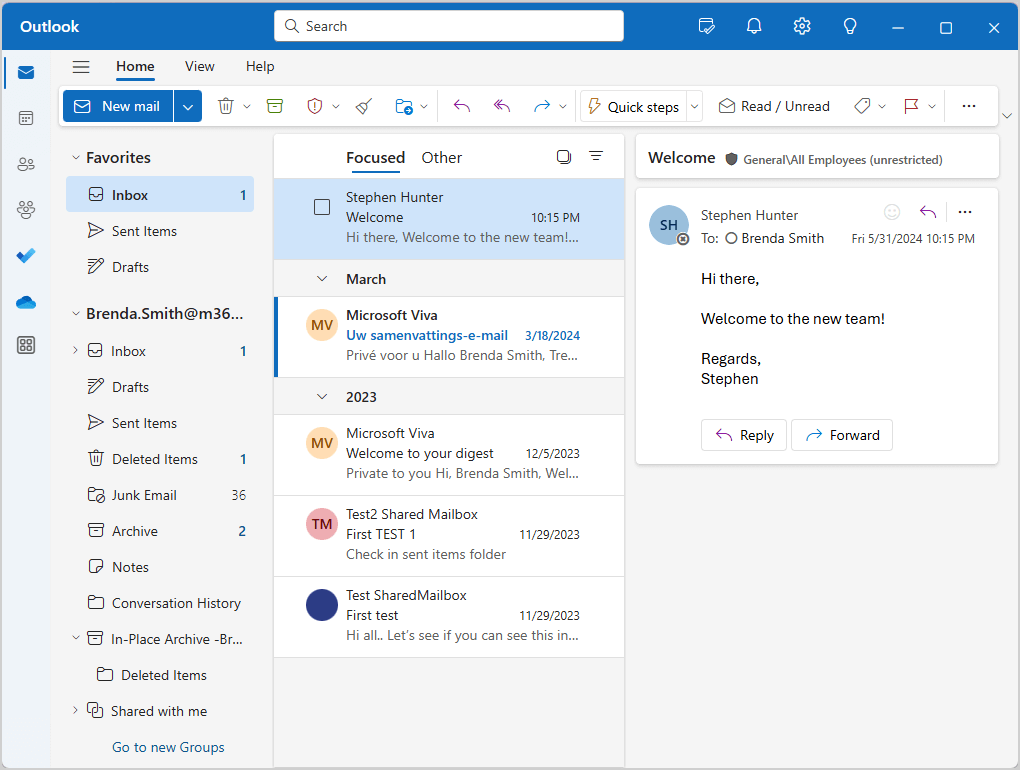
The screenshot below shows the restored mailbox items merged with the new user mail items in the Outlook app.
To verify, you also moved the archive folder to the new user mailbox:
- Sign in to the Outlook app or OWA
- Verify the In-Place Archive and subfolders are restored from the soft-deleted mailbox
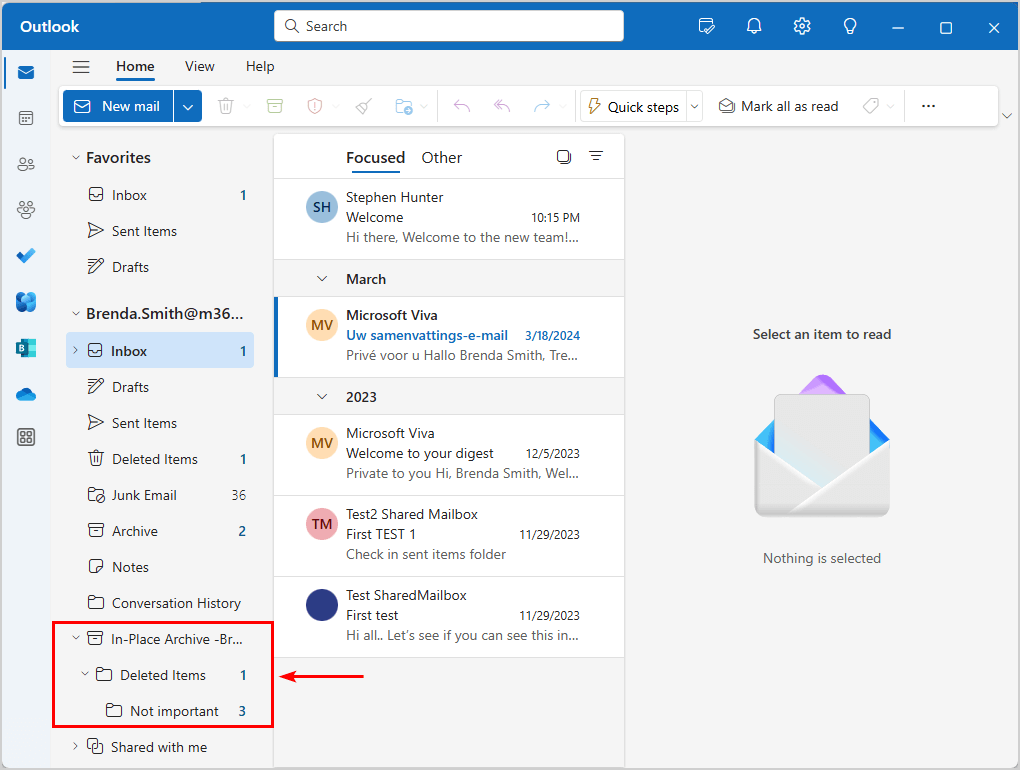
The screenshot below shows the restored mailbox archive moved to the new user mailbox in the Outlook app.
That’s it!
Read more: How to Restore a deleted Microsoft 365 mailbox »
Conclusion
You learned how to restore mailbox content to another mailbox with PowerShell. With the New-MailboxRestoreRequest PowerShell cmdlet, you can copy the mail items of a soft-deleted mailbox to another user mailbox. Once you enable the archive for the new user mailbox, you can also restore the In-Place Archive folder of the inactive mailbox.
Did you enjoy this article? You may also like Manage user mailbox with PowerShell. Don’t forget to follow us and share this article.
It’s good work. Thank you for your work. Thank you for this.