In this article, we will show you how to manage a Microsoft 365 user mailbox…
Connect to Exchange Online PowerShell
After you install the Exchange Online PowerShell module, you can connect to Exchange Online. Once you connect with Exchange Online PowerShell, you can use a single command or script to perform bulk operations and more. In this article, we will show you how to connect to Exchange Online using Windows PowerShell.
Table of contents
Exchange Online PowerShell module
Let’s look at which Exchange Online PowerShell module version is installed on the machine and how to update the Exchange Online PowerShell module to the latest version.
Set PowerShell Execution Policy
To change the PowerShell Execution Policy, we must first run Windows PowerShell as administrator.
By default, the PowerShell console will not allow us to run a script. We can enable script execution by using the cmdlet Set-ExecutionPolicy.
To set the Execution policy, use the below PowerShell cmdlet.
Set-ExecutionPolicy RemoteSignedYou will see the following result on your screen. Press Y followed by Enter.
PS C:\> Set-ExecutionPolicy RemoteSigned

Execution Policy Change
The execution policy helps protect you from scripts that you do not trust. Changing the execution policy might expose
you to the security risks described in the about_Execution_Policies help topic at
http://go.microsoft.com/fwlink/?LinkID=135170. Do you want to change the execution policy?
[Y] Yes [A] Yes to All [N] No [L] No to All [S] Suspend [?] Help (default is "N"): Y
Warning: You must close the PowerShell window and reopen it to save the changes and avoid errors.
Before we can connect to Exchange Online you must install the Exchange Online PowerShell module.
Check Exchange Online PowerShell module version
You can check if you have installed the Exchange Online PowerShell V3 module and see which version is running.
Use the below command in PowerShell to verify you have installed Exchange Online PowerShell.
Get-InstalledModuleNow you will see a list of all the installed modules and versions.
PS C:\> Get-InstalledModule

Version        Name                           Repository       Description
-------        ----                           ----------       -----------
3.1.0          ExchangeOnlineManagement       PSGallery        This is a General Availability (GA) release of the Exchange Online Powershell V3 module. Exchange Online cmdlets in this module are REST-backed and…
1.4.8.1        PackageManagement              PSGallery        PackageManagement (a.k.a. OneGet) is a new way to discover and install software packages from around the web….
2.2.5          PowerShellGet                  PSGallery        PowerShell module with commands for discovering, installing, updating and publishing the PowerShell artifacts like Modules, DSC Resources, Role Cap…
Update PowerShellGet module
You can always keep your PowerShell modules up to date and run the below command.
Update-Module PowerShellGetConnect to Exchange Online
Open Windows PowerShell as administrator and run the below cmdlet.
Connect-ExchangeOnlineThe sign in to your account window opens, where you choose your account and enter the password. Then click on Sign in.
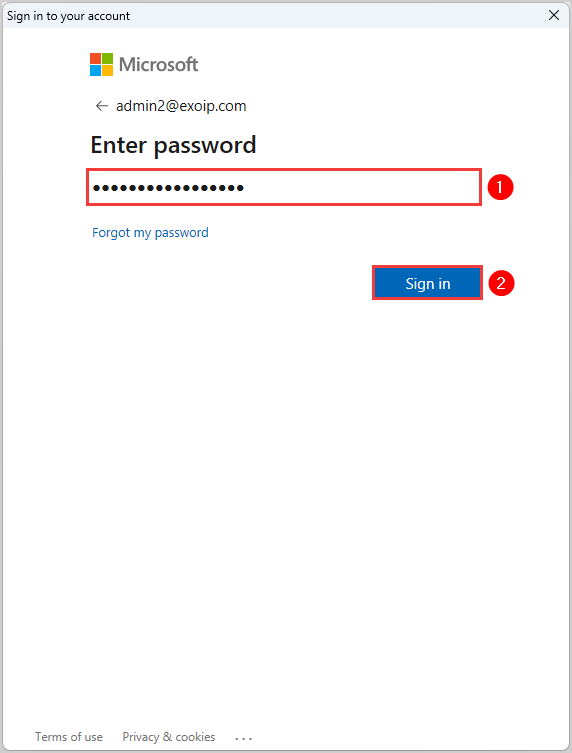
If you have MFA enabled, you will get a verification code sent as a text message or to your Authentication app on your phone. If your MFA is disabled, you will not do anything here.
Now you must go back to the PowerShell window.
That’s it! You have successfully connected to Exchange Online.
Verify PowerShell connection
To verify that you are connected to Exchange Online, you can use Get-EXOMailbox cmdlet to check.
Open PowerShell as administrator and use the below cmdlet.
Get-EXOMailbox | ft UserPrincipalName,DisplayNameIt will display a list of all the mailboxes in Microsoft 365.
PS C:\> Get-EXOMailbox | ft UserPrincipalName,DisplayName

UserPrincipalName          DisplayName
-----------------          -----------
Zoe.Howard@exoip.com       Zoë Howard
Amanda.Morgan@exoip.com    Amanda Morgan
Amelia.Nash@exoip.com      Amelia Nash
Stephen.Hunter@exoip.com   Stephen Hunter
Carol.Baker@exoip.com      Carol Baker
Craig.Hansen@exoip.com     Craig Hansen
Curt.Berry@exoip.com       Curt Berry
Disconnect Exchange Online
When you finish your session, you must disconnect from the remote PowerShell. It clears all the active sessions when using Exchange Online.
Use the below cmdlet to disconnect from Exchange Online PowerShell.
Disconnect-ExchangeOnlineYou will get the notification text below. To confirm, press Y and then press Enter.
PS C:\> Disconnect-ExchangeOnline

Running this cmdlet clears all active sessions created using Connect-ExchangeOnline or Connect-IPPSSession.
Press(Y/y/A/a) if you want to continue.
[Y] Yes [A] Yes to All [N] No [L] No to All [S] Suspend [?] Help (default is "Y"): Y
Or use the below cmdlet to disconnect from Exchange Online PowerShell without a confirmation text.
Disconnect-ExchangeOnline -Confirm:$falseFrequently Asked Questions (FAQ)
How do you run Exchange Online PowerShell as an administrator?
Click on Start and search for the PowerShell app. On the right side, you should click on Run as administrator. Or you can right-click the PowerShell icon and select Run as administrator. This way, you can run PowerShell commands without restrictions.
Which Exchange Online PowerShell module do I need to install?
It is best to install the latest EXO V3 module as it supports PowerShell 7 on Windows, Linux, and MacOS. It also uses modern authentication and MFA, which is more secure. If you are using an older PowerShell module (EXO V2), you can update it to the latest PowerShell module.
Read more: Install Exchange Online PowerShell »
Do I need multi-factor authentication (MFA) when I connect to Exchange Online PowerShell?
To connect to Exchange Online PowerShell, you don’t need MFA enabled. The cmdlet Connect-ExchangeOnline works for accounts with or without MFA. However, we recommend enabling MFA to protect your organization and have strong security.
Read more: Improve Microsoft Entra MFA security »
How do you connect to Exchange Online Powershell without a login prompt (unattended scripts)?
You can connect to Exchange Online PowerShell without inserting user credentials or getting MFA prompts. To run unattended automated scripts in Exchange Online PowerShell, you must configure Certificate-Based Authentication (CBA).
Read more: Configure Certificate-Based Authentication to run automated PowerShell scripts »
Conclusion
You have successfully managed to connect to Exchange Online Powershell. You must install the Exchange Online PowerShell module before you connect with Exchange Online. We recommend you check which module version you have and update it to the latest version. Lastly, remember to disconnect Exchange Online when you finish.
Did you enjoy this article? You may also like Bulk create shared mailboxes with PowerShell. Don’t forget to follow us and share this article.
What Others Are Reading

This Post Has 0 Comments