skip to Main Content

Outbound DKIM signing and DNS infrastructure | Building the required DNS records for Office 365 | Part 4#10

In a scenario in which we want to use outbound DKIM signing for our public domain name in Office 365 based environment, we will need to generate 4 DNS records that will be used for the required two CNAME records.
Regarding the task of the required DKIM DNS records, the primary challenge that we are facing is –how to know what is that exact host names which we should use.
In other words -what is the naming convention that we should use for this DKIM DNS record.

Besides the issue of – “DKIM DNS recorded naming convention in Office 365”, it’s also important that we understand the special redirection mechanism that implemented via the use of CNAME records.
Office 365 considered as “hosted mail environment” and for this reason, the DNS infrastructure that will be utilized for the outbound DKIM signing is different vs. on-Premises mail infrastructure.

In the current article, we will review:

  1. The naming conventions for the required “DKIM DNS records” that we need to use for implementing outbound DKIM signing of our public domain name in Office 365 based environment.
  2. The “use” of the DKIM DNS record in an Office 365 based environment in which one set of DNS record will serve as a “logical router” to the other set of DKIM DNS record that serves as a logical container for the Public Key value.

Implementing outbound DKIM signing in Office 365 based environment | basic concepts

The task of creating the required DKIM DNS record for outbound DKIM signing in an Office 365 based environment is a little tricky because, we will need to configure four host names and, we will need to know the “formula” (the naming convention) for the required DNS records host names.

Technically speaking, the implementation of outbound DKIM signing is built upon a Public Key infrastructure + DNS records.

The good news is that in Office 365 (Exchange Online) based environment, we will not have to deal with the Public Key infrastructure “tasks” such as – purchase and install the public certificate, etc.

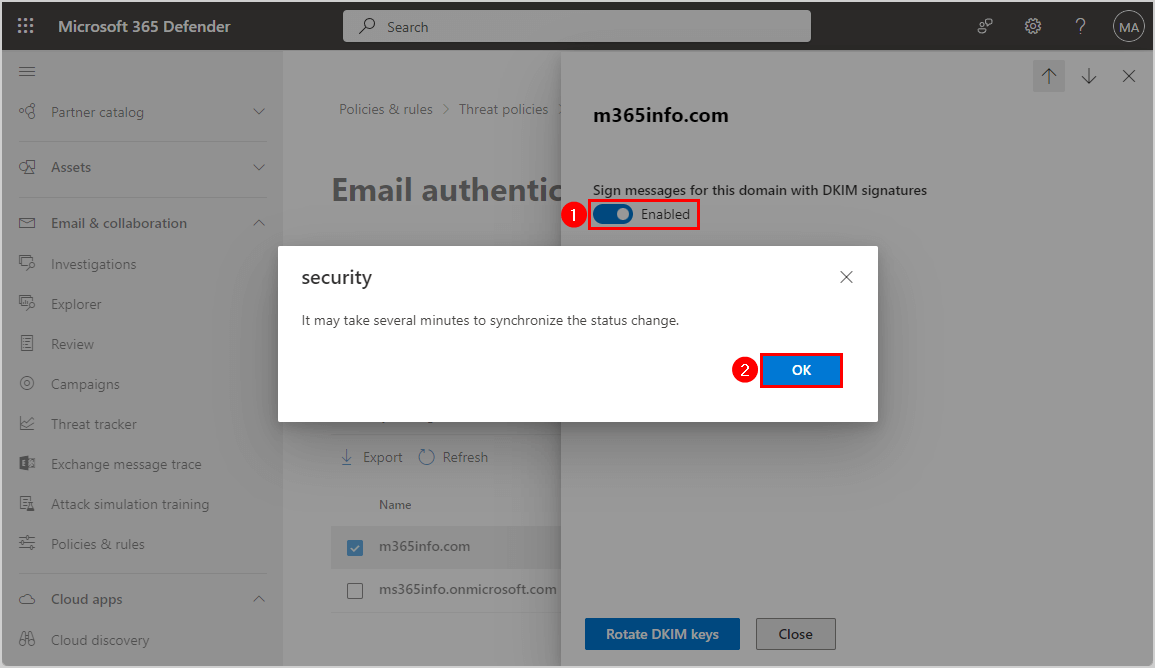
The only task that we need to complete is – creating two dedicated CNAME DKIM DNS records + enable the option of outbound DKIM signing for our public domain that is hosted at Office 365.

Task 1#4 – I describe the first task as “write-down” the required DKIM host name because, in an Office 365 based environment, we will need to “generate” 4 DNS host names who will be created based on the DKIM standard naming convention + the Office 365 naming convention for two special DKIM records (the TXT record that will hold the value of the Office 365 Public Key).

In the current article, we will review the naming convention that we need to implement for the first task of “writing down” the required DKIM host names.

The next tasks – Task 2#4, Task 3#4 and Task 4#4, will be reviewed In the next article – How to enable outbound DKIM signing for your domain in Office 365 |Part 5#10

We will discuss the rest of the necessary tasks such as – how to create the required CNAME record using the GoDaddy DNS management interface, and how to enable the outbound DKIM signing in an Office 365 based environment for our public domain name.

Regarding Task 4#4 – although this part is not a mandatory requirement, I recommend completing is – the task of verifying the implementation of the outbound DKIM signing after we have created all the required configuration settings.

Enabling outbound DKIM signing for our public domain name in Office 365 - Task list -01

Regarding the task of – “writing down the required DNS host names”, when implementing outbound DKIM signing in Office 365 based environment, we need to “declare” about two
DKIM selectors that will represent our public domain name which is hosted at Office 365.

This two DKIM selectors host name, will serve as a logical router, that will redirect DNS client requests to the two additional Office 365 special DKIM records, that contain the value of the Office 365 Public Key.

The required DNS records for implementing outbound DKIM signing in Office 365 based environment -02

The naming convention of the DNS records that we will need to “write-down” relies on the DKIM standard naming convention + the “Office 365 naming convention” that we need to use for redirecting DNS client requests to the “particular Office 365” DNS record that represents our public domain name.

The required DKIM DNS records format and naming convention -03

Office 365 and Domain Names

Before we begin with the explanation of the structure of the DKIM records hostnames in an Office 365 based environment, it’s important that we will be familiar with basic terms that relate to the “domain name” concept in an Office 365 environment.

1. onMicrosoft.com domain name

When we open a new Office 365 tenant, Office 365 automatically create a dedicated domain for the particular Office 365 tenant.

If we want to be more accurate, Office 365 will create a dedicated sub-domain that will added to the Office 365 domain name – onMicrosoft.com

The dedicated Office 365 naming convention will be-
<Registered organization name>.onMicrosoft.com

For example- I have registered my organization name as o365info2

My Office 365 tenant domain name is:

o365info2.onMicrosoft.com

2. Public domain, vanity domain or a custom domain

Most of the time, we will not use the “onMicrosoft” domain name and instead; we will use our company or organization domain name.

In the Office 365 environment, there are a couple of parallel terms that describe the domain name that the Office 365 customer register in Office 365.

The following terms: public domain, vanity domain or a custom domain relates to the domain name which the Office 365 customers own and which is “hosted” at the Office 365.

Note: Office 365 customers can register one or more public domain in Office 365.

When we mention the term “enabling outbound DKIM signing” the meaning is to enable the outbound DKIM signing for our public domain that was registered in Office 365.

Outbound DKIM signing and domain names

Now, let’s review the relationship that exists in an Office 365 environment between the different components: the “domain name” and the process of outbound DKIM signing:

Domain name concept in Office 365 base environment -04
  1. The option of outbound DKIM signing is activated automatically for the default onMicrosoft domain name.
  2. The option of outbound DKIM signing is activated automatically for each of the registered public domain names by using our onMicrosoft Office 365 DKIM selector host names.
  3. When we use the term “enabling outbound DKIM signing” we mean – change the default behavior of Office 365 \ Exchange Online and, use a “dedicated” DKIM selector Host names that will be used for the DKIM Digital signature that will appear in outgoing E-mail messages.

Sound confusing?
The truth is it’s really confusing!

The meaning of the above “declarations” is – that in an Office 365 environment, the process of signing outgoing E-mail message using DKIM is implemented for whether we like it or not!

In case that we didn’t enable the option of outbound DKIM signing for our public domain, Office 365 will implement the DKIM signing by using the DKIM selector host name which consists of a combination of our Office 365 tenant name + the Office 365 onMicrosoft.com domain name.

The Office 365 “feature” in which every outgoing mail will automatically sign using DKIM has advantages and disadvantages.

The advantage

The advantage is that the DKIM signature will enable the destination side (the receiving mail server) to validate the sender identity meaning our recipient sender identity.

The disadvantage

The disadvantage for this “default behavior” is that in case that the receiving mail server using an additional E-mail standard named DMARC, the fact that the DKIM Selector domain name
(onMicrosoft.com tenant name, domain) is different from the recipient E-mail address domain name could cause to a scenario in which the E-mail message will classify as “not aligned”.

The best practice or the recommended way of using the option of outbound DKIM signing for our public domain name hosted at Office 365 is not to use the default Office 365 DKIM setting but insisted, create the required configurations that will enable us to “customize” the process of the outbound DKIM signing for our specific public domain name.

In other words, implement the process of outbound DKIM signing using a dedicated DKIM Selector that includes the suffix of our public domain name in their host name (in their FQDN name).

For example – the DKIM selector that will sign outgoing E-mail message to recipients who use E-mail address with the domain name – o365pilot.com will need to use an FQDN (fully qualified domain name) that includes the suffix of – o365pilot.com domain name.

Scenario 1#2 – leave the default Office 365 settings for outbound DKIM signing

In a scenario in which we “leave” the default Office 365 setting that relate to outbound DKIM signing the undesirable outcome could be – a scenario in which outgoing E-mail that will be sent to external receipt, will be classified as an email message with a problem (Incompatibility between the Office 365 DKIM selector host name and the E-mail address of the Office 365 recipient).

Outbound DKIM signing was not enabled for the public domain name -01

Scenario 2#2 – enable outbound DKIM signing for our public domain name

The best practice is to implement the required configuration settings for outbound DKIM signing for our public domain name which was registered at Office 365, for – preventing in advance a scenario in which outgoing E-mail that will send to external receipt classified as an E-mail message with a problem.

In case that we want to “activate” the outbound DKIM signing for our public domain name who was registered with Office 365, we will need to create a dedicated DKIM DNS record for our specific domain name, that will enable Office 365 to perform the outbound DKIM signing process optimally.

When we create the required DKIM DNS record, the outbound DKIM signing will include a
DKIM Selector name who uses the suffix of our public domain name.

Outbound DKIM signing was enabled for the public domain name -02

Recap

Q1: Do we have to activate outbound DKIM signing for our public domain name who is registered with Office 365?

A1: No, we don’t have but the best practice is to invest the extra effort by adding to our DNS server the required “DKIM records” and later enabling the option of outbound DKIM signing for each of our Office 365 registered public domain separately.

DKIM flows and the relationship with DNS Infrastructure

In this section, I would like to review the relationships that exist between the mail server infrastructure (the sending and the receiving mail server) the DKIM flow and the DNS infrastructure.

Q1: How does the “source mail server” (the mail server that represents the sender) implement the outbound DKIM signing?

A1: The “source mail server”, digitally signs the E-mail message (using his Private key) and adds his hostname to the E-mail message header. The purpose of adding hos host name is for “presenting” himself as the DKIM selector entity that signed the E-mail message

Q2: How does the receiver mail server verify the DKIM signature that appears in the E-mail message?

A2: The receiving mail server “fetch” from the E-mail message the DKIM selector host name and address DNS server, looking for information about the specific host name.

Q3: What is the specific information that the receiver mail server looks for?

A3: The receiver mail server “assume” that the DNS server includes a TXT record with the specific DKIM selector name, which contains the value of the Public Key meaning – the Public Key of the “source mail server” that signed the E-mail message.

Q4: Given that the receiver mail server will find the required Public Key value, what he will do with this information?

A4: The receiver mail server will use the Public Key for decrypting the HASH value that appears in the Digital signature.

Q5: Are there any special characters for the DKIM flow in Office 365 based environment?

A5: Yes, the special DKIM character is that in hosted environment such as Office 365, one entity (Office 365 DKIM infrastructure) will serve all the hosted customers (Office 365 tenants). The implementation of the Public Key infrastructure and the implementation of the DNS infrastructure is different vs. on-Premises mail environments

Q5: What are the unique characteristics of DKIM flow and DNS infrastructure in an Office 365 based environment?

A6: The main difference regarding the DNS flaw is that in an Office 365 based environment is that the receiver mail server, that queries the DNS server looking for a TXT record that represents the DKIM selector hostname, will not get the content of the TXT record, but instead, will be redirected (by using CNAME record) to additional hostname who represents the Office 365 DKIM selector.

DKIM flow and the receiver mail server

The process in which the receiver mail server verifies the sender identity when using DKIM signature is implemented by using the Public key of the sender domain.

The way that the receiving mail server uses for getting the information about the Public key of the sender is – by looking for a specific TXT record that “hold” the information about the Public key of the sender domain.

For this reason, when we want to enable to Office 365 outbound DKIM signing for our public domain, we will need to publish the information about “our Public key” in the DNS server who hosts our public domain name.

When the Exchange Online server will deliver an email message that was sent by our organization recipients to external recipient and will sign the E-mail message using a DKIM signature, the destination mail server (receiving mail server) will need to create a DNS query in which he will ask the DNS server to – provide him the content of a TXT record that “contain” the information about “our Public key“.

DKIM infrastructure and DNS infrastructure relationships -03

DKIM infrastructure and the TXT record

As mentioned, in DKIM scenario, the receiver mail server uses the Public key of the sender, for implementing the process of verifying sender identity.

The information about the Public Key that should be used by the receiver mail server is published in DNS by using a TXT record.

For those of us that are not familiar with the concept of TXT records, in DNS environment, we can relate to TXT record as a logical container that contains information.

The purpose of TXT record -04

When using a TXT record, the DNS client addresses the DNS server and request that the content is “stored” in the specific TXT record.

A DNS client can address DNS server and, ask for information about all the existing TXT records or request information about a specific TXT record.

In case that the DNS client needs to request information about a specific TXT record, the DNS client will need to query for a specific TXT record host name (the hostname of the TXT record).

The Host name of a TXT record -05

In a DKIM implementation, the information about the Public Key of the sender (the mail server that creates the DKIM Digital signature) is published by using a TXT record.

Using the TXT record in DKIM infrastructure -06

Office 365, DKIM Public Key and the TXT record

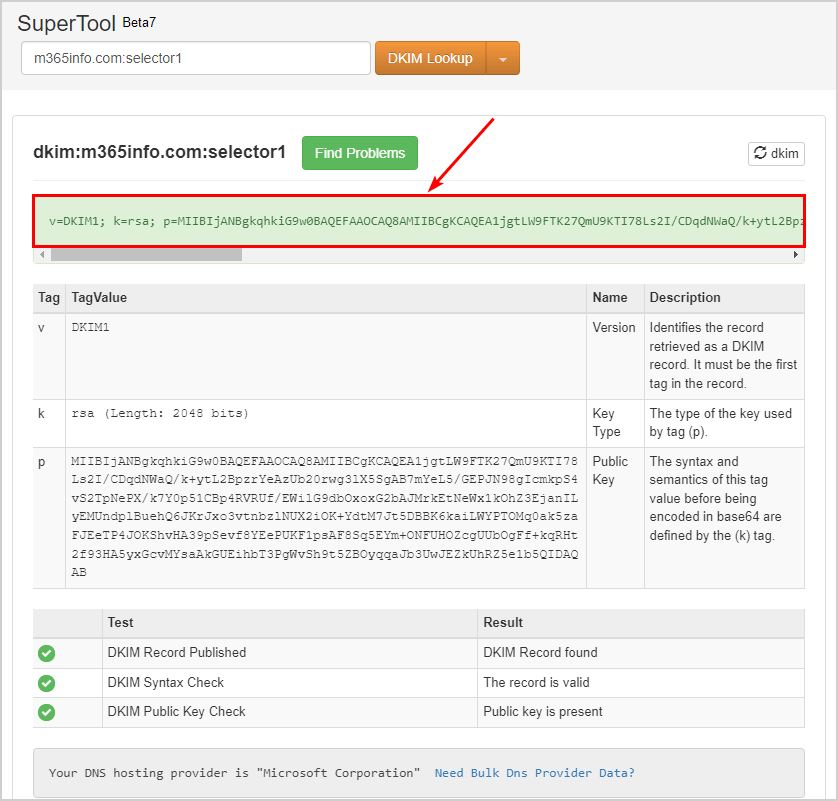
In the Office 365 environment, we don’t really have a dedicated Public key which was created exclusively for our specific public domain name.

The Office 365 infrastructure, provide us a “General Public key” that we can “borrow” and “attach” to our specific public domain name when using outbound DKIM signing.

Outbound DKIM signing in Office 365 -Borrowing” the Office 365 Public Key -01

The above concept seems a little confusing at first because apparently, we let “someone else” to sign mail coming from our public domain name.

The good news is that from the DKIM perspective and, the need to proof our sender identity perspective, this process is entirely legitimate and useful.

The process in which we let “Office 365” implement DKIM Digital signature for our domain name, considered as a legitimate process because we are publishing this information in the public DNS that hosts our domain name.

In other words, as the owner of a specific public domain name, we declare publicly about a specific Public Key that will be used for verifying DKIM signature that appears in an E-mail message that includes our domain name.

Office 365 is Authorized to use DKIM signing on ?E-mail message with my domain name -02

To be able to use Office 365 Public Key infrastructure for our specific domain, we will use a little trick.

We will publish a DKIM DNS record that represents our public domain name, DNS record that Apparently containing our Public Key value.

Because that as Office 365 customers, we don’t relay have a dedicated Public Key, we will redirect the original DNS request to – other DNS records.

The “other DNS record” is the “real” Office 365 DKIM TXT record that contains the value of the Office 365 Public Key.

Q1: What is the tool or the mechanism that we use for redirecting DNS queries to the Office 365 DKIM selector TXT record?

A1: The “trick” that we use for redirecting DNS client requests implemented by using a DNS CNAME record.

DKIM Selector “formal” hostname

To be able to be compatible with the DKIM naming convention of the DKIM Selector hostname, we will publish this “formal record” in the DNS that hosts our domain name.

This “formal DKIM hostname” that we will publish is not a real TXT record that contains the required information about the Public Key value, but instead, a record that serves as a “logical router” that route the request of the DNS client (the receiving mail server) to the “right hostname” meaning – the HOST name of the Office 365 DKIM Selector that was created for representing the specific public domain.

(Later on, we will review the syntax that we need to use for publishing the DKIM Selector record that represents our public domain name + the “special Office 365 DNS record)

The receiving mail server request for the TXT record that represents the domain will be redirected to an Office 365 TXT record -03

The special DKIM DNS flow that is implemented in an Office 365 based environment

As It was mentioned, in an Office 365 base environment, we would need to use a little trick that will redirect DNS query for the “standard DKIM selector” hostname to the “special” Office 365 DKIM record that includes the required Public Key value.

Two types of DKIM DNS records in ?Office 365 based environment -04

The need to reference to the unique Office 365 DKIM record by using a “redirection mechanism” is because – Office 365, consider as a hosted environment in which many different organizations share the same mail infrastructure meaning the Exchange Online infrastructure.

In a hosted environment such as Office 365 and Exchange Online, we cannot create a dedicated certificate (Public Key and Private key pair) for each of the different Office 365 tenant or for each of the public domain that is registered with Office 365.

The mechanism that enables us to use the “shared mail environment” and at the same time use a DKIM infrastructure that is “attached” to our specific public domain name is implemented in the following way:

When we enable the option of outbound DKIM signing for our public domain, Office 365 will create a dedicated DNS record that will serve as the DKIM selector record for our public domain name.

This “special record” will contain the value of the Public key that is used by Exchange Online when we use the option of outbound DKIM signing.

When we want to enable the option of outbound DKIM signing for our public domain name, we will need to create a CNAME record, that will redirect DNS queries about the “standard DKIM hostname” to the “special Office 365 DKIM record”.

The challenging fact is that at the current time, the Office 365 management portal doesn’t include any information about the host names of the required DKIM host named records.

In other words, we will need to “generate” or “build” the necessary DKIM DNS hostnames for:

  1. The standard DKIM host name record that will represent our domain name:
  2. The “special Office 365 DKIM record”

The DKIM Selector host names redirection process

An additional important concept that we need to be familiar with when we enable the option of outbound DKIM signing for our public domain name is the concept of “hostnames redirection” that is implemented by using a DNS CNAME record.

A DNS CNAME record serves as “logical container” for two different DNS records (two host names).

When a DNS client addresses the DNS server asking about hosts “A“, the DNS server answer, includes a redirection to the name of host “B“.

The concept of DNS CNAME record -01

A DKIM flow scenario in which the sender accommodated in the Exchange Online server

In the Office 365 environment, when we enable the option of outbound DKIM signing for our public domain name, the outgoing E-mail message will include a standard DKIM host name that represents our public domain name.

When the E-mail message reaches to the destination recipient, the receiving mail server will fetch the value of the DKIM selector host name and will address the DNS server looking for information about the “DKIM selector HOST name”.

Because, as Office 365 we don’t relay has a dedicated TXT record that containing our specific Public Key, the DNS request will be redirected to the “real” Office 365 DKIM TXT record.

The “redirection” information will be sent by the DNS server to the receiver mail server, and the receiver mail server will create a new DNS query looking for infrastructure about the “new HOST name” (the host name of Office 365 DKIM TXT record).

The concept of resolving the host name of the DKIM selector in Office 365 -02

DKIM DNS Record Structure and Naming Convention in Office 365 Based Environment

As mentioned, to be able to activate the process of outbound DKIM signing for our public domain name who is hosted at Office 365, we will need to create the required DNS records.

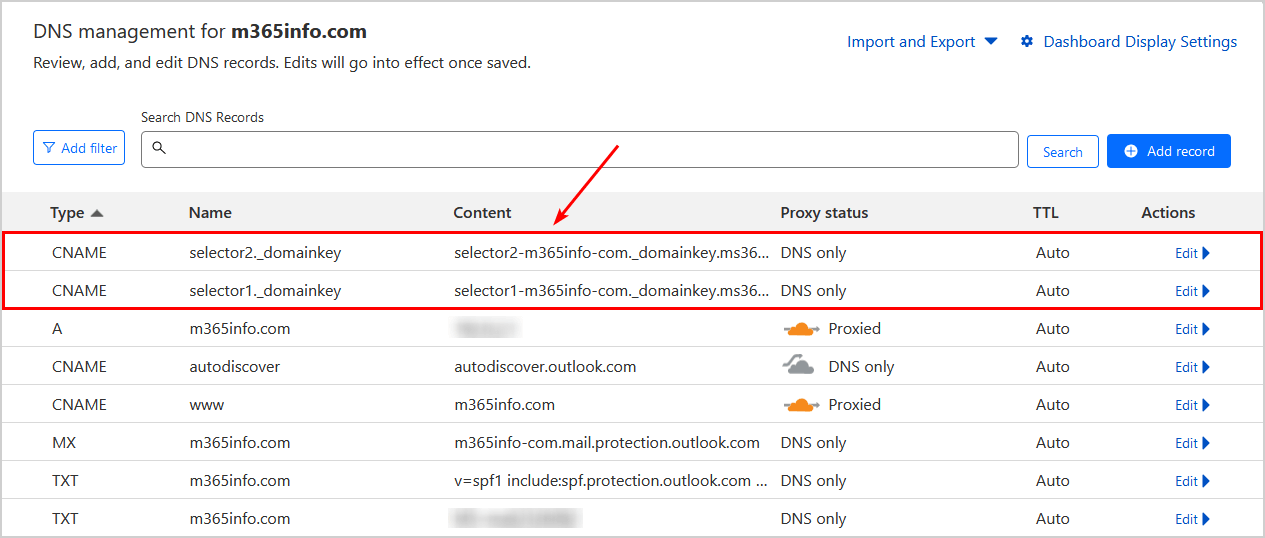
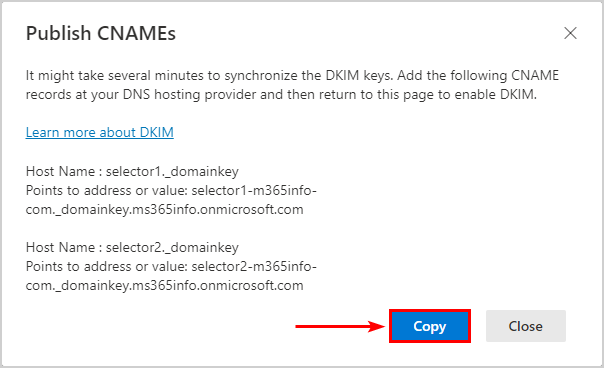
The implementation of outbound DKIM signing in Office 365 based environment is implemented by adding two CNAME records to the DNS that hosts our public domain name.

The CNAME records structure is based on a concept of two different parts.
In other words, the CNAME record serves as a container for two hosts names.

DNS queries for the hostname who appear in the “first part” of the CNAME record, will be redirected to the “second part” (the second host name) of the CNAME record.

In other words, the DNS client asks for information about Host A, while the DNS server answers with information about Host B.

The concept of resolving the host name of the DKIM selector in Office 365 by using CNAME record

In our scenario, the DKIM DNS records will be published by using two CNAME records that represent two DKIM selectors.

The “first part” of the CNAME DNS record, include the DKIM selector hostname, that is published as a representation of our domain name.

The second part of the CNAME record, include the “real Office 365 hostnames” that is pointing to a TXT record that includes the required Public key pair.

In the following sections, we will review the structure and the naming convention of the DNS DKIM CNAME records, that need to create in Office 365 based environment.

Part 1#2 –Office 365 DKIM CNAME record the first part

In this section, we review the naming convention of the hostname who is configured in the “first part” of the CNAME record.
This is the host name of the DKIM selector that is supposed to represent our domain name.
In other words, the hostname of the DKIM selector should include the domain name as the domain name that appears in the E-mail message that he signs.

For example, if our recipient sends E-mail using the domain name – o365pilot.com , the host name of the DKIM selector that sign the E-mail message should also include the domain name – o365pilot.com

The “source server” meaning, the sender mail server that “stamp” the outgoing E-mail message defines as – DKIM Selector.

The outgoing E-mail that sent from our recipient and sent by the Exchange Online, will include the host name of “our DKIM Selector

The receiving mail server that will get the E-mail message will look at the E-mail header for the host name of the DKIM selector that sign the E-mail message.

In Office 365 we don’t have a “real Public Key“. Because the receiver mail server expects to get our Public Key by looking for the DKIM selector host name who appears in the E-mail message, we will need to publish a “standard DKIM host name based on the DKIM naming convention, that will serve as a “dummy host” that apparently represents the TXT record that includes “our Public Key“.

The term DKIM Selector -03

The naming convention of a “standard” DKIM record that will appear in the E-mail message, contains three parts:

Hostname + predefined sub domain name ( _domainkey ) + public domain name.

Note: The technical term that should be used for describing the DKIM selector record name is – FQDN (fully qualified domain name). The term FQDN includes the host name + the domain name.

1. Hostname

The first part of the “hostname” could be any arbitrary name whom we choose.

The structure of a standard DKIM selector DNS record -04

Note: In an Office 365 base environment, we will have to use a predefined host name.

2. DKIM Subdomain name

The second part described as “sub-domain“.
This part is a mandatory part that will need to include as part of the DKIM selector full host name. The name whom we will need to add as a “DKIM sub-domain” is – _domainkey

3. The public domain name

The “last part” of the host name is the public domain name of the particular organization.

An example for a DKIM selector host (FQDN) name

In the following diagram, we can see an example for an optional DKIM Selector record, that represents a domain named – o365pilot.com

In our specific scenario, we choose to use the host name – selector1.

The “middle part” is the “reserved sub-domain name” ( _domainkey ) and the last part is the domain name.

An example for standard DKIM selector DNS record for the domain – o365pilot.com -05

The DKIM selector record in Office 365 – public domain name

The DKIM selector DNS record that we use in an Office 365 based environment for representing a specific public domain name is based on the standard DKIM naming convention that is used for the DKIM selector record.

The only difference is that in Office 365 we cannot choose a host name whom we “like” (we cannot use the arbitrary host name) and instead, we have to use the hostname selector1 and selector2.

The reason for using two DKIM host names (selector1 and selector2) is because that in an Office 365 based environment, we use two DKIM records that represent two different DKIM selectors.

The structure of Office 365 DKIM DNS record -01

In the following diagram, we can see an example for the “Office 365 DKIM selector” hostname that will be used for representing the domain name – o365pilot.com

An example for the DKIM host name the we need to publish for our domain name in Office 365 based environment -02

Part 2#2 – Office 365 DKIM CNAME record the second part

The hostname of the Office 365 DKIM record that is created for a specific public domain name who is hosted at Office 365 is created automatically.

The main questions are – how do we get this hostname?

Theoretically, the name of the Office 365 DKIM record was supposed to appear in the DNS setting of the Office 365 portal, but at the current time, the information about this record doesn’t appear in the DNS admin web interface.

The way that we can use for getting the required hostname of the Office 365 DKIM record that represents a specific domain name is

  1. By using PowerShell command. This is the simplest way because all we need to do is connecting Exchange by using a remote PowerShell and type the required PowerShell command.
    We will review the required steps in section – Option 1#2 – Getting the host name of Office 365 DKIM selector using PowerShell
  2. By generating the host name, given that we know the exact naming conversion used by Office 365 infrastructure. This is the most challenging way. If you like to understand the “under the hood” of the method that is used by Office 365, you can read the section – Option 2#2 – Manually create the required Office 365 DKIM selector host name for our specific domain name

The next article in the current article series

In the next article – How to enable outbound DKIM signing for your domain in Office 365 |Part 5#10, we will review the process of – How to enable outbound DKIM signing in Office 365 for our public domain name.

The o365info Team

The o365info Team

This article was written by our team of experienced IT architects, consultants, and engineers.

This Post Has 0 Comments

Leave a Reply

Your email address will not be published. Required fields are marked *