In the article, we will review: What are the possible reasons that could cause to…
My E-mail appears as spam | Troubleshooting – Mail server | Part 14#17
In the current article and the next article: My E-mail appears as spam | Troubleshooting – Mail server | Part 15#17, we will review the troubleshooting process of the scenario – “our mail server appears as blacklisted” in Office 365 and Exchange Online environment.
Another variation of this scenario could be – a scenario, in which we want to understand if the problem in which our organization E-mail identified as spam/junk mail relates to our mail server or other possible issues.
Table of contents
The troubleshooting path logic
Vs. a scenario in which we use on-Premises mail infrastructure, in case that our mail infrastructure is hosted at Office 365 (Exchange Online), the troubleshooting logic and steps that we will need to implement are different.
The “major component” in our troubleshooting path, includes the following parts:

1. Get information from the E-mail message
The basis for our scenario is the information that appears in the E-mail. The “E-mail message” could be:
- An NDR message that was sent to one of our organization users, which inform him that “his mail server” (our organization Exchange Online server) is blacklisted.
- A scenario, in which external recipient reports that – our E-mail saved in his junk mail folder, and he sends us the E-mail header which includes our mail server IP address.
To be able to start the troubleshooting process, we will need to “extract” the IP address that appears in the NDR message (the IP address of the Exchange Online server which appears as blacklisted).
2. Get information about your Exchange Online infrastructure
In an Exchange Online environment, we will need to get information about the Exchange Online that represents our domain – the Exchange Online hostname + IP address that is “mapped” to our Exchange Online hostname.
3. Fetch the information about the Exchange Online IP address
We will need to get the IP address of the “Office 365 mail server” that sent out the E-mail message “on behalf” of the Office 365 users to the destination recipient.
4. Verify if the “formal “Exchange Online IP address appear as blacklisted.
This is the “cross-section” part, in which we want to verify if the IP address that appears in the NDR message is related to our “formal Exchange Online server” or, to anther possible scenario – Exchange Online- High Risk Delivery Pool.
Infer the necessary conclusions – based on the information from the previous step; we can decide what are the “operations” that we will need to implement.
Get the information from the E-mail message that was identified as spam/NDR
In the following phase, we will need to “fetch” from the E-mail, the required information about the mail server host name or the IP address that was blacklisted.
We will need to ask our organization user who gets the NDR message or the external recipient who informs us that our E-mail saved in his junk mail folder, to send us a copy of the E-mail.

Forwarding a copy of the NDR message or the message that saved to the junk mail folder
In a scenario in which we need to examine E-mail messages, the best practice is to ask for a copy of the original E-mail message.
The way for providing a “complete copy” of the E-mail is by forwarding a copy of the E-mail.
Outlook and OWA mail client include the option of “forwarding an E-mail copy” but, not all the mail client support this option.
For example: as far as I know, there is no option to send a copy of the original E-mail message when using the Gmail mail client (the possibility of “forwarding” E-mail doesn’t send the “complete E-mail message that included the original mail headers).
In the following section, we will demonstrate how to forward or copy of the “original E-mail message” by using Outlook and OWA mail client.
1. Sending E-mail as attachment using Outlook
Outlook mail client includes the option that describes as forward E-mail as an attachment.
- Select the E-mail item
- In the HOME menu, click on the more option and then click on the forward as attachment

In the following screenshot, we can see the result – the E-mail that sent includes a copy of the original E-mail message.
Later, we can access the “original E-mail message” and analyses the information contained in the E-mail header.

2. Sending (forwarding) E-mail as attachment using OWA
- Log into Office Web App (OWA).
- Click on the option New.
- Click the open separate window icon, located at the top right corner of the message window. This will open this message in its own window within your browser.
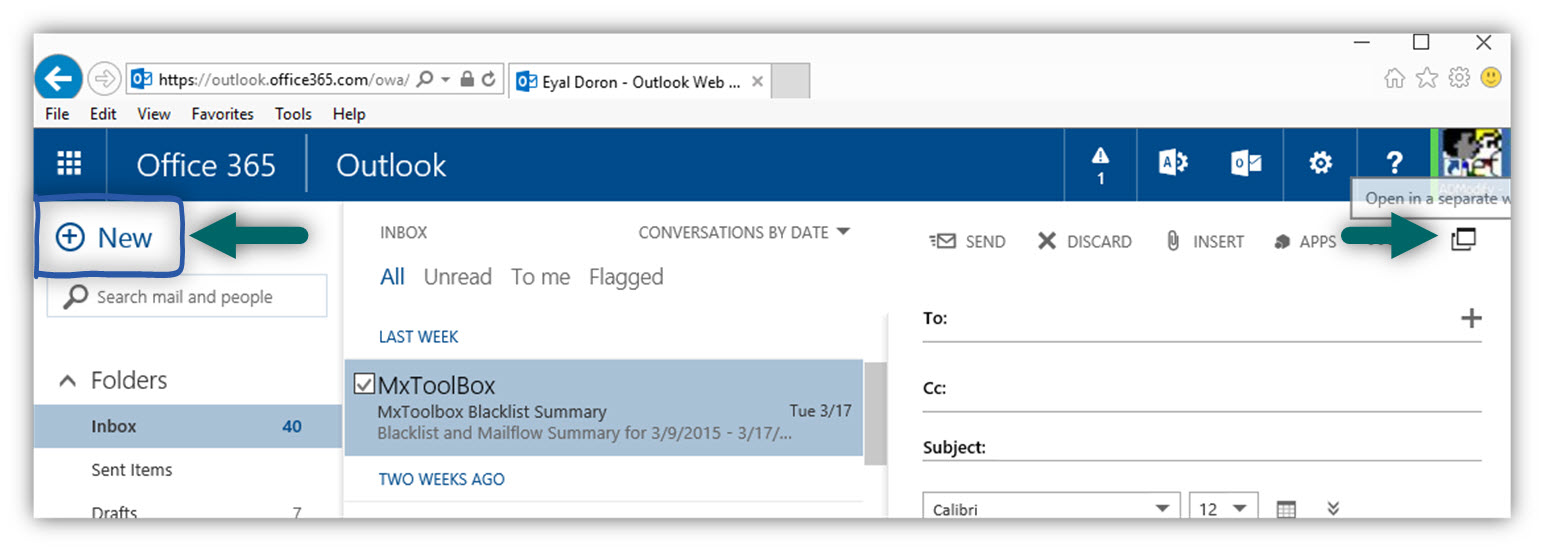
- Locate the “new E-mail window” side by side with the OWA window.
- Drag and drop the email from your mail folder in the window of the new E-mail message
In the following screenshot, we can see the E-mail appears as an attachment in the “new E-mail message.”

Getting the required information from the E-mail header
In a scenario in which we need to “extract” the Exchange Online server IP address from an E-mail that was sent to an external receipt, we will need to access the information is “hidden”, in the E-mail part named: mail header.

Getting the E-mail header when using Outlook mail client
- Choose the particular E-mail message
- Select the File menu
- In the window that appears, select the Properties menu
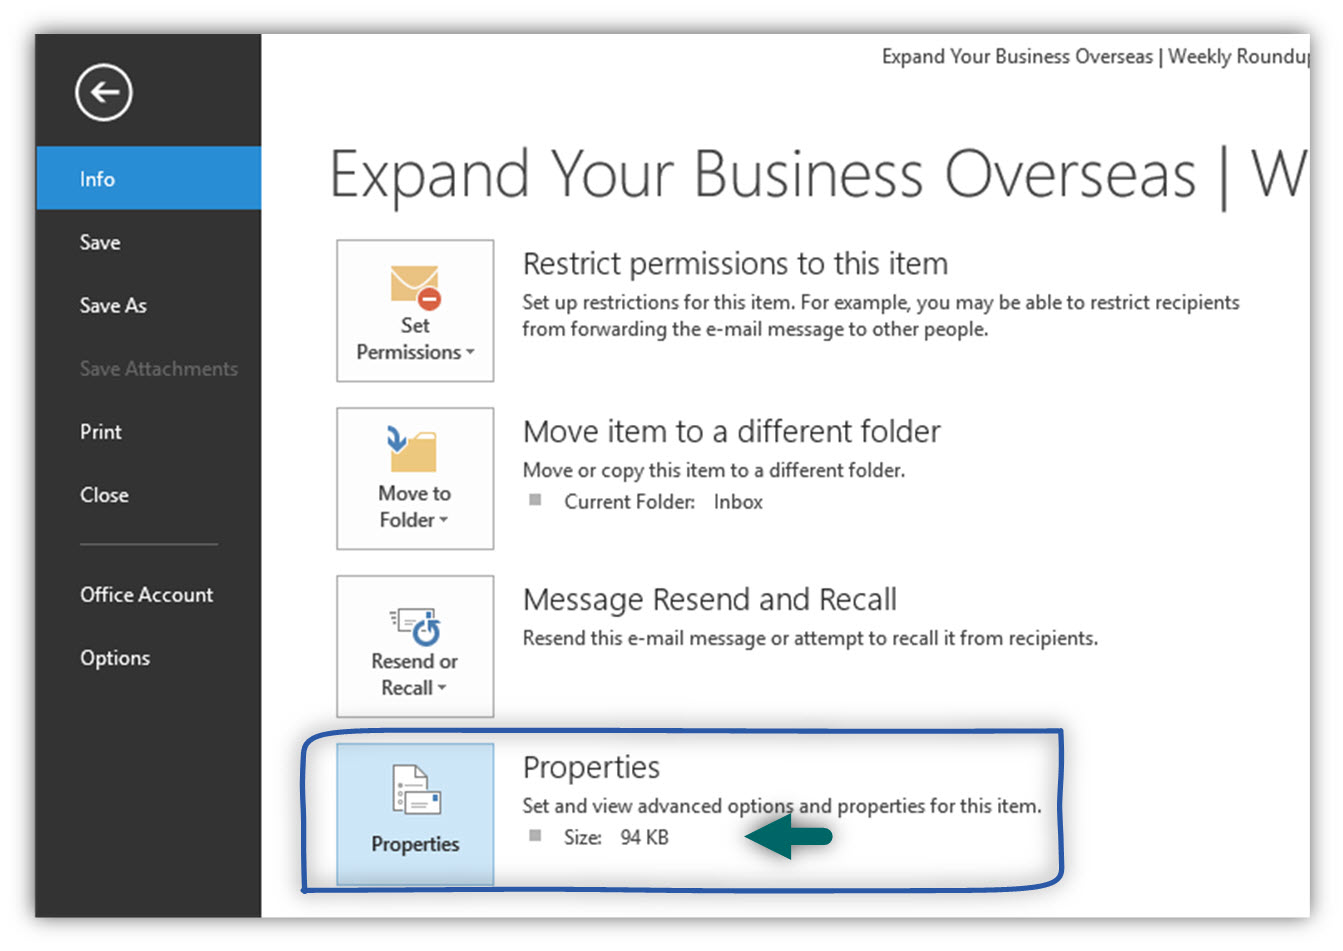
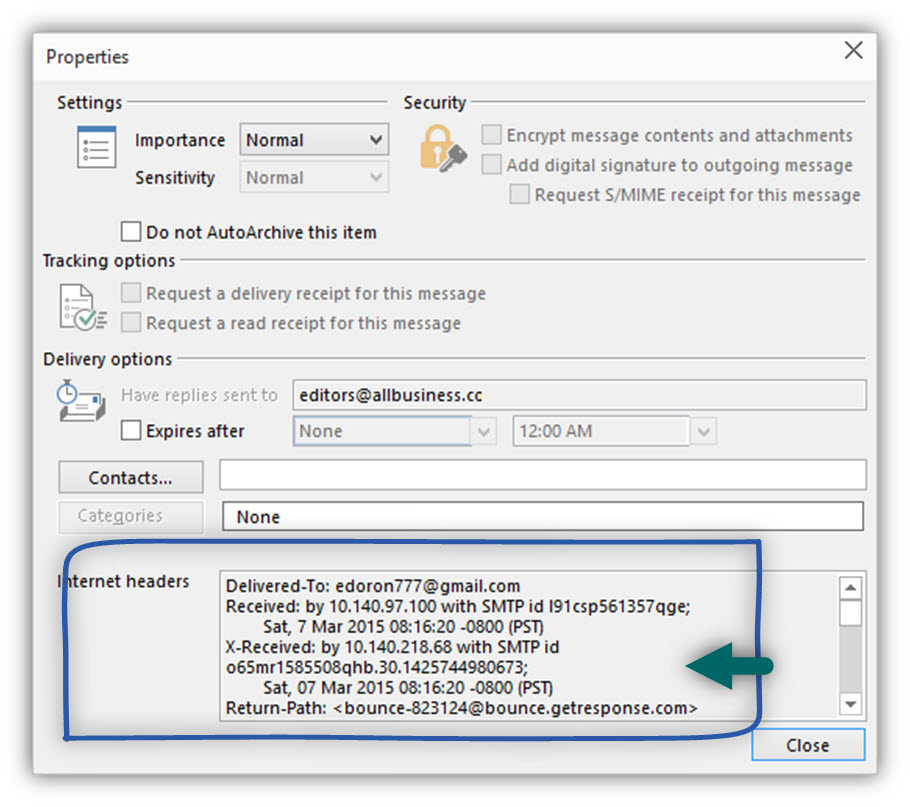
- In the section named: Internet headers, you can see the content of the mail header.
- Copy the information from the window and send the information for further analysis.
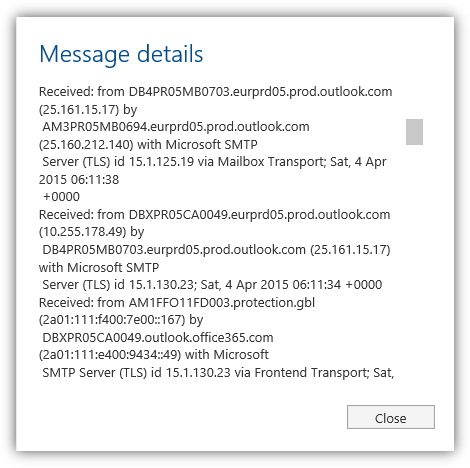
Getting the E-mail header when using OWA mail client
- Choose the particular E-mail message
- Choose the “more option” icon (the three dots)
- Select the option: View message details
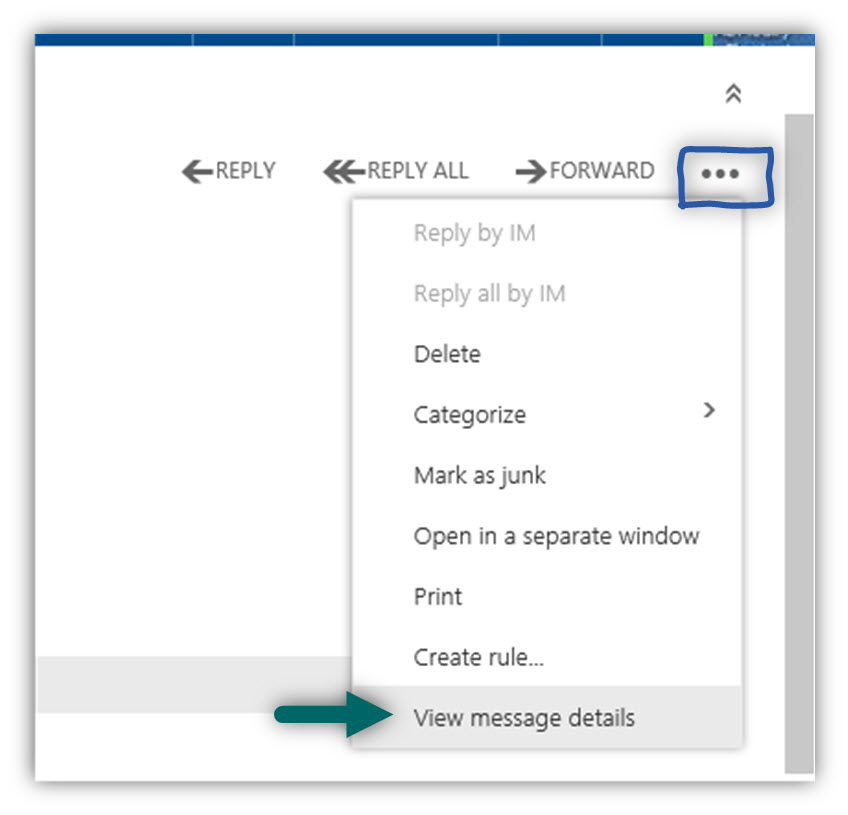
- In the pop-out windows that appear, we can see the content of the mail header.
- Copy the information from the window and send the information for further analysis.
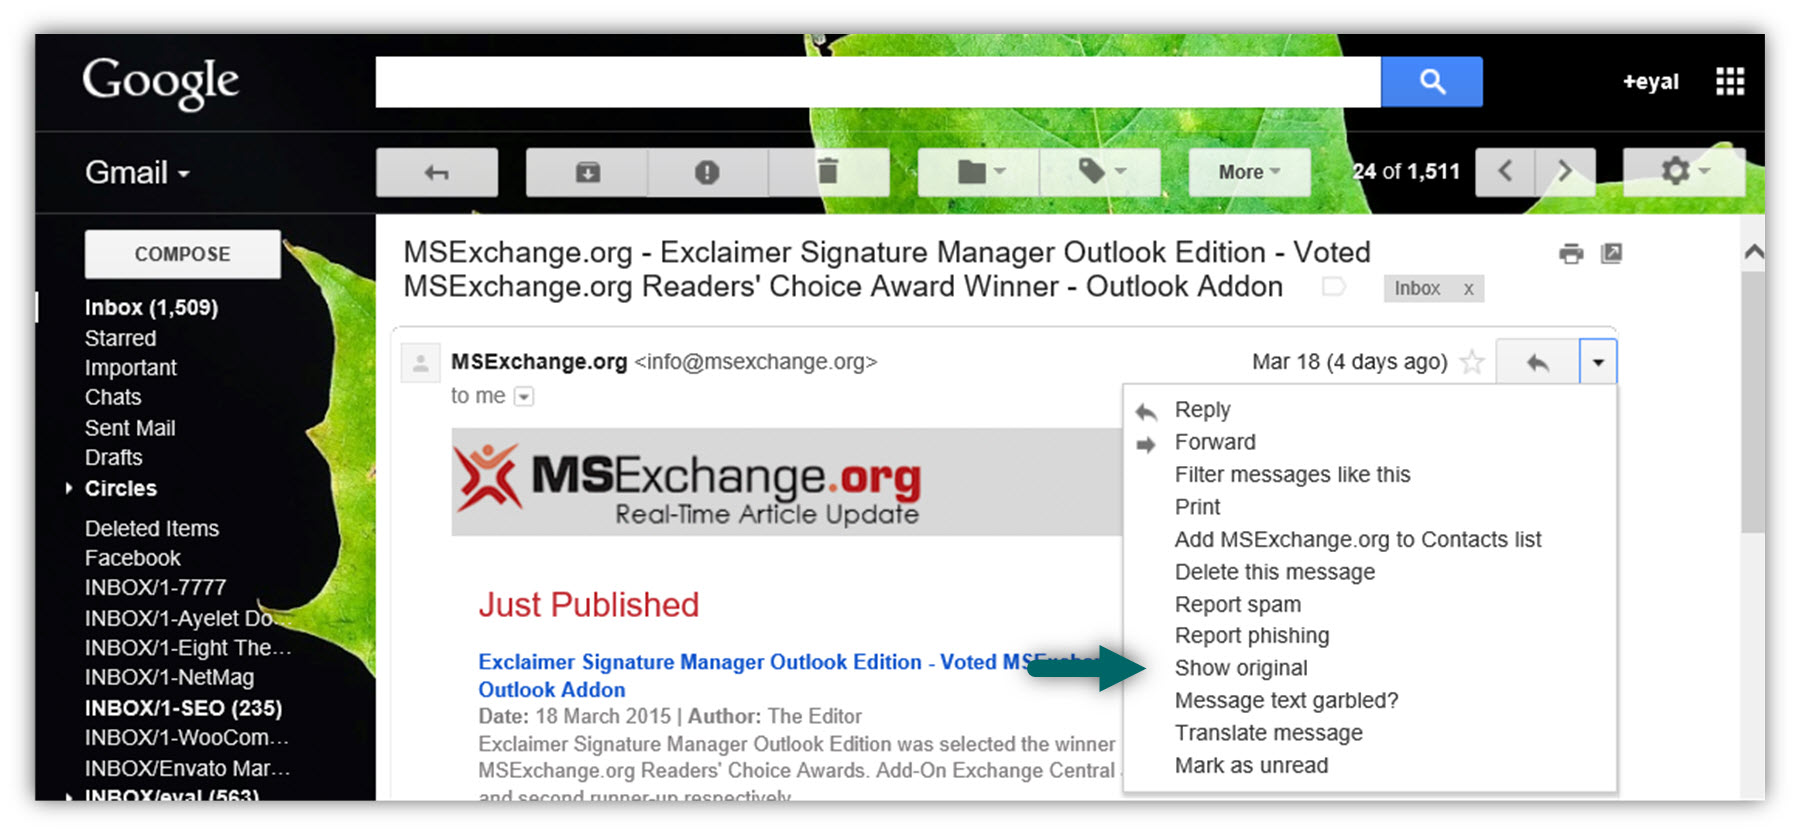
Getting the E-mail header when using Gmail mail client
The Gmail E-mail web client doesn’t include an option for forwarding E-mail message as an attachment.
The only option that we can use is asking for the user to send us a copy of the E-mail header (the E-mail that saved in his junk mail folder).
To be able to view the E-mail header when using Gmail mail client, use the following procedure:
- Open the message in your Gmail inbox.
- Click the down-arrow in the top-right corner of the message.
- Click the “Show original” link toward the bottom of the option’s box. The message will open in a separate window with the full message headers at the top.
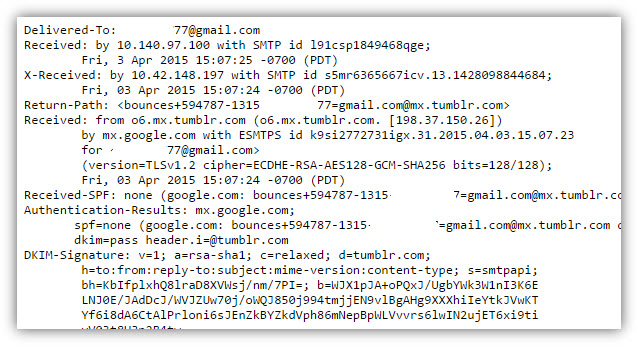
- In the windows that appear, we can see the content of the mail header.
- Copy the information from the window and send the information for further analysis.
What Others Are Reading
This Post Has 0 Comments