Organizations get numerous unwanted emails from various domains in their junk mail. It's best to…
How to assign Full Access mailbox permission
You can assign a user Full Access permission to another mailbox. It’s possible to assign mailbox permissions to single, multiple, or bulk all licensed user mailboxes, shared mailboxes, or groups. In this article, you will learn how to assign Full Access mailbox permissions in the Exchange admin center and with PowerShell.
Table of contents
- Exchange Online permission types
- Assign Full Access mailbox permission in Exchange admin center
- Verify Full Access mailbox permissions
- Connect Exchange Online
- Add mailbox permission with PowerShell parameters
- 1. Assign Full Access permission to user mailbox
- 2. Assign user Full Access permission to all mailboxes
- 3. Assign user mailbox permission to filtered mailboxes
- 4. Assign Full Access permission to mail-enabled security group
- 5. Assign distribution group permission to user mailbox
- 6. Assign distribution group permission to all user mailboxes
- 7. Assign user permission to list of users from CSV file
- 8. Assign filtered members list Full Access mailbox permissions to a user mailbox
- 9. Assign mail-enabled security group Full Access mailbox permission to other group members
- 10. Assign group members Full Access mailbox permission to other group members
- Conclusion
Exchange Online permission types
There are three different permissions types in Exchange Online:
| Permission | Description |
|---|---|
| Send as | It allows a delegate to send an email from another mailbox. It shows the message was sent from the mailbox owner. |
| Send on behalf | It allows a delegate to send email on behalf of another mailbox. It shows that the message was sent by the delegate on behalf of the mailbox owner. |
| Read and manage (Full Access) | It allows a delegate to open another mailbox and behave as the mailbox owner. |
In this article, we will only focus on the Full Access permission.
Note: You can only assign Full Access permission to licensed mailboxes.
Assign Full Access mailbox permission in Exchange admin center
You can assign Full Access permission to a user mailbox. It means you will give a user the same rights as the owner of a user mailbox.
In our example, we would like to assign a user named David Full Access permission to Amanda’s mailbox.
After we provide the required permissions, we need to verify that David can view Amanda’s mailbox using the Outlook app or Outlook on the web (OWA).
How to assign user Full Access mailbox permission
Assign Full Access permission in EAC by following the below steps:
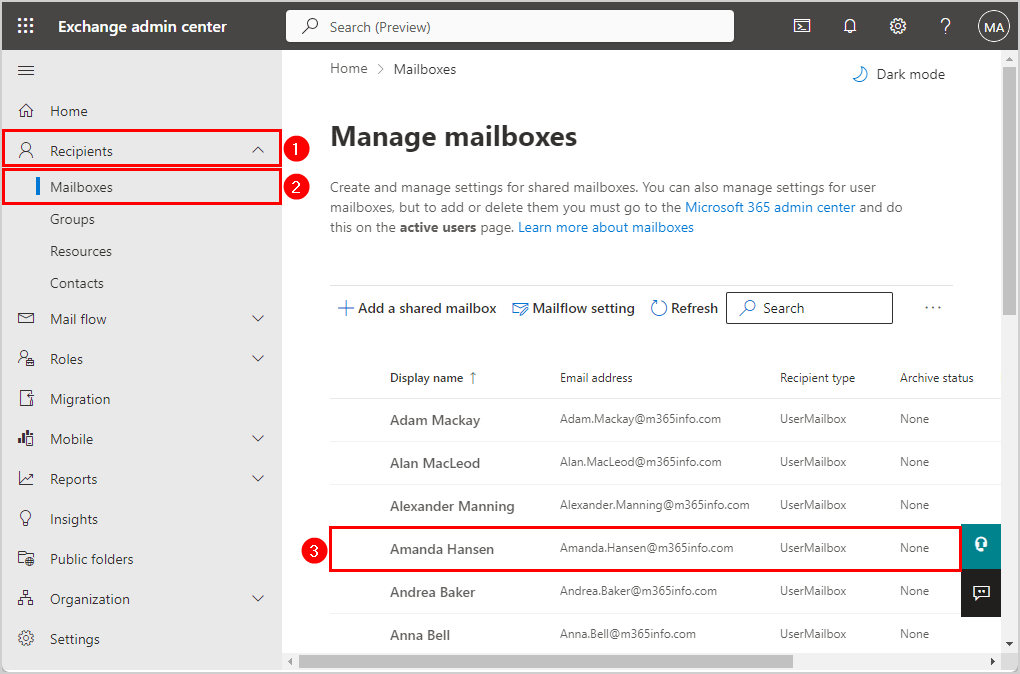
- Sign in to Exchange Online admin center
- Click Recipients > Mailboxes
- Click on a specific recipient to whom you want to assign Full Access permission on their mailbox
In our example, the recipient who will share his mailbox with another user is Amanda Hansen.
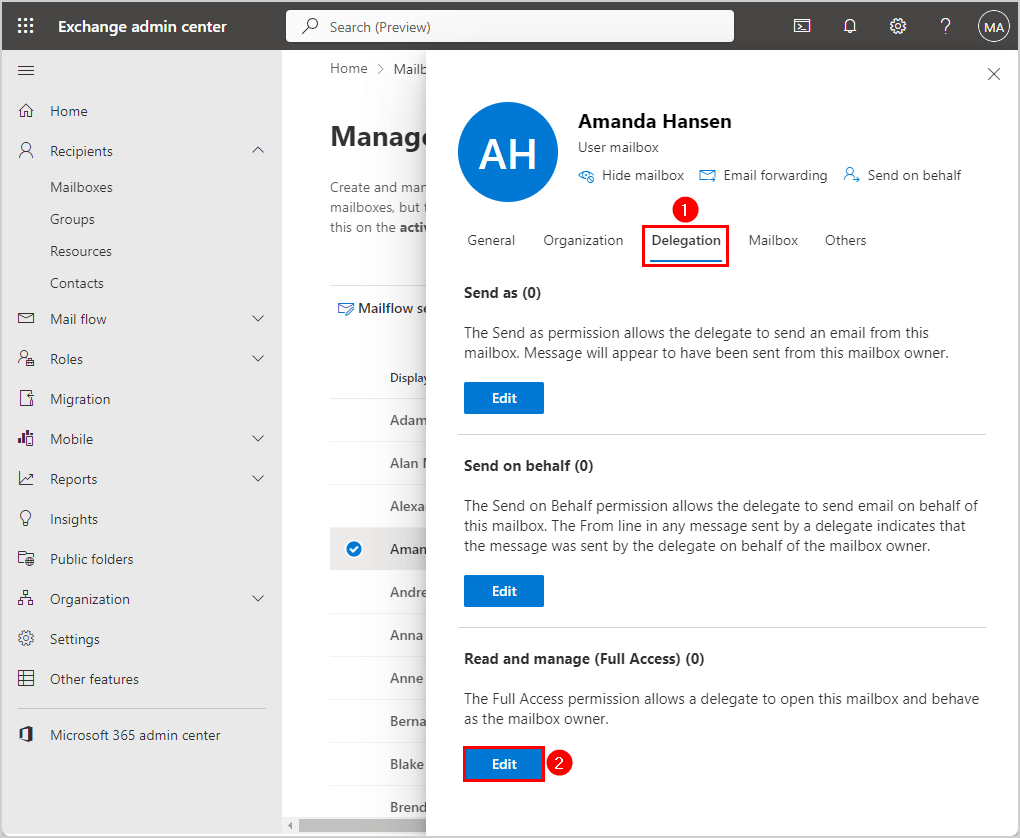
- Click the tab Delegation
- Go to Read and manage (Full Access)
- Click on Edit
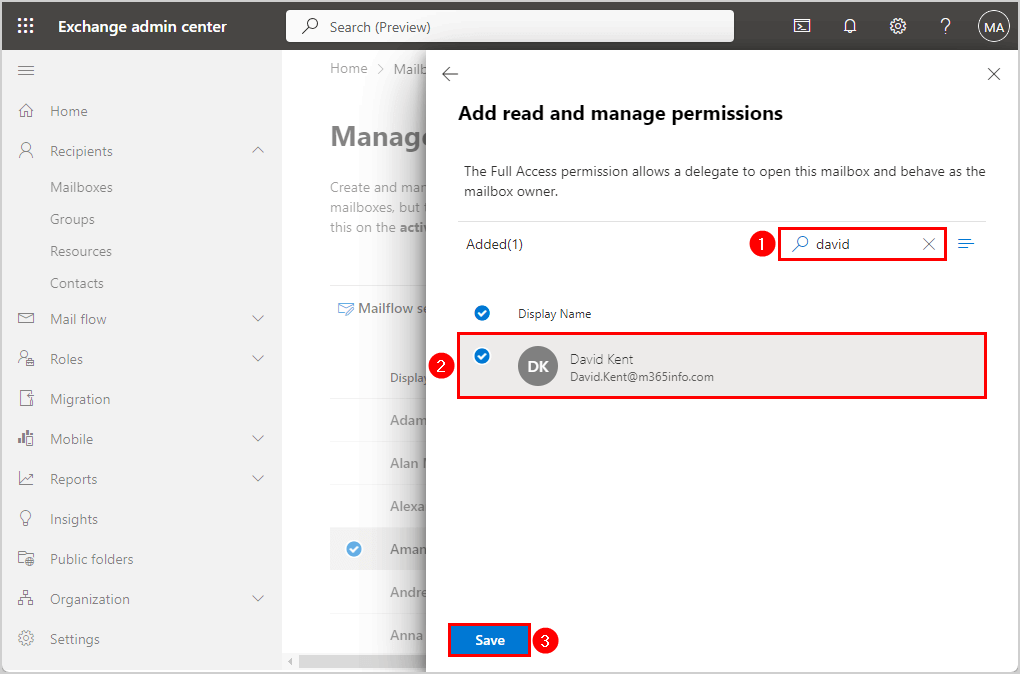
- Click Add members
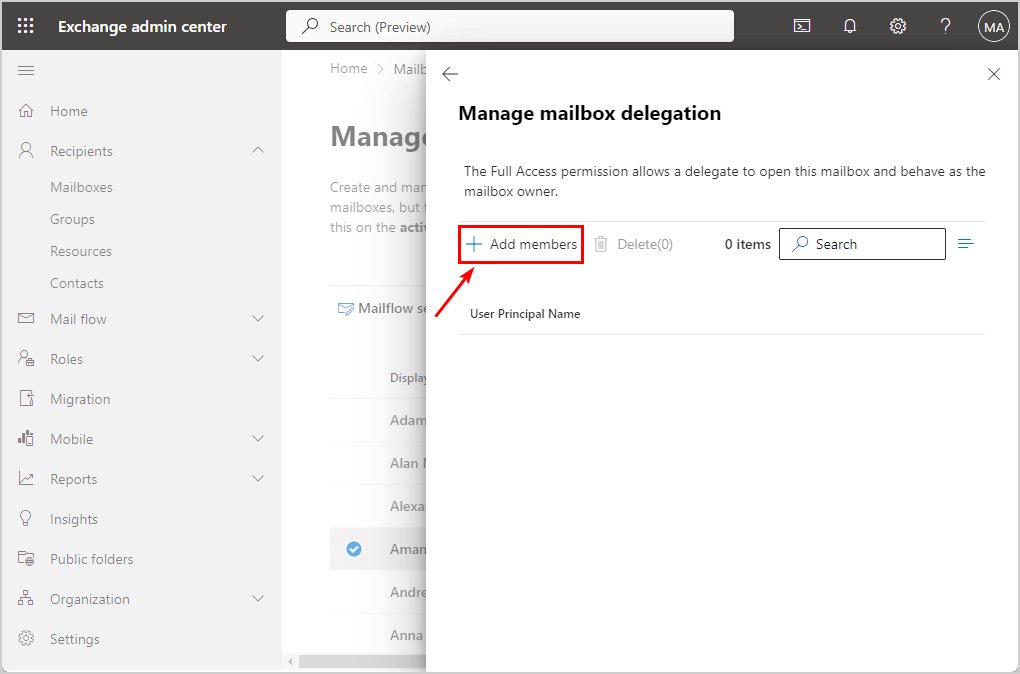
- Search for the user
- Select a mailbox (David.Kent@m365info.com)
- Click Save
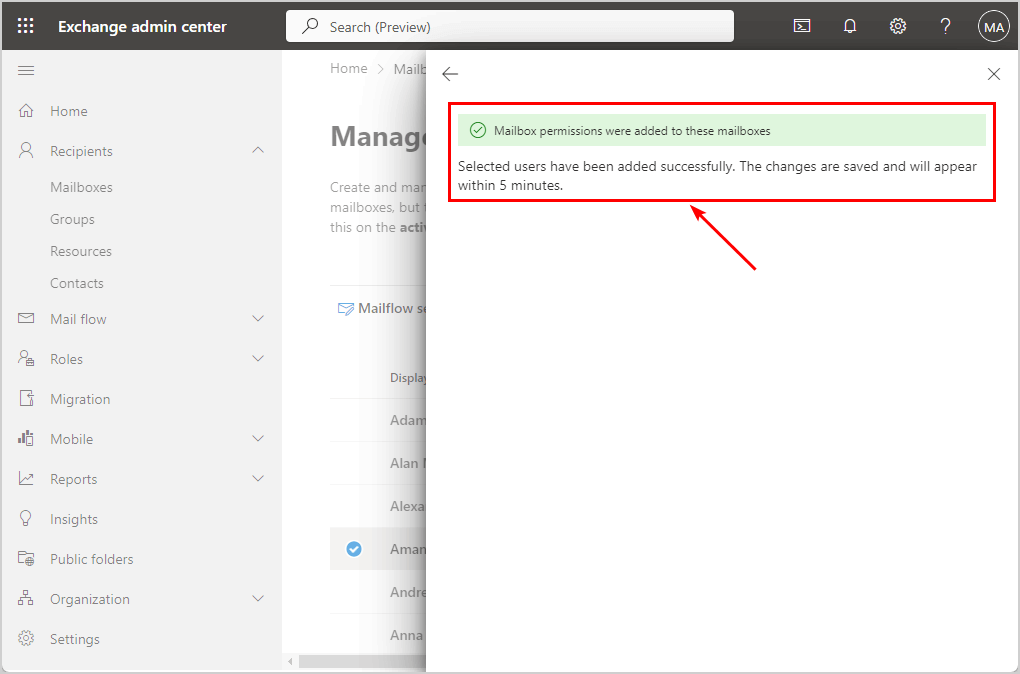
- Click Confirm

- Mailbox permissions were added to these mailboxes
Verify Full Access mailbox permissions
After we assign the Full Access permission to a user mailbox, we want to access the mailbox in Outlook. The Full Access permission allows a user to open another user’s mailbox and behave as the owner. The disadvantage is that it will not add the mailbox folder in Outlook on the Web (OWA), so you must do this manually.
Check mailbox in Outlook
Go to the Outlook app of the user with Full Access mailbox permissions.
In our example, we will open David’s Outlook. As you can see below, it automatically adds a folder with the destination mailbox (Amanda Hansen).
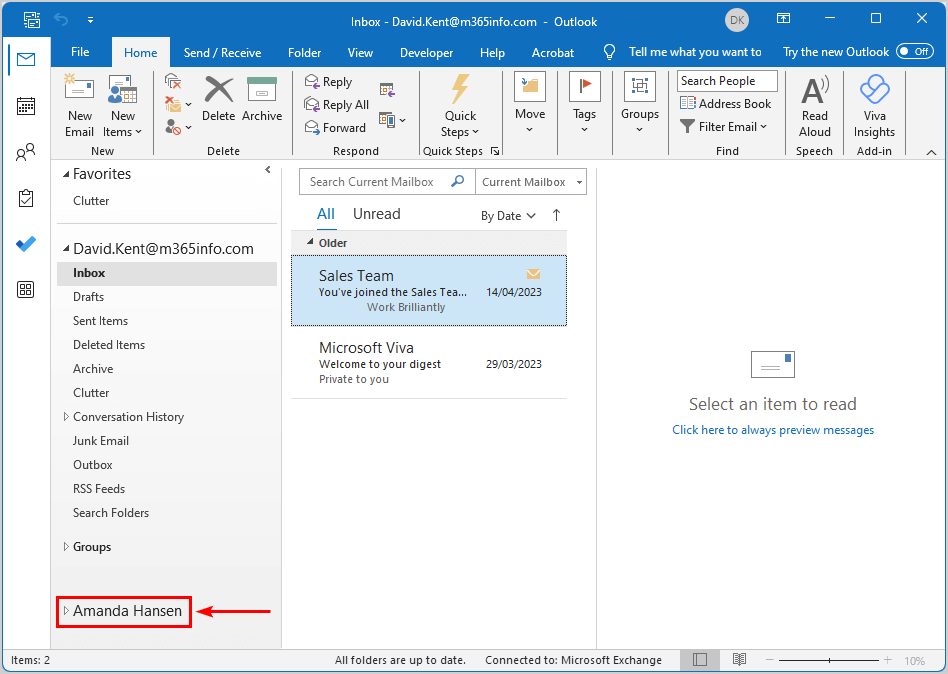
In Outlook on the Web (OWA), you must add the destination mailbox, which we will show you in the next step.
Check mailbox in Outlook on the web (OWA)
If a user has Full Access permission to another user’s mailbox, you will not see that mailbox in the left panel in OWA. In our case, we want to see how Amanda can access David’s mailbox in Outlook on the web (OWA).
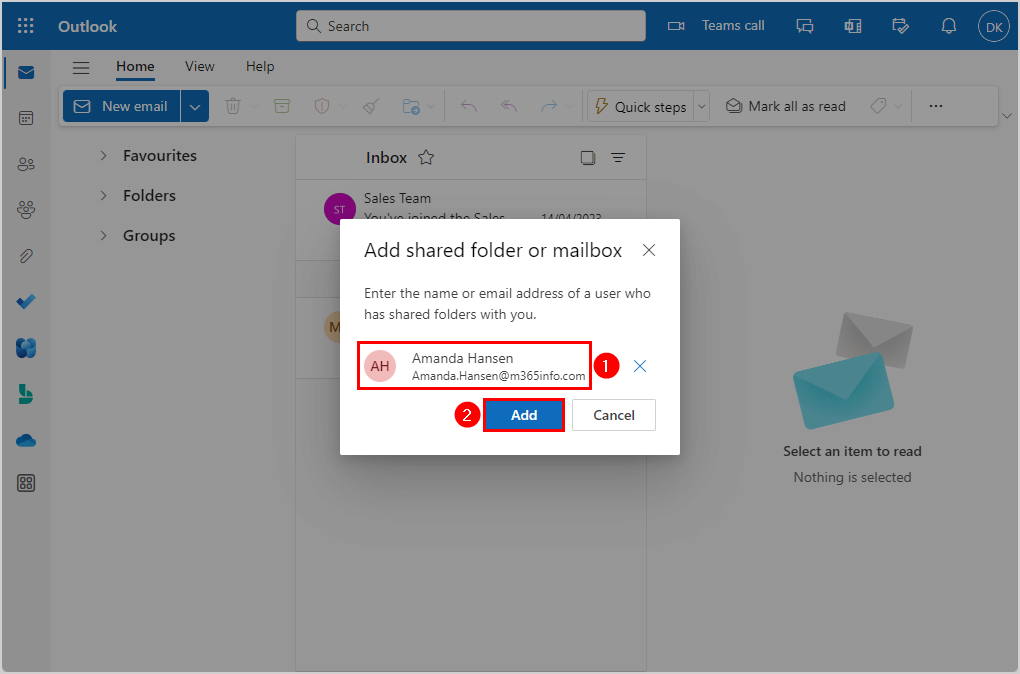
How to add Full Access permission mailbox in OWA:
- Sign in to Outlook on the web
- Right-click on Folders
- Select Add shared folder or mailbox
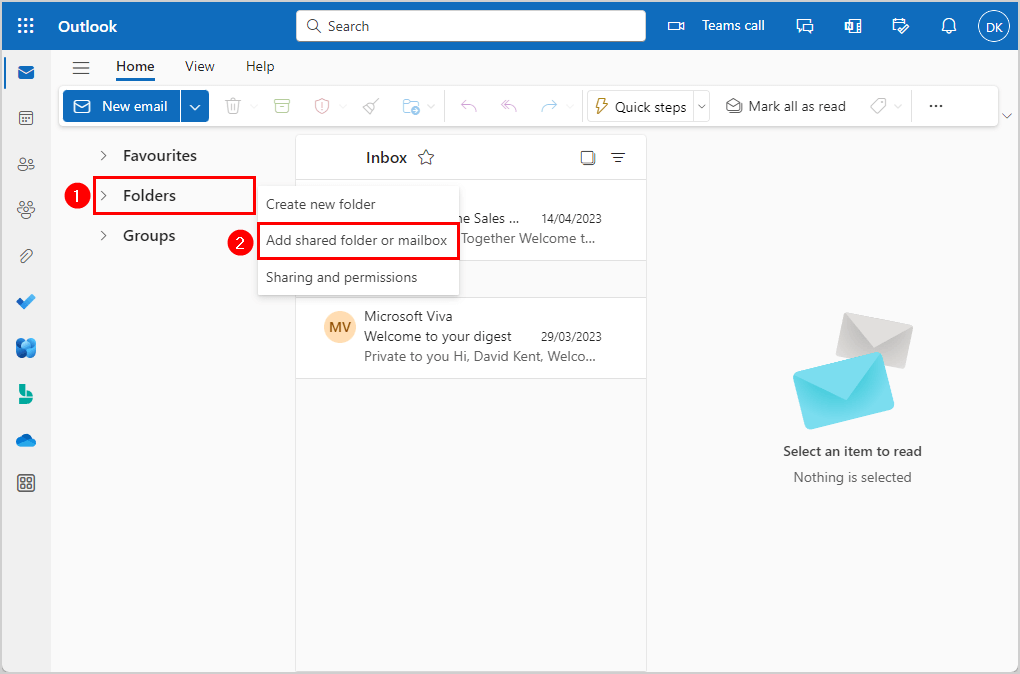
- Enter the name or email address of the mailbox that you have Full Access permission to
- Add the user (Amanda.Hansen@m365info.com)
- The additional mailbox (Amanda Hansen) has been added to David’s OWA.
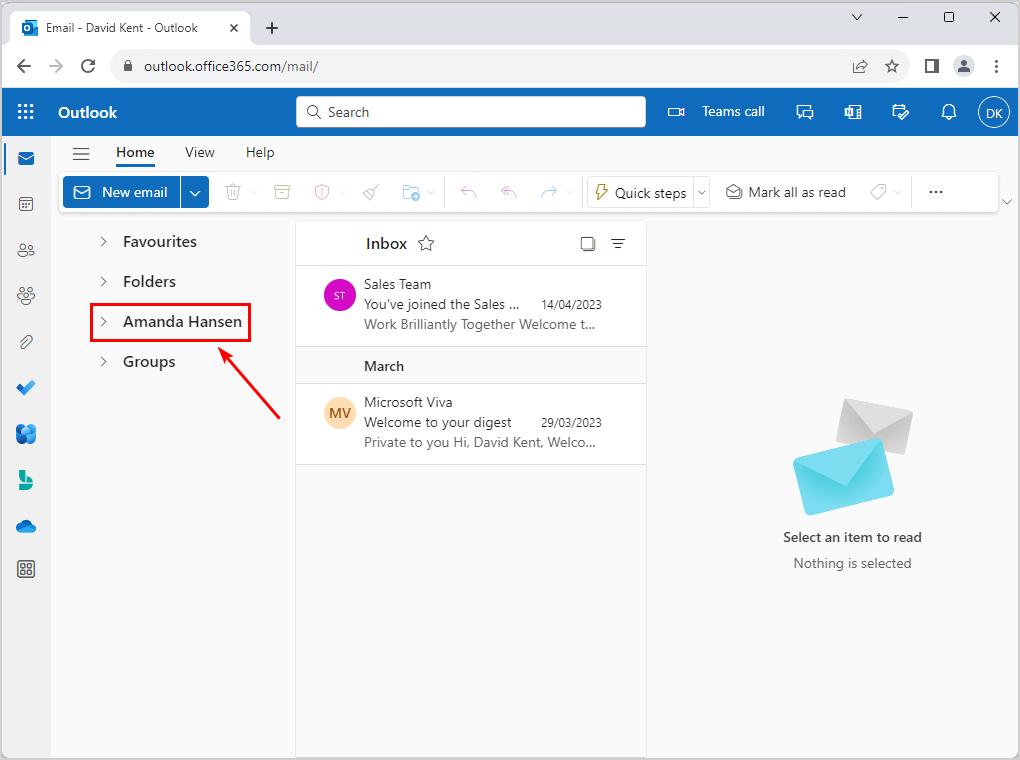
You successfully assigned Full Access permission to a user mailbox and added the mailbox in Outlook on the Web (OWA).
Connect Exchange Online
To be able to run PowerShell commands, you must Connect to Exchange Online PowerShell. Open Windows PowerShell as administrator, run the below cmdlet, and sign in with your admin credentials.
Connect-ExchangeOnlineAdd mailbox permission with PowerShell parameters
We will show you the PowerShell command you must use to assign permission to another user’s mailbox. Then, you can add different parameters to set additional settings.
The basic PowerShell syntax to add permission.
Add-MailboxPermission -Identity "Identity" -User "Identity" -AccessRight FullAccessNote: You can only assign Full Access mailbox permissions to licensed users. It’s not required for shared mailboxes.
We will explain the PowerShell parameters you can use with the above cmdlet.
| PowerShell parameter | Value | Description |
|---|---|---|
| -Identity | Name, Alias, User ID, UPN, and more. | The mailbox of the one who will share their mailbox. |
| -User | Name, Alias, User ID, UPN, and more. | The mailbox of the one who will get the permission. |
| -InheritanceType | All (default value), None | Permission to access all of the existing and additional new folders that the user mailbox might add. |
| -Automapping | $true (default value), $false | It can add a mailbox folder to the user’s Outlook profile with Full Access permission. |
Add -Automapping parameter
AutoMapping is a feature that automatically adds a mailbox folder to the Outlook profile for the user with Full Access permission.
When we provide Full Access mailbox permissions, the PowerShell command uses the AutoMapping feature by default. The -AutoMapping parameter value is set to $true.
The purpose of AutoMapping is to avoid letting the user add a mailbox folder manually to their Outlook profile.
In our example, we want to provide Brenda.Smith@m365info.com Full Access permission to David.Kent@m365info.com mailbox. By default, it automatically adds the additional mailbox (AutoMapping) to Brenda’s Outlook mail profile.
Run the below PowerShell command to assign Full Access permission with the default AutoMapping.
Add-MailboxPermission -Identity "David.Kent@m365info.com" -User "Brenda.Smith@m365info.com" -AccessRight FullAccessThe PowerShell output result.
Identity             User                 AccessRights IsInherited Deny
--------             ----                 ------------ ----------- ----
eec2668a-0773-494... S-1-5-21-70143928... {FullAccess} False       False
If you want to disable AutoMapping, you can avoid this default feature by setting the value to $false.
Run the below PowerShell command to assign Full Access permission without AutoMapping.
Add-MailboxPermission -Identity "David.Kent@m365info.com" -User "Brenda.Smith@m365info.com" -AccessRight FullAccess -AutoMapping $falseNote: To disable AutoMapping for a mailbox where the user was already assigned Full Access permission, you must remove the user’s Full Access permission using the Remove-MailboxPermission cmdlet. Then, reassign the user Full Access permission on the mailbox using the AutoMapping parameter with the value $false.
Add -InheritanceType All parameter
By default, the user (Brenda) with Full Access permission will only get access to current mailbox folders that exist in the user mailbox (David). Whenever the user mailbox (David) adds another folder, the user with Full Access permission (Brenda) will not be able to access this new folder.
To avoid this, add the -InheritanceType All parameter to the PowerShell command. It will enable the user (Brenda) with Full Access permission to access all the additional new folders that the user (David) might add.
Use the below PowerShell command to assign Full Access permission with the parameters -Automapping and -InheritanceType All.
Add-MailboxPermission -Identity "David.Kent@m365info.com" -User "Brenda.Smith@m365info.com" -AccessRight FullAccess -AutoMapping $false -InheritanceType All1. Assign Full Access permission to user mailbox
You can assign Full Access permission for a user (Brenda) to another user mailbox (David).
As mentioned before, we recommended adding the -InheritanceType All parameter to the PowerShell command to enable Brenda to get access to a new mail folder that David can create in the future.
We don’t need to add the -AutoMapping parameter because the option is enabled by default. So when you run the following PowerShell command, it automatically adds David’s mailbox to Brenda’s Outlook mail profile.
Powershell command syntax:
Add-MailboxPermission -Identity "Identity" -User "Identity" -AccessRight FullAccess -InheritanceType AllPowerShell command example:
Add-MailboxPermission -Identity "David.Kent@m365info.com" -User "Brenda.Smith@m365info.com" -AccessRight FullAccess -InheritanceType All2. Assign user Full Access permission to all mailboxes
You can also assign a user mailbox permission to all the user mailboxes in bulk. The PowerShell command will consist of the following parts:
- In the first section, we want to get a list of all the Exchange Online mailboxes. The default PowerShell Get-Mailbox only displays the first 1,000 mailboxes. We need to use the Get-Mailbox -ResultSize Unlimited command to get a list of all the existing mailboxes. The output from the first part is piped to the second part of the PowerShell command.
- In the second part, we want to assign Brenda Full Access mailbox permission on all the mailboxes. The mailbox list we got from the first part of the PowerShell command.
- Add the -InheritanceType All parameter to access any new folders the users might add in the future.
- For the last part, we need to use the -AutoMapping parameter and set the value to $false to avoid adding hundreds of mailboxes to Brenda’s Outlook profile.
In our example, we will grant Brenda Full Access mailbox permission to all the mailboxes without AutoMapping.
Run the below PowerShell command example.
Get-Mailbox -ResultSize Unlimited | Add-MailboxPermission -User "Brenda.Smith@m365info.com" -AccessRights FullAccess -InheritanceType All -AutoMapping $falseThe PowerShell output result is shown below.
Identity             User                 AccessRights           IsInherited Deny
--------             ----                 ------------           ----------- ----
0de964ae-f09a-4e6... S-1-5-21-70143928... {FullAccess}           False       False
ed01f464-daf9-42a... S-1-5-21-70143928... {FullAccess}           False       False
d23f1e98-02db-429... S-1-5-21-70143928... {FullAccess}           False       False
41377e9c-dc47-46c... S-1-5-21-70143928... {FullAccess}           False       False
7bfec79d-7806-484... S-1-5-21-70143928... {FullAccess}           False       False
f034e5cd-4abb-47c... S-1-5-21-70143928... {FullAccess}           False       False
5cae3874-442b-459... S-1-5-21-70143928... {FullAccess}           False       False
6ec79c8e-5a84-499... S-1-5-21-70143928... {FullAccess}           False       False
5f4d37cd-383c-413... S-1-5-21-70143928... {FullAccess}           False       False
d912b0fc-6f7e-4ec... S-1-5-21-70143928... {FullAccess}           False       False
091c4453-82be-47c... S-1-5-21-70143928... {FullAccess}           False       False
7acf56e8-6d86-4e2... S-1-5-21-70143928... {FullAccess}           False       False
Catch All            S-1-5-21-70143928... {FullAccess}           False       False
WARNING: The appropriate access control entry is already present on the object "CN=
Catch All,OU=ms365info.onmicrosoft.com,OU=Microsoft Exchange Hosted Organizations,D
C=EURPR02A011,DC=PROD,DC=OUTLOOK,DC=COM" for account "S-1-5-21-701439281-3420630407
-1831248095-12986084".
In our example, it also shows a warning if Brenda Smith already has Full Access permission on a specific mailbox.
3. Assign user mailbox permission to filtered mailboxes
We want to show examples of assigning a user mailbox permission on all filtered licensed user mailboxes.
Assign Full Access permission to all user mailboxes
In Exchange Online, we have user, room, shared, and equipment mailboxes. You can filter these mailboxes to your needs. In our example, we want to give Brenda Full Access mailbox permission to a filtered list of user mailboxes.
We need to use the -Automapping parameter and set the value to $false. Otherwise, it will automatically add hundreds of mailboxes to Brenda’s Outlook profile.
Run the below PowerShell command example.
Get-Mailbox -ResultSize Unlimited -Filter { (RecipientTypeDetails -eq 'UserMailbox') } | Add-MailboxPermission -User "Brenda.Smith@m365info.com" -AccessRights FullAccess -InheritanceType All -AutoMapping $falseThe PowerShell output result shows it adds mailbox permission to each user mailbox in Exchange Online. It will also show a warning if the user already has Full Access permission on a specific mailbox.
Identity             User                 AccessRights           IsInherited Deny
--------             ----                 ------------           ----------- ----
0de964ae-f09a-4e6... S-1-5-21-70143928... {FullAccess}           False       False
ed01f464-daf9-42a... S-1-5-21-70143928... {FullAccess}           False       False
41377e9c-dc47-46c... S-1-5-21-70143928... {FullAccess}           False       False
7bfec79d-7806-484... S-1-5-21-70143928... {FullAccess}           False       False
f034e5cd-4abb-47c... S-1-5-21-70143928... {FullAccess}           False       False
6ec79c8e-5a84-499... S-1-5-21-70143928... {FullAccess}           False       False
5f4d37cd-383c-413... S-1-5-21-70143928... {FullAccess}           False       False
091c4453-82be-47c... S-1-5-21-70143928... {FullAccess}           False       False
Assign Full Access permission to mailboxes with special email address
We want to grant a user Full Access mailbox permission to all the mailboxes with a specific domain suffix in their email address. In our example, we want to give Brenda access only to mailboxes with the m365info.com domain name suffix.
The PowerShell script we use consists of these parts:
- First, we want to get a list of all the existing mailboxes.
- Then, we use the -Filter parameter to get a list of the mailboxes with the domain name suffix you provide (m365info.com).
- We pipe the result from the first part to the second part of the PowerShell command using the pipeline (|).
- We assign Brenda Full Access mailbox permission to the filtered mailbox list.
See the PowerShell command syntax.
Get-Mailbox -ResultSize Unlimited -Filter { (EmailAddresses -like "*Mail address suffix*") } | Add-MailboxPermission -User "Identity" -AccessRights FullAccess -InheritanceType All -AutoMapping $falseRun the below PowerShell command example.
Get-Mailbox -ResultSize Unlimited -Filter { (EmailAddresses -like "*m365info.com*") } | Add-MailboxPermission -User "Brenda.Smith@m365info.com" -AccessRights FullAccess -InheritanceType All -AutoMapping $falseThe PowerShell output shows it assigns the Full Access Rights to all the mailboxes with the domain you provided.
Identity             User                 AccessRights           IsInherited Deny
--------             ----                 ------------           ----------- ----
0de964ae-f09a-4e6... S-1-5-21-70143928... {FullAccess}           False       False
ed01f464-daf9-42a... S-1-5-21-70143928... {FullAccess}           False       False
d23f1e98-02db-429... S-1-5-21-70143928... {FullAccess}           False       False
41377e9c-dc47-46c... S-1-5-21-70143928... {FullAccess}           False       False
7bfec79d-7806-484... S-1-5-21-70143928... {FullAccess}           False       False
f034e5cd-4abb-47c... S-1-5-21-70143928... {FullAccess}           False       False
5cae3874-442b-459... S-1-5-21-70143928... {FullAccess}           False       False
6ec79c8e-5a84-499... S-1-5-21-70143928... {FullAccess}           False       False
5f4d37cd-383c-413... S-1-5-21-70143928... {FullAccess}           False       False
d912b0fc-6f7e-4ec... S-1-5-21-70143928... {FullAccess}           False       False
091c4453-82be-47c... S-1-5-21-70143928... {FullAccess}           False       False
7acf56e8-6d86-4e2... S-1-5-21-70143928... {FullAccess}           False       False
Catch All            S-1-5-21-70143928... {FullAccess}           False       False
WARNING: The appropriate access control entry is already present on the object "CN=
Catch All,OU=ms365info.onmicrosoft.com,OU=Microsoft Exchange Hosted Organizations,D
C=EURPR02A011,DC=PROD,DC=OUTLOOK,DC=COM" for account "S-1-5-21-701439281-3420630407
-1831248095-12986084".
In our example, it shows a warning if Brenda Smith already has Full Access permission on the mailbox.
Assign Full Access permission to mailboxes from specific department
We want to assign a user mailbox permission for all the users who work at a specific department. Therefore, we need to filter the departments and specify a department.
In our example, we want to assign Brenda mailbox permission to all the licensed user mailboxes within the Sales department. If there are other users within the Sales department without a mailbox license, it will not assign permissions to them.
We must use the Get-User cmdlet to get information about Microsoft 365 user mailboxes in Exchange Online.
See the below PowerShell command syntax.
Get-User -RecipientTypeDetails UserMailbox -Filter { (Department -eq "Sales") } -ResultSize Unlimited | Add-MailboxPermission -User "Identity" -AccessRights FullAccess -InheritanceType All -AutoMapping $falseRun the PowerShell command example.
Get-User -RecipientTypeDetails UserMailbox -Filter { (Department -eq "Sales") } -ResultSize Unlimited | Add-MailboxPermission -User "Brenda.Smith@m365info.com" -AccessRights FullAccess -InheritanceType All -AutoMapping $falseThe PowerShell output result is shown below.
Identity             User                 AccessRights         IsInherited Deny
--------             ----                 ------------         ----------- ----
52a6c1c7-77d2-4109-… S-1-5-21-701439281-… {FullAccess}         False       False
82cd0d62-e974-4892-… S-1-5-21-701439281-… {FullAccess}         False       False
b602b148-2fcf-435a-… S-1-5-21-701439281-… {FullAccess}         False       False
It only assigns Full Access permission to licensed user mailboxes within the department (Sales) you provided. It will show a warning if the user already has Full Access permission on a mailbox within the provided department.
Assign Full Access permission to users from two departments
We want to provide a user Full Access mailbox permission to users from two different departments.
In our example, we want to give Brenda mailbox permissions to licensed user mailboxes from the Sales department and the Marketing department. To be able to find users from both departments, we will use the logic operator -or.
See the below PowerShell command syntax.
Get-User -RecipientTypeDetails UserMailbox -Filter { (Department -eq "Sales") -or (Department -eq "Marketing") } -ResultSize Unlimited | Add-MailboxPermission -User "Identity" -AccessRights FullAccess -InheritanceType All -AutoMapping $falseRun the PowerShell command example.
Get-User -RecipientTypeDetails UserMailbox -Filter { (Department -eq "Sales") -or (Department -eq "Marketing") } -ResultSize Unlimited | Add-MailboxPermission -User "Brenda.Smith@m365info.com" -AccessRights FullAccess -InheritanceType All -AutoMapping $falseThe PowerShell output result only assigns Full Access permission to licensed user mailboxes within your provided departments.
Identity             User                 AccessRights        IsInherited Deny
--------             ----                 ------------        ----------- ----
b602b148-2fcf-435a-… S-1-5-21-701439281-… {FullAccess}        False       False
41377e9c-dc47-46c0-… S-1-5-21-701439281-… {FullAccess}        False       False
5cae3874-442b-459c-… S-1-5-21-701439281-… {FullAccess}        False       False
82cd0d62-e974-4892-… S-1-5-21-701439281-… {FullAccess}        False       False
52a6c1c7-77d2-4109-… S-1-5-21-701439281-… {FullAccess}        False       False
It will show a warning if the user already has Full Access permission on a mailbox within these departments.
Assign Full Access permission using logic operators -or -and
We want to assign Brenda Full Access mailbox permission to all Managers in:
- Sales department
- Marketing department
Now, we will use a combination of logic operators. We used the logic operator -or, but now we need to add the logic operator -and.
See the below PowerShell command syntax.
Get-User -RecipientTypeDetails UserMailbox -Filter { ((Department -eq "Department") -or (Department -eq "Department")) -and (Title -eq "Title") } -ResultSize Unlimited | Add-MailboxPermission -User "Identity" -AccessRights FullAccess -InheritanceType All -AutoMapping $falseRun the PowerShell command example.
Get-User -RecipientTypeDetails UserMailbox -Filter { ((Department -eq "Sales") -or (Department -eq "Marketing")) -and (Title -eq "Manager") } -ResultSize Unlimited | Add-MailboxPermission -User "Brenda.Smith@m365info.com" -AccessRights FullAccess -InheritanceType All -AutoMapping $falseThe PowerShell output result only assigns Full Access permission to licensed user mailboxes within your provided departments and Manager title.
Name                                 RecipientType
----                                 -------------
b602b148-2fcf-435a-9d34-ce72c3a8c748 UserMailbox
82cd0d62-e974-4892-aca6-e0387abc62be UserMailbox
52a6c1c7-77d2-4109-99b9-a4076167b6e2 UserMailbox
4. Assign Full Access permission to mail-enabled security group
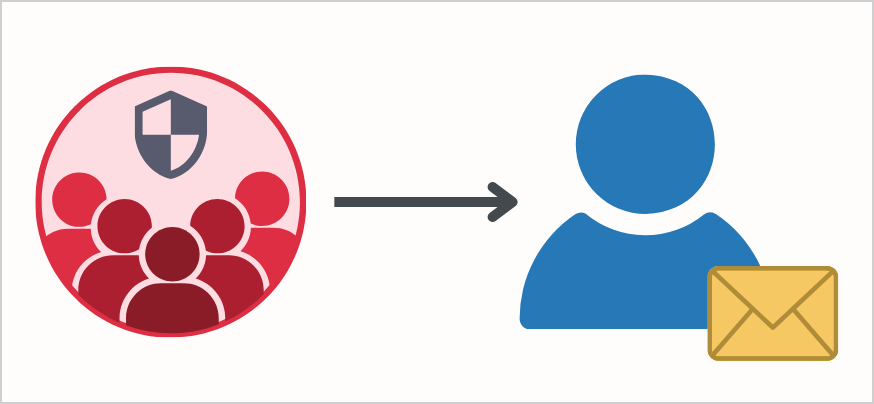
If you need to provide multiple users Full Access permission to a specific user mailbox, you can create a security group. Then, you can add the users to the security group and assign permissions. It’s easier to manage a group with users instead of separate users.
There is no option to get information about the specific members of the security group in PowerShell. The output will only show the security group name without showing the mailbox permissions of each member.
You can always add new users with Full Access permission to the specific user mailbox by adding these users to the security group. The new users will automatically inherit the permission assigned to the security group. The same applies when you need to remove mailbox permission from a specific user. You can remove the member from the security group, and the permissions will be removed.
Note: When we assign mailbox permission to a security group, the AutoMapping feature is not enabled for each group member. It’s because when we assign mailbox permission to a security group, the permission is assigned directly to the group and not to the group members.
Assign security group Full Access permission to user mailbox
We want to show you how to provide a security group Full Access permission to a user mailbox.
The PowerShell command syntax for assigning mailbox permission to users or a security group is identical. There is no special parameter that we need you to use when we assign permission to a Security group. All we need to do is to use the name of the mail-enabled security group after the -User parameter.
In the following example, we want to assign the security group (Finance USA) Full Access permission to a specific user mailbox (Brenda).
See the PowerShell command syntax.
Add-MailboxPermission -Identity "Identity" -User "Identity" -AccessRights FullAccess -InheritanceType AllRun the below PowerShell command example.
Add-MailboxPermission "Brenda.Smith@m365info.com" -User "FinanceUSA@m365info.com" -AccessRights FullAccess -InheritanceType AllThe PowerShell output result shows the Object ID of the user mailbox (Brenda), which shares Full Access permission.
Identity             User                 AccessRights           IsInherited Deny
--------             ----                 ------------           ----------- ----
d912b0fc-6f7e-4ec... S-1-5-21-70143928... {FullAccess}           False       False
It automatically adds the security group as a mailbox delegate of the user mailbox. The members of the mail-enabled security group have Full Access rights to Brenda’s mailbox.
Assign security group Full Access permission user mailbox with AutoMapping
One of the main differences when granting mailbox permissions is whether they are assigned to a security group or a user mailbox. When permissions are assigned to a security group, it can’t implement the AutoMapping option for each group member. It’s because of the permission assignment implemented by referencing the group object and not the security group members.
Note: PowerShell doesn’t add a mailbox folder in Outlook (AutoMapping) for the members of a group. You need to enable that with the -AutoMapping parameter and set the value to $true.
We will show you how to enable the AutoMapping option for the security group members in PowerShell. Instead of assigning permission directly to the security group, we will first extract a list of the group members names. Then, we will use the ForEach PowerShell cmdlet to provide the required mailbox permissions for each group member.
See the PowerShell script example below.
- Type the Primary SMTP address of the security group in line number 1
- Type the UserPrincipalName of the user mailbox in line number 3
$SecurityGroup = Get-DistributionGroupMember -Id "Primary SMTP address"
ForEach ($Member in $SecurityGroup) {
    Add-MailboxPermission "UserPrincipalName" -User $Member.Name -AccessRights FullAccess -InheritanceType All -AutoMapping $true
}
Run the PowerShell script with AutoMapping.
$SecurityGroup = Get-DistributionGroupMember -Id "FinanceUSA@m365info.com"
ForEach ($Member in $SecurityGroup) {
    Add-MailboxPermission "Brenda.Smith@m365info.com" -User $Member.Name -AccessRights FullAccess -InheritanceType All -AutoMapping $true
}
The PowerShell output result shows all the members of the security group.
Identity             User                 AccessRights           IsInherited Deny
--------             ----                 ------------           ----------- ----
41377e9c-dc47-46c... S-1-5-21-70143928... {FullAccess}           False       False
It will add a mailbox folder of the user mailbox (Brenda) to each member of the security group (Finance USA).
Assign security group Full Access permission to all user mailboxes
We want to provide the security group Full Access permission to a filtered list of user mailboxes. It means that all the members of a mail-enabled security group can open all user mailboxes in your organization and behave as the mailbox owner.
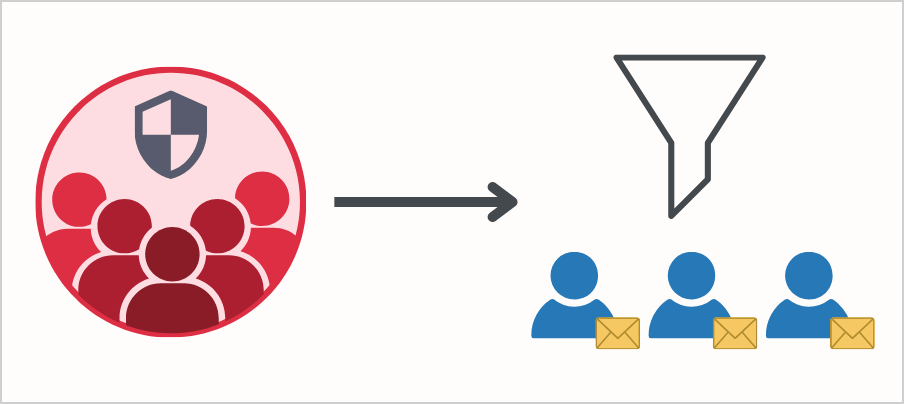
In our example, we want to assign mailbox permission to a security group named (Finance USA) to bulk user mailboxes.
See the PowerShell command syntax.
Get-Mailbox -ResultSize Unlimited -RecipientTypeDetails UserMailbox | Add-MailboxPermission -User "Identity" -AccessRights FullAccess -InheritanceType AllRun the PowerShell command example.
Get-Mailbox -ResultSize Unlimited -RecipientTypeDetails UserMailbox | Add-MailboxPermission -User "FinanceUSA@m365info.com" -AccessRights FullAccess -InheritanceType AllThe PowerShell output result appears as below.
Identity             User                 AccessRights           IsInherited Deny
--------             ----                 ------------           ----------- ----
0de964ae-f09a-4e6... S-1-5-21-70143928... {FullAccess}           False       False
ed01f464-daf9-42a... S-1-5-21-70143928... {FullAccess}           False       False
41377e9c-dc47-46c... S-1-5-21-70143928... {FullAccess}           False       False
7bfec79d-7806-484... S-1-5-21-70143928... {FullAccess}           False       False
f034e5cd-4abb-47c... S-1-5-21-70143928... {FullAccess}           False       False
6ec79c8e-5a84-499... S-1-5-21-70143928... {FullAccess}           False       False
5f4d37cd-383c-413... S-1-5-21-70143928... {FullAccess}           False       False
091c4453-82be-47c... S-1-5-21-70143928... {FullAccess}           False       False
WARNING: The appropriate access control entry is already present on the object "CN=
091c4453-82be-47c2-a9e4-854ed27a511a,OU=ms365info.onmicrosoft.com,OU=Microsoft Exch
ange Hosted Organizations,DC=EURPR02A011,DC=PROD,DC=OUTLOOK,DC=COM" for account "S-
1-5-21-701439281-3420630407-1831248095-16740258".
Our example shows that the security group Finance USA already has Full Access permission on a user mailbox.
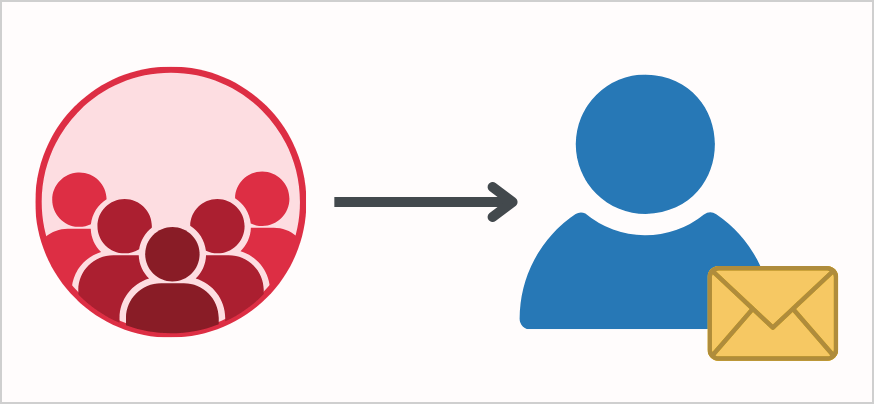
5. Assign distribution group permission to user mailbox
By default, we can’t provide permissions to a distribution group on other objects, such as Exchange Online mailbox, because a distribution group is not a security-enabled object.
When you try to assign a Full Access mailbox permission to a distribution group, the PowerShell will display the below error.
User or group "Sales UK" wasn’t found. Please make sure you've typed it correctly.The PowerShell error is not correct and unclear because the message specifies the distribution group doesn’t exist even though it does. You only get this message because Sales UK is a distribution group, and it doesn’t allow you to assign mailbox permissions to the distribution group.
We will use PowerShell to bypass this limitation and assign Full Access permission to a specific distribution group on a user mailbox.
The PowerShell script will extract all the distribution group members and store this information in a variable. We will use the ForEach PowerShell cmdlet to assign mailbox permission to the group members on the destination mailbox. It will automatically enable the feature AutoMapping for each distribution group member.
In our example, we will assign the members of the distribution group (Sales UK) Full Access permission on the user mailbox (Brenda Smith).
See the PowerShell command syntax.
- Type the Primary SMTP Address of the distribution group in line number 1
- Type the UserPrincipalName of the user mailbox in line number 3
$DistributionGroupName = Get-DistributionGroupMember "Primary SMTP Address"
ForEach ($Member in $DistributionGroupName) {
    Add-MailboxPermission -Identity "UserPrincipalName" -User $Member.name -AccessRights 'FullAccess' -InheritanceType All
}
Run the below PowerShell example.
$DistributionGroupName = Get-DistributionGroupMember "SalesUK@m365info.com"
ForEach ($Member in $DistributionGroupName) {
    Add-MailboxPermission -Identity "Brenda.Smith@m365info.com" -User $Member.name -AccessRights 'FullAccess' -InheritanceType all
}
The PowerShell output results.
Identity             User                 AccessRights           IsInherited Deny
--------             ----                 ------------           ----------- ----
eec2668a-0773-494... S-1-5-21-70143928... {FullAccess}           False       False
eec2668a-0773-494... S-1-5-21-70143928... {FullAccess}           False       False
All the members of the distribution group (Sales UK) will have Full Access to Brenda’s mailbox. It will also add a mailbox folder (Brenda) in Outlook for each distribution group member.
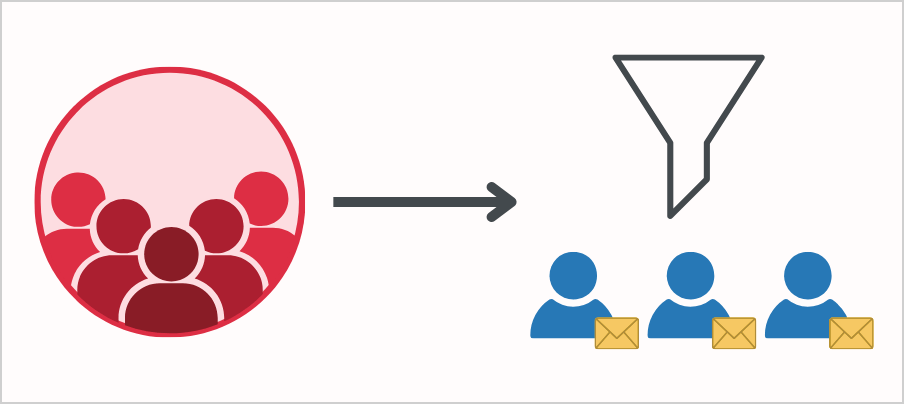
6. Assign distribution group permission to all user mailboxes
We want to provide Full Access mailbox permission to a member in a distribution group for all the filtered user mailboxes.
Because we cannot assign Full Access mailbox permission directly to a distribution group, we will use two ForEach loops.
- To reference each group member, we will create a variable named $Members, which will serve as an array that contains all the members of a distribution group (Sales UK).
- Referencing the Exchange Online mailboxes. To reference all the user mailboxes, we will create an additional variable named $Mailboxes that will serve as a container for all the user mailboxes.
- The first ForEach section runs the command separately for each of the mailboxes.
- The next ForEach section (nesting ForEach) will run the command for each group member.
- The user who wants to share their mailbox is represented by the variable $Mailbox.Name.
- The part that describes the user who will have access to the user mailbox is represented by the variable $Member.Name.
See the below PowerShell command syntax.
- Type the Identity (primary SMTP address) of the distribution group in line 1
$Members = Get-DistributionGroupMember -Id "Identity"
$Mailboxes = Get-Mailbox -ResultSize Unlimited -RecipientTypeDetails UserMailbox
ForEach ($mailbox in $Mailboxes) {
    ForEach ($member in $Members) {
        Add-MailboxPermission $mailbox.Name -AccessRights FullAccess -user $Member.Name -InheritanceType All -AutoMapping $false
    }
}
Run the PowerShell command example.
$Members = Get-DistributionGroupMember -Id "SalesUK@m365info.com"
$Mailboxes = Get-Mailbox -ResultSize Unlimited -RecipientTypeDetails UserMailbox
ForEach ($mailbox in $Mailboxes) {
    ForEach ($member in $Members) {
        Add-MailboxPermission $mailbox.Name -AccessRights FullAccess -user $Member.Name -InheritanceType All -AutoMapping $false
    }
}
The PowerShell output will add the members of the distribution groups to bulk all user mailboxes.
In our example, the distribution group Sales UK consists of three members. So, it will add these three members to each user mailbox.
Identity             User                 AccessRights           IsInherited Deny
--------             ----                 ------------           ----------- ----
0de964ae-f09a-4e6... S-1-5-21-70143928... {FullAccess}           False       False
0de964ae-f09a-4e6... S-1-5-21-70143928... {FullAccess}           False       False
0de964ae-f09a-4e6... S-1-5-21-70143928... {FullAccess}           False       False
ed01f464-daf9-42a... S-1-5-21-70143928... {FullAccess}           False       False
ed01f464-daf9-42a... S-1-5-21-70143928... {FullAccess}           False       False
ed01f464-daf9-42a... S-1-5-21-70143928... {FullAccess}           False       False
5f4d37cd-383c-413... S-1-5-21-70143928... {FullAccess}           False       False
5f4d37cd-383c-413... S-1-5-21-70143928... {FullAccess}           False       False
5f4d37cd-383c-413... S-1-5-21-70143928... {FullAccess}           False       False
091c4453-82be-47c... S-1-5-21-70143928... {FullAccess}           False       False
091c4453-82be-47c... S-1-5-21-70143928... {FullAccess}           False       False
091c4453-82be-47c... S-1-5-21-70143928... {FullAccess}           False       False
41377e9c-dc47-46c... S-1-5-21-70143928... {FullAccess}           False       False
41377e9c-dc47-46c... S-1-5-21-70143928... {FullAccess}           False       False
41377e9c-dc47-46c... S-1-5-21-70143928... {FullAccess}           False       False
6ec79c8e-5a84-499... S-1-5-21-70143928... {FullAccess}           False       False
6ec79c8e-5a84-499... S-1-5-21-70143928... {FullAccess}           False       False
6ec79c8e-5a84-499... S-1-5-21-70143928... {FullAccess}           False       False
f034e5cd-4abb-47c... S-1-5-21-70143928... {FullAccess}           False       False
f034e5cd-4abb-47c... S-1-5-21-70143928... {FullAccess}           False       False
f034e5cd-4abb-47c... S-1-5-21-70143928... {FullAccess}           False       False
7bfec79d-7806-484... S-1-5-21-70143928... {FullAccess}           False       False
7bfec79d-7806-484... S-1-5-21-70143928... {FullAccess}           False       False
7bfec79d-7806-484... S-1-5-21-70143928... {FullAccess}           False       False
7. Assign user permission to list of users from CSV file
We want to provide a user mailbox permission to multiple users (recipients). The difference is that you will create a list of users in a CSV (comma-separated value) file format.
There are a couple of advantages to using a file as a source of information because you can easily edit the data with an application such as Excel.
Assign list of users Full Access permission to user mailbox
We would like to provide a list of users with Full Access mailbox permission to a single user mailbox. The list of users will be created in a CSV file.
Create a CSV file with a list of users:
- Type Users in the first column header
- List the usernames in the first column
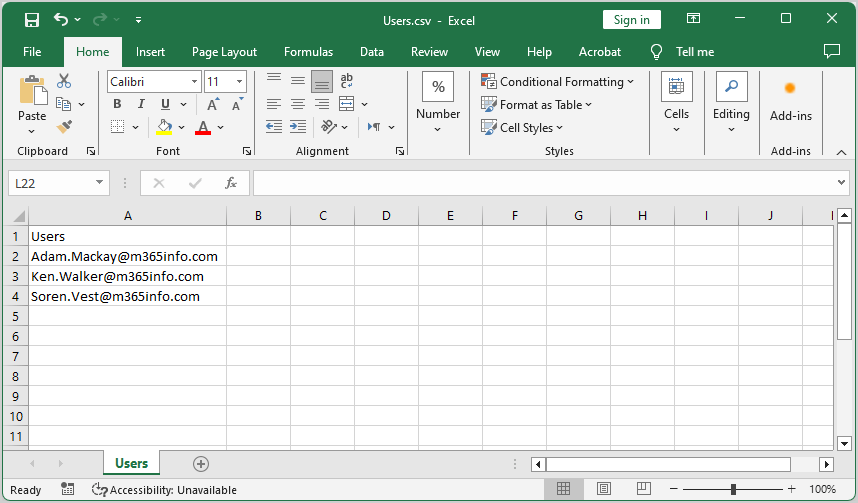
- Name the file Users
- Create a temp folder in the (C:) drive
- Save it as a CSV file
To import the list from the CSV file, we will use the PowerShell cmdlet Import-Csv and provide the path and the file name.
Import-Csv "C:\temp\Users.csv"We will use the ForEach loop for assigning the required permission to each of the users separately.
We can define the user list from the CSV file as an array. To enable PowerShell to relate to each of the users, we use the $_. users. The meaning is that the ForEach loop will look at the table column named Users and run the mailbox permission command for each of the users who appear under the table column.
Run the PowerShell command example.
Import-Csv "C:\temp\Users.csv" | ForEach { Add-MailboxPermission "Brenda.Smith@m365info.com" -User $_.users -AccessRights FullAccess -InheritanceType All }The PowerShell output shows the result.
Identity             User                 AccessRights           IsInherited Deny
--------             ----                 ------------           ----------- ----
d912b0fc-6f7e-4ec... S-1-5-21-70143928... {FullAccess}           False       False
d912b0fc-6f7e-4ec... S-1-5-21-70143928... {FullAccess}           False       False
d912b0fc-6f7e-4ec... S-1-5-21-70143928... {FullAccess}           False       False
The users from the list get Full Access permission on this user mailbox (Brenda). It will also add the mailbox folder (Brenda) in Outlook for each user in the list.
Assign user Full Access permission to list of users from CSV
We want to provide a single user Full Access mailbox permission to a list of user mailboxes.
Create a CSV file with a list of users:
- Type User in the first column header
- List the usernames in the first column
- Name the file User
- Create a temp folder in the (C:) drive
- Save it as a CSV file

See the PowerShell syntax example.
- Type the path and file name in line number 1
- Type the user mailbox in line number 3
- Run the below PowerShell script
$Mailboxes = Import-Csv "C:\temp\User.csv"
ForEach ($Mailbox in $Mailboxes) {
    Add-MailboxPermission $Mailbox.user -User "Brenda.Smith@m365info.com" -AccessRight FullAccess -InheritanceType All
}
The PowerShell output will list the users from the CSV file.
Identity             User                 AccessRights           IsInherited Deny
--------             ----                 ------------           ----------- ----
7bfec79d-7806-484... S-1-5-21-70143928... {FullAccess}           False       False
f034e5cd-4abb-47c... S-1-5-21-70143928... {FullAccess}           False       False
1d9fc432-6a9f-44c... S-1-5-21-70143928... {FullAccess}           False       False
We have given the user mailbox (Brenda) Full Access permission to the users from the CSV file. It will also add a mailbox folder of each user (AutoMapping) to Brenda’s Outlook.
Assign mailbox permissions with CSV file
We want to assign a user mailbox Full Access permission to another user mailbox in bulk. We can use a single CSV file with two user lists.
Create a CSV file to assign mailbox permissions:
- Type List1 in the first column
- List the usernames who will share Full Access permission
- Type List2 in the second column
- List the usernames that will get Full Access permission
- Name the file UserLists
- Create a temp folder in the (C:) drive
- Save it as a CSV file
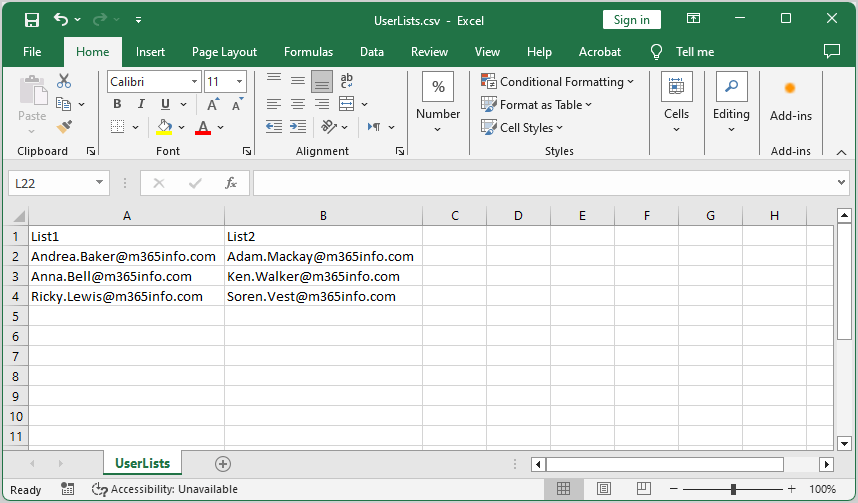
In our example, the user Adam Mackay will get Full Access permission to Andrea’s mailbox.
Run the PowerShell command example.
Import-Csv "C:\temp\UserLists.csv" | ForEach { Add-MailboxPermission $_.List1 -User $_.List2 -AccessRights FullAccess -InheritanceType All }The PowerShell output shows the list of users sharing Full Access permission.
Identity             User                 AccessRights                  IsInherited Deny
--------             ----                 ------------                  ----------- ----
7bfec79d-7806-484... S-1-5-21-70143928... {FullAccess}                  False       False
f034e5cd-4abb-47c... S-1-5-21-70143928... {FullAccess}                  False       False
1d9fc432-6a9f-44c... S-1-5-21-70143928... {FullAccess}                  False       False
It means the users from the second column have Full Access permission on the above user mailboxes. It will automatically add a mailbox folder to each user in Outlook.
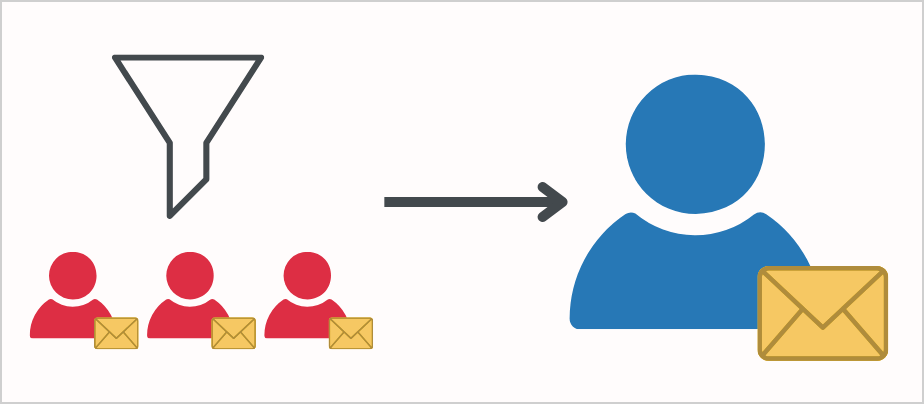
8. Assign filtered members list Full Access mailbox permissions to a user mailbox
We want to provide a filtered list of users mailbox permissions to a user mailbox. In our example, we want to provide users with a manager as title Full Access permission to Brenda’s mailbox.
The PowerShell command script will consist of these parts:
- First, we need to get a list of users with the title manager. We need to use the PowerShell cmdlet Get-User. As mentioned, the Title property is a user object, not a mailbox object. A mailbox can never be a manager, only a user.
- We will create a variable named $Members, which will store or contain the list of the users whose Title is manager.
- We use the -Filter parameter to get a filtered list of only the users with the condition Title is a manager.
- In the next section, we use the ForEach loop that enables us to go through each member in all the users whose Title is a manager.
- In the last part, we assign the Full Access mailbox permission to each member on the user mailbox (Brenda). To reference each manager mailbox, we create a variable named $Member and add the identifier Name.
See the PowerShell command syntax.
- Type the Identity (UPN) of the user mailbox in line number 3
$Members = Get-User -ResultSize Unlimited -Filter { (RecipientType -eq 'UserMailbox') -and (Title -like '*Title*') }
ForEach ($Member in $Members) {
    Add-MailboxPermission "Identity" -AccessRights FullAccess -User $Member.Name -InheritanceType All
}
Run the below PowerShell command.
$Members = Get-User -ResultSize Unlimited -Filter { (RecipientType -eq 'UserMailbox') -and (Title -like '*manager*') }
ForEach ($Member in $Members) {
    Add-MailboxPermission "Brenda.Smith@m365info.com" -AccessRights FullAccess -User $Member.Name -InheritanceType All
}
The PowerShell output lists the users with manager as Job Title and assigns them Full Access permission on Brenda’s user mailbox.
Identity             User                 AccessRights           IsInherited Deny
--------             ----                 ------------           ----------- ----
d912b0fc-6f7e-4ec... S-1-5-21-70143928... {FullAccess}           False       False
d912b0fc-6f7e-4ec... S-1-5-21-70143928... {FullAccess}           False       False
d912b0fc-6f7e-4ec... S-1-5-21-70143928... {FullAccess}           False       False
It will automatically add Brenda’s mailbox folder to each of these managers in Outlook.
9. Assign mail-enabled security group Full Access mailbox permission to other group members
Technically, you cannot provide permissions from a security group directly to another group (security or distribution group).
Therefore, we need to extract the group members of a security or distribution group as individual users. Then, we can provide the required permission for each of the individual group members to the security group.
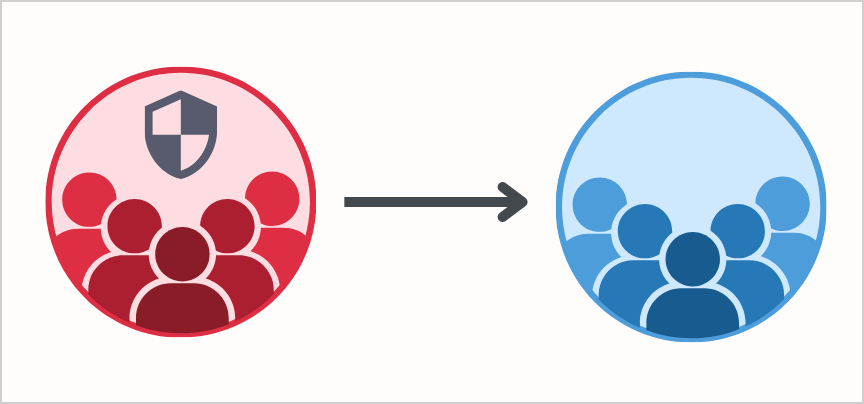
In our example, we will assign Full Access permission to a security group named Finance USA for each of the group members of a distribution group named Sales USA.
- In the first part of the PowerShell script, we create a variable named $Member, which will store or contain the members of the destination group. The Get-DistributionGroupMember PowerShell cmdlet serves for getting a distribution group and mail-enabled security group.
- In the next section, we use the ForEach loop that enables us to go through and perform an action on each of the members in the distribution group.
- In the last part, we assign the Full Access mailbox permission to a mail-enabled security group (Finance USA). To reference each member separately in the distribution group (Sales USA), we use a variable named $Member and add the property name to get the identity of each user.
See the PowerShell command syntax.
- Type the Identity of the distribution group in line number 1
- Type the Identity of the security group in line number 3
$Members = Get-DistributionGroupMember -Id "Distribution Group Identity"
ForEach ($Member in $Members) {
    Add-MailboxPermission $Member.Name -AccessRights FullAccess -User "Security group Identity" -InheritanceType All
}
Note: It will not automatically add AutoMapping to each member of a security group, because you need to enable that.
Run the below PowerShell command example.
$Members = Get-DistributionGroupMember -Id "SalesUSA@m365info.com"
ForEach ($Member in $Members) {
    Add-MailboxPermission $Member.Name -AccessRights FullAccess -User "FinanceUSA@m365info.com" -InheritanceType all
}
The PowerShell output shows the list of the distribution group members who will share their mailboxes.
Identity             User                 AccessRights                  IsInherited Deny
--------             ----                 ------------                  ----------- ----
d912b0fc-6f7e-4ec... S-1-5-21-70143928... {FullAccess}                  False       False
b602b148-2fcf-435... S-1-5-21-70143928... {FullAccess}                  False       False
7bfec79d-7806-484... S-1-5-21-70143928... {FullAccess}                  False       False
It automatically assigns the security group (Finance USA) as a delegate with Full Access permission to each of the above mailboxes. There is no AutoMapping here.
10. Assign group members Full Access mailbox permission to other group members
We will show you how to assign mailbox permission from a distribution group to another distribution group and vice versa.
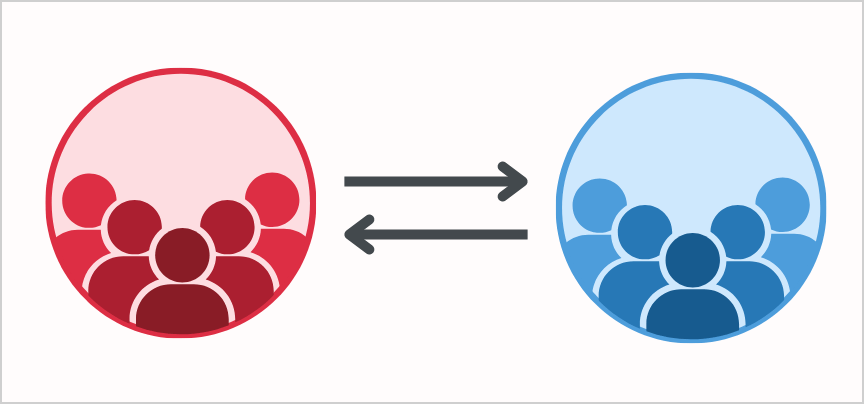
In our example, we have two distribution groups:
- The assistant’s group name is Sales UK (4 members)
- The manager’s group name is Sales USA (3 members)
Each of the managers needs Full Access mailbox permission for each of the assistant mailboxes and vice versa. Meaning that each of the assistants needs Full Access mailbox permission to each of the managers’ mailboxes.
Run the PowerShell command script.
- Type the first distribution group in line number 2
- Type the second distribution group in line number 5
# Get all members of the distribution group and filter out only the user mailboxes
$GroupA = Get-DistributionGroupMember -Identity "SalesUK@m365info.com" -ResultSize Unlimited | Where-Object { $_.RecipientType -eq "UserMailbox" }

# Get all members of the distribution group and filter out only the user mailboxes
$GroupB = Get-DistributionGroupMember -Identity "SalesUSA@m365info.com" -ResultSize Unlimited | Where-Object { $_.RecipientType -eq "UserMailbox" }

# Iterate over each member in groupA
ForEach ($MemberA in $GroupA) {
    # Iterate over each member in groupB
    ForEach ($MemberB in $GroupB) {
        # Add full mailbox permissions to each member in groupA for all members in groupB
        Add-MailboxPermission -Identity $MemberB.Identity -User $MemberA.Identity -AccessRights FullAccess -AutoMapping:$false -InheritanceType All

        # Add full mailbox permissions to each member in groupB for all members in groupA
        Add-MailboxPermission -Identity $MemberA.Identity -User $MemberB.Identity -AccessRights FullAccess -AutoMapping:$false -InheritanceType All
    }
}
The PowerShell output lists all the members of both groups. It automatically assigns Full Access permission both ways.
Identity             User                 AccessRights                  IsInherited Deny
--------             ----                 ------------                  ----------- ----
d912b0fc-6f7e-4ec... S-1-5-21-70143928... {FullAccess}                  False       False
eec2668a-0773-494... S-1-5-21-70143928... {FullAccess}                  False       False
b602b148-2fcf-435... S-1-5-21-70143928... {FullAccess}                  False       False
eec2668a-0773-494... S-1-5-21-70143928... {FullAccess}                  False       False
7bfec79d-7806-484... S-1-5-21-70143928... {FullAccess}                  False       False
eec2668a-0773-494... S-1-5-21-70143928... {FullAccess}                  False       False
d912b0fc-6f7e-4ec... S-1-5-21-70143928... {FullAccess}                  False       False
fa956d8c-87df-4cd... S-1-5-21-70143928... {FullAccess}                  False       False
b602b148-2fcf-435... S-1-5-21-70143928... {FullAccess}                  False       False
fa956d8c-87df-4cd... S-1-5-21-70143928... {FullAccess}                  False       False
7bfec79d-7806-484... S-1-5-21-70143928... {FullAccess}                  False       False
fa956d8c-87df-4cd... S-1-5-21-70143928... {FullAccess}                  False       False
d912b0fc-6f7e-4ec... S-1-5-21-70143928... {FullAccess}                  False       False
12eefbb2-e5f4-4ee... S-1-5-21-70143928... {FullAccess}                  False       False
b602b148-2fcf-435... S-1-5-21-70143928... {FullAccess}                  False       False
12eefbb2-e5f4-4ee... S-1-5-21-70143928... {FullAccess}                  False       False
7bfec79d-7806-484... S-1-5-21-70143928... {FullAccess}                  False       False
12eefbb2-e5f4-4ee... S-1-5-21-70143928... {FullAccess}                  False       False
d912b0fc-6f7e-4ec... S-1-5-21-70143928... {FullAccess}                  False       False
0de964ae-f09a-4e6... S-1-5-21-70143928... {FullAccess}                  False       False
b602b148-2fcf-435... S-1-5-21-70143928... {FullAccess}                  False       False
0de964ae-f09a-4e6... S-1-5-21-70143928... {FullAccess}                  False       False
7bfec79d-7806-484... S-1-5-21-70143928... {FullAccess}                  False       False
0de964ae-f09a-4e6... S-1-5-21-70143928... {FullAccess}                  False       False
In our example, all the members of Sales UK (4) will share their mailbox with all members of Sales USA (3) and vice versa. So, the PowerShell output will list (4 users x 3 users x 2 distribution groups) 24 user mailboxes.
That’s it!
Read more: Convert user mailbox to shared mailbox »
Conclusion
You learned how to assign Full Access mailbox permission with Exchange Online PowerShell and Exchange admin center. With PowerShell, there are ultimate choices to filter and assign permissions. Use a CSV file or filter the users when you grant mailbox permissions to a single, multiple, or bulk all mailboxes.
Did you enjoy this article? You may also like Bulk create shared mailboxes with PowerShell. Don’t forget to follow us and share this article.
This Post Has 0 Comments