In this article, we will show you how to manage a Microsoft 365 user mailbox…
Convert user mailbox to shared mailbox
If you want multiple users to access the same mailbox, without paying a license because it is under 50 GB, it’s best to have a shared mailbox instead. There are three ways to convert a user mailbox to shared mailbox. In this article, you will learn how to convert a user mailbox to a shared mailbox in Exchange Admin Center (EAC), Microsoft Admin Center, and PowerShell.
Table of contents
User mailbox vs. shared mailbox
Let’s explain the main differences between a user and a shared mailbox.
User mailbox:
- Paid license
- Sign in with your credentials
Shared mailbox:
- Free license under 50 GB of storage
- Multiple users accessible (25 persons recommended)
- Sign in with a user account that has access permission
Note: If you want to store more than 50 GB, you must have Exchange Online plan 2 license assigned to the shared mailbox. And if you need the online archive, you need to assign the Exchange Online plan 1 license to it.
Convert user to shared mailbox in Exchange Admin Center
From December 2022, Microsoft announced that the classic Exchange Admin Center will be depreciated. Therefore, Microsoft recommends using the new EAC. We want to show you the steps to convert the user mailbox to a shared mailbox in the new Exchange Admin Center (EAC).
Note: The user mailbox must have an Exchange Online license assigned before you can convert it to a shared mailbox. Otherwise, you won’t see the option to convert the mailbox. If you’ve removed the license, you must add it back to convert the mailbox.
Follow the steps below to convert a regular user mailbox to a shared mailbox in EAC:
- Sign in to Exchange Admin Center
- Click on Recipients > Mailboxes
- Select the user mailbox you want to convert
- Click Others
- Select Convert to shared mailbox
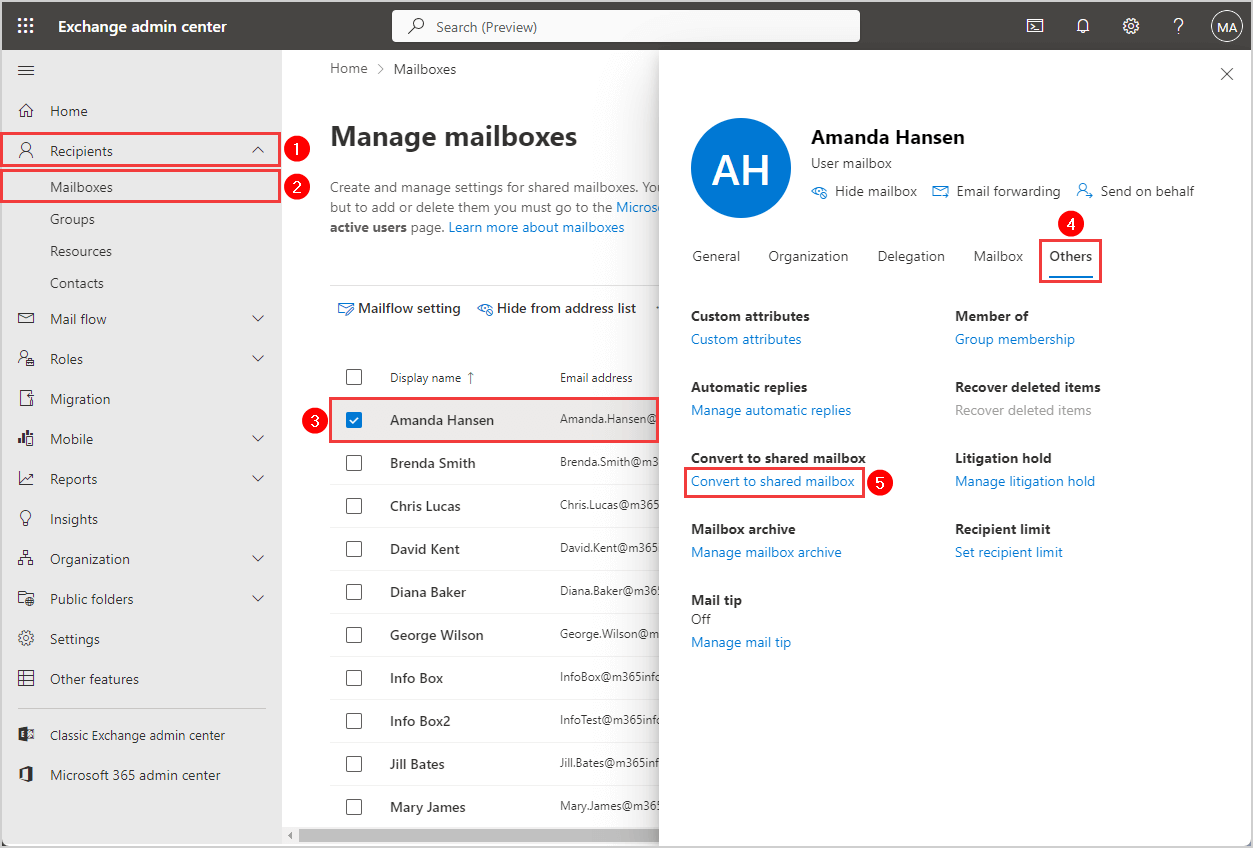
- Click Confirm
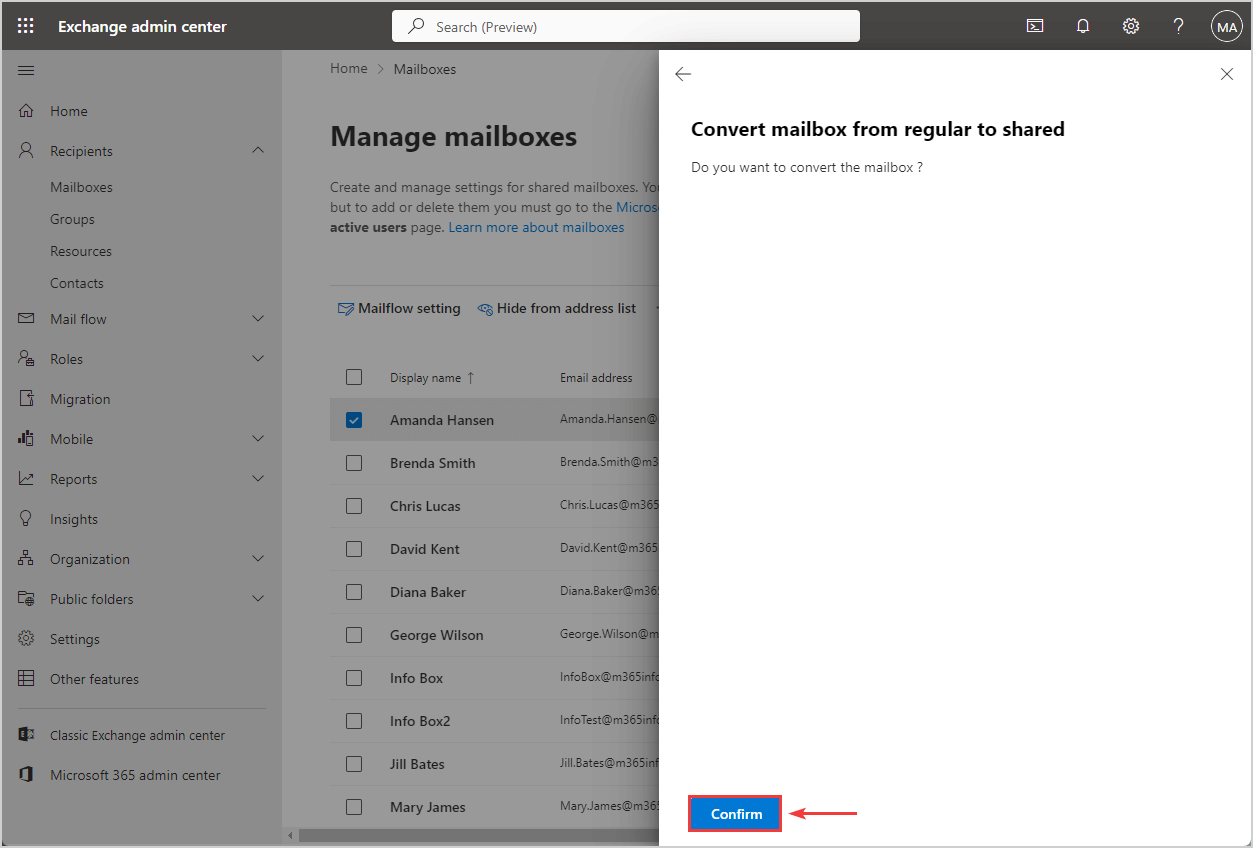
The mailbox is being converted from a regular to a shared mailbox. You successfully converted the mailbox!
Note: After converting the user mailbox to a shared mailbox, you can remove the license from the user’s account.
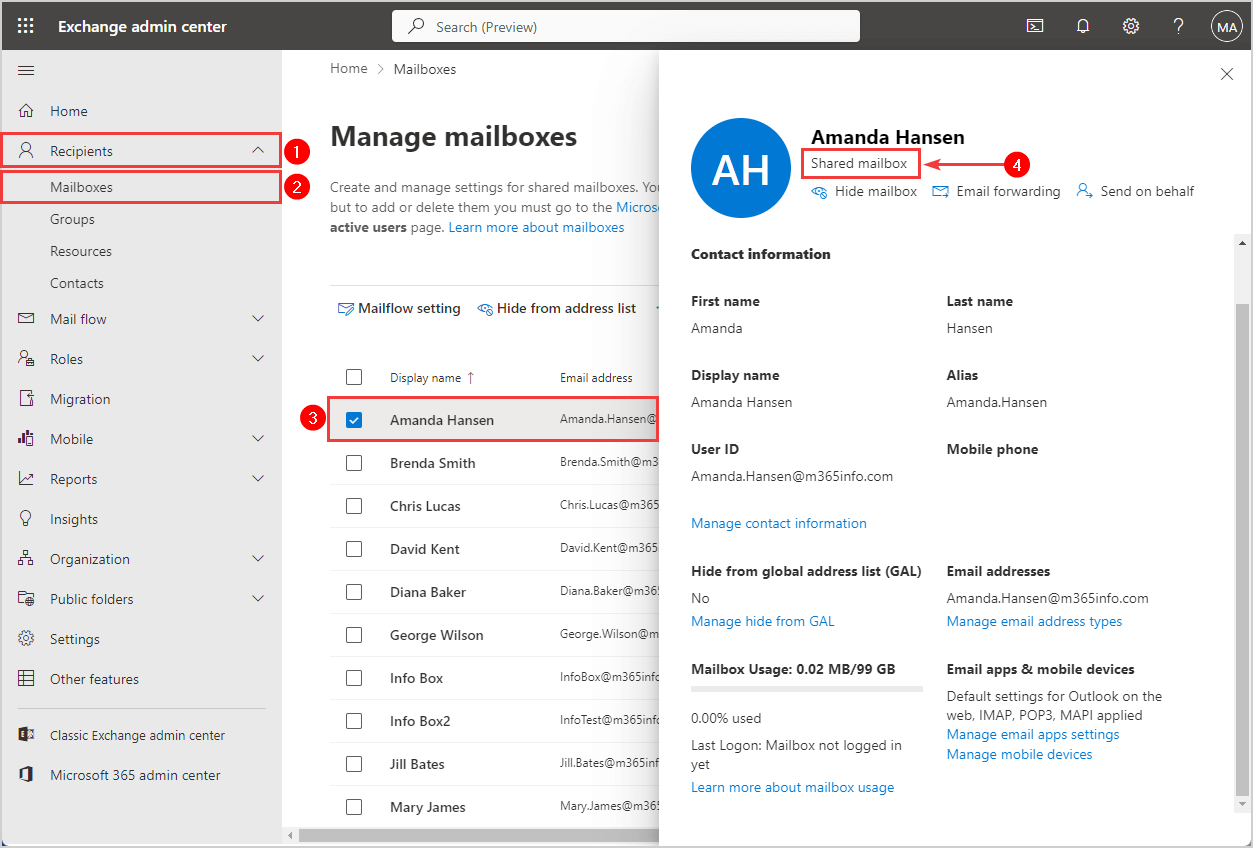
To verify that you converted to a shared mailbox, navigate to EAC > Recipients > Mailboxes. Click on the user, and you will see Shared mailbox under the user name.
Convert user to shared mailbox in Microsoft 365 Admin Center
Follow the steps below to convert a regular user to a shared mailbox in Microsoft 365 Admin Center:
- Sign in to Microsoft 365 Admin Center
- Click on Users > Active users
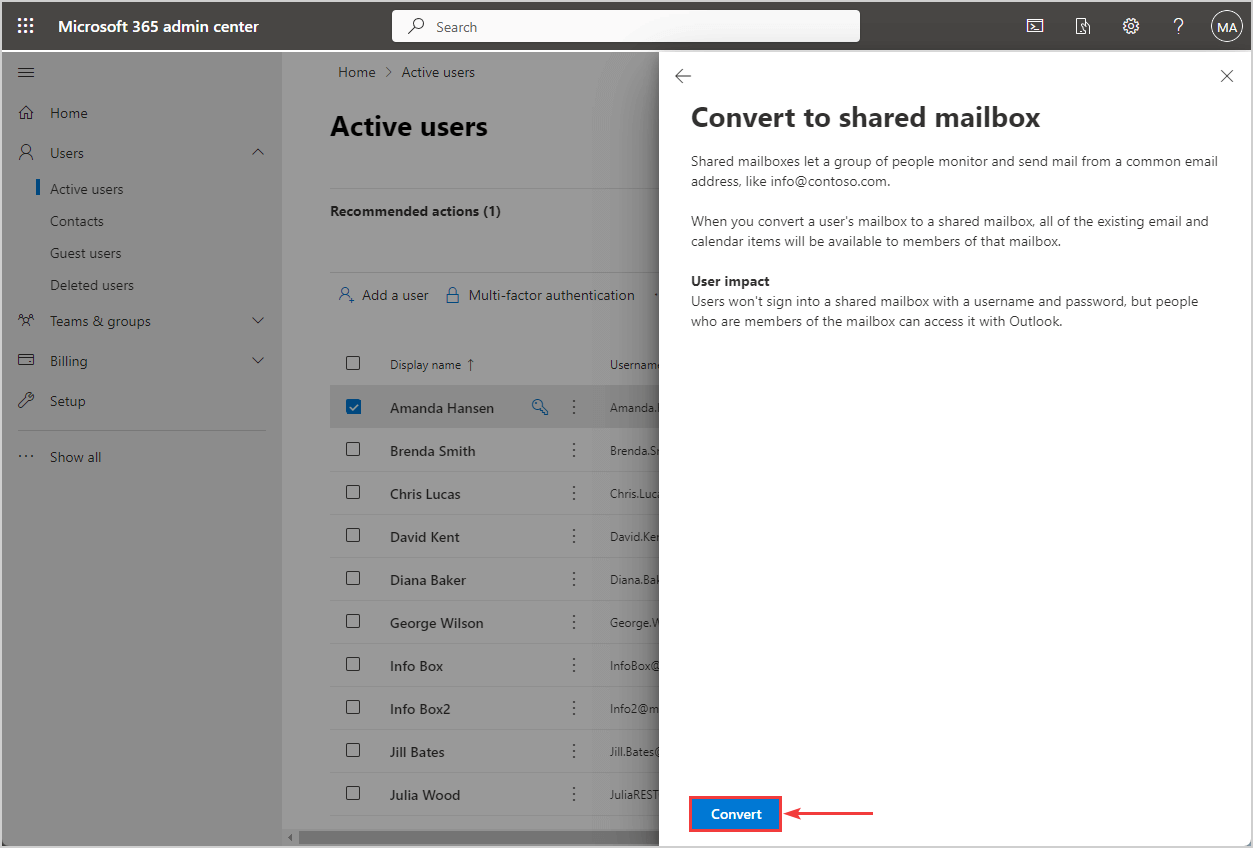
- Select the user mailbox you want to convert
- Click Mail
- Click Convert to shared mailbox
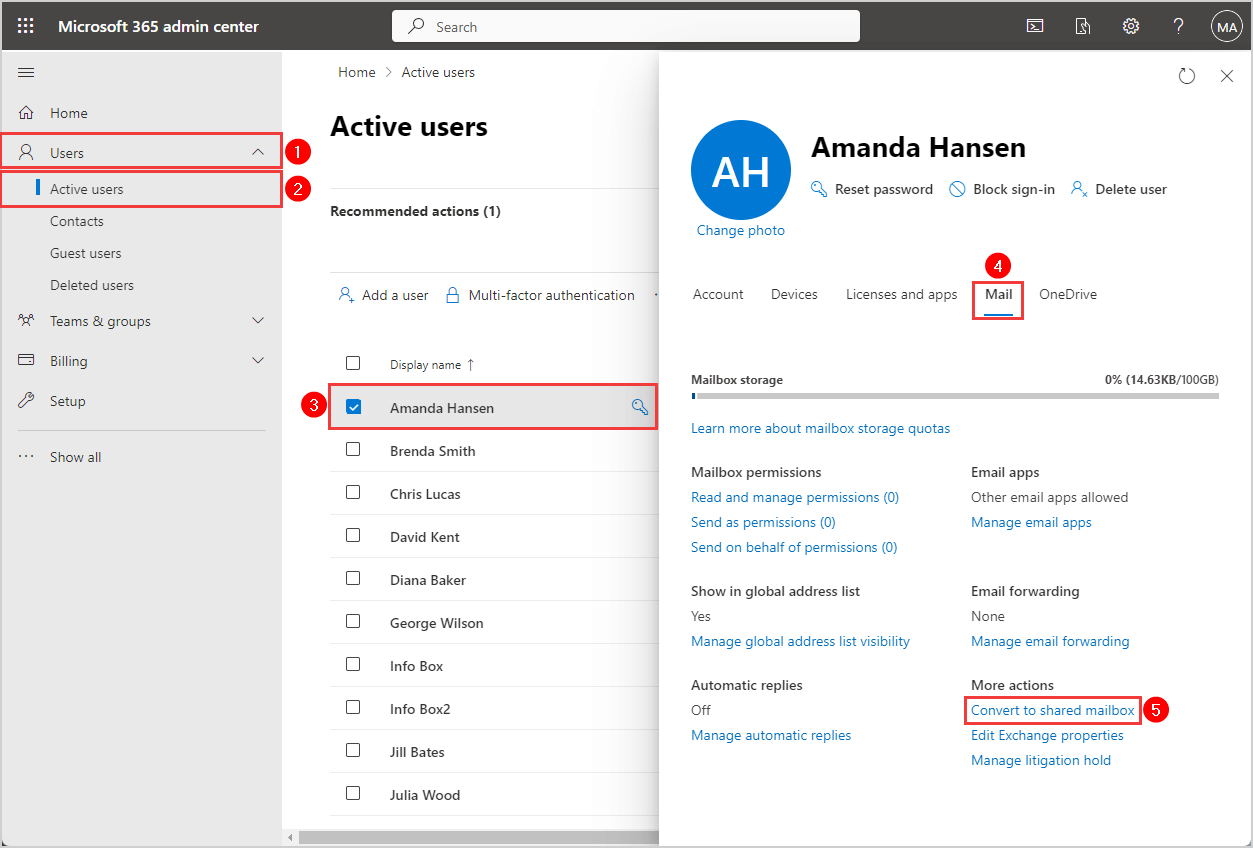
- Click Convert
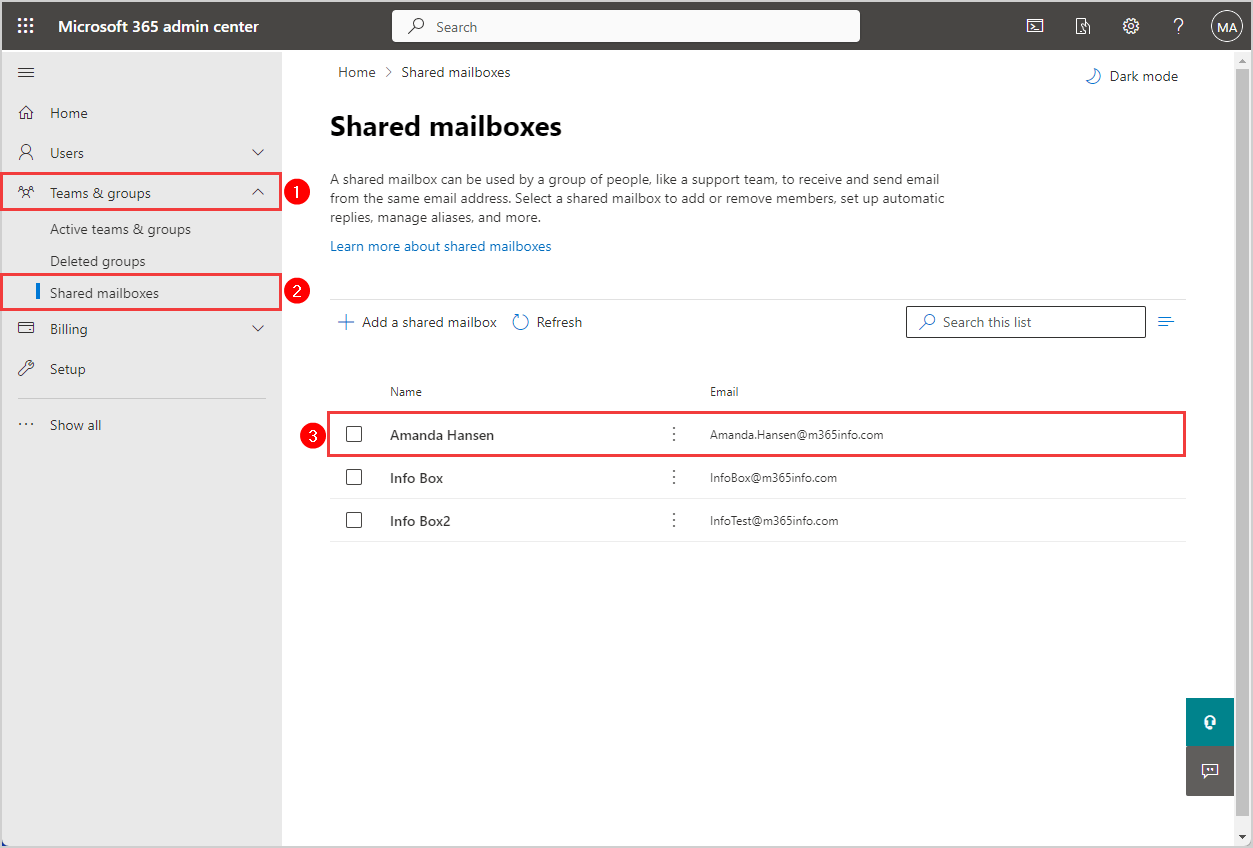
To verify that you successfully converted the user to a shared mailbox, navigate to Microsoft 365 admin center > Teams & groups > Shared mailboxes. Find the user in the shared mailboxes list.
Use PowerShell to convert user to shared mailbox
Another option to convert a user to a shared mailbox is with PowerShell. Before you start, you need to Install Exchange Online PowerShell module.
1. Use the below command to Connect to Exchange Online PowerShell.
Connect-ExchangeOnlineWe will use the -Type parameter with the Shared value to make it a shared mailbox type.
2. Use the below PowerShell command to convert a user mailbox to shared mailbox. Type in the name of the user mailbox.
Set-Mailbox "Amanda Hansen" -Type SharedYou can also use the same PowerShell command and type the user’s email address instead.
Set-Mailbox "Amanda.Hansen@m365info.com" -Type Shared3. To check that you converted this user to a shared mailbox in PowerShell, you can run the Get-Mailbox cmdlet, including the mailbox name.
Get-Mailbox -Identity "Amanda Hansen" | Format-Table Name, RecipientTypeDetailsOr use the below PowerShell command to verify you converted and type the mailbox email address.
Get-Mailbox -Identity "Amanda.Hansen@m365info.com" | Format-Table Name, RecipientTypeDetailsThe PowerShell output shows that you successfully converted to a shared mailbox.
Note: Always double-check the licenses to see if they are correctly set, as you don’t need a license for a shared mailbox under 50 GB of storage.
PS C:\> Get-Mailbox -Identity "Amanda.Hansen@m365info.com" | Format-Table Name, RecipientTypeDetails

Name          RecipientTypeDetails
----          --------------------
Amanda Hansen SharedMailbox
Which of the three options did you use to convert a user mailbox to a shared mailbox?
Read more: Manage Office 365 Shared Mailbox with PowerShell »
Conclusion
You learned how to convert a user mailbox to a shared mailbox in three ways. It’s possible to do this in the Exchange Admin Center (EAC), Microsoft 365 admin center, or PowerShell Exchange Online. A shared mailbox doesn’t require having licenses, so remember to remove licenses or double-check them after you convert.
Did you enjoy this article? You may also like Bulk create shared mailboxes with PowerShell. Don’t forget to follow us and share this article.
This Post Has 0 Comments