The current article is the continuation of the previous article in which we review that…
Configure Exchange Online to forward E-mail to a FAX service |Part 1#2
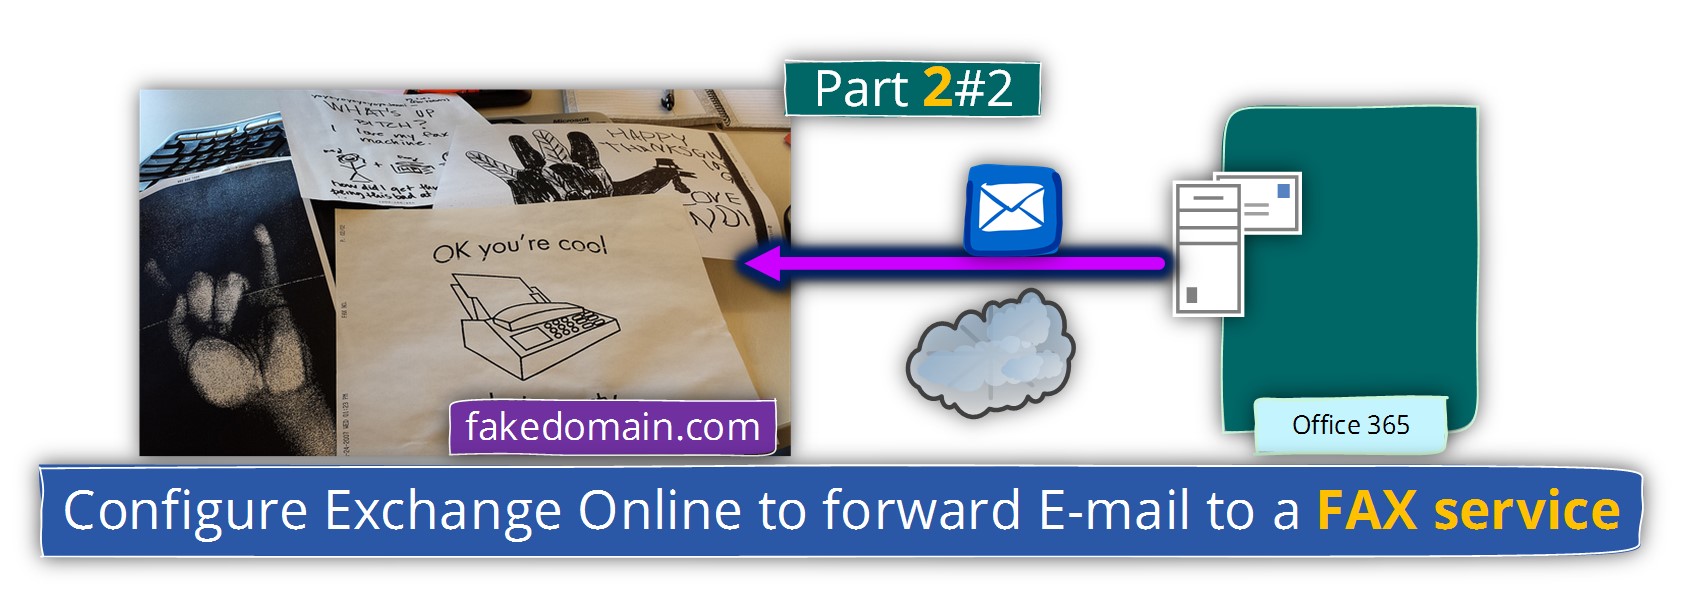
In the current article and the next article, we will review a scenario in which we need to use the Exchange Online infrastructure for – “forward” E-mail messages that need to be sent as an FAX message, to an FAX service that is hosted on an external network, such as our On-Premises organization’s network.
Theoretically, we can think of a scenario in which we “install” the FAX service (such as FAX connector) on the Exchange Online infrastructure but in the current time, this option is not available.
In other words, we can install or use FAX services on our “private environment” and ask from Exchange Online to “redirect” E-mail message to this “external FAX services.”
Table of contents
Implementing the “redirection procedure” to the external FAX service
The process in which we redirect E-mail message that we created by Exchange Online recipient to the FAX services implemented by using “outgoing Exchange Online mail connector”.
The “redirection” will implement by using a specific domain name that represents the “external FAX infrastructure”.
Most of the time the domain name is a fake domain that serves only for the routing purposes.
The process based on the following logic – each time that an Exchange Online recipient sends an E-mail message to the destination recipient who includes a particular domain name. The E-mail will be “captured” by Exchange Online and will “channeled” via the dedicated Exchange Online outbound connector that will send \ forward the E-mail to the external FAX service.
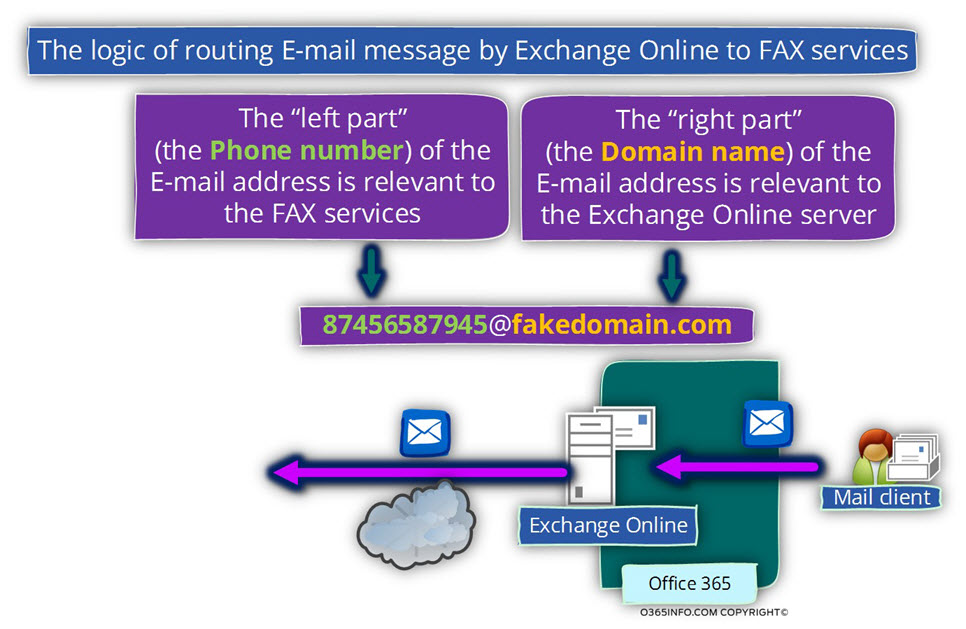
In the following diagram, we can see an example of the logic of routing E-mail messages to external FAX services.
The “external FAX services” is represented by the domain name – fakedomain.com.
Based on the assumption that we have already created the required outgoing Exchange Online send connector, each time that the Exchange Online recipient will send E-mail using the E-mail address such as 87456587945@fakedomain.com, Exchange Online will “understand” that he needs to route this E-mail to the smart host, which configured in the sends connector (in our scenario, the domain name is fakedomain.com).
When the E-mail message reaches the destination FAX services, the FAX service will “fetch” the left part Public Folder the E-mail that includes the phone number (in our scenario, the phone number is 87456587945).
Testing the settings in which Exchange Online to forward E-mail to on-Premises FAX
In this type of scenario, there are two parties that involved in the communication channel:
- Exchange Online infrastructure
- External FAX infrastructure
In the current article, we can only review the “Exchange Online side” of the story because we have no control or information about the “destination FAX infrastructure”.
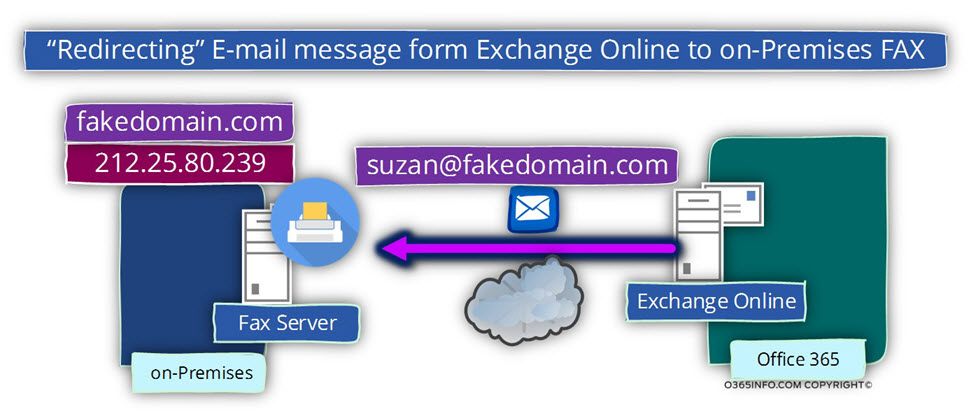
To be able to simulate the “full flow” in which E-mail sent from Exchange Online infrastructure to the “external FAX infrastructure” we will use Exchange on-Premises infrastructure that will help us to verify of the Exchange Online setting working “OK” and the E-mail routed to the external FAX infrastructure.
Scenario description
In our specific scenario, the “FAX domain name” (the domain name that will be used by Exchange Online for routing purposes) is – fakedomain.com
We will configure this domain name on Exchange on-Premises server and also, select a “test user” to whom we will add E-mail address with this domain name.
In our scenario, we will add the additional E-mail address – Suzan@fakedomain.com
to Suzan Exchange on-Premises mailbox.
Step 1#2 – configuring the required setting in the Exchange on-Premises infrastructure
As mentioned, this step is not mandatory, and the only reason that we are implementing these steps is to “mimic” the FAX environment, so we will be able to verify that the task of routing E-mail messages from Exchange Online to the external FAX services successfully completed.
In our particular scenario, we will use an Exchange 2010 based server.
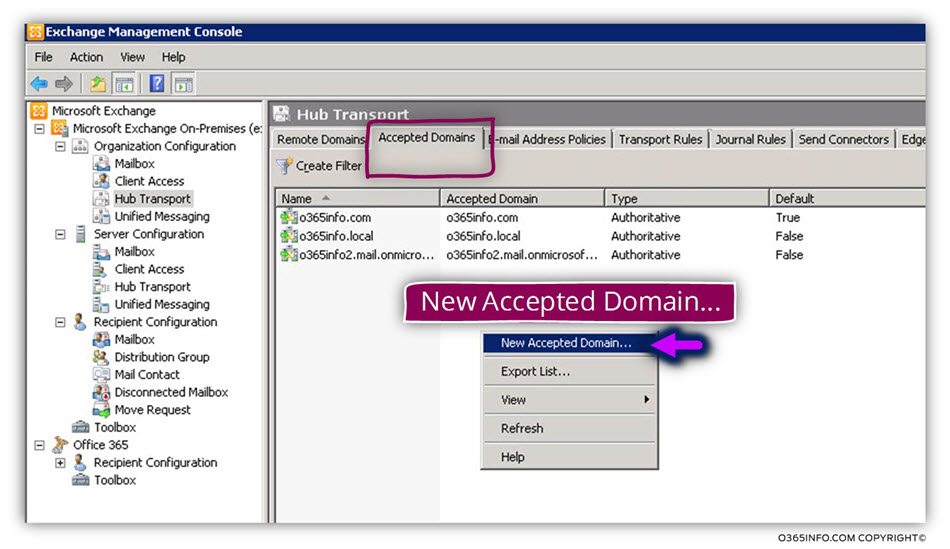
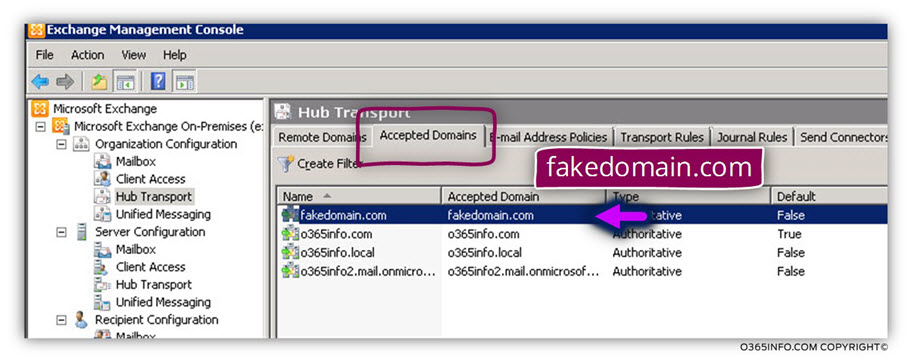
We will add and additional “accepted domain” under the Organization Configuration and choose the tab – Accepted Domains
In our scenario, we will add the domain name – fakedomain.com
Right click on the “white space” and chose the menu – New Accepted Domain…
We will add the domain name – fakedomain.com
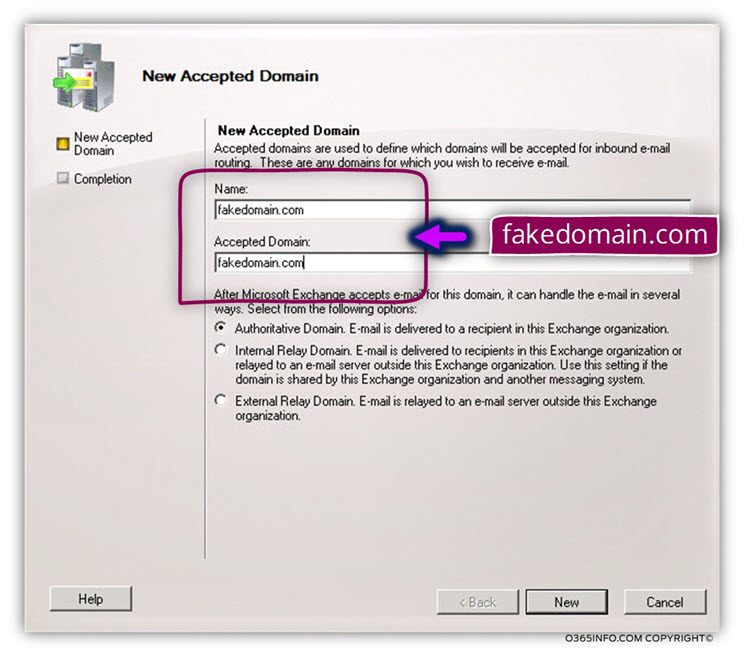
And click on the Finish button to end the process.
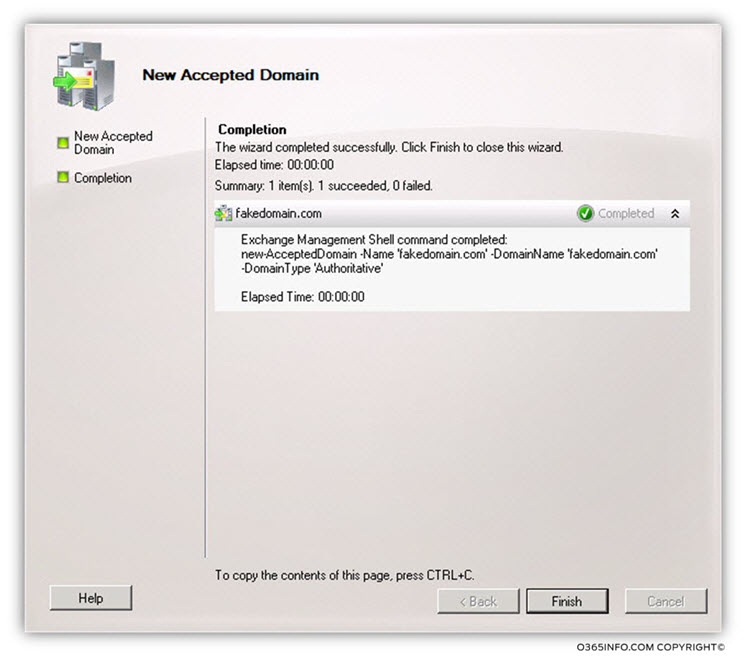
In the following screenshot, we can see now, Exchange on-Premises “understand” that he is responsible for the domain name – fakedomain.com
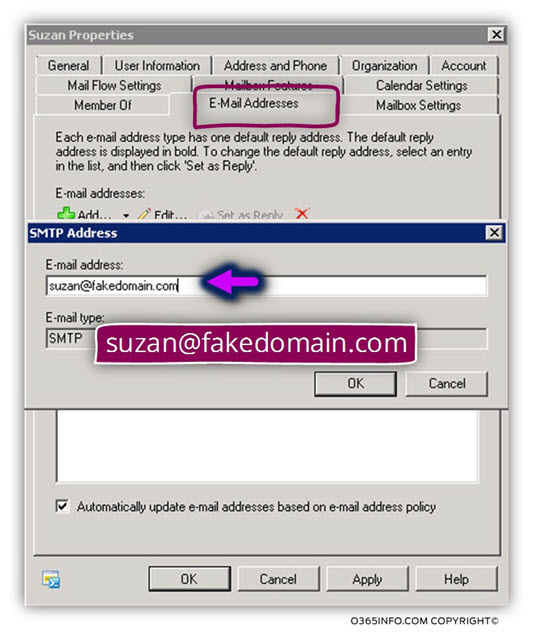
In the next step, we will add to Suzan mail box an additional E-mail address based on the domain name that we have added in the previous step.

We will chose the E-mail tab and add the following E-mail address – Suzan@fakedomain.com
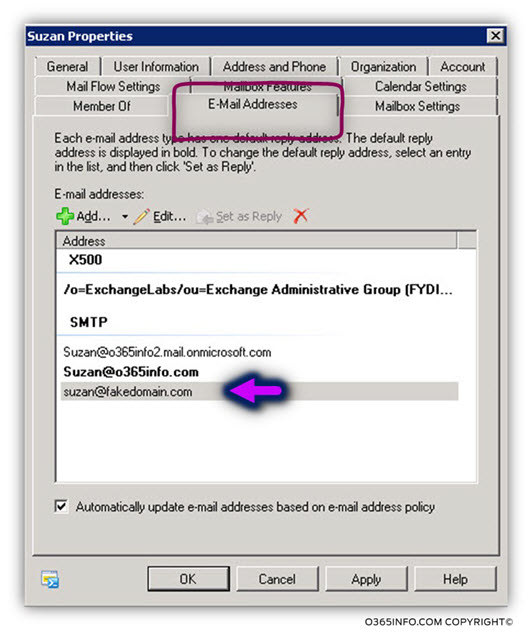
In the following screenshot, we can see that now Suzan has an addition E-mail address. In the next article, we will create the required configuration setting in Exchange Online and at the end, try to send E-mail message the domain that represents the “External FAX infrastructure.”
Next Article
In the next article, we will review the required steps for creating and verifying an Exchange Online send connector, that will be used for forwarding the E-mail message to the FAX server.
What Others Are Reading
This Post Has 0 Comments