In the current article, we continue to review the steps that are needed for completing…
Setting up an Automatic Reply in Office 365 using Public Folder | Part 3#7
In the current article, we review the implementation of an Automatic Reply mailbox rule using Public Folder in Office 365 based environment.
Table of contents
- Configuring Automatic Reply by using a Public folder business scenario
- Step 1#12 – Creating a new Public folder
- Step 2#12 – Configure the Public folder as Email-enabled Public folder
- Step 3#12 – Managing Public Folder E-mail address
- Step 4#12 – Assign Owner permissions to the Public Folder manager
- Step 5#12 – Creating Public Folder automatic reply inbox rule using the Folder assistant via Outlook
- Step 6#12 – Verify that the Public Folder automatic reply inbox rule operating properly
In our scenario, we will use an Exchange Online Public Folder as a “service mailbox” for the human resource department. The Public Folder will serve as a “container” for resumes that sent by external recipients who apply for a specific job offer.
The Public Folder will be configured as mail enabled Public Folder.
The external recipient will be instructed to send their resume to the E-mail address of the Human Resource Public Folder.
The human resource Public Folder will be configured to use an Automatic Reply.
Each time that E-mail reaches to the human resource Public Folder, the Public Folder will respond using a predefined E-mail template, that informs the sender that his resume was accepted and so on.
The Public Folder Automatic Reply procedure will be implemented by creating a mailbox rule. When we deal with an “Exchange Public Folder object,” we create the inbox rule using a feature named – Folder Assistant.
Note: Although the demonstration was created in Office 365 (Exchange Online) based environment, most of the process is implemented in a similar way in Exchange on-Premises based environment.
Configuring Automatic Reply by using a Public folder business scenario
The business need that we need to fulfill includes the following requirements:
- We need to provide to the Human resource department, a “central store” for the E-mails, that are sent by the external recipient who applies for a job position and sends their resume.
- If possible, we would like to avoid by purchasing a license for this purpose (using a dedicated mailbox). For this reason, the central store will be implemented by using Public Folder.
- The Public Folder will be named – jobs
- The organization users that will manage the “Jobs Public Folder” is – Bob (Bob is the manager of the Human resource department). Bob will be assigned with the owner permissions, so he will be able to manage the Jobs Public Folder.
- The Human resource employees will have the publishing editor permissions to the Jobs Public Folder, so they will be able to access the information stored in the Public Folder.
- The Jobs Public Folder will be configured to respond with an automatic email message to each E-mail that will be sent by external Job applicants. The Reply\Respond will include a signature + company logo.
- The Public Folder will be configured as mail enabled Public Folder. The E-mail address that will be assigned to the Jobs Public Folder is – jobs@o365info.com
- A copy of each E-mail address that sent to the Jobs Public Folder, will be forwarded to Human resources reprehensive named – Angelina.
In the following diagram, we can see the flow of our desired scenario.

Prefix
To be able to complete all the “business scenario” requirements we will need to execute “12 steps.”
- The current article describes the step 1-6.
- The next article describes steps 7-12.
Step 1#12 – Creating a new Public folder
In this step, we will create a new Public Folder that will serve as a “service mailbox” for the Human resources department.
The basic assumption is that you already have an Exchange Online public folder infrastructure. If you need to create the public folder from scratch, go through the below steps:
- Log in to the Exchange Online admin center
- On the left menu bar, choose the menu – public folders
- On the top menu bar, select the menu – public folders
- Click on the plus icon

- Write the public folder name. In our example, the Public Folder name is – Jobs
- Click – Save

Step 2#12 – Configure the Public folder as Email-enabled Public folder
In this step, we will configure the “Jobs Public Folder” as mail enabled Public Folder.
Configuring a Public Folder as mail enabled Public Folder, enable us to turn the Public Folder into an “Exchange recipient object”.
When we activate the option of Public Folder mail settings, an E-mail address will be assigned to the Public Folder by Exchange Online, and the Public Folder can act as a “standard Exchange recipient.”
For example – we can send E-mail to the Public Folder; the Public Folder can send E-mail, etc.
To configure the new Jobs Public Folder as mail enabled Public Folder, use the following steps:
- Select the required Public Folder (in our example the Jobs Public Folder)
- In the right property’s pane, under the – Mail settings – Disabled select the option – Enable

- Click Yes to save the settings

In the following screenshot, we can see that now, the Jobs Public Folder configured as – mail enabled Public Folder.

Step 3#12 – Managing Public Folder E-mail address
The subject of – mail enabled Public Folder in Exchange Online based environment, is a little tricky.
In the next section, we will review how to deal with some challenges that Exchange sets before us regarding the mail-enabled Public Folder.
In our scenario, we want to create a configuration in which the Public Folder will send an automatic reply to the external sender who sends their resume.
The automatic reply will implement by using a predefined E-mail address.
In our specific scenario, the E-mail address is – Jobs@o365info.com
Most of the time, the “senders” that send their resume, will be considered as “external senders” meaning – non-organization recipients.
Exchange Online and the default Public Folder E-mail address policy.
In Exchange Online based environment, the E-mail address that will be automatically assigned to a public folder when we configure the Public Folder as “mail enabled Public Folder” is – an E-mail address that includes the Office 365 onmicrosoft tenant domain name.
In addition, the onmicrosoft E-mail address will be configured as the primary E-mail address.
Although we can add an additional E-mail address to the mail-enabled Public Folder, by default, we cannot set this E-mail address as a primary E-mail address because the default Exchange Public Folder email policy will not enable this option.
In our scenario, we wish to create some settings, in which the Human Resource Public Folder will send automatic reply E-mail, using her “public E-mail address” (Jobs@o365info.com) and not the default primary onmicrosoft E-mail address.
To be able to fulfill this requirement, we will need to disable the default Exchange Online Public Folder E-mail address policy.
An additional obstacle which we will have to go through is – the default Exchange Online “Public Folder security policy“.
By default, Exchange Online allows only organization users to send E-mail to the “Public Folder and prevents from external recipients to send E-mail to a mail-enabled Public Folder.
To enable the external recipient to send E-mail to the “Jobs Public Folder”, we will need to update the default Public Folder security policy permissions.
In the next section, we will complete the following tasks:
- 1 – Add a public E-mail address to the jobs Public Folder.
- 2 – Disable the default Exchange Online Public Folder Email Address Policy.
- 3 – Set the jobs public E-mail address reply E-mail address.
- 4 – Configure the Public Folder to accept E-mail from, external recipient.
3.1 – Add a public E-mail address to the jobs Public Folder
To add an additional E-mail address to Exchange Online Public Folder, use the following steps:
- Select the specific Public Folder (in our example, the Jobs Public Folder)
- Click on the pencil (edit) icon

- On the left menu bar, select the email address menu
- Click on the pencil (edit) icon
In the following screenshot, we can see the default “onmicrosoft” E-mail address that was created automatically by Exchange Online, when we configure the Public Folder as “mail enabled Public Folder.”

In our example, we want to add the following E-mail address – Jobs@o365info.com
- In the section *E-mail address: write the required E-mail address
- Click OK

In the following screenshot, we can see that a new E-mail address was added
- Click Save

3.2 – Disable the default Exchange Online Public Folder Email Address Policy.
To be able to cancel the default Exchange Public Folder E-mail address policy, which prevents us from configuring the desired E-mail address (Jobs@o365info.com) as a primary E-mail address, we will need to run a PowerShell command.
Note: To be able to run the required PowerShell command, you will need to Connect to Exchange Online PowerShell.
Set-MailPublicFolder -Identity "\<Public Folder name>" -EmailAddressPolicyEnabled $FalseIn our example, the PowerShell command syntax that we use is:
Set-MailPublicFolder -Identity "\jobs" -EmailAddressPolicyEnabled $False3.3 – Set the jobs public E-mail address reply E-mail address
In this step, we are going to set the public E-mail address (Jobs@o365info.com) as a
Primary E-mail address.
- Select the specific Public Folder. In our example, the Jobs Public Folder (number 1).
- Click on the pencil (edit) icon (number 2).
- On the left menu bar, select the email address menu (number 3).
- Select the required E-mail address that you want to edit (number 4).
- Click on the pencil (edit) icon (number 5).

- Select the option box – make this the reply address

In the following screenshot, we can see that the “type” of the E-mail address is SMTP. Notice that the characters are written in capital letters.
The capital letters indicate that the specific E-mail address is a “primary E-mail address”.
- Click Save

3.4 – Configure the Public Folder to accept E-mail from the external recipient
As mentioned, the default Exchange Online Public Folder security policy “allow” only organization recipient to send E-mail to a mail-enabled Public Folder.
In our scenario, we would like to enable the external recipient to send E-mail to the “Jobs Public Folder”. To be able to remove this Exchange Online restriction, we will need to use a PowerShell command.
Note: To be able to run the required PowerShell command, you will need to connect to Exchange Online PowerShell.
The PowerShell command syntax that we need to use is:
Add-PublicFolderClientPermission -identity "\<Public Folder name>" -User Anonymous -AccessRights CreateItemsIn our example, the PowerShell command syntax that we use is:
Add-PublicFolderClientPermission -identity "\Jobs" -User Anonymous -AccessRights CreateItemsIf you are not familiar with this process, you can read the article Connect to Exchange Online PowerShell.
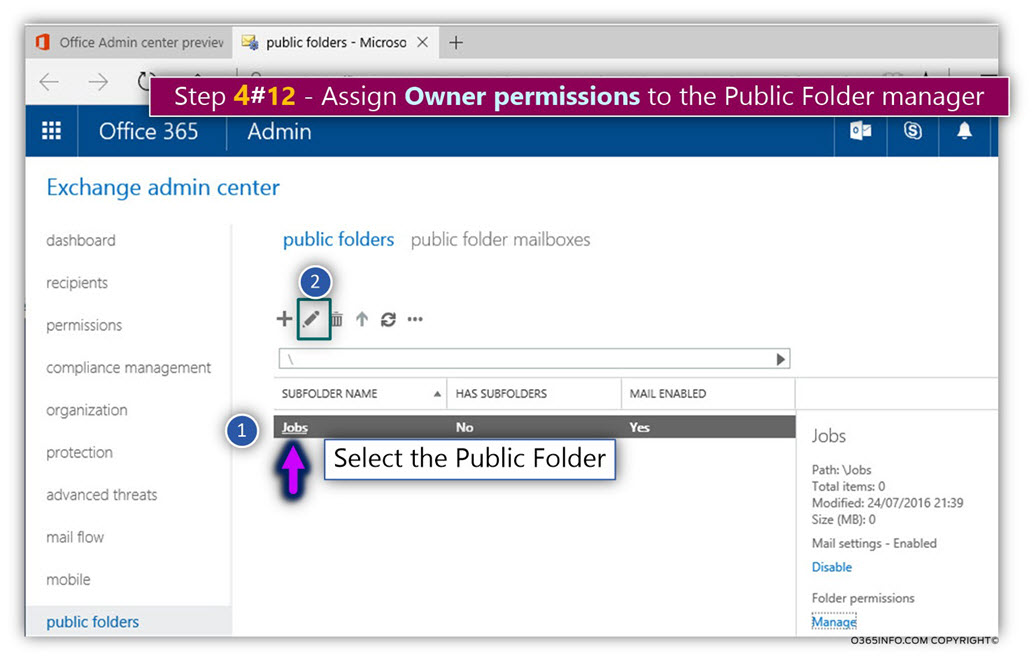
Step 4#12 – Assign Owner permissions to the Public Folder manager
In this step, we want to assign the “owner permissions” to the organization user, that will manage the jobs Public Folder. In our scenario, Bob is the Human resource department manager.
To configure the Public Folder permissions, use the following steps:
- Select the specific Public Folder (in our example, the Jobs Public Folder) (number 1).
- Click on the pencil (edit) icon (number 2).
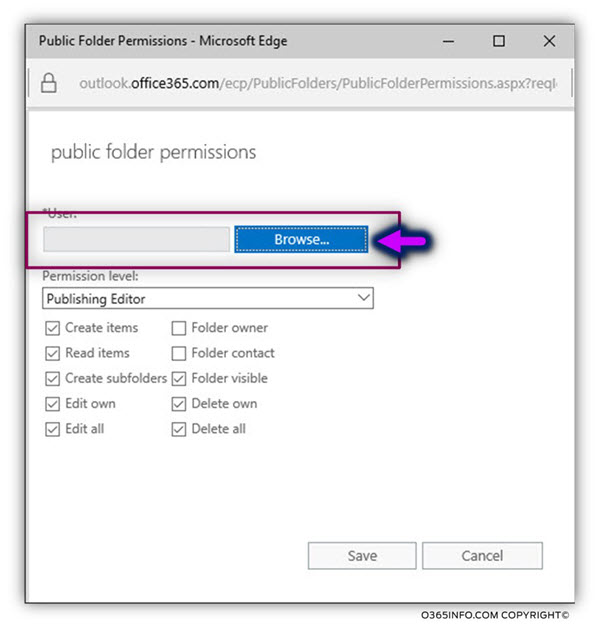
- Click on the plus icon.

Click on the Browse… button.
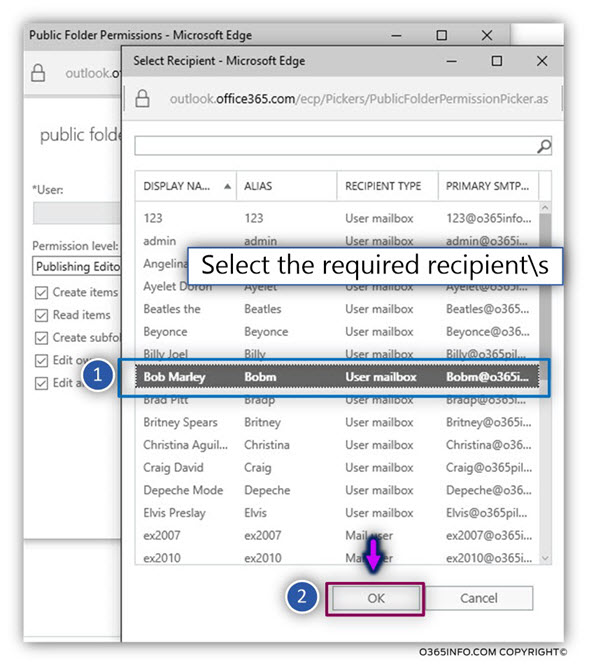
- From the recipient list select the required recipient. In our example we select Bob.
- Click OK.
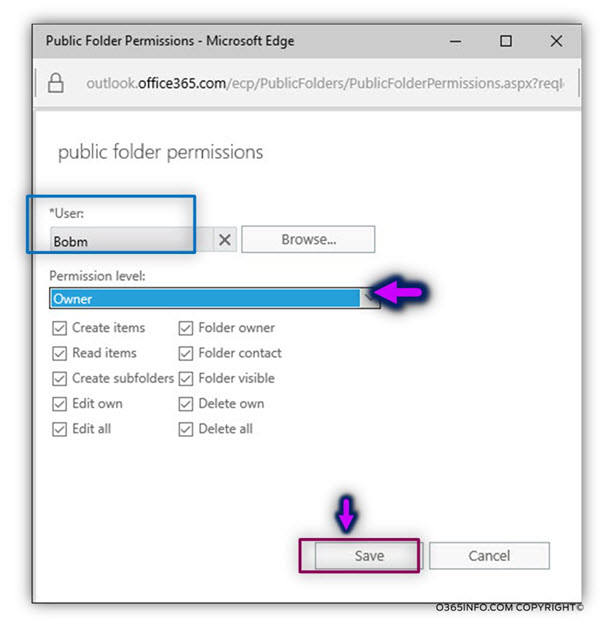
- In the Public Folder permissions box, select the required permissions. In our example, we choose the owner.
- Click Save.

In the following screenshot, we can see the Bob is having the owner permissions.
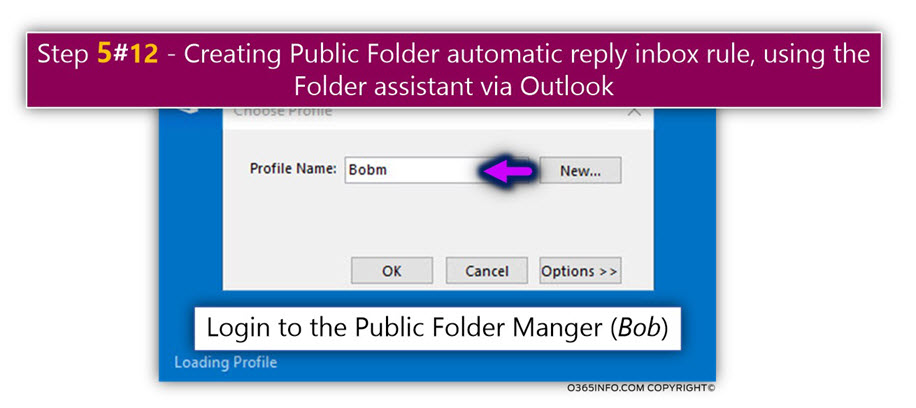
Step 5#12 – Creating Public Folder automatic reply inbox rule using the Folder assistant via Outlook
In this section, we will create the automatic reply Public Folder rule.
The implementation of the automatic response will be implemented by using the Exchange feature – inbox rule option.
In a scenario in which we want to assign inbox rules to Exchange Public Folder, the rule will be created via the option named – Folder Assistant.
To be able to access the Public Folder – Folder assistant option, we will need to use the Outlook mail client interface.
By default, Outlook mail client (Outlook 2013, 2016) doesn’t display the Public Folder tree.
The first step will be to configure Outlook to display the Public Folder tree and the next step will be – using the Public Folder Folder Assistant for creating the required automatic reply rule.
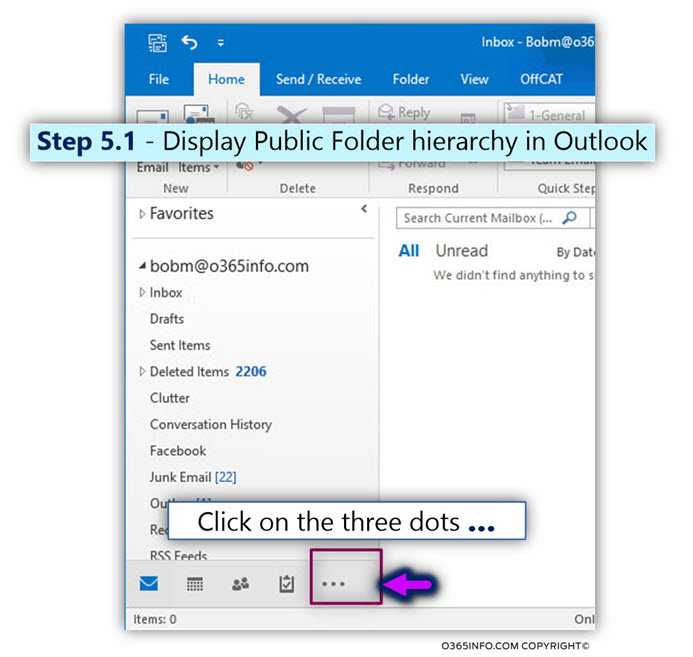
Step 5.1 Display Public Folder hierarchy in Outlook
In our example, we will use the Bob mailbox for creating the required Public Folder automatic reply rule.
- To be able to display the Public folder tree, on the bottom Outlook toolbar, click on the three dots (…) menu
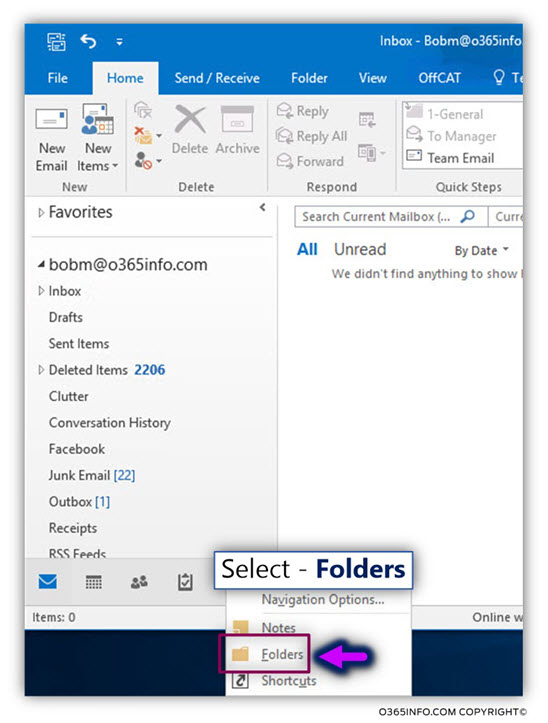
- Select – Folders.
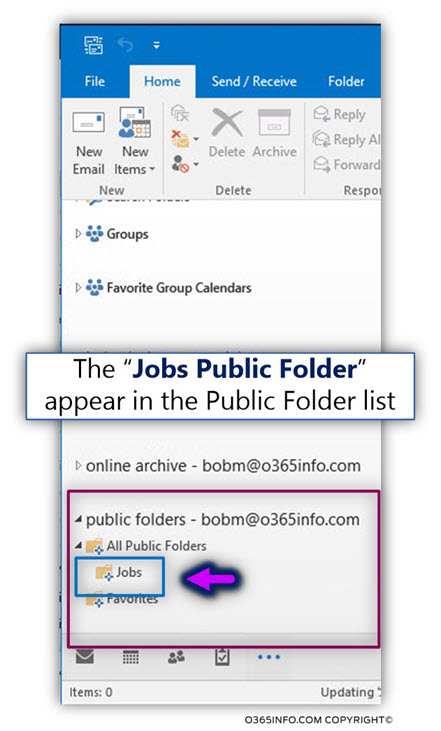
In the following screenshot, we can see the Public Folder tree and the Jobs folder that was configured in the previous steps.
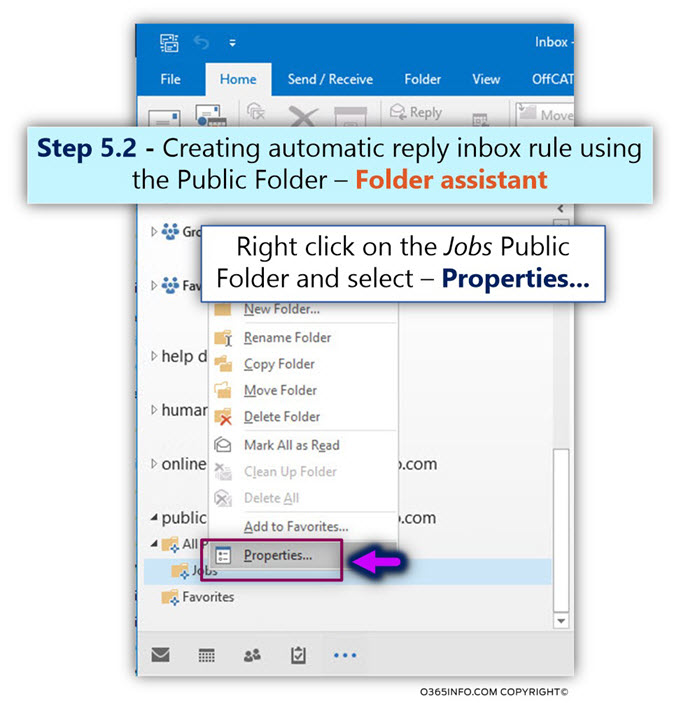
Step 5.2 Creating automatic reply inbox rule using the Public Folder – Folder assistant
In this section, we will use the Public Folder – Folder assistant for creating an automatic reply inbox rule.
- Right-click on the required Public Folder. In our example – we select the Jobs Public Folder
- Select the Properties… menu
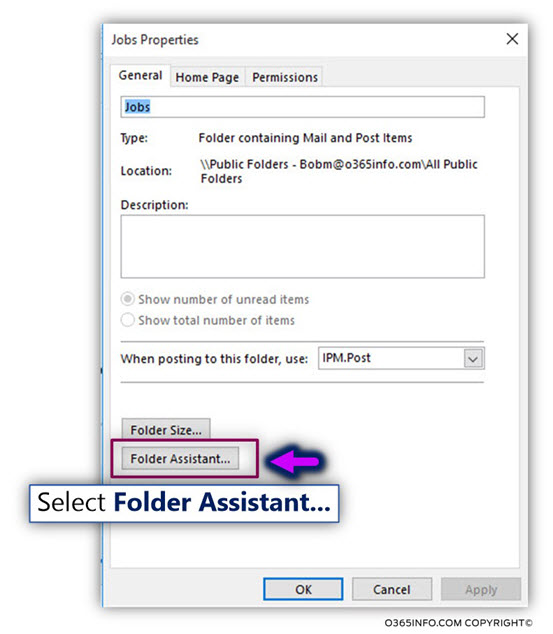
- Click on the Folder Assistant… button
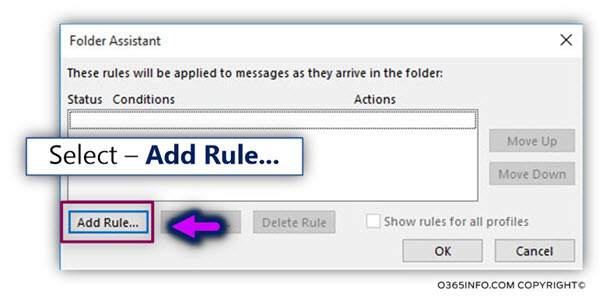
Click on the Add Rule… button
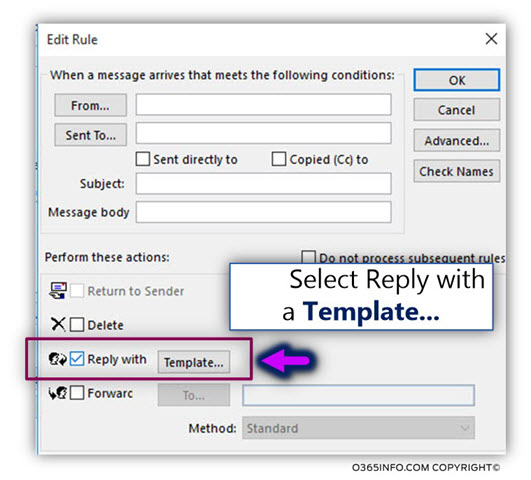
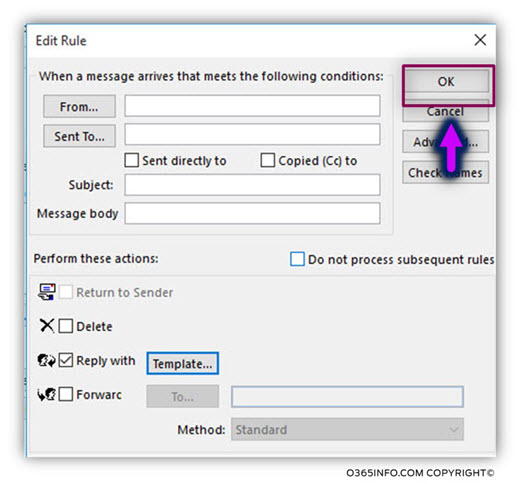
- Select the option box – Reply with
- Click on the Template… button
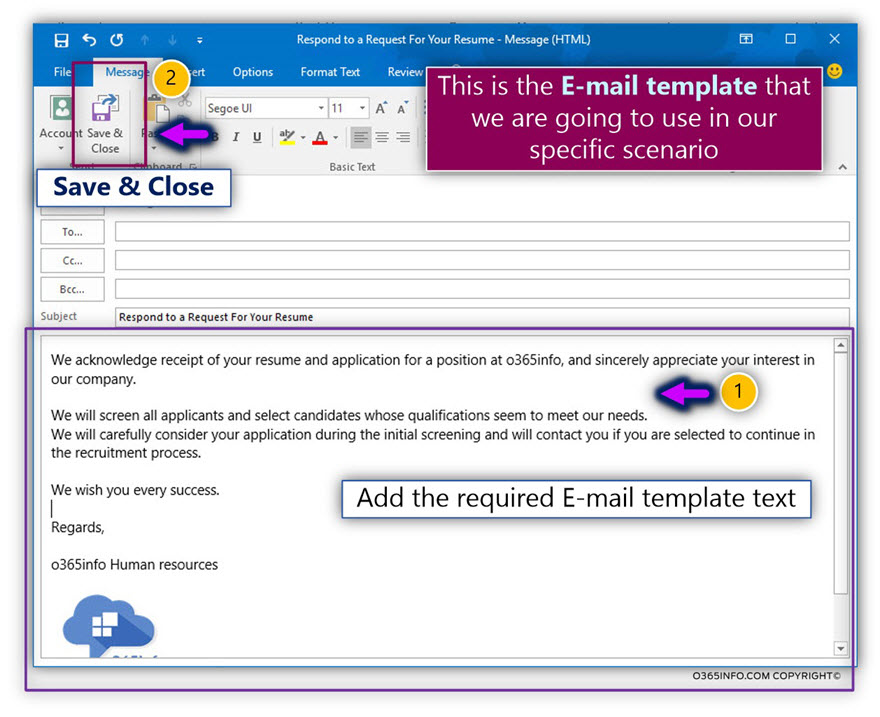
In the following screenshot, we can see an example. The template is implemented as a “new E-mail message”.
- Add the required automatic reply text
- Select – Save & Close
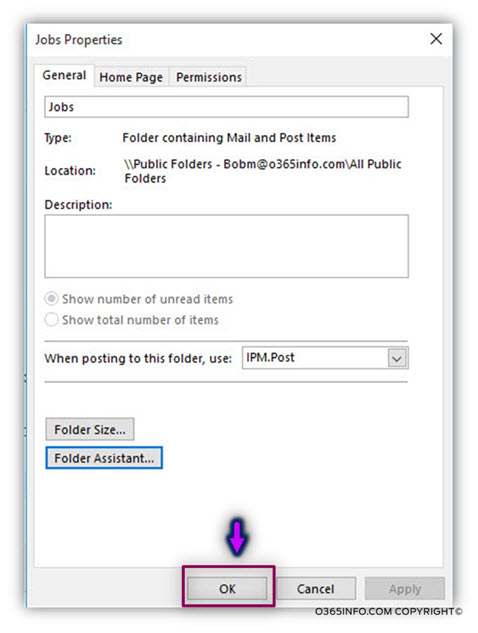
- Click OK
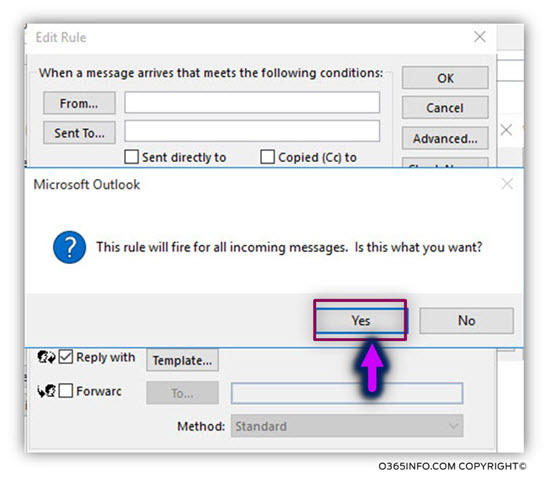
- Click Yes to save the automatic reply rule settings
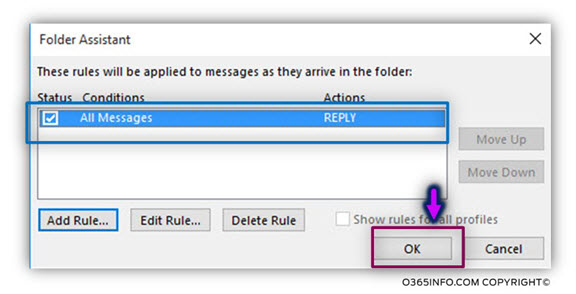
In the following screenshot, we can see that a new rule was created.
- Click OK
- Click OK to save the automatic reply rule settings
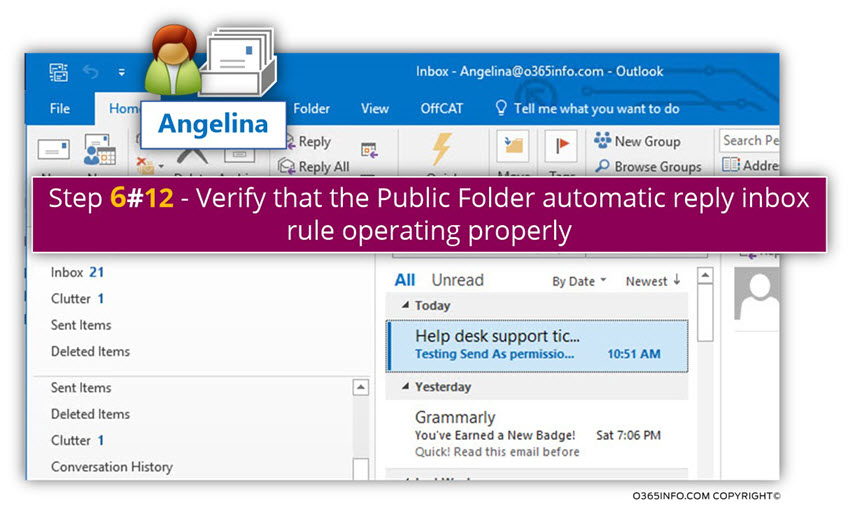
Step 6#12 – Verify that the Public Folder automatic reply inbox rule operating properly
In this section, we would like to verify if the “automatic reply Public Folder rule” that was configured in the previous step, is operating properly.
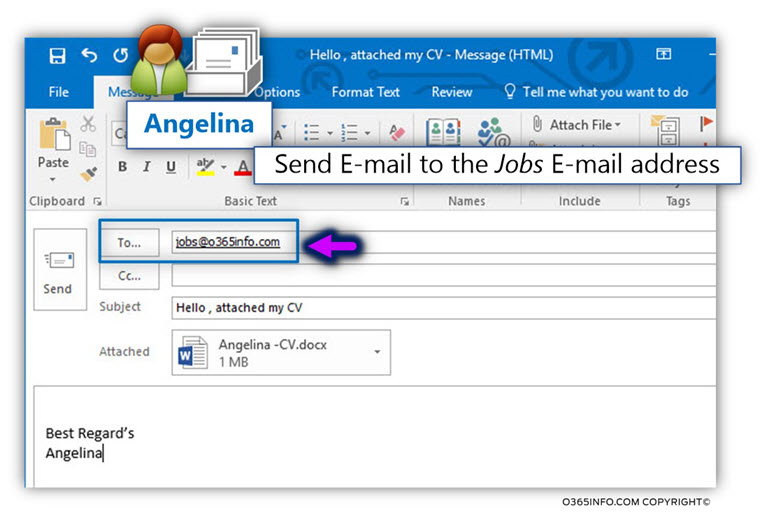
To test the Jobs inbox rule, we will use the Angelina E-mail address and send an E-mail message to the Jobs Public Folder E-mail address (Jobs@o365info.com).
In the following screenshot, we can see that Angelina creates a new E-mail and sends the E-mail to the E-mail address – Jobs@o365info.com.
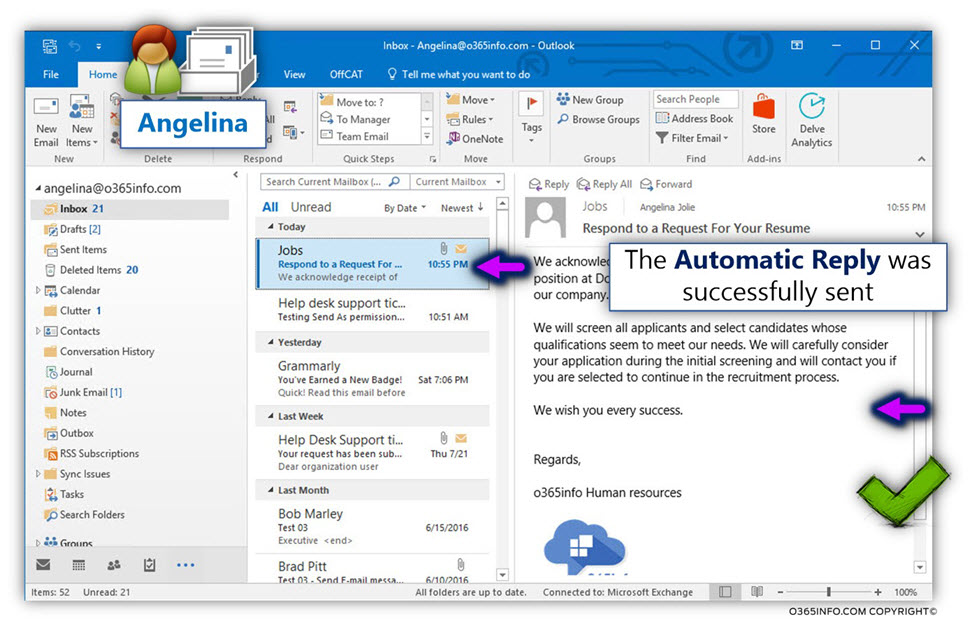
In the following screenshot, we can see that the automatic reply E-mail response was usefully sent by the “Jobs Public Folder.”
In the next article we will Set up an Automatic Reply in Office 365 using Public Folder | Part 4#7.
What Others Are Reading

This Post Has 0 Comments