In the current article and the next article, we will review a very interesting feature…
Configure Force TLS on Exchange on-Premises environment |Settings of Send connector | Part 8#12
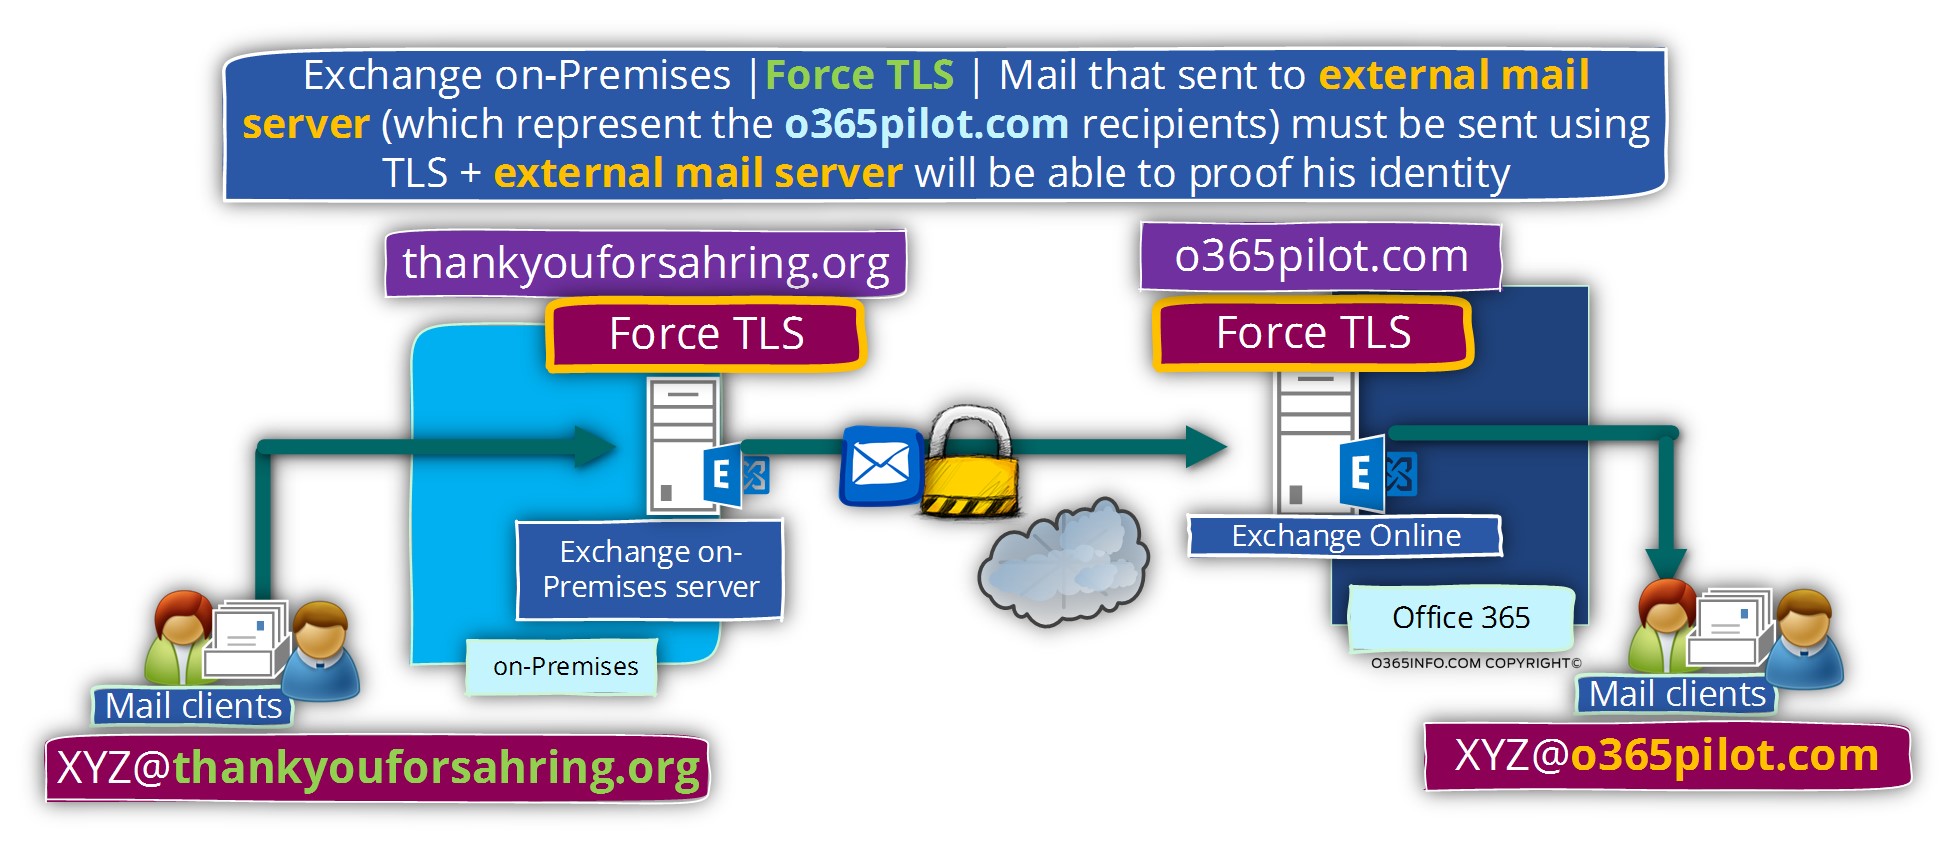
In the current article, we will review the required configuration settings for implementing Force TLS in Exchange on-Premises based environment. In our specific scenario, we need to configure the Force TLS option for the “outgoing mail flow“.
The meaning is – mail that is sent by the Exchange on-Premises server to a specific external domain name (that is represented by external mail server).
The Force TLS configuration setting will be applied to the Send connector.
Table of contents
Exchange on-Premises | outgoing mail | scenario requirements.
The complete scenario description appears in the previous article
In this article, we will implement the following part from the complete scenario:
When the Exchange on-Premises needs to send E-mail to a recipient who have the domain name – o365pilot.com (a recipient hosted at Exchange Online), the Exchange on-Premises server will “agree” to create the mail flow only when the following terms will fulfilled:
- The mail communication will need to be implemented by using encrypted communication line (TLS).
- The “external server” (Exchange Online) must support TLS.
- The “external server” (Exchange Online) must identify himself using a trusted public certificate.
- The public certificate of the “external server” must include a specific host name who will approve the identity of the mail server – *.outlook.com
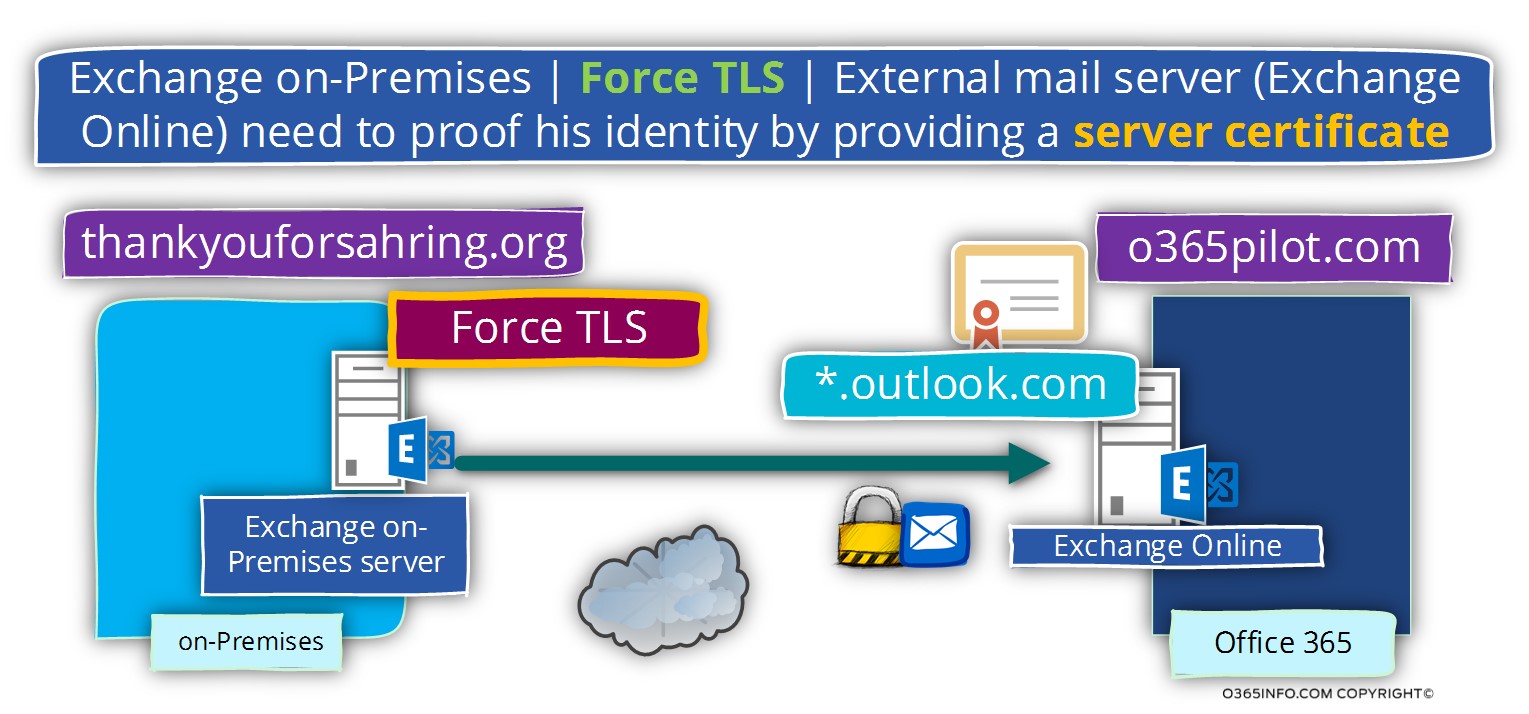
In the following diagram, we can see an illustration for the business requirement – using the option of Force TLS for mail that sent from Exchange on-Premises to the domain o365pilot.com which is hosted at an external mail server (Exchange Online in our scenario).
Exchange on-Premises |Creating the required configuration for force TLS | Send connector
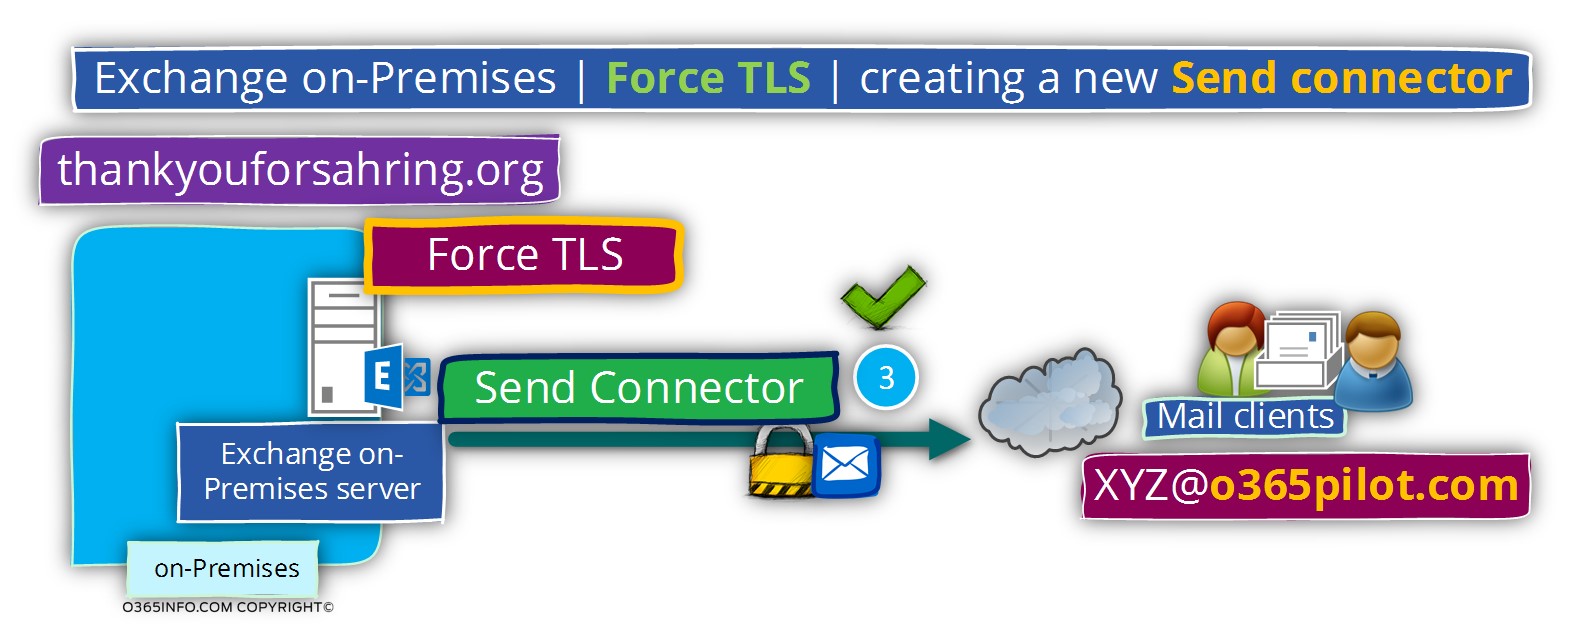
To be able to fulfil the requirement, in which each E-mail message sent by Exchange on-Premises to the external mail server (Exchange Online in our scenario), that represent the domain name – o365pilot.com will be encrypted, we will create a new Send mail connector
Phase 1#2 – creating to send connector using the Exchange management interface
The following demonstration is implemented by using the Exchange 2010 server version.
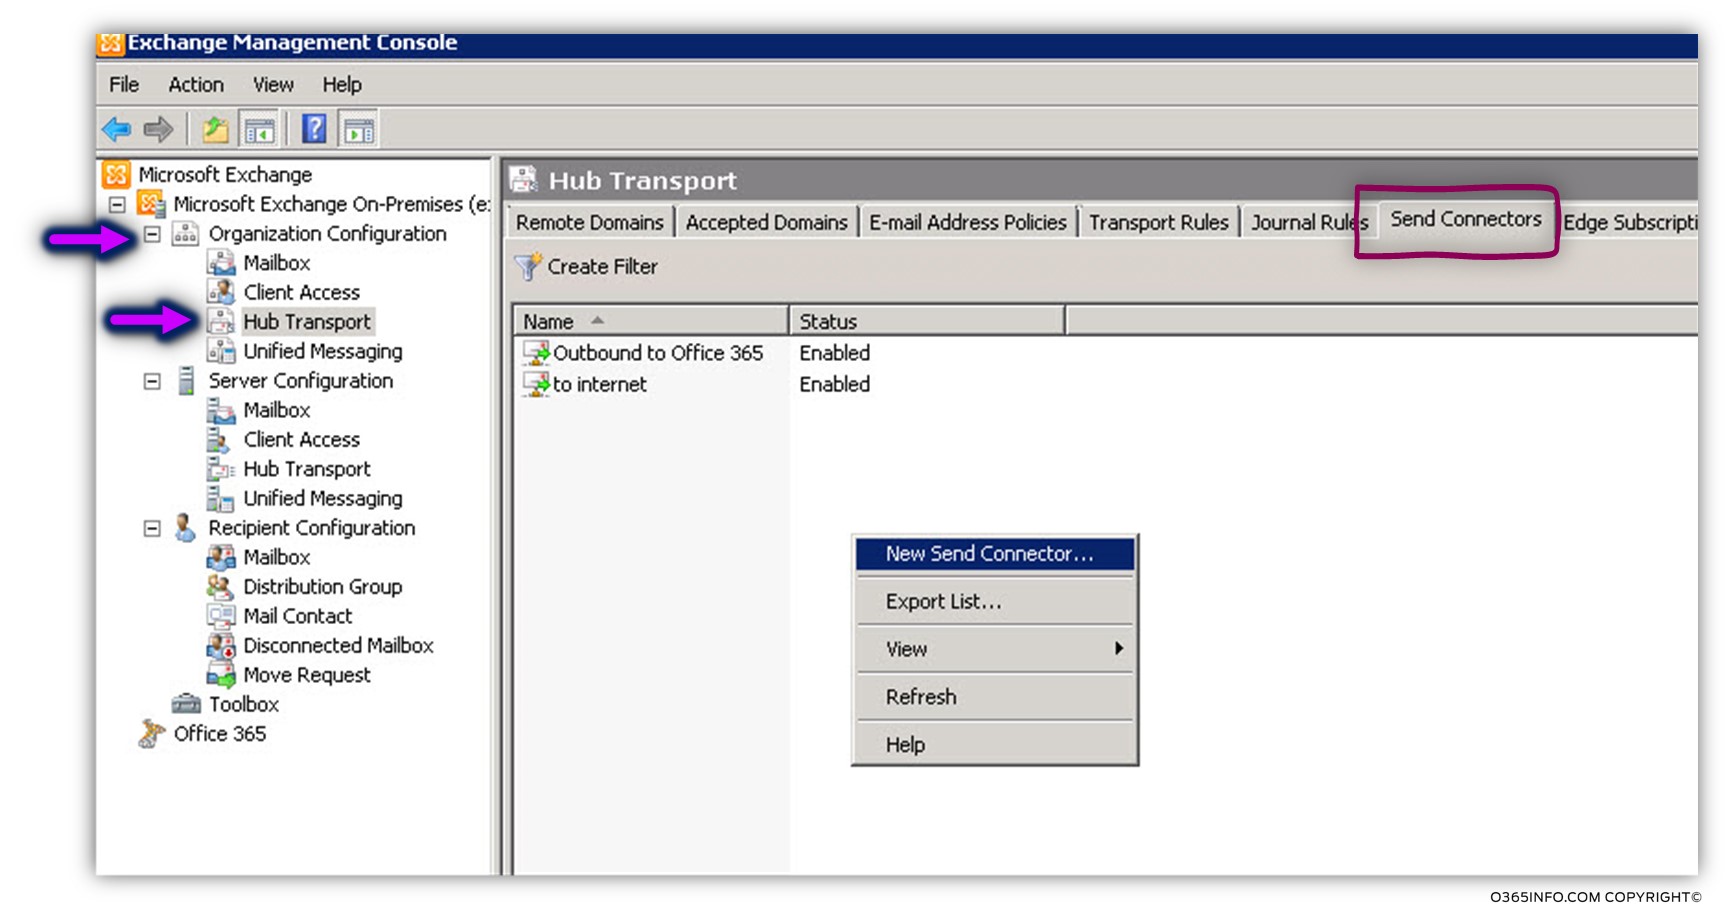
Open the Exchange management console. Choose Organization configuration, Hub Transport.
On the top bar, choose – Send Connectors.
Right click on the empty space and choose – New Send Connector…
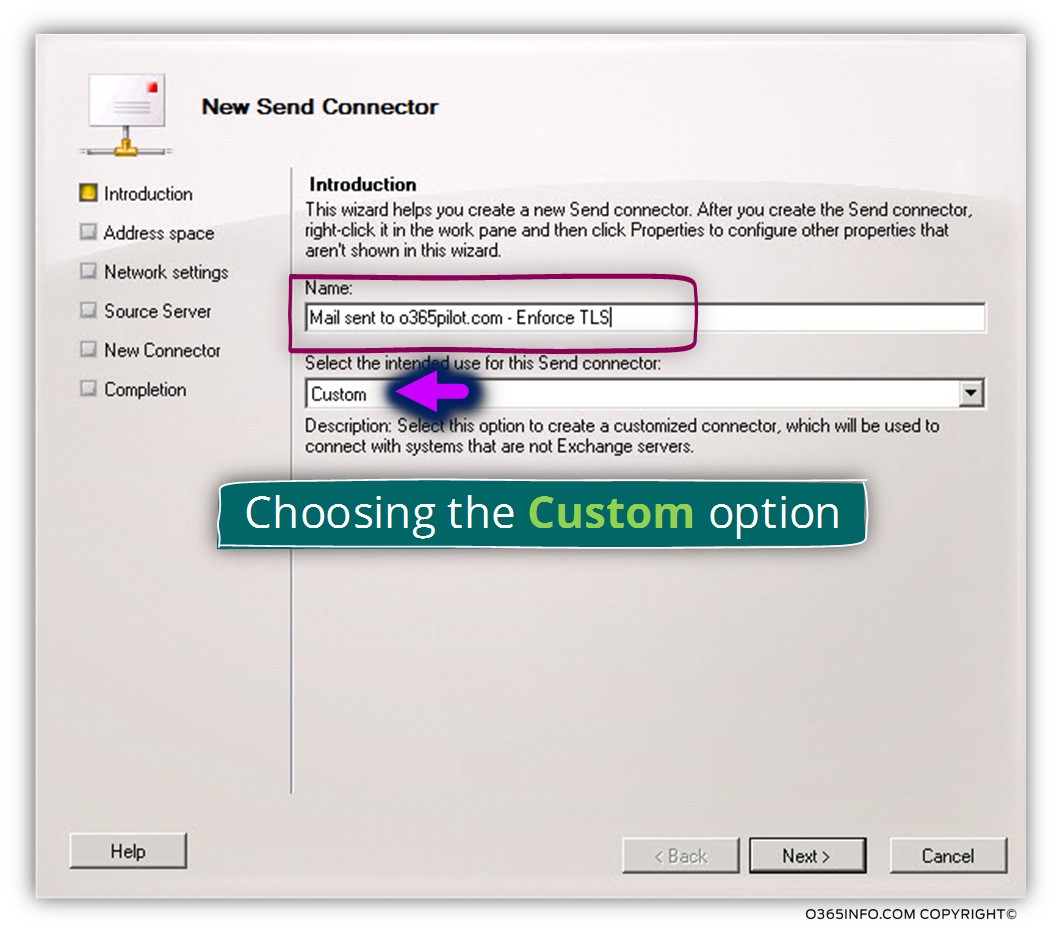
In the Name text box, write the name that is suitable for your needs.
My recommendation is to use a descriptive name so in the future, in the case of a troubleshooting process, it would be easy to understand the purpose of a particular mail connector.
In the option box – select the intend using for this Send connector, choose custom
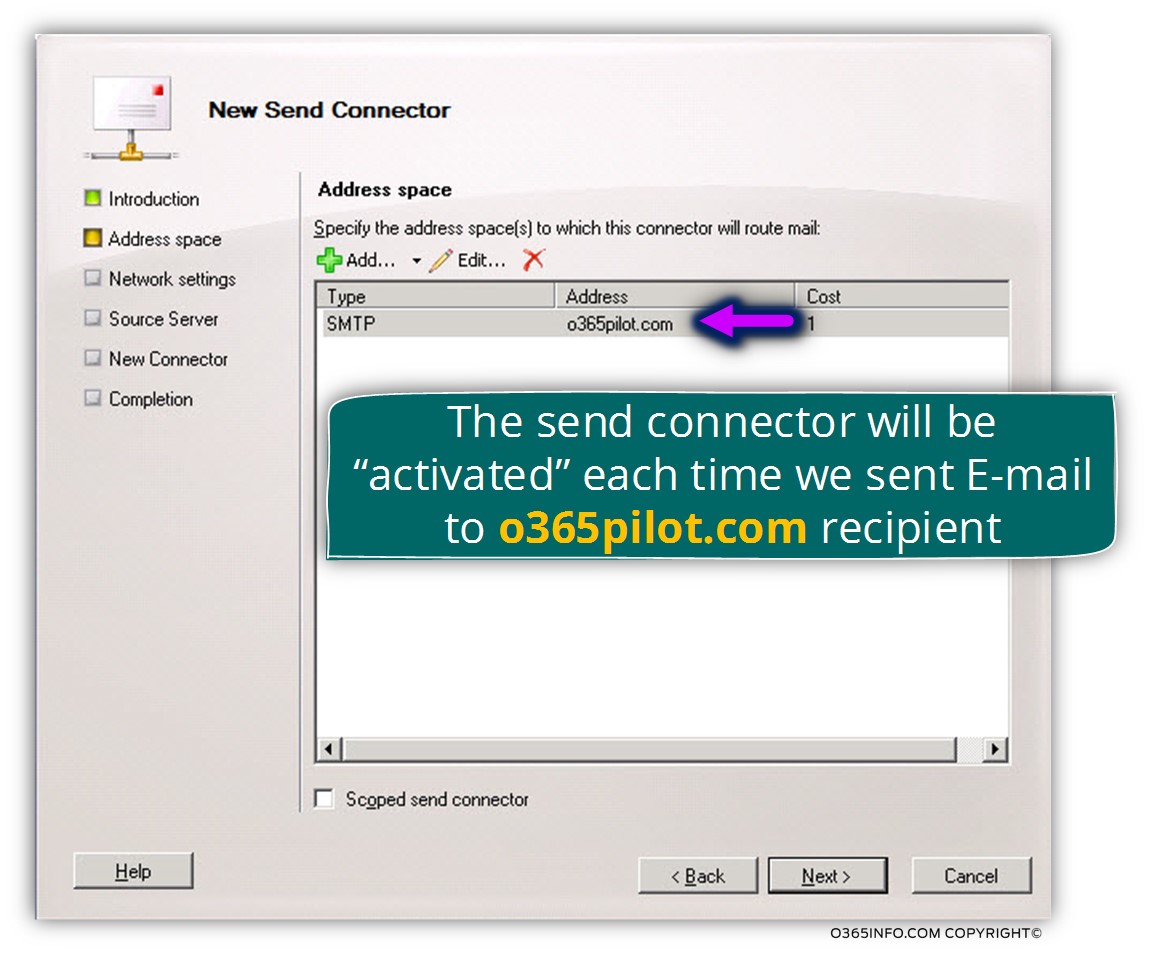
Add the required address space by clicking on the plus sign
The purpose of the “address space” is to configure the logic of “what if”.
In our scenario, we want to activate the send connector, each time a mail will be sent to a destination recipient who has the domain name – o365pilot.com
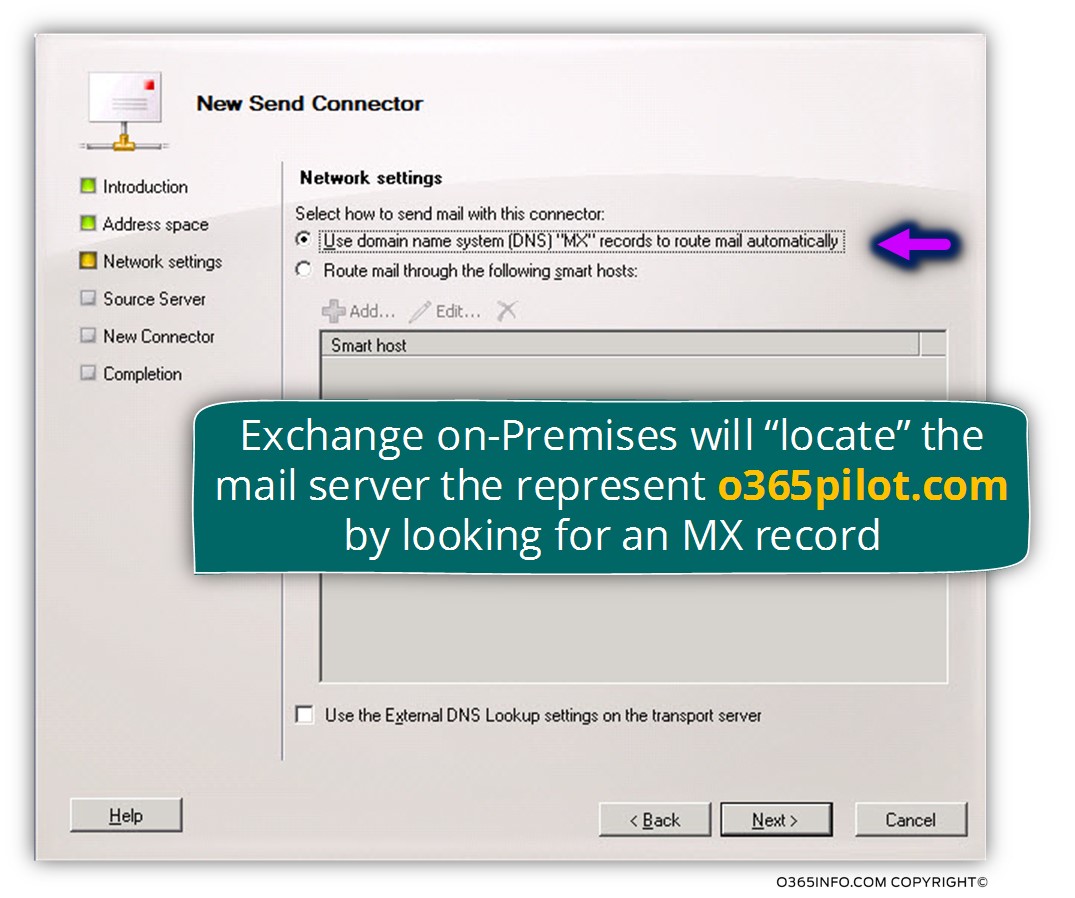
In the next screen, we will need to decide, how to “locate” the destination mail server.
We can choose between two options:
- MX record – a method in which the mail server will query DNS server looking for an MX record for a specific destination domain name.
- Smart host – a method in which we “enforce” our mail server to address a specific IP address or specific host name.
In our scenario, we will choose the option of MX record – Use domain name system (DNS) “MX” record to route mail automatically.
In the next screen, we will need to choose the Exchange on-Premises server, we want to “attach” the new Send connector.
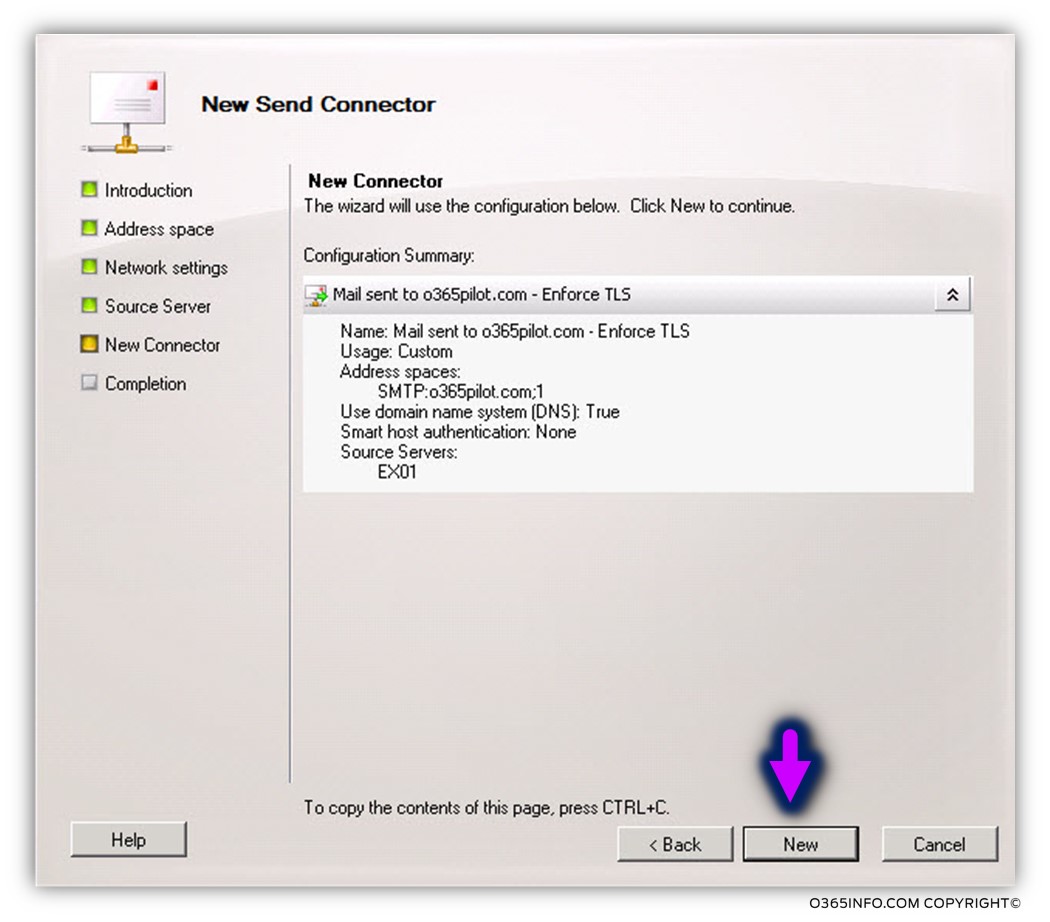
In our specific scenario, we attach the new Send connector to Exchange on-Premises server named- EX01

On the next screen, we can see a summary of the configuration settings.
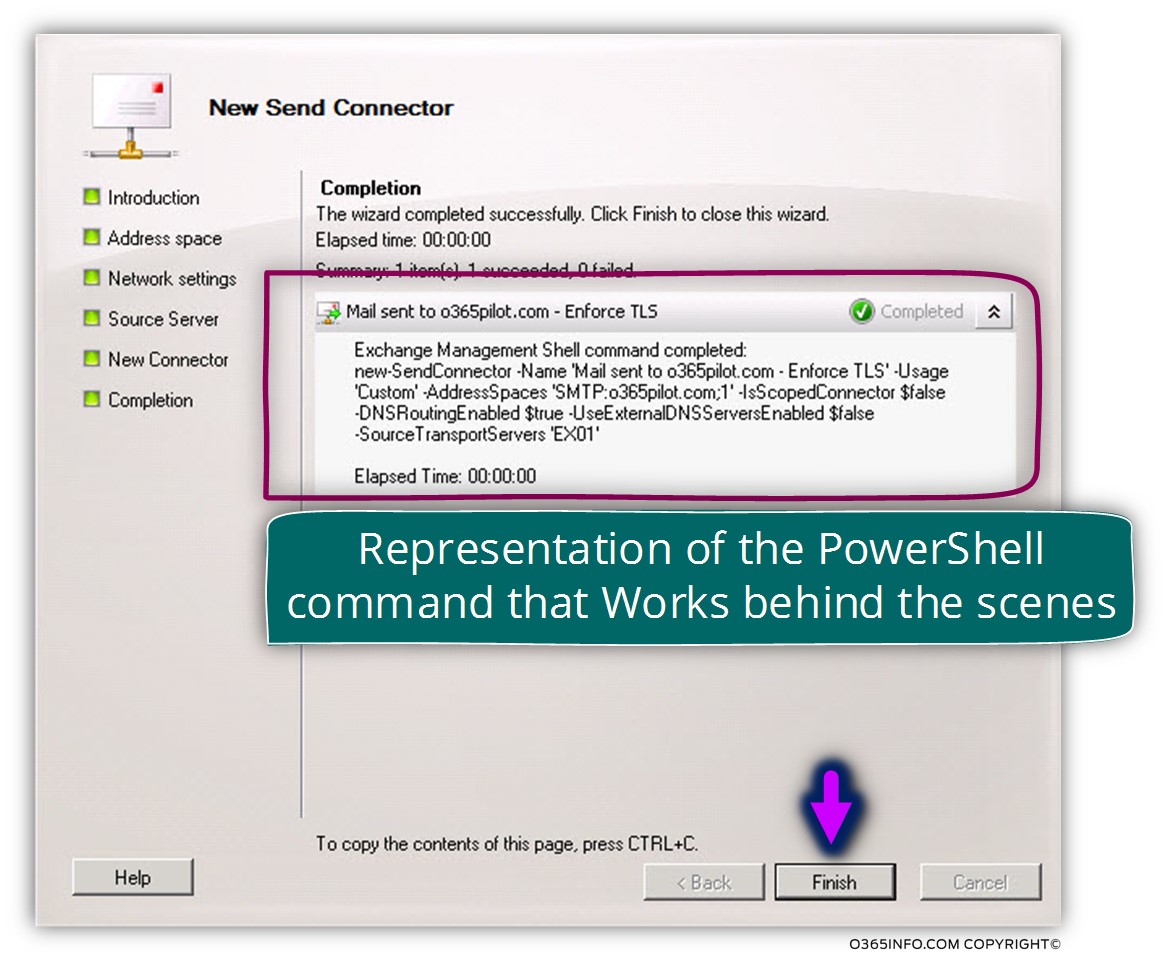
On the next screen, we can see the PowerShell commands that used for creating the required configuration settings.
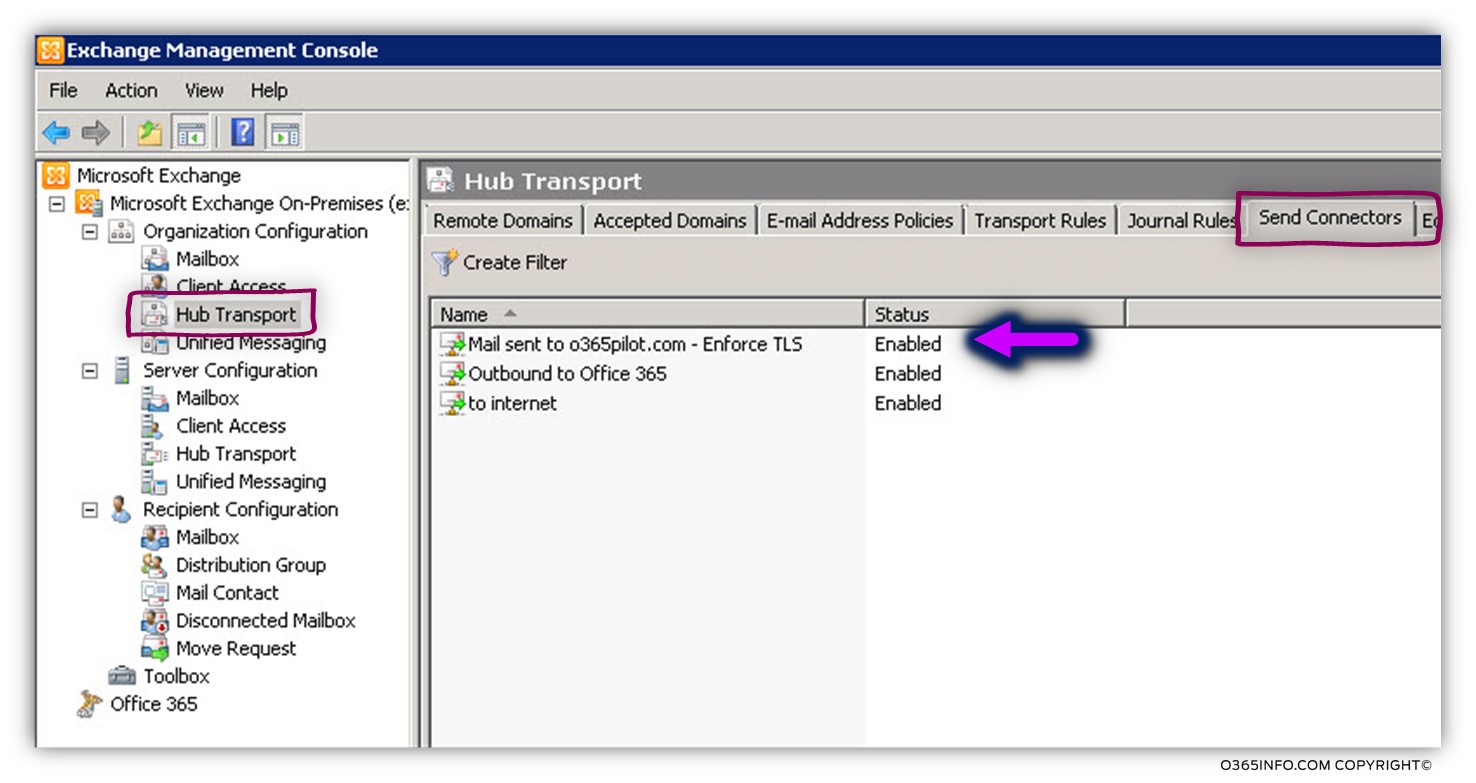
In the following screenshot, we can see the result. A new Send connector was created.
Phase 2#2 – set the required configuration setting for force TLS using PowerShell
In the current phase, a new Send connector was created, but it’s important to emphasize that the new Send connector, doesn’t include all the required configurations, which we need to implement in our scenario.
Just a quick reminder, we need to implement a configuration in which Exchange on-Premises will identify the “destination mail server” by requesting a server certificate, which will include a specific host name.
Exchange Online and server-side certificate
Because in our particular scenario, the target mail server is an Exchange Online server, we need to know that despite the fact that the Exchange Online server represents the domain name – o365pilot.com, the Exchange Online server certificate will not include any information related to this specific domain name.
Exchange Online infrastructure uses a “general server certificate”, which used for all the existing Office 365 tenants.
Generally speaking, the Exchange Online server certificate includes the host name mail.protection.outlook.com but if we want to be on the safe side, we will request from the destination server (Exchange Online in our scenario) to have the domain name – *.outlook.com instead a specific host name.
Configuring the required setting for the Exchange on-Premises send connector using PowerShell
In the following section, we will configure the Exchange on-Premises Send connector to identify the “destination mail server” (Exchange Online in our scenario) by using three parameters:
- RequireTls – this parameter will use for configuring the send connector to use the option of Force TLS meaning a mandatory requirement for TLS (by default, the Send connector is configured to use opportunistic TLS).
- TlsAuthLevel – by default, the Send connector is not configured to “demand” from the destination server to prove his identity. In our scenario, we need to change the default setting and “activate” the option in which Exchange on-Premises will request from the destination server to identify himself by providing valid server certificate and in addition; the certificate will need to include a specific domain name.
As mentioned in the article xx, we can choose three types of validation. In our specific scenario, we need a domain validation. The specific parameter that will be used is DomainValidation. - TlsDomain – the name of the domain that needs to be included in the destination mail server certificate. In our scenario, the certificate should include the domain name- *.outlook.com
To be able to display the settings of the new Send connector that was created in the previous phase, we will use the following PowerShell command:
Get-SendConnector “EX01\Mail sent to o365pilot.com – Enforce TLS” |FL
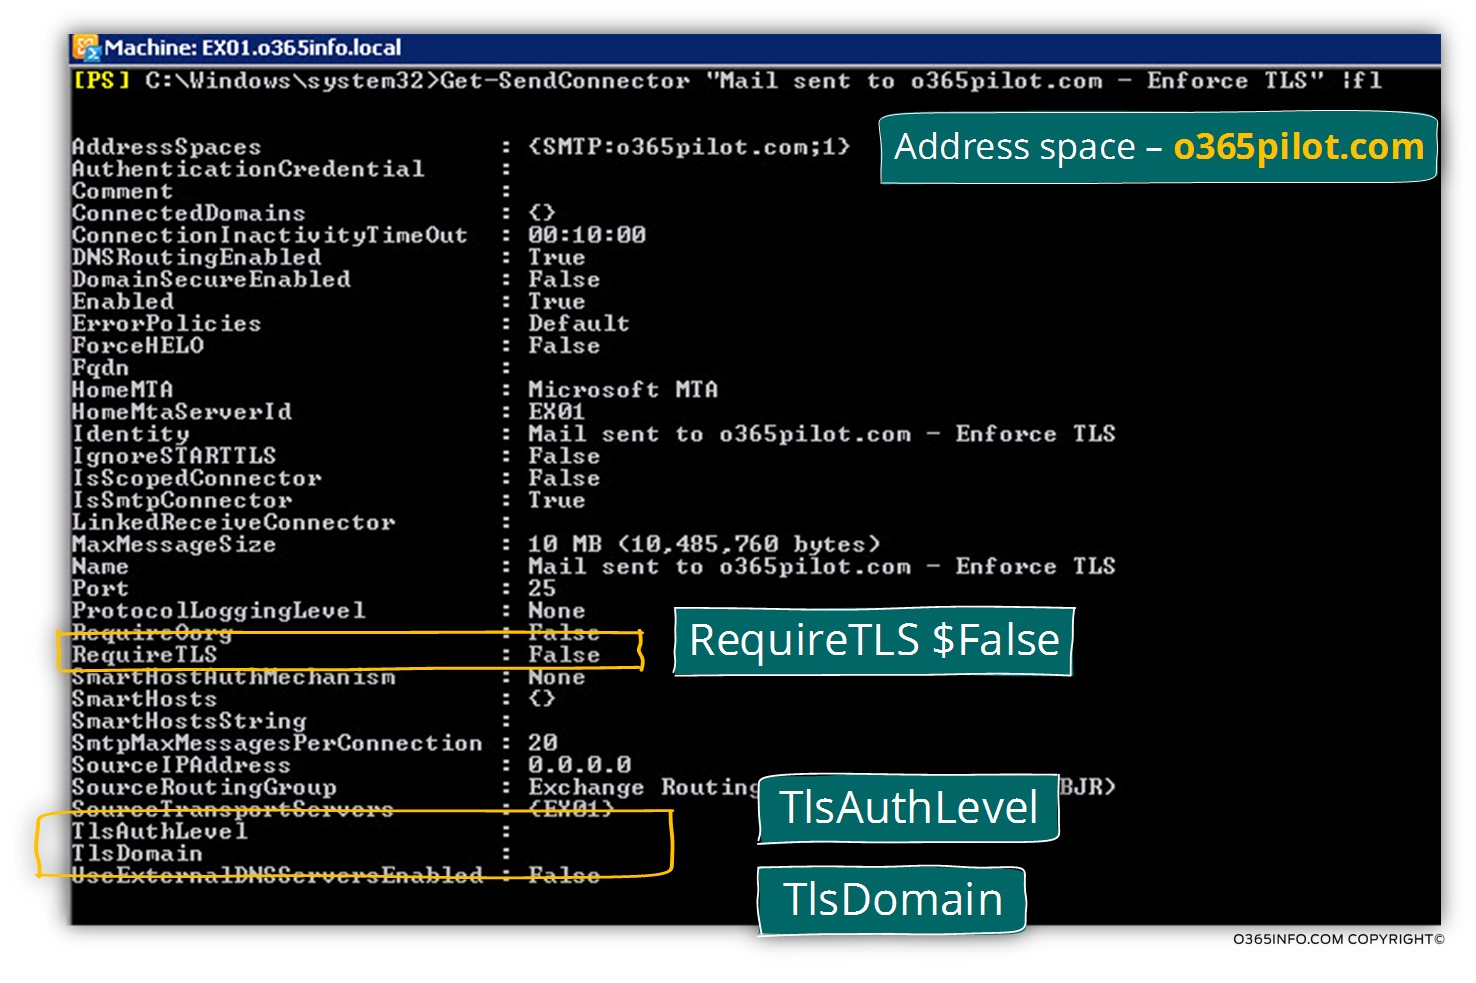
In the following screenshot, we can see the Send connector settings.
Notice that the value of following parameters that relate to TLS is empty by default
- RequireTls
- TlsAuthLevel (using the option of DomainValidation)
- TlsDomain
To be able to configure the Exchange on-Premises Send connector with the required force TLS setting, we will use the following PowerShell command
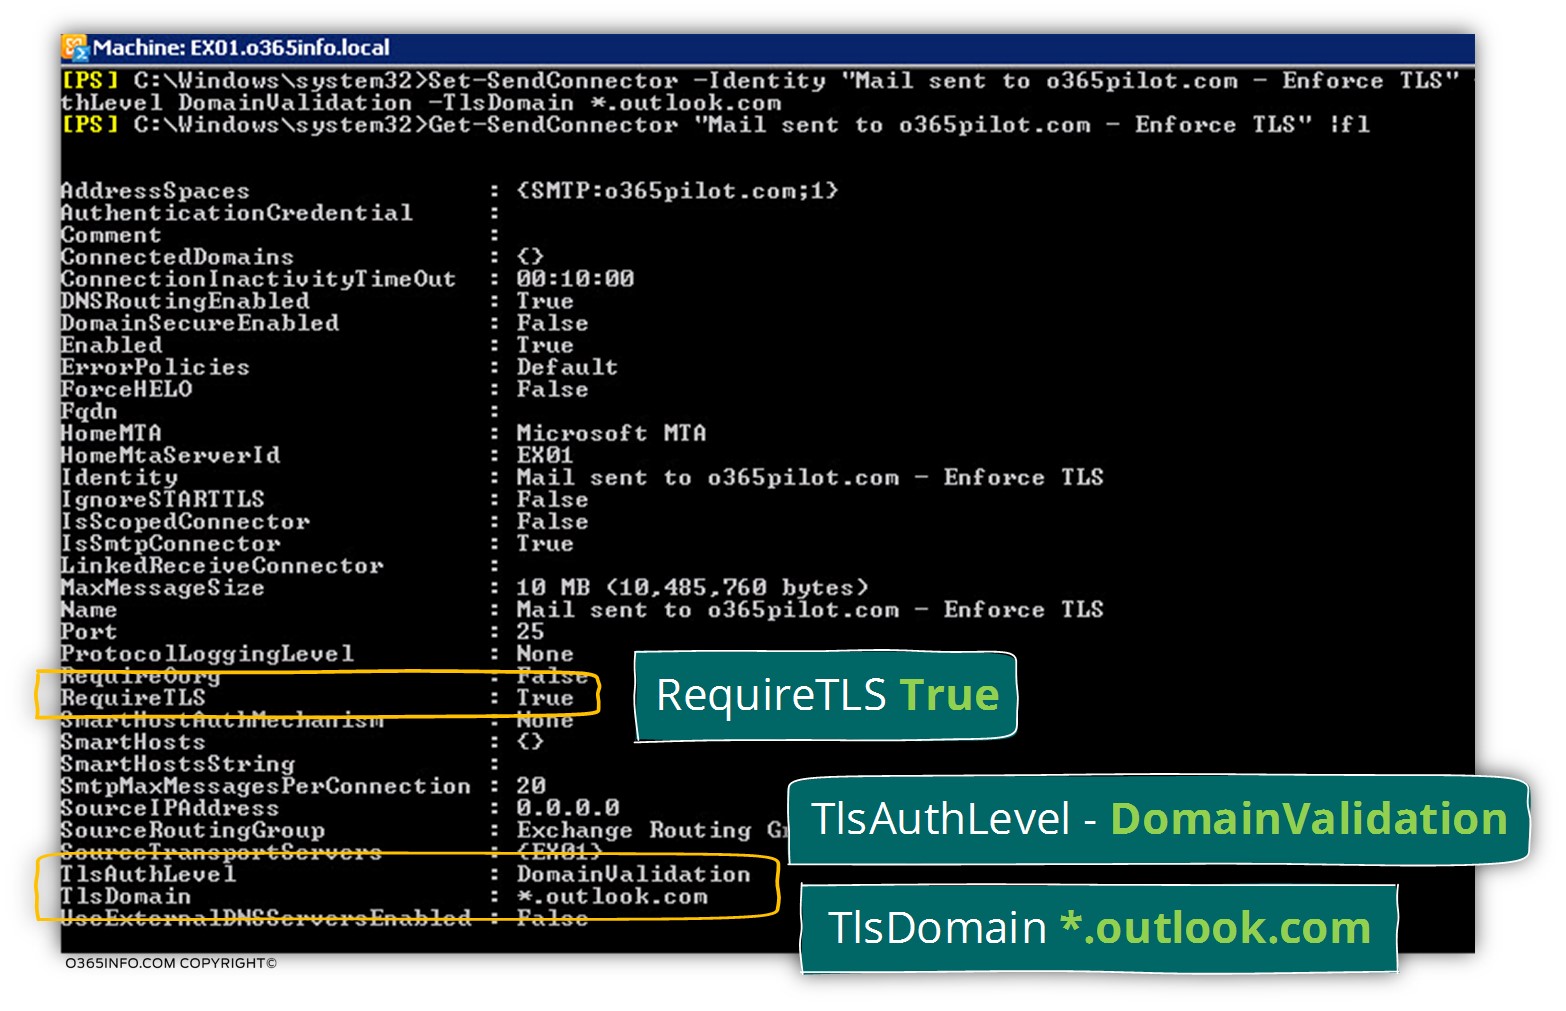
Set-SendConnector -Identity "Mail sent to o365pilot.com - Enforce TLS" -RequireTls $true -TlsAuthLevel DomainValidation -TlsDomain *.outlook.comNotice that we use the domain name outlook.com for the value of – TlsDomain

In the following screenshot, we can see the results:
- RequireTls – the value was set to True (Force TLS).
- TlsAuthLevel – the value that we set is DomainValidation
- TlsDomain – the domain name *.outlook.com
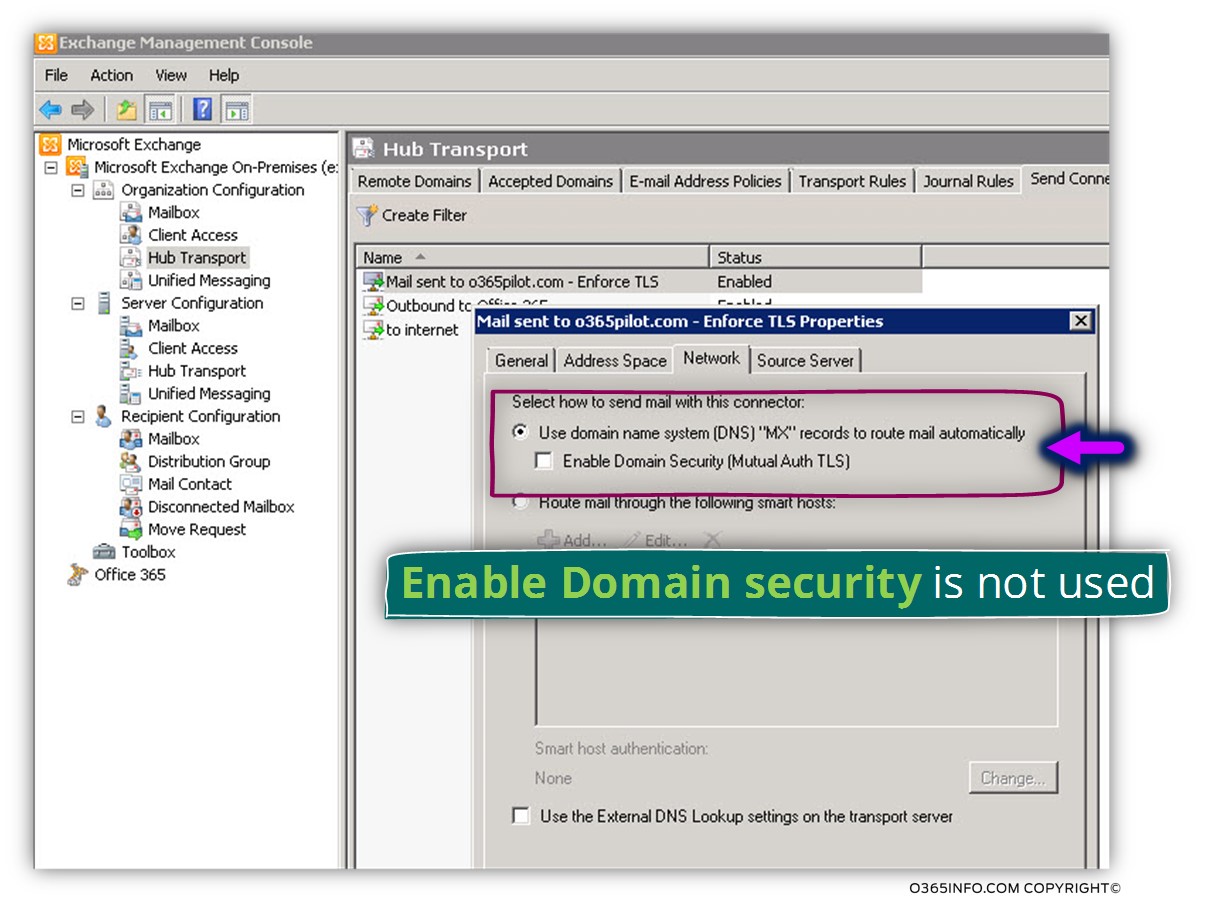
An additional thing that I would like to mention is that when we are looking at the properties of the new Send connector in the Network tab, we can see that the value of – Enable Domain Security (Mutual Auth TLS) is not selected.
Do not be confused; this is the “right” configuration. The option of Enable Domain Security (Mutual Auth TLS) is suitable only for a specific scenario in which the “destination mail server” is Exchange on-Premises server.
Recap and the next article
In the current article, we have reviewed the required configuration setting for Force TLS that needs to be implemented for “outgoing mail flow” meaning, mail that sent by Exchange on-Premises to a specific destination domain name (o365pilot.com).
The Force TLS settings, was configured by using the Exchange on-Premises Send Connector
In our scenario, the Force TLS setting will be “activated”, each time, that E-mail message is sent to the destination recipient who uses the domain name – o365pilot.com
In the next article (Configure Force TLS on Exchange on-Premises environment | Settings of Receive connector | Part 9#12), we will review the required configuration setting for Force TLS that needs to be implemented for “outgoing mail flow” meaning, mail that is sent to Exchange on-Premises by an external mail server that represents a specific destination domain name (o365pilot.com).
What Others Are Reading
This Post Has 0 Comments